Strouty
Well-known member
Or.......
You could just use it.
You could just use it.

Or.......
You could just use it.


Boilermakerfan,
Nice score on the fan!


lol now you will find your other 4 cans of wd40 when you put those away.
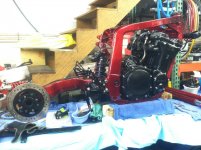
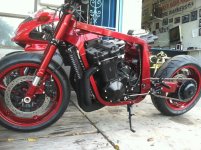
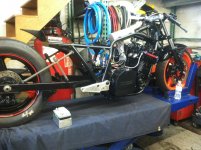
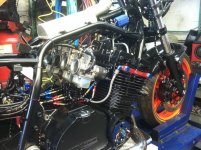
i'll have to peak in the other threads so i can follow the bike explanations
cheers GB
That Triumph would be a good daily driver. The early Triumphs were supposedly way-overbuilt. Even though it's 17 years old, compared to your other vintage holdings, the ride, performance and overall utility of a more-modern bike will be a pleasant surprise.
Depending on how-old/flexible you are, the bars may be a bit low. Easily fixed though. Since this isn't supposed to be a sportbike but a sport-touring bike, you may find the bars are OK.
If you want to add 50% more power, the same-vintage Triumph Daytona 955i made 149 HP. I believe it's the same engine family.
http://www.bikez.com/motorcycles/triumph_sprint_rs_2001.php
http://www.bikez.com/motorcycles/triumph_daytona_955i_2002.php


I needed a 90deg drive adapter for my drill to finish attaching the two dividers for the middle shelf.
Picked this up today at Lowe's, marked down to $15 plus an extra 10% off. No complaints there. It worked better than I thought it would.
Then it was time to cut the back for the shelves... I had a piece of 1/8" beaded plywood that had a bit of water damage and a chunk of the corner missing. It was the perfect size. All of the damaged wood was cut off but I didn't "waste" any more wood either.
So the construction phase of the first shelving unit is done! The back is attached. Now I just have to fill in the screw holes and flaws, sand it back down, and sealer prime it. After that it comes inside and my wife gets to pick a color and paint it.
I was going to use a few screws and staples to attach the back, but then I decided to just use cabinet screws I had and make it stronger! It's attached to the sides, all the shelves, dividers, and the support pieces on the bottom. The thing is solid, which is exactly what I was hoping for.
I can't wait to see it under the TV once it's painted. I have the two smaller side shelves to build still. They will flank the big unit on either side. We still haven't decided if the side units will be a little taller or a few inches shorter than the center unit.
EDIT: The best part about it: My wife LOVES it. She said it's exactly what she wanted.
Awesome! Please get it in place!
Looks great, the wife is happy, you can’t go wrong with those two things.


Thanks guys.
I'm working on it rodpoa! I want them done for a few reasons. Mainly to have a new home for my receivers and other audio equipment, but the side units will have our books on them too. I'd like to have my books back out on the shelves.
I need to build two sets of stereo speakers, but I think I'm going to use the CNC router at the university to do all of that cutting. I don't want that much dust in the garage.
This evening I got out in the garage and filled in all the screw holes and the small flaws in the shelves:
The filler has to dry for at least 6 hours so I can't sand them flush until tomorrow afternoon. But after I sand the first coat of sealing primer is going on!
I'll have to determine the cutouts for the receivers for wiring and the locations of holes for routing the wires from the Wii, Xbox, CDP, USB DAC, etc. I'll get those cut out after the primer is on.
It is like a big puzzle, after a while the pieces will just fit. Will there be room for records? I have a love hate relationship with books, they seem to love dust and I hate that. I have a really small house, so I had to scale back my AV stuff. We use a Mac mini as our main media device and then we have a Wii and I have an original PS3 for Blu-ray and vintage games, I think I only have one or two PS3 games, most are PS1.
Totally understand. I shared a picture of mine, I have 6 niches only. I’m upgrading to 12 more! Mine won’t store the audio hardware though because I already have the main cabinet for that, but surely more books and records!
You know what I’m going to do with the wiring? They will reach my pc and speakers in front of the shelves over the floor. The way to hide them will be placing a carpet on top of all the mess and that’s about it
Be careful about covering 120 V wiring w/carpet. I saw too-many fires originating from wires covered by carpeting, working fire/rescue.


More crazy weather today...
But I didn't go out in the garage tonight. I wasn't up to spending another 2-3 hours painting on the second coat of primer tonight. I'll apply the second coat on Saturday.
I'm tempted to pick up an airless sprayer. It would make the process faster and provide a better finish. Plus it will come in handy when I go to prime and paint the walls/ceiling in the garage.
Tonight on my walk with my wife I saw a garage like ours that did not have the 16' wide door, but only one 9' wide door. I pointed the garage out to my wife and said that I would like to change our garage to look like that one. At first she wasn't keen on spending ANY money on the garage to change the garage door. I was prepared. I pointed out that with our garage remodeled to a single 9' door, she would be able to park in the garage most of the time. I pointed out the fact that the garage would be heated in the winter and with the smaller door, we would save money since less heat would escape. I told her that with a single, smaller door I could put up a divider curtain between the working side and her parking side to keep dust off the Pilot too.
I also pointed out that we would probably save more than enough money on the narrower driveway to pay for the costs of changing the garage door and residing the garage to match the house for more curb appeal. Changing to a single door cuts the amount of concrete driveway to one-half the size which would add more grass in the back and give us room to add raised garden beds which she has wanted for years. We would also be able to pay a little more for the smaller driveway and have it stamped and dyed to make it look more like rock pavers instead of a light grey runway.
After a bit she said we'll see, but she was adamant that no money will be spent on the garage or new driveway until after the basement is professionally water-proofed and refinished.
About the basement remodel... I told her that when I get the cost estimates for waterproofing the basement I am going to ask for a quote to only waterproof the areas on the basement walls where the water weeps in. We haven't had water get in through the walls that are finished in the years since I caulked the basement windows.
Better check with the Building and Zoning dept's about a smaller driveway, you may be required to have a 2-vehicle driveway. Here in south Florida, if you close-in your garage to living space, you have to widen the driveway to a minimum of two spaces for a single-family residence. A telltale giveaway for an unpermitted garage-to-living space enclosure is having a single-width driveway. Some areas may require a garage of a certain size.


BoilermakerFan,Busy day today! I had to wash a dump truck, a front end loader, and a bucket crane. I thought I was going to keel over, but I got the job done.


All of my wiring will be clean and proper... and I think rodpoa has 240Vac mains.
Today after work I quickly sanded down the filler, then I had to run my son to his trombone lesson and summer lacrosse practice. Got home after 8pm and had dinner. Then at 9:30pm I went out to the garage to apply the first coat of primer. Ugh. THREE hours later the shelving unit was primed (except for the back, which I get done after the rest is finished).
It's probably going to need two more coats of sealing primer to cover and blend everything. I now remember why I don't like working with pine/spruce.
You were more productive than I was. The door looks great.
Yes, I do have 220 actually.
Am I being naive in thinking it is pretty much safe to throw a carpet over the cord? Below the carpet is supposed to run three wires only, two audio for the speakers and a single energy cord to power the dock station where laptop, keyboard and monitor are powered from.
BMF, I'm in the midst of doing the same, switching from brass to stainless/nickel. I don't know how that's going for you but for me it quickly snowballed. Went from entry light fixture to door hardware (deadbolt, handle and kick plate), garage light fixtures and a re-paint.Thanks Strouty. I'm happy with the new storm door and really happy to get rid of the bright brass trim. Talking the wife into replacing the lighting above the doors and replacing the door hardware to purge the brass... Not an easy sale on the door hardware since that would be 3 sets of locks and I don't like the cheap lock sets.
I'm bummed, I can't see any of the pictures.
I'm bummed, I can't see any of the pictures.
Nope, no pics on the other threads.

