To avoid these ads, REGISTER NOW!

Kitchen pictures please

bchee

Well-known member
Joined
Aug 20, 2007
Messages
6,148
Location
Texas
I'm interested in any pictures you guys have of fairly big kitchen remodels that you did mostly by yourself, and on a limited budget.

No big $50,000 kitchens.

More specifically, did you incorporate any garage elements in your remodel, like using epoxy on the floor, etc.

THANKS:beer:
 
To avoid these ads, REGISTER NOW!

lupinsea

Well-known member
Joined
Mar 30, 2010
Messages
261
"We" did a refresh of our kitchen this last winter. I have a big write-up of the whole thing here.

Highlights include:
  • Welded steel c-chanel counter top edge
  • Full height glass tile back splash throughout
  • Concrete window sill
  • Linoleum counter top
  • Repainted cabinets + new hardware
  • Repainted wall ovenj
  • New cork floor
  • New sink + plumbing "fix"
  • New cook top

It was a big project that took about 3 months of non-stop work in my spare time (weekend, evenings after work M-F). Total price was about $2800.


P1040366.jpg

Before

P1050990_1.jpg

After


P1040369.jpg

Before

P1060006.jpg

After


P1040372.jpg

Before

P1050982.jpg

After


P1040367.jpg

Before

P1050990.jpg

After


shapeimage_3.png


One note on the cork floor. Over all we like it a lot but our dog's claws are scratching hell out of it. With the lighter "natural" cork color it wouldn't be noticeable. But with the dark cork color we picked it shows up pretty bad. Other than that, it's a very nice, resilient floor surface to walk on barefoot.


I'll post a few notable process pictures in the next post.
 

lupinsea

Well-known member
Joined
Mar 30, 2010
Messages
261
Welding the steel c-chanel edge trim:

P1050483-filtered.jpg
.
P1050478-filtered.jpg
.
P1050489.jpg


P1050629.jpg


Concrete Window Sill:
I wanted something nice and chunky for the window sill but I didn't want it out of wood. And the tile stuff was all too thin. So I cast my own concrete window sill and built my own formwork. This was an "oh ****, gotta come up with something" last minute job.

P1050259.jpg
.
shapeimage_5.png
.
P1050266.jpg

Building the formwork, mixing the concrete, filling the formwork


P1050420.jpg

This is the bottom, inside of the sill. Note radiused
inside corner to reduce potential cracking.


P1050425.jpg

Window sill installed but prior to tile grouting


P1050473.jpg

Detail of the concrete window sill.
 

demondriven

Well-known member
Joined
Jun 21, 2010
Messages
71
Location
Buffalo, New York
Dont mean to highjack the thread. But can you tell more about the concrete window sill? Is this your first time doing it? What do you think about using it as a countertop? What kind of concrete? Sorry I'm really interested in it.
 
OP
B

bchee

Well-known member
Joined
Aug 20, 2007
Messages
6,148
Location
Texas
Thanks for the picts. that's exactly what I was looking for.
 

z28snksknr

Well-known member
Joined
Jul 8, 2009
Messages
1,827
Location
Turnersville, NJ
Here's my before :shocking::shocking::shocking::

IMG_1477.jpg


IMG_1478.jpg

There were fake "bricks" plastered all over the walls, so I had to tear down to studs and re-rock the whole place. I added some lighting, removed the soffit, and tiled, after I put 600 screws into the plank flooring, installed 5/8" plywood (another 400 screws), and 1/4" backerboard (another 500 screws). Floor is solid!! :lol_hitti 
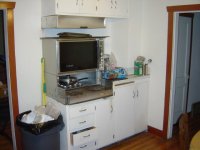
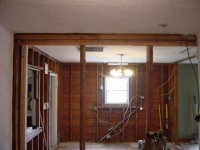
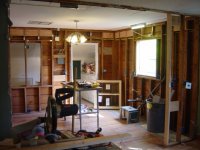
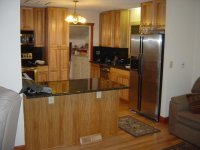
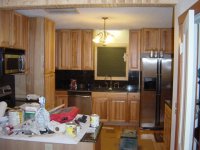
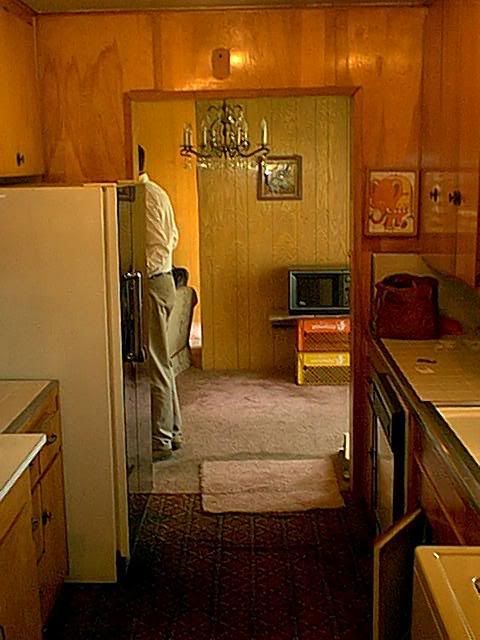
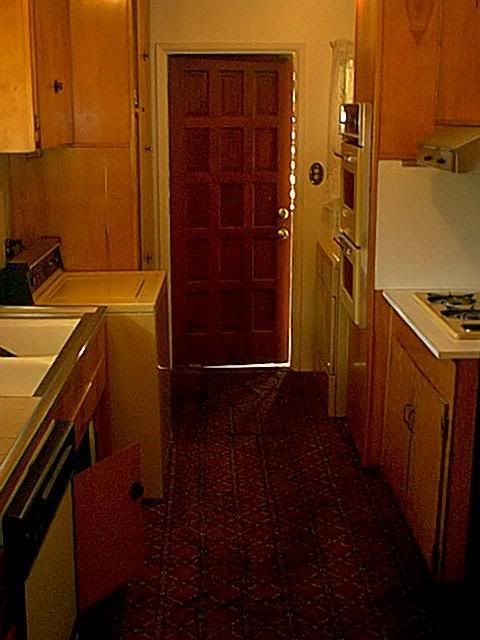
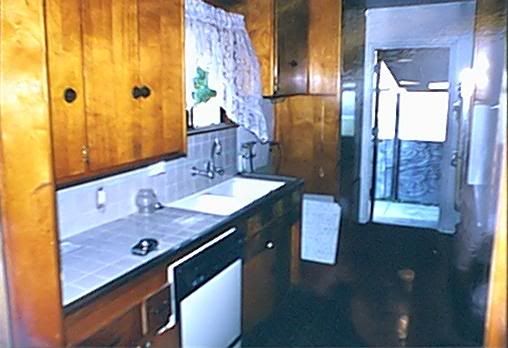
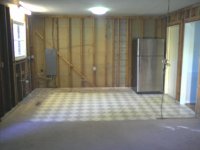
Here are the progression pics. Let me know if you have questions (only have time to post pics tonight so I can't detail the process).
IMG_1579.jpg


IMG_1580.jpg


IMG_1586.jpg


IMG_0119.jpg


IMG_1597.jpg


IMG_0128.jpg


IMG_0129.jpg


IMG_0131.jpg


IMG_1596.jpg


IMG_0148.jpg


IMG_0149.jpg


IMG_0155-1.jpg


IMG_0153.jpg


IMG_0154-1.jpg


IMG_2005.jpg

Total cost was roughly $14k. That's start to finish, soup to nuts. Took me 3 months of evenings and weekends (just me, wife helped with cleanup / etc.). I have crown molding up on the top of the cabinets now (no pics - kitchen too dirty right now :lol_hitti), and trim / molding is now installed on the cabinet bottoms. Enjoy!!
 
OP
B

bchee

Well-known member
Joined
Aug 20, 2007
Messages
6,148
Location
Texas
This forum is awesome. Nice job and picts. Why did you paint the ceiling last?
That's the first thing I plan to do; at least will try to work top down
 

ddawg16

Well-known member
Joined
Jul 11, 2008
Messages
21,005
Location
S. California
z28.....nice job....

Ok....here is mine....

First, you need to see what we moved into....typical galley kitchen....we moved into the house in 2000....never used the kitchen....gutted it within 2 months....

OldKitchenViewtowardsLivingroom.jpg


OldKitchenViewtowardsSideDoor.jpg


KitchenBefore.jpg


So we gutted the whole thing....including the ceiling....

FrontWindow.jpg


Drywalled everything in after adding insulation (there was not insulation in the front south facing wall)

CeilingES1.jpg


PaintedWE.jpg


And I built my own cabinets....

Image13.jpg


KitchenViewfromdriveway.jpg


CookbookShelves.jpg


I have maybe a total of $7000 in the kitchen....but that included appliances (new oven and stove) as well as the upgraded electrical. I replaced the old 60A serverice with a 200A panel...added 4 ckts to the kitchen included a 220V 50A service for the oven.

Right now the kitchen is in limbo....we never finished the backsplash....after my wife remodeled her mom's kitchen using granit....we decided that granit was a much better option than tile....so by next spring I'll be doing some more major mods....we are removing part of one wall where the fridge is...moving the fridge over to the other side...and building in a breakfast bar....while replacing all of the counter tops with granit..

The key to this time frame is getting my 2-story addition done which includes a utility room...and the washer and dryer come out of the kitchen....my wife can't wait for that.
 

ddawg16

Well-known member
Joined
Jul 11, 2008
Messages
21,005
Location
S. California
How hard is it to make an arch with drywall?

Not hard....I used plywood to make the arch frame...the curved portion was just some thin 1/8" plywood...then on the drywall you scribe the back about every inch and then just push it up in there....mud hides the rest.

But this will be coming out soon....that is an old pic...we have since put in a larger fridge....that fridge will go to the other side...we will close off that opening on the right and the wall on the left is going bye bye...including the arch.

By doing the 2-story addition, we add a big day room, hence, our current living room will become a dinning room....
 

ebstein

Well-known member
Joined
Mar 31, 2010
Messages
83
Location
Green Bay, WI
we went from this:
2007kitchen003.jpg

2007kitchen001.jpg


to this:
new.jpg

kitchen1.jpg

kitchen.jpg


the cabinets were roughly 12grand, and that was the only thing I didnt do...I did the plastering and flooring and painting..
 
OP
B

bchee

Well-known member
Joined
Aug 20, 2007
Messages
6,148
Location
Texas
the cabinets were roughly 12grand, and that was the only thing I didnt do...I did the plastering and flooring and painting..

$12,000?

It looks like just the doors were replaced.

edit: the remodel looks great by the way
 
Last edited:

ewetzelx7

New member
Joined
Jul 15, 2010
Messages
1
Thanks for the pics Ebstein. Actually I am also looking to renovate my kitchen and have got lovely ideas from your sharing. Thanks a lot.
 

lupinsea

Well-known member
Joined
Mar 30, 2010
Messages
261
Dont mean to highjack the thread. But can you tell more about the concrete window sill? Is this your first time doing it? What do you think about using it as a countertop? What kind of concrete? Sorry I'm really interested in it.

This was the second interior finish concrete project I had done. The first was a concrete counter top for the vanity in our bathroom that I did a remodel on two years ago.

I never got around to taking finished photos of that project but this is a picture of the concrete vanity counter top before the sink and hardware were installed:


100_8021.jpg


100_8025.jpg


For both I simply used the 5,000 psi mix of bagged concrete from Lowes or Home Depot. Added some pigmentation to the concrete when I mixed it with water. For the bathroom vanity I borrowed a friends polishing equipment and worked my way from 50 grit polishing pads to 3,000 grit pads for a shiny look. This was after squeegeeing in a slurry of colored cement to plug any micro air bubble holes for a more uniform finish.

For the window sill I wanted a more sandstone look. As soon as I peeled away the formwork (2-4 days after pouring) I scrubbed the fresh concrete with a stiff nylon brush and water. This loosened and washed away some of the "cream" and left a different more sandstone-like texture.

If one is going to do a concrete counter top be aware of the weight and how you build it. Plus you'll need to have shorter cabinets as the concrete shouldn't be any thinner than 2". Most counter tops are 3/4" thick with an extra 3/4" edge laminated on (so while it looks like it's 1 1/2" it's actually 3/4" as sitting directly over the cabinet tops). You can make the concrete as thick as you want, however.

Also, there are two methods of construction: pre-cast (what I did for both the vanity top and the window sill) or site cast (poured directly on top of the cabinets. You'll get the best, most uniform finish out of the pre-cast method as you can used factory smooth sheets of MDF, Malamine, etc. to build your form work out of. . . . just cast the piece upside down. With site cast you have to trowel off the top yourself, it tends to not be quiet as smooth and uniform, though perfectly servicable.

What dictates the method is how big of pieces you wan to cast. Concrete is heavy and so the pre-cast should be limited in size. My little 22" x 48" vanity top weighed about 140 lb.

For more info check out the concreteexchange.com. And if you want to do this, YES, it's very worth BUYING Fu-Tung Cheng's book on Concrete Countertops. He's the guy that runs the site and has been doing this stuff for a while.

Oh, and a photo album from my concrete counter top project.
 
Last edited:
OP
B

bchee

Well-known member
Joined
Aug 20, 2007
Messages
6,148
Location
Texas
For both I simply used the 5,000 psi mix of bagged concrete from Lowes or Home Depot. Added some pigmentation to the concrete when I mixed it with water. For the bathroom vanity I borrowed a friends polishing equipment and worked my way from 50 grit polishing pads to 3,000 grit pads for a shiny look. This was after squeegeeing in a slurry of colored cement to plug any micro air bubble holes for a more uniform finish.

For the window sill I wanted a more sandstone look. As soon as I peeled away the formwork (2-4 days after pouring) I scrubbed the fresh concrete with a stiff nylon brush and water. This loosened and washed away some of the "cream" and left a different more sandstone-like texture.

If one is going to do a concrete counter top be aware of the weight and how you build it. Plus you'll need to have shorter cabinets as the concrete shouldn't be any thinner than 2". Most counter tops are 3/4" thick with an extra 3/4" edge laminated on (so while it looks like it's 1 1/2" it's actually 3/4" as sitting directly over the cabinet tops). You can make the concrete as thick as you want, however.

Also, there are two methods of construction: pre-cast (what I did for both the vanity top and the window sill) or site cast (poured directly on top of the cabinets. You'll get the best, most uniform finish out of the pre-cast method as you can used factory smooth sheets of MDF, Malamine, etc. to build your form work out of. . . . just cast the piece upside down. With site cast you have to trowel off the top yourself, it tends to not be quiet as smooth and uniform, though perfectly servicable.

What dictates the method is how big of pieces you wan to cast. Concrete is heavy and so the pre-cast should be limited in size. My little 22" x 48" vanity top weighed about 140 lb.

For more info check out the concreteexchange.com. And if you want to do this, YES, it's very worth BUYING Fu-Tung Cheng's book on Concrete Countertops. He's the guy that runs the site and has been doing this stuff for a while.

Oh, and a photo album from my concrete counter top project.

That is really amazing. Do you think the time invested was worth the cost savings?
 

lupinsea

Well-known member
Joined
Mar 30, 2010
Messages
261
That is really amazing. Do you think the time invested was worth the cost savings?

Hm.

Depends. Probably. I'd do it again if I could but my wife didn't want to do this for the kitchen counter tops.

To do the bathroom vanity top took maybe a month. Granted, that's not working on it all the time. The timeline looked roughly like this:

1. Build formwork and form rebar / wire mesh + any knockouts

2. Mix and pour concrete (didn't take long) and get it smooth

3. Remove formwork (I waited about 7-14 days) and carefully flip over concrete top

4. Hit concrete with the polishing equipment and up to about 800 grit or so,

5. Wait another 1-2 weeks for concrete to harden more before finishing polishing up to 3000 grit (1200-1500 is recommended minimum)

6. Install counter top with some helpers by gooping down silicone on the top of the vanity cabinet


Total cost for the concrete counter top was maybe $140 but that didn't include the polishing equipment and pads that I borrowed. The concrete was $12-15. A sheet of 3/4 melamine for the formwork was $40 or so, then the rebar, pigment, etc. etc.

I figure it was still a fraction of the cost of a custom cut stone in the shape we wanted. At the time and in our area an equivalent stone top would have been $700-900. But that's custom. An off the shelf stone top from Lowes or HD would have been in the $500 range.

The other thing to keep in mind is that for larger counter tops you might need to reinforce the floor. For the bathroom vanity it was only 140 lb. Not a big deal. But for a kitchen you could be looking at over 1000+ lb. of concrete. And it's not just the floors but the cabinets that need to be able to take the weight.

I'm not saying this to discourage but simply as an FYI if you want to DIY.

It's a fun project. And there are TONS of desing details that you can cast in to the concrete. Either relief forms and shape or various metal inserts. I think Cheng's book had a picture of some motorcycle chain sprockets one guys cast flush into his counter top. It looked awesome.
 
Last edited:
OP
B

bchee

Well-known member
Joined
Aug 20, 2007
Messages
6,148
Location
Texas
I think I might just stick with solid surface.
I'm doing my kitchen, not the bathroom.
 
Last edited:
OP
B

bchee

Well-known member
Joined
Aug 20, 2007
Messages
6,148
Location
Texas
Highlights include:
  • Welded steel c-chanel counter top edge

Is this serving any functional purpose right now? Looks like a great way to hang stuff, like towels, or maybe a create a custom chopping board that can be put in the channel, then removed when not in use.
 
To avoid these ads, REGISTER NOW!

lupinsea

Well-known member
Joined
Mar 30, 2010
Messages
261
I think I might just stick with solid surface.
I'm doing my kitchen, not the bathroom.

We've done a number of concrete counter tops in the houses we've designed for our clients. It works there, too. Here is one of the kitchens we desgined for a new-construction house we did for a client of ours about 8 years ago.

2.jpg


Cherry lower cabinets with painted red upper cabinets and a concrete counter top.

I also designed a kitchen island for another client where the edge of the island was 5" thick with mild steel door and drawer fronts for the cabinets. Sorry, no pictures of that one. Looks cool, though.

Anyways, the concrete will develop a "patina of age" and show wear as it's not as durable as typical counter top stone work like granite. Some people are fine with it, some aren't.


Is this serving any functional purpose right now? Looks like a great way to hang stuff, like towels, or maybe a create a custom chopping board that can be put in the channel, then removed when not in use.

As for the steel c-chanel for the edge trim. No functional purpose other than to protect the edge of the linoleum we used as the counter top.
 
OP
B

bchee

Well-known member
Joined
Aug 20, 2007
Messages
6,148
Location
Texas
We've done a number of concrete counter tops in the houses we've designed for our clients.

I totally missed this important piece of info from the previous post. I'm no professional.
Since I'll be doing everything myself, I've been paralyzed by my fear of making the kitchen look WORSE.
 

54FordPanel

Well-known member
Joined
Aug 7, 2009
Messages
5,711
Location
Fort 54, Littleton, Co
3 "before" pictures.

DSC00483.jpg


DSC00490.jpg


DSC00491.jpg


3 "during" pictures. We took down a wall and moved it, and put oak floor everywhere.....

P3070039.jpg


P3230017.jpg


P3250025.jpg


And the finished kitchen. We had $8000 in the cabinets, $6000 in the granite, so probably $18000. We did the whole house so it's hard to say how much was kitchen only. Got a good deal on all the appliances at the time....

IMG_0047.jpg


IMG_0063.jpg


IMG_1441.jpg
 

Kevin54

MEMBER EMERITUS
Joined
Jan 12, 2005
Messages
29,341
Location
Urbana, Ohio
IMG_0063.jpg


I can bet that isn't to code by not having a wall or railing between the wall and living room. How many times have you got done eating and went straight down to the couch for a little R&R? :lol_hitti
 

54FordPanel

Well-known member
Joined
Aug 7, 2009
Messages
5,711
Location
Fort 54, Littleton, Co
I can bet that isn't to code by not having a wall or railing between the wall and living room. How many times have you got done eating and went straight down to the couch for a little R&R? :lol_hitti

Code?......What Code?.....I DON'T HAVE TO FOLLOW ANY STINKIN' CODE!

No, that picture wasn't of it finished finished....I put up a oak railing after that. But I don't have any pictures of it for some reason.

Looks like you have a sunken living room. That's cool

It's was a tri-level house, which is why the family room looks sunken. I really liked that floor plan. We are in a 2 story now, and I liked the tri-level (actually 4 levels) better.
 

CharlieM

Well-known member
Joined
Jan 8, 2005
Messages
280
Before and After..... Don't really know how much. I did all the work with a retired boss from my work... Turned out pretty nice...
 

Attachments

  • IMG_0074.jpg
    IMG_0074.jpg
    143 KB · Views: 43
  • IMG_0110.jpg
    IMG_0110.jpg
    42 KB · Views: 60

323wc

New member
Joined
Dec 31, 2009
Messages
2
Location
portsmouth va
My wife and I did everything but hang the cabinets. Total gut and rewire.
 

Attachments

  • 1.jpg
    1.jpg
    43 KB · Views: 54
  • HPIM0486.JPG
    HPIM0486.JPG
    59.7 KB · Views: 92

323wc

New member
Joined
Dec 31, 2009
Messages
2
Location
portsmouth va
Heres a few.
 

Attachments

  • 0301091722.jpg
    0301091722.jpg
    141.9 KB · Views: 46
  • 12.jpg
    12.jpg
    37.8 KB · Views: 35
  • 13.jpg
    13.jpg
    51 KB · Views: 34
  • 3.jpg
    3.jpg
    42.7 KB · Views: 29

65Stang

Well-known member
Joined
Sep 25, 2008
Messages
240
Location
Washington State
Here are my before and after pictures. The kitchen was a real disaster when we purchased the home. Carpet flooring with moldy underlayment, white lino countertops that were peeling, plywood cabinets that were just ugly, no base or trim, and on and on.

Before:
View media item 5171View media item 5170
We probably spend about $1,000 on the remodel. I made all the cabinets in our shop, the floor is just lino, but fits very well, countertops are the pre-formed ones from the box store, etc. The pictures below are when it was about 75% complete, there have been additional cabinets, trim work, wine cabinet, side deck/door installed, hood above stove, etc., completed since these pictures. I am a very frugal spender. I can only imagine what I would have done with the funds from some of the remodels noted above! Some pretty nice kitchens.

After (but not quite complete):

I need some updated pictures!

View media item 5172View media item 5173
 
Last edited:

maxchaney

New member
Joined
Mar 20, 2010
Messages
1
Here are a few of before, during and "almost done" The sad part is that the kitchen has been 99% complete for over a year now and I still don't have some good after pictures. :)

The total cost was around $14,000. This was with family members and myself doing all of the work. The appliances were just over $3,000, the granite was about $2,200 (3 cm slab and 12" backsplash tiles) and the cabinets were right about $5,500 ,with the remaining $3,300 for lumber, windows, paint, electrical, plumbing, etc....

I tore out two walls and basically opened up everything making a large open floorplan.

DSC01394_sized.jpg and DSC01704_sized.jpg are the same view.

I have since added under cabinet lighting which really helped to lighten things up as the dark granite (uba tuba color) was just "too dark"
 

Attachments

  • DSC01392_sized.jpg
    DSC01392_sized.jpg
    58.1 KB · Views: 16
  • DSC01394_sized.jpg
    DSC01394_sized.jpg
    70.5 KB · Views: 16
  • DSC01448_sized.jpg
    DSC01448_sized.jpg
    72.5 KB · Views: 16
  • DSC01475_sized.jpg
    DSC01475_sized.jpg
    77.1 KB · Views: 15
  • DSC01643_sized.jpg
    DSC01643_sized.jpg
    58.7 KB · Views: 18
  • DSC01703_sized.jpg
    DSC01703_sized.jpg
    65.1 KB · Views: 16
  • DSC01704_sized.jpg
    DSC01704_sized.jpg
    81.4 KB · Views: 16
Last edited:

65Stang

Well-known member
Joined
Sep 25, 2008
Messages
240
Location
Washington State
Last edited:
To avoid these ads, REGISTER NOW!
Top Bottom