To avoid these ads, REGISTER NOW!

KR-562A My taco cart restore

Laro13

Well-known member
Joined
Oct 8, 2011
Messages
219
Location
The Netherlands, Europe
Nice taco carts.:thumbup:

I need some new slides for my KRA-379a, but over here in Europe it's a lot harder to get some replacements for free.:dunno:

Has anybody got experience with Snap on customer service in Europe?
 
To avoid these ads, REGISTER NOW!
OP
S

softailgarage

Well-known member
Joined
Apr 20, 2011
Messages
5,153
Location
Bullhead City, Az.
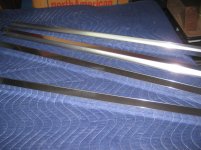
UPDATE- I've finished priming the drawers. I've started on the box itself, de-greasing and taking the paint down to the metal. I also decided to replace the 4 corner trim pieces. I spent about a half hour on the phone with TJ at Snap On yesterday, the trim is no longer available, however after a lot of part # searching and matching, TJ was able to come with 4 pieces that will work, I'll just have to cut about 1 1/2"s of each one. Another $150.00 (ever see a $10,000 taco cart?)

Pictures to follow...
 
OP
S

softailgarage

Well-known member
Joined
Apr 20, 2011
Messages
5,153
Location
Bullhead City, Az.
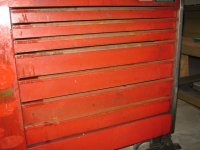
Drawers primed
IMG_3488.JPG

Have to finish stripping the end and the cabinet side
IMG_3482.JPG
IMG_3483.JPG

Trim looks like Hell, will replace
IMG_3485.JPG
IMG_3486.JPG

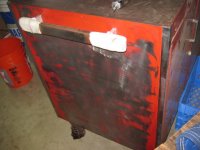
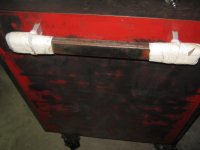
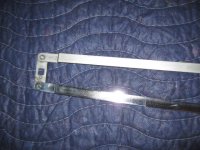
Last, the handle. Any idea's as to what I should do? I don't know how they looked off the line, new, but this one is pretty much done. I wrapped the ends due to some sharp edges, don't want to scratch or cut anything.
IMG_3487.JPG
 

acmech

Member
Joined
Aug 14, 2012
Messages
18
Location
acton, ca
Drawers primed
IMG_3488.JPG

Have to finish stripping the end and the cabinet side
IMG_3482.JPG
IMG_3483.JPG

Trim looks like Hell, will replace
IMG_3485.JPG
IMG_3486.JPG

Last, the handle. Any idea's as to what I should do? I don't know how they looked off the line, new, but this one is pretty much done. I wrapped the ends due to some sharp edges, don't want to scratch or cut anything.
IMG_3487.JPG


mine is same color as the box and has some rubber end caps. I'm missing one though. has "snap on" on the edge of the caps.
 

zkling

Well-known member
Joined
Jan 23, 2007
Messages
16,939
Last, the handle. Any idea's as to what I should do? I don't know how they looked off the line, new, but this one is pretty much done. I wrapped the ends due to some sharp edges, don't want to scratch or cut anything.
IMG_3487.JPG

They were painted red, same as the box, the spacers were bare aluminum and each end had black rubber fitted end caps which are no longer available to my knowledge. In case you didn't know the handle slides into two pieces, exposing the screws so you can remove it completely from the box. I'd just repaint it and try to make some basic ends caps for safety. The original caps had the snap on logo on one end.
 

d_frontier

Well-known member
Joined
Jun 8, 2013
Messages
117
Location
Atlanta, Ga
this inspires me to hurry up and finish restoring mine, the wheels are covered under warranty except that they don't carry those anymore and wheel send you the chrome ones that the new boxes come with any way you could send me the part# for the chrome edge piece mine is missing all of them
 
OP
S

softailgarage

Well-known member
Joined
Apr 20, 2011
Messages
5,153
Location
Bullhead City, Az.
The chrome trim came in yesterday, looks like it going to fit perfectly, just a little trim for the trim :bounce:
IMG_3599.jpg

IMG_3600.JPG

The old trim
IMG_3601.JPG
IMG_3602.JPG
BTW, Snap On part # is 10770 case silver brite

In order to get the rear trim, next to the door, I had to remove the piano hinge which was riveted thru the trim to the case
IMG_3609.JPG
IMG_3610.JPG
 
OP
S

softailgarage

Well-known member
Joined
Apr 20, 2011
Messages
5,153
Location
Bullhead City, Az.
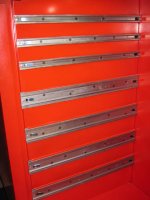
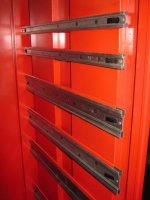
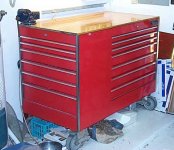
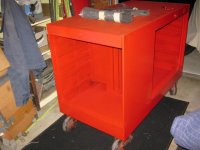
Sorry guys, it's been a couple months or 3, but I'm back at it. I had a guy call last week wanting to know about a KR-58A & KR-58B I had for sale. Gave him dimensions, but he needed something bigger, so I brought up the Taco Cart. Long story short, it's sold... but I have 8 days to finish:wtf: That was 6 days ago. I have the main case done, 3/4's of the drawers done and the drawer rails are in. I still have to finish drawers, cut & install the chrome trim, remove & repaint the spring loaded casters, clean up the wheels and find something for the top. No problem :willy_nil Does anyone know what type of material the top board in made of ? Its the basic fiber/cardboard /?/ or where I can find it ?
IMG_4253.JPG

IMG_4254.JPG

IMG_4255.JPG

IMG_4256.JPG

IMG_4257.JPG

BTW, do to the lack of time and a place to do it, I rattle canned it :confused: I took my time, was careful and it actually turned out o.k. There is 1 coat of Rustolem Rusty Metal Primer (18 cans) & 3 coats of Rustoleum Professional " Safety Red" (57+ cans) with some light sanding by hand w/ 1000 grit wet sanding in between coats.

More Tomorrow...:beer:
 

nine4gmc

Well-known member
Joined
Mar 24, 2012
Messages
14,357
Location
Dallas
:shocking: I can not believe you have that many rattle cans in it :shocking: A gallon of safety red in a spray gun goes a long ways ;)
 
OP
S

softailgarage

Well-known member
Joined
Apr 20, 2011
Messages
5,153
Location
Bullhead City, Az.
:shocking: I can not believe you have that many rattle cans in it :shocking: A gallon of safety red in a spray gun goes a long ways ;)

I know, I know, but I'm not set up for a sprayer and have never used a sprayer and didn't want to "experiment' on this. I have plenty of experience with the can. It pissed me off to no end buying the cans, but turned out fine. The end result with the sprayer I think wouldn't have been pretty.
 

zkling

Well-known member
Joined
Jan 23, 2007
Messages
16,939
:shocking: I can not believe you have that many rattle cans in it :shocking: A gallon of safety red in a spray gun goes a long ways ;)

:+1: >$250 :shocking:

I know, I know, but I'm not set up for a sprayer and have never used a sprayer and didn't want to "experiment' on this. I have plenty of experience with the can. It pissed me off to no end buying the cans, but turned out fine. The end result with the sprayer I think wouldn't have been pretty.

You don't have to spray it, put it on with a foam brush or roller. Put it on thick and then cut it back wit 1k grit and then compound. It looks really good what you did, but maybe for future reference. :beer:
 

FJ 432

Well-known member
Joined
Aug 2, 2010
Messages
3,739
Location
Littleton Colorado
Is your only issue with the handle is the rubber caps? I have a spare handle but the caps are not in good shape if I recall.
 
OP
S

softailgarage

Well-known member
Joined
Apr 20, 2011
Messages
5,153
Location
Bullhead City, Az.
:+1: >$250 :shocking:


You don't have to spray it, put it on with a foam brush or roller. Put it on thick and then cut it back wit 1k grit and then compound. It looks really good what you did, but maybe for future reference. :beer:

I had no idea something like this could be brush painted. Seems like you would come out with brush or roller lines.

Is your only issue with the handle is the rubber caps? I have a spare handle but the caps are not in good shape if I recall.

Yes, the handle is fine, I only need the end caps. I've been watching ebay, just missed one that went for about $15.00 months ago. Since then I haven't seen any.

I don't get it...you put all this work into it to make it really nice and you're selling it?

I originally was going to keep it, but I simply don't have room for it. And $2,000 bucks is $2,000.00 buck's :thumbup:

OK, so, the drawers are done, the slides are in & I started on the chrome trim.
IMG_4255.JPG
IMG_4257.JPG

The handle missing the end caps
IMG_4258.JPG


I cut the piece to size and the cut out the areas where it slides over the frame with a dremel. Rivited it in place.

IMG_4259.JPG
IMG_4260.JPG

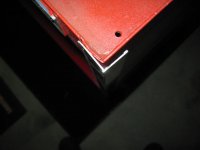
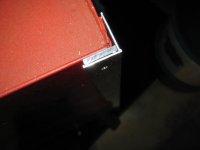
Thought it looked good, until I took a closer look
IMG_4263.JPG
IMG_4265.JPG

I don't know what to do about the gap. I thought maybe plastic L caps, but the gap runs the length. So, this is my dilemma right now.
I'm done for the night, have to run over to girlfriends and borrow her sons floor jack. Tomorrow I'll jack it up, put it on blocks and get the casters off and cleaned up. Any idea's about the trim...I'm all ears:dunno:
 

jakemac

Well-known member
Joined
May 21, 2013
Messages
9,035
Location
New England
Can you drill out the rivets, shim the moulding on the inside, then re-rivet to push the trim over ? Or is there no room.
 

nine4gmc

Well-known member
Joined
Mar 24, 2012
Messages
14,357
Location
Dallas
Black rtv for the gap, tape a straight line on the paint so it peels clean edge. Lick your finger and wipe the bead. :thumbup:
 
OP
S

softailgarage

Well-known member
Joined
Apr 20, 2011
Messages
5,153
Location
Bullhead City, Az.
Problem fixed!!! 3/4" x 1/8" x 36" Aluminum flat bar. After searching the internet and a few local hardware stores all day for red plastic strips or trim, I said screw it, went to HD and grabbed some black rubber weatherseal. Found the aluminum stock while headed to cashier and knew right away it would work and it did. So now maybe I can wrap this up by Monday (after the Pomona Swap Meet of course). The buyer is aware and cool with it, so for ONCE luck was on my side.:beer:

IMG_4278.JPG

IMG_4279.JPG

It actually looks better in person, I'll try to get a better shot tomorrow.
 
To avoid these ads, REGISTER NOW!
OP
S

softailgarage

Well-known member
Joined
Apr 20, 2011
Messages
5,153
Location
Bullhead City, Az.
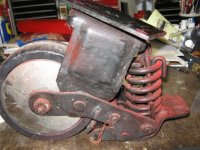
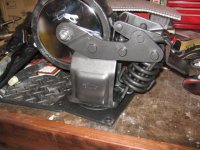
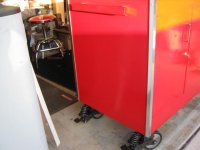
Today the wheels were done. Nothing too difficult, jacked up the box with a floor jack, set it on some 4x6's, disassembled, cleaned polished, painted and lube. Something I did not know, The axle rods have a Zerk fitting on one end and a small pinhole in the shaft to keep the rod and bearing lubricated. Dug around the garage, found a grease gun and filled each one.

IMG_4280.JPG

IMG_4283.JPG

IMG_4300.JPG

IMG_4301.JPG

IMG_4302.JPG

Now, back to the trim...
 
OP
S

softailgarage

Well-known member
Joined
Apr 20, 2011
Messages
5,153
Location
Bullhead City, Az.
I put the hubs on the bench polisher and started with blue compound, then green and finished with Mothers Mag & Aluminum Polish by hand. The axle nuts just the blue. The spring casters,I was thinking about just a gloss black, but I wanted to try something else first & grabbed the Rustoleum Hammered Black. I figured if I didn't like the way it came out, I could go over it with the gloss black. I stuck with the Hammered, gives it a sort of vintage industrial look. I also replaced all of the mounting bolts with Grade A 5/16-18x1" bolt's and internal lock washer. I knew those casters were beefy, but man, holding them suckers, you can really feel their weight. Thats good American Steel, just what you want when it's loaded down with tools being towed across the Tarmac all the time. Taco Carts are badass, they dont get parked in a shop for 10 years, they spend their time workin'. I want another one.:bounce:
 
OP
S

softailgarage

Well-known member
Joined
Apr 20, 2011
Messages
5,153
Location
Bullhead City, Az.
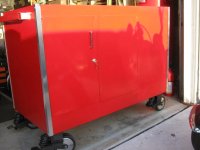
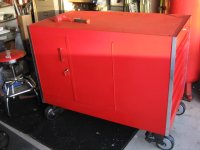
Well, after messin with the trim for 3 days, it's done! The trim was by far the hardest part of the whole job. Out of the 4 pieces Snap On sent, I was able to use 2. The other end of the cart had narrow corners, which I hadn't realized while ordering. I started out at Home Depot picking up several different sizes of C Channel, seeing what would work and what wouldn't. All 4 pieces had to be cut/slotted. The cutting I did mostly with a Dremel and THIN cutting disc, excess on the length was cut using a Milwaukee Hackzall. The biggest problem was the Cabinet door corner. Snap On had the chrome trim in between the cabinet hinge and the cab and not a lot of room for error. Nothing from HD was working , so i headed to a metal supply house in Escondido, found the perfect c channel with thinner walls. Tried ity when I got home and couldn't be happier. Once the trim pieces were cut and fitted I put them on the bench polisher and brought them from a dull aluminum to bright chrome. Each piece was then riveted to the cab.
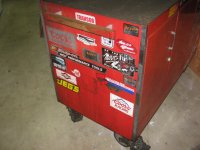
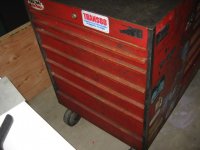
Before I start showing the finished cab, here is some more pics of the way it looked right after Snap On delivered it

KR562ABACK.JPG

KR562AHANDLE.JPG

KR562AREAR.JPG

KR562ADRAWER2.JPG

KR562ATAG.JPG

KR562AGREASE.JPG

KR562AWIDEDRAWER.JPG
 
OP
S

softailgarage

Well-known member
Joined
Apr 20, 2011
Messages
5,153
Location
Bullhead City, Az.
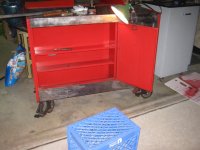
The trim on the cabinet side was the biggest challenge. Besides having to trim and notch all 4 pieces, the trim at the cabinet had to go between the cab & the door hinge and still look good. Trying to mount the cabinet door, keep the trim under the hinge and line up to all previously drilled holes was loads of fun.

IMG_4328.JPG

IMG_4320.JPG

IMG_4321.JPG

IMG_4327.JPG

IMG_4330.JPG

A short recap:
Stripped to bare metal
Degreased (twice)
Sandblasted drawers
Replaced all drawer rails with new Snap On
Replaced all chrome, 1/2 from Snap On
Primer w/ Rustoleum Rusty Metal Primer/ painted 3 coats with Rustoleum Professional Safety Red (rattlecan and so many I try not to think about it)
Cabinet Door lock replaced
Casters cleaned, painted , lubed, polished and all caster to cab bolts replaced.

The problem with my Snap On guy has been resolved with truck credit for the full amount paid and ....my customer is MIA:sad:
 

miketyler

Well-known member
Joined
Sep 10, 2009
Messages
635
Location
Cedar Hill, TX
Looks good - did you attempt any restoration on the Snap-on logo plate? I might suggest lightly surfacing the raised lettering and edging to brighten it up with 320 grit on a sanding block and then follow with a light coat of clear gloss or satin finish to keep from oxidizing.
 

Lookin4'67Galaxieconv

Well-known member
Joined
Jul 2, 2008
Messages
16,642
Location
Atlanta, GA
Outstanding job! Very nice. I prefer the later carts, i.e. '83-85 vintage with the chrome trim on each drawer, though I know some prefer the clean look. Regardless, it looks great! :)

So what's the deal...this guy told you he'd pay you two grand, now he's not returning calls?
 

miketyler

Well-known member
Joined
Sep 10, 2009
Messages
635
Location
Cedar Hill, TX
Agreed - the drawer trim looks very nice on these boxes. My old one pictured below....still miss her.
 

Attachments

  • toolbox.JPG
    toolbox.JPG
    54.5 KB · Views: 310
OP
S

softailgarage

Well-known member
Joined
Apr 20, 2011
Messages
5,153
Location
Bullhead City, Az.
Looks good - did you attempt any restoration on the Snap-on logo plate? I might suggest lightly surfacing the raised lettering and edging to brighten it up with 320 grit on a sanding block and then follow with a light coat of clear gloss or satin finish to keep from oxidizing.

No, I did not, mainly because I didn't know what or how to do it. I considered re-painting the black but figured it would turn out like ****, so I left it alone (it's the only piece that didn't get touched. I'm going to give your idea a shot, I'll post the result, thanks.

Outstanding job! Very nice. I prefer the later carts, i.e. '83-85 vintage with the chrome trim on each drawer, though I know some prefer the clean look. Regardless, it looks great! :)

So what's the deal...this guy told you he'd pay you two grand, now he's not returning calls?

Agreed - the drawer trim looks very nice on these boxes. My old one pictured below....still miss her.

I agree also about the drawer trim, it definitely adds some "pop", makes the drawers stand out.

The Customer (now referred to as "Douchebag") The guy called me in reference to some other Snap On boxes I had on CL. He came to the conclusion they were too small for his needs, I then told him I was restoring a taco cart. Long story short, the guy came over, gave me $100.00 deposit to make sure I called him first when it was done. We kept in contact with updates, etc. until the last week, when he went MIA. I finally got a hold of him yesterday by text, told me he had been working long hours, was no longer interested in it, he was just missing his old one he got rid of years ago. :wtf:WTF *******? I should have known, he agreed to the 2,000 too fast.:mad: I told him I was keeping the $100.00, which he didn't have a problem with. It *****, but I never would have finished it otherwise. What really ***** is I'll never find somebody willing to pay $2,000.00, so I'll start it at $1500.00 and work its way down.
Or maybe I'll keep it

These threads have inspired me to create a group for all my Taco Box owning Brothers. I encourage all owners to join!:

http://www.garagejournal.com/forum/group.php?groupid=123

Hey thats cool, sign me up! And Galaxie & Mike thanks for the compliments :beer:
 
OP
S

softailgarage

Well-known member
Joined
Apr 20, 2011
Messages
5,153
Location
Bullhead City, Az.
Another member PMed me regarding the trim, I thought I would post the answer, maybe it will help.

Default Re: KR562
Quote:
Originally Posted by engelhe
What is the part number for the trim pieces you are using for the KR562 and how do they come off?

"The trim pieces are riveted in 2 places, one top & one bottom, except for the side with the paint can cabinet. that one is also riveted but under the door hinge. You'll have to drill out the rivets & remove the door and hinge. Getting it back together is a ***** cause you have to drill new holes in the trim to match the existing holes. The trim (all 4) are also crimped at the top & bottom. Its impossible to remove the original trim without destroying it, so there's no turning back at that point. Only 2 piece's from Snap On fit and still they had to be cut to fit in the notches of the case. As for part numbers, save your money and go to home depot. In the hardware aisle you'll find a section with metal and aluminum stock, flat bars, C- channels, "L" angles & rolled stock. what I would do in get the "L" angles and cut and rivet to the case. It wont be original, but will save you a lot of time, money & frustration. They can be put to a bench grinder/polisher and brought to a chrome finish."
 

ADSR

Well-known member
Joined
Jan 12, 2013
Messages
10,713
That's an awesome cart! LOL, is it a cart or box?

I'd almost think that would be better than a cart and box.
 

one9gt

Well-known member
Joined
Feb 15, 2014
Messages
677
Location
San Francisco
Sorry to bring an old thread back but I just had a few questions. I just received a KR562A for free from the head mechanic and it's not in too rough of condition but still needs work. I've already got new rails on the way for free and they want the old rails back, free shipping as well.

What's the easiest way to remove them?
Also, since my box is dated 81, anyone know the part numbers for chrome trim on drawer handles?

Just need to find the paint can cabinet handle and toolbox handle and I'm set, any leads??

Thanks!!
 
OP
S

softailgarage

Well-known member
Joined
Apr 20, 2011
Messages
5,153
Location
Bullhead City, Az.
Sorry to bring an old thread back but I just had a few questions. I just received a KR562A for free from the head mechanic and it's not in too rough of condition but still needs work. I've already got new rails on the way for free and they want the old rails back, free shipping as well.

What's the easiest way to remove them?
Also, since my box is dated 81, anyone know the part numbers for chrome trim on drawer handles?

Just need to find the paint can cabinet handle and toolbox handle and I'm set, any leads??

Thanks!!

If you look at the rails, on each end is a cutout rectangular prong or tab. Push in and they should slide out.
Keep an eye open on Ebay for the handles, they're rare, but do pop up sometimes
 
To avoid these ads, REGISTER NOW!
Top Bottom