To avoid these ads, REGISTER NOW!

KR537D resto help

2ndGearRubber

Well-known member
Joined
Mar 24, 2014
Messages
14,185
Location
Pittsburgh
I recently picked up a 1982 Kr537d, with matching bottom, in poor condition.


It's getting a full repaint, polishing, and new liners cut. I'm planning on fixing it up and using it as overflow/junk collector for my KRL1033.


However, I'm missing a few key pieces. The lock was punched out, so I bought the same key/lock as my KRL, it's an update/backdate part, so everything will be keyed the same.

My big issue, is the lock bar itself, and the hinges for the top lid.


The right hand side hinge is completely ripped off, and the leftside one is quite loose and will no longer support the lid securely. I called Snap-on, and was told said hinges are no longer available. Being that I know basically nothing about hinges, finding a replacement has proved difficult. They are also riveted in, so I'll need to either find a way to bolt them in, or re-rivet.


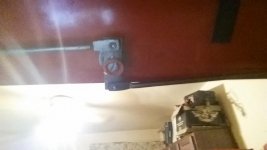
The Locking bar and plate that bolt to the back of the lock cly, itself are also missing. I have been unable to find close up pictures of one (at all), so I was hoping someone could take a picture of it directly, and/or measure it.


This is the box in question, mine in just all faded and missing paint.

20pwklu.jpg


Help me Garage Journal, you're my only hope. :lol:
 
To avoid these ads, REGISTER NOW!

gte718p

Well-known member
Joined
Mar 12, 2009
Messages
3,977
A hinge is a hinge. If there is nothing fundamentally wrong with the one you have rivet it back on. You probably want to remove it completely anyway if you are going to paint the box. If the hinge is not serviceable take some measurements and find a similar on on McMaster Carr. They literally have thousands of varieties of piano hinges. It may take some time, but you will find something extremely close to the original.
 

Wamsutta

Well-known member
Joined
Jan 8, 2014
Messages
10,891
Location
Amarillo, Texas
I can't help you with the parts, but I can help you with the paint. Get the surface down to bare steel. A random orbit electric finish sander work great for this because it doesn't leave any directional scratch marks. Use 320, 400, and then 600 grit for the final pass. Wipe the surface clean with Rustoleum paint prep wipes and then dry with a clean cotton towel. Flower sack dish towels work great.

Make sure you got gloves on during this prep process to avoid finger prints. Right before spraying, go over the surface with a microfiber towel to pick up the lint left behind from the previous cotton towel. Use the Snap-on spray can; it's excellent paint. Spray on 3 coats five minutes apart from each other (if it's below 80 degrees F you may need more flash time).

The coats should be tacky, but not dry in between coats. Use a stop watch to time your flash off. The first coat is a light tack coat (with some bare steel still visible) and then the next two coats are progressively heavier. Keep the spray can moving in a linear direction and keep it the same distance from the surface. Using both hands to steady the spray can helps. In between coats, take an acid brush and dab the spray tip with lacquer thinner to keep it clear. This paint does not work well with primer; that's why I didn't mention it. When you are done and you did everything right, you won't be able to tell it from the factory paint job.
 
To avoid these ads, REGISTER NOW!

martin666

Well-known member
Joined
Apr 15, 2015
Messages
425
Location
New Jersey
This is the lock plate and bars, I gave up trying to find that hinge long ago. I don't have a key but I could be talked out of the whole assembly if you can't find one.
 

Attachments

  • 20160503_184912.jpg
    20160503_184912.jpg
    142.1 KB · Views: 14
OP
2

2ndGearRubber

Well-known member
Joined
Mar 24, 2014
Messages
14,185
Location
Pittsburgh
I can't help you with the parts, but I can help you with the paint. Get the surface down to bare steel. A random orbit electric finish sander work great for this because it doesn't leave any directional scratch marks. Use 320, 400, and then 600 grit for the final pass. Wipe the surface clean with Rustoleum paint prep wipes and then dry with a clean cotton towel. Flower sack dish towels work great.

Make sure you got gloves on during this prep process to avoid finger prints. Right before spraying, go over the surface with a microfiber towel to pick up the lint left behind from the previous cotton towel. Use the Snap-on spray can; it's excellent paint. Spray on 3 coats five minutes apart from each other (if it's below 80 degrees F you may need more flash time).

The coats should be tacky, but not dry in between coats. Use a stop watch to time your flash off. The first coat is a light tack coat (with some bare steel still visible) and then the next two coats are progressively heavier. Keep the spray can moving in a linear direction and keep it the same distance from the surface. Using both hands to steady the spray can helps. In between coats, take an acid brush and dab the spray tip with lacquer thinner to keep it clear. This paint does not work well with primer; that's why I didn't mention it. When you are done and you did everything right, you won't be able to tell it from the factory paint job.

That is likely a better method than mine. I simply primed with filling primer, sanded several times with 3-400 grit, then shot color. Rustolium Sunrise Red, is what I choose, just a bit darker than "stock" faded red.


This is the lock plate and bars, I gave up trying to find that hinge long ago. I don't have a key but I could be talked out of the whole assembly if you can't find one.

PM Sent.
 
To avoid these ads, REGISTER NOW!
Top Bottom