To avoid these ads, REGISTER NOW!

Between 265 & 485 SQ/FT Kwik Fab's Small Shop

Workspaces sized between 265 and 485 squarefeet.
OP
K

KwikFab

Well-known member
Joined
Jul 27, 2024
Messages
1,308
Location
Central Valley, CA
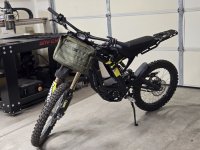
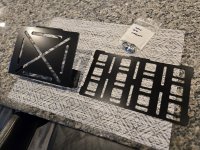
Nice thing about having a business partner is, I can get **** powder coated whenever and however. Feeling really confident in knocking this out first try, I opted to get them powder coated and picked them up today.
20260727_134408.jpg

20260727_134418.jpg

20260727_134425.jpg

20260727_134729.jpg

20260727_134748.jpg

And even though the owner of said bike lives 3hrs away, he still made it out today to pick it up and allow me to get measurements for the next two projects.

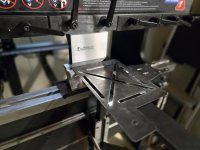
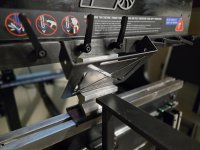
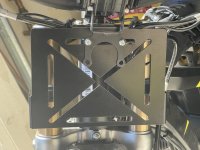
Installed on the bike.

20260727_175433.jpg

20260727_175452.jpg

20260727_182848.jpg

20260727_182908.jpg

And since I intentionally designed this as a modular setup, it allows the end user to attach any other panel of their choice (mentioned above).

20260727_183215.jpg

20260727_183205.jpg

It is 95% done and that's because I needed the assembly installed before I could get the measurements from the bolt holes on the panel (the flanges I made) to add a bracket that'll attach to the side of the fork.

This will add much more rigidity to the whole thing.

Next projects for the bike are to make a panel that attaches to one side for a rifle case, and the other side for a pelican case or two.
 
Last edited:
To avoid these ads, REGISTER NOW!
OP
K

KwikFab

Well-known member
Joined
Jul 27, 2024
Messages
1,308
Location
Central Valley, CA
I follow along, but don’t post much on your thread. You do some very impressive stuff !!

Thanks for the kind words!

Never know who's watching, and never know what their background is! Been surprised myself by many members here.

That’s a nice kit.

Thanks! I do hope for it to become a kit if I find the right market!

The e-bike Facebook group(s) I saw were full of bots/scammers and the E-Bike forum is absolutely dead.
 
OP
K

KwikFab

Well-known member
Joined
Jul 27, 2024
Messages
1,308
Location
Central Valley, CA
Since we're heading out tomorrow to NV, I thought I'd make one more little item for my friend there.

He's the one I recently made those tetris-shaped brackets for to mount to his truck. Well I remembered that he's essentially making his own bed rack and all he has are these rectangular steel tubes to lay across the bed.

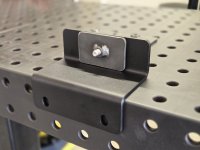
The brackets I made, bolt into the built-in accessory rail with the use of 2 t-nuts per bracket (other companies will use as few as one per bracket).

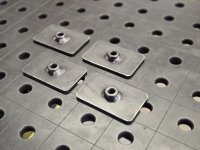
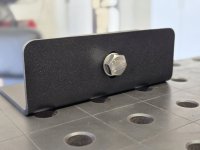
Well I decided to cut out some end caps with a nut welded on the inside for him. Unsure if it's the route he would've gone but I do recall him saying he wants to keep the bars as flat as possible, essentially laying the bars on the brackets. With this end cap getting welded on, he'll have a means of bolting the bar to the bracket it sits on.

20260728_122419.jpg

20260728_144445.jpg

I'm even providing the hardware :ROFLMAO:

20260728_144520.jpg

20260728_144526.jpg

20260728_144718.jpg

I spoil my friends a bit too much huh?

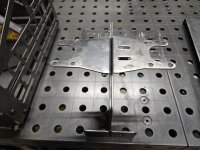
Also, while in the garage I decided to just make another one of those bike panels in case interest did occur for one of them.

20260728_110418.jpg

20260728_110423.jpg

20260728_110616.jpg

20260728_110622.jpg

20260728_110808.jpg

20260728_110821.jpg

20260728_112455.jpg

20260728_112502.jpg
 
OP
K

KwikFab

Well-known member
Joined
Jul 27, 2024
Messages
1,308
Location
Central Valley, CA
Friend of mine reached out yesterday and asked about making something for his truck.He's long supported what I do so whenever a request comes up, I look forward to it cause it's always something more custom.

He reached out about adding some fold-down tables to his swingout on his truck. Seeing as how he has dual swingouts, he wants to take advantage of the wasted space behind them. That and he's got an extremely long drive he'll be doing next year so he's trying to get the truck completely dialed in and finished by then.

IMG_20260805_055017.jpg

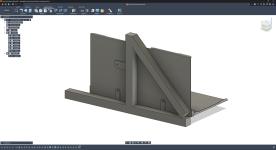
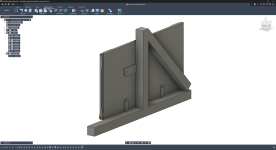
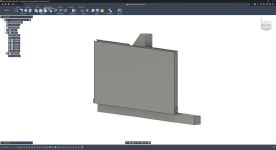
Started with drawing up the smaller table for the left side since I'll be utilizing existing bolt holes and this is what I came up with.

Screenshot 2026-08-08 134258.png

It doesn't need to be fancy, just functional. I added the logo as something to break up the plain surface and the original "rectangles" idea I had didn't look as good as I wanted.

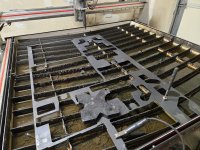
Anyway, I got right to work this morning to cut and bend everything out.
20260809_094633.jpg

20260809_094653.jpg

Everything came out square as expected.

20260809_101123.jpg

20260809_101128.jpg

20260809_101701.jpg

20260809_101712.jpg

20260809_101819.jpg

20260809_101826.jpg

Next up the table bottom. This one I thought would be a little tricky seeing as how I made the flanges smaller towards the center; I did this as an aesthetic choice.

20260809_093052.jpg

20260809_093103.jpg

20260809_093212.jpg

20260809_093217.jpg

Perfect!

20260809_093427.jpg

See next post - picture limit really makes it difficult to keep things in a single post :willy_nil
 
Last edited:
OP
K

KwikFab

Well-known member
Joined
Jul 27, 2024
Messages
1,308
Location
Central Valley, CA
Even though the table is only 14 gauge, having added those bends especially for the table bottom really stiffened the whole thing up as it is rigid as hell.

Also happy with how square everything came out as neither corner sits higher than any other when it's flipped upside down.

20260809_093501.jpg

Anyway the way I made mounting points, I opted to maintain a small gap between both panels. This is so I can create a pivot point with the use of a bolt and nylock nut to prevent from the hardware from backing out, as well as a 3D printed washer made from ASA to allow the pivoting action.

20260809_102025.jpg

20260809_111359.jpg

20260809_111420.jpg

My recent maintenance to my table ensures everything was also cut correctly. A few days ago I found some odd movements so I got a needle for greasing up the zerks and went to town.

20260809_111448.jpg

The gap is an even 1" between the panels. I did this because the hardware through the swingout sticks out roughly 3/4" through the backside.

With the parts done, the last thing I want to do is create a sort of "cushion" that will sit on the bolt and get bolted down with the rest of the hardware. This cushion will be printed out of TPU and will become the "soft stop" when folding up the table.

Seeing as how I have practically no actual 3D modeling experience, it'll take me a few minutes to create and print this small cushion.

The final details of attaching the plastic coated steel wire, or the use of an eyelet, will be left for my friend as he's very resourceful and does a lot of DIY work. I also don't want to buy such small things being that this is only a one-off deal.
 
OP
K

KwikFab

Well-known member
Joined
Jul 27, 2024
Messages
1,308
Location
Central Valley, CA
Here's that bushing, or "cushion" I mentioned.

20260809_132552.jpg

Took but a few minutes to draw up, but being out of TPU meant a whole hour of print time.

20260809_132629.jpg

Everything is on point, and the bushings will prevent from any metal-on-metal while folded up not to mention providing the necessary clearance for said hardware.
 
OP
K

KwikFab

Well-known member
Joined
Jul 27, 2024
Messages
1,308
Location
Central Valley, CA
I'll be leaving it up to my friend to decide how he wants it to suspend the fold down portion.

Most tables utilize small eyelets and run a plastic coated steel wire to keep from the table bottom from flopping straight down. Here's how my old 4Runner was done.

IMG_20210302_181632_343.jpg

20210715_151112.jpg

Then there's the latching mechanism for keeping it closed. Mine used a simple wingnut.

20210715_151209.jpg

I don't really need to be buying parts and accessories for a one-off item so I'll let him figure all that out.

And after speaking with him last night, I got the larger table drawn up along with the mounting pattern needed.

Screenshot 2026-08-10 213256.png

Screenshot 2026-08-10 213247.png

The brackets on the backside are those I'll be making out of 3/16". They'll get welded onto the swingout and should be more than strong enough to hold a 30" wide table.

Screenshot 2026-08-10 213332.png

Screenshot 2026-08-10 213433.png

Too bad he isn't closer as the two could've been knocked out all in one day but he's out in Utah.
 
OP
K

KwikFab

Well-known member
Joined
Jul 27, 2024
Messages
1,308
Location
Central Valley, CA
Also got the call yesterday to confirm that my kid starts pre-school next Monday.

Why do kid's have to grow up so damn fast 😭

Not to mention we got a text that soccer practice starts next Tuesday so my weekdays will start to get busy.

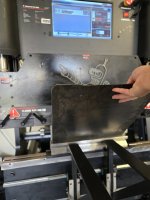
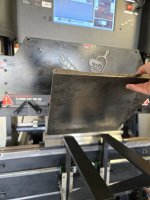
Had no plans to do any work in the garage, and thought I'd hold off on doing the table assembly this coming weekend. Since I still have a bit of steel and I like to avoid loading and unloading unnecessarily, I opted to cut a revised Surron bike panel.

20260811_115705.jpg

Here's the revised version, cut and bent.

20260811_115718.jpg

Looks the same, until you see the missing horizontal slot up front as well as the missing slots on top.

20260811_115840.jpg

20260811_115820.jpg

This is because the owner of the first panel confirmed it was easier to simply mount the factory headlight to the front of the panel. This allows it to sit even higher above anything attached to the front, and allows for better angle adjustment.

Here's a pic he had sent me when I was in NV.

IMG_4689.jpeg

As well as the "side mounts" that fix the hanging panel assembly to the side of the forks.

IMG_4691(1).jpeg

He had sent this picture before I called to remind him that they go on the outside of the panel, not the inside. Anyway once he put them on the outside, everything was perfect.

Hoping to get a timeline on getting other requests done that I haven't even posted about here. Have lots of items to make including one for the kid; a metal Paw Patrol sign to replace the Bluey one I made him last year.

I just took it off the wall and posted it for sale but so far no takers.

20260807_090342.jpg
 

LeonardY

Well-known member
Joined
Apr 16, 2011
Messages
5,199
Location
Southern California
See next post - picture limit really makes it difficult to keep things in a single post :willy_nil
Remember when you only posted in "What did you do in the garage today."? This is so much better.

That was tough to follow your projects because you had so much interesting stuff going on.
Really glad you decided to start your own thread.

As always, impressive work.
 
OP
K

KwikFab

Well-known member
Joined
Jul 27, 2024
Messages
1,308
Location
Central Valley, CA
Amazon delivered some hardware - while I did say I wasn't going to be buying any accessories for a one off project, I'm not going to skip out on buying appropriately sized hardware for the job. That's not something that should be left up to a customer, much less my friend especially since I'm the one who designed the thing.

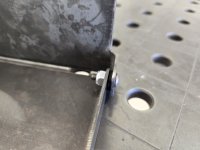
Having tons of bolts, both in SAE and Metric, I didn't have any M5 x 12mm and that was exactly what I needed for this unlike the M5 x 8mm hardware that delivered yesterday and was too short.

20260811_204104.jpg

With these, the threads go completely through the nylock nut ensuring the nylon grabs hold of the threads. Also love how perfect the stops made from TPU came out.

20260811_204114.jpg

Also, I'm unsure if anyone caught the open ended tube in my friend's swingout. I didn't tell him anything but I couldn't just let that go so I printed up a 2" square tube insert out of ASA for him.

20260811_204130.jpg

No way I'm going to let him have that opening exposed like that.

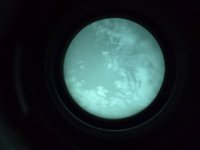
Well, turning in for the night but not before going outside to check out the night skies in hopes of catching a meteor shower.

20260811_205341.jpg

20260811_205256.jpg

In all my years of owning nods, if I stare up long enough, I always happen to catch something enter and burn up in our atmosphere. But tomorrow night we're supposed to be able to see quite a bit more than usual so my wife and I are excited about that.
 
OP
K

KwikFab

Well-known member
Joined
Jul 27, 2024
Messages
1,308
Location
Central Valley, CA
Remember when you only posted in "What did you do in the garage today."? This is so much better.

That was tough to follow your projects because you had so much interesting stuff going on.
Really glad you decided to start your own thread.

As always, impressive work.

Thanks!

I kept my posts there pretty short (while still including photos) cause there's so much everyone is doing in there.

At least here I'll add my thought process to stuff, and how I did said things. Also, not everyone's into metal working.
 
OP
K

KwikFab

Well-known member
Joined
Jul 27, 2024
Messages
1,308
Location
Central Valley, CA
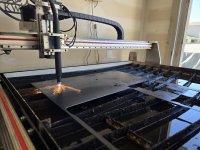
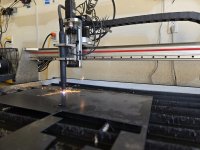
It was overcast for all of 10 minutes here, so I quickly fired everything up to cut and bend the large folding table bottom.

This thing is just over 32.25" wide.

20260812_104056.jpg

20260812_104102.jpg

20260812_104311.jpg

20260812_104317.jpg

Perfect.

20260812_104430.jpg

Since both tables extend towards the end user the same length, I thought I'd make the flanges match the smaller one for a symmetrical look.

20260812_104438.jpg

I'll cut and bend the next one tomorrow or something so I can dedicate the weekend to that Surron e-bike rifle mount or something.
 
To avoid these ads, REGISTER NOW!
OP
K

KwikFab

Well-known member
Joined
Jul 27, 2024
Messages
1,308
Location
Central Valley, CA
See.lol You would be an awesome neighbor. :beer:

Only because you said this, and only because I just stopped by my neighbor's house, did I remember some of the stuff I've done for him before. But we got to know each other pretty well so I don't charge him for anything - he did find a way to pay me for one of those jobs though :ROFLMAO:

Was taking out the trash when I saw him and his teenager washing the car so I had to stop by and say hi as we haven't seen each other in awhile. Well, he got his kid a GMC Jimmy and asked if I could weld on the metal "ball" that captures the rear hatch strut. Will need to source the right sized one but that'll be a quick an easy job.

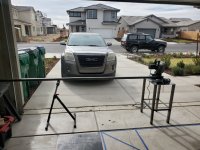
The last time I did something for him was for his discontinued sunshade set he had bought from Home Depot way back. He finally set it up (this was some years ago) only to find that one of the crossmembers had bent and cracked. That's what happens when cheap, thin aluminum is used.

Man, looking at these pics, I had such a mess and so few tools compared to now lol

20230616_144054.jpg

Just happened to have some solid aluminum bar at that time, so it was perfect for using as a sort of guide since I did the whole pre-heat and bend thing first. With the help of some angle iron too I got it mostly straight, but still had to deal with the broken aluminum tube.

20230616_145238.jpg

Welded her up and got her nice and clean shortly after.

20230616_155329.jpg

Even threw on some black paint and dropped it off at the side of his house (he was gone).

20230616_163126.jpg

20230616_163118.jpg

You bet your *** he was happy though cause I got the knock on the door soon as he got home :ROFLMAO:
 
OP
K

KwikFab

Well-known member
Joined
Jul 27, 2024
Messages
1,308
Location
Central Valley, CA
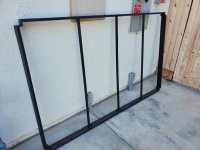
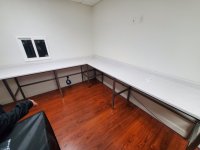
Then there's the very first welding job I did for him. This is one that took a bit of time since my welding table consisted of some old 1/8" steel plate tacked on top of a Harbor Freight stand.

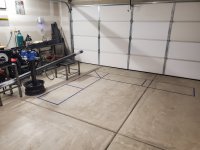
The request was for an L shaped shelf in this extra room at his business that would be used for assembling new computers and/or upgrading old ones. The painter's tape on the floor was my idea as I wanted to provide a visual of how I would attack the project (I was in my beginning stages as a fabricator).

20221104_094220.jpg

20221104_094224.jpg

It measured something like 12' by 8' or something close to that. So with those measurements, I put them down in my garage.

20221104_173909.jpg

The houses around us weren't even built yet, as we were the first ones living in the neighborhood. That'll tell ya how much trust he had in me already as we only knew each other for as long as we lived there.

20221106_103517.jpg

20221106_121851.jpg

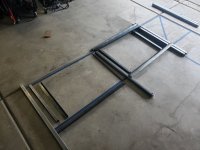
My welding wasn't the best, but I was trying to make it look good (while also being strong).

20221117_151133.jpg

20221222_140710.jpg

And the fun part, getting this all squared up and welded on a poor excuse of a table :lol:

20221222_140720.jpg

I was making due though!

20221222_171908.jpg

Things were coming out exactly as I had laid out.

20221225_113031.jpg

What I didn't mention yet was that I had also shared with him that this needed to be semi-modular, as it would be hard without a trailer to transport this from my garage to his shop.

20221226_111746.jpg

20221226_140411.jpg

Anyway once it was all done, I had to snap a picture to showcase just how well within the parameters it came out to be.

20221227_144042.jpg

And the end result once we got it back to his shop.

20221227_160554.jpg

The adjustable feet allowed for making the whole thing sit flat on the floor. The area below the shelf was intentionally left open and accessible as boxes for the computer cases and hardware would sit right under the computer being built.

And even though he was sort of forced to find a new location (bad landlord, not servicing the AC and raising rent by a lot), he took it over to the new shop and kept it in use. I only had to modify one part of it and that was it.
 

madison069

Well-known member
Joined
Nov 5, 2010
Messages
4,388
Location
Monroeville, PA
If I had known the sky was active I would of went outside instead of trying to fight insomnia while reading a book!

That L shape table looks very familiar! Looking at the weld I was like, wish my weld looked like that already!
 
OP
K

KwikFab

Well-known member
Joined
Jul 27, 2024
Messages
1,308
Location
Central Valley, CA
If I had known the sky was active I would of went outside instead of trying to fight insomnia while reading a book!

That L shape table looks very familiar! Looking at the weld I was like, wish my weld looked like that already!

I didn't see it posted in this thread so maybe it was elsewhere.

Old stuff but still good; I had maybe a few months of welding experience at the time so I had a lot to learn still.

Well kind of, in this hobby you never really stop learning.

The meteor shower is supposed to be going on for a few more weeks so you can catch something tonight I'm sure. I even saw some flyers the night before except there was a bit of cloud cover.

This one didn't leave as much of a streak but still cool.

20260812_225701.jpg

Rest of the time I just enjoyed the show and didn't bother to snap pictures.
 
OP
K

KwikFab

Well-known member
Joined
Jul 27, 2024
Messages
1,308
Location
Central Valley, CA
I'm curious to see if it's still going on tonight once it gets dark.

I would've finished up the folding table but my friend is dragging *** on whether he wants a background on the "backsplash" or not.

Initially he sent me a pic of his dog - I had to break it to him that it'd take a long time (I'm not versed in graphic design or photo editing), not to mention having to go through the hassle of doing another trial run for photoshop and adobe.

And if I did all that over again, I'd be doing it for a regular customer at a high cost which is basically my "don't want to do it price" on account of the frustration :ROFLMAO:

I've always been honest about graphic/art work. I refuse to do such, I don't like such work, and that sort of stuff doesn't pay well at all when it comes to one off jobs.
 
OP
K

KwikFab

Well-known member
Joined
Jul 27, 2024
Messages
1,308
Location
Central Valley, CA
Dang, I thought you guys would just be able to walk outside and start seeing stuff.

I stepped out about 9pm and saw one right away. I saw something each time I went outside and this went on between 10pm to 1230am when I finally turned in.

We have light pollution out here as well, but fortunately very little cloud cover.
 
OP
K

KwikFab

Well-known member
Joined
Jul 27, 2024
Messages
1,308
Location
Central Valley, CA
I'm curious to see if it's still going on tonight once it gets dark.

I would've finished up the folding table but my friend is dragging *** on whether he wants a background on the "backsplash" or not.

Initially he sent me a pic of his dog - I had to break it to him that it'd take a long time (I'm not versed in graphic design or photo editing), not to mention having to go through the hassle of doing another trial run for photoshop and adobe.

And if I did all that over again, I'd be doing it for a regular customer at a high cost which is basically my "don't want to do it price" on account of the frustration :ROFLMAO:

I've always been honest about graphic/art work. I refuse to do such, I don't like such work, and that sort of stuff doesn't pay well at all when it comes to one off jobs.

I said I wasn't going to do it.

I insisted I wasn't going to do it.

And I went on and ******* did it anyway.

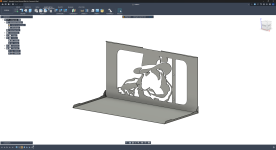
Screenshot 2026-08-13 230823.png

He doesn't even know, and I'm going to just cut it out anyway without telling him as it'll be a surprise.

This is what he wanted (without knowing how difficult it is to do).

Attach0.jpg
 
OP
K

KwikFab

Well-known member
Joined
Jul 27, 2024
Messages
1,308
Location
Central Valley, CA
And of course, can't forget mine.

We have two but, this one is absolutely attached like crazy. Can't go to another room without her following me, even if it's just for a split second.

Had gone outside for a bit and when I came back in, I had to shove her from the door :ROFLMAO:

And with the lights all off, thought I'd get her in the dark.

20260813_232535.jpg

20260813_232258.jpg
 

LXCam

ALLIANCE MEMBER
Joined
Apr 23, 2013
Messages
19,356
Location
AZ
It’s 4:15, been out here for 20 minutes looking NE. I got nothing. But there’s a really intense lighting storm about 40 miles north of me putting on an incredible show that’s really cool. The sky lighting up the thunderheads every few seconds is mesmerizing.

IMG_0609.jpeg

Bud, that dog cutout backplate kicks *** 👊

How do you do that. Is it basically an overlay you trace with a cursor then make sure you haven’t connected the wrong dots for the reliefs?
 
OP
K

KwikFab

Well-known member
Joined
Jul 27, 2024
Messages
1,308
Location
Central Valley, CA
Used an online background remover, which did little work as there wasn't much to remove.

Open Inkscape for different types of bitmap tracing and allow it to automatically create black and white contours.

Then use it as a canvas on Fusion and manually draw it all up with the spline feature.

Lastly, I copy and pasted the table backsplash and centered it as best as possible along with bridging things so they don't fall out.

Initially the items that are solid were actually going to be cut out from the backsplash. But I didn't like how the rendered image looked so I sort of create a negative space and made the cutouts into a solid instead.

I know if I had gone the other route of using photo editing software and more, I'd get a much more detailed setup. But even at 30" wide, some details are really small so I can't be messing with such things.
 

LXCam

ALLIANCE MEMBER
Joined
Apr 23, 2013
Messages
19,356
Location
AZ
Used an online background remover, which did little work as there wasn't much to remove.

Open Inkscape for different types of bitmap tracing and allow it to automatically create black and white contours.

Then use it as a canvas on Fusion and manually draw it all up with the spline feature.

Lastly, I copy and pasted the table backsplash and centered it as best as possible along with bridging things so they don't fall out.

Initially the items that are solid were actually going to be cut out from the backsplash. But I didn't like how the rendered image looked so I sort of create a negative space and made the cutouts into a solid instead.

I know if I had gone the other route of using photo editing software and more, I'd get a much more detailed setup. But even at 30" wide, some details are really small so I can't be messing with such things.
:eyecrazy::eyecrazy::eyecrazy:

Thanks for the detailed explanation…

But might I suggest the next time some ignoramiss such as myself asks..do it in English 🥹


Wow bud, that’s obviously a royal pita for one-offs. My hat off to you for making the effort and pulling it off spectacularly 👍
 

Blackbyrd

Well-known member
Joined
Nov 28, 2020
Messages
1,196
Location
TN
Used an online background remover, which did little work as there wasn't much to remove.

Open Inkscape for different types of bitmap tracing and allow it to automatically create black and white contours.

Then use it as a canvas on Fusion and manually draw it all up with the spline feature.

Lastly, I copy and pasted the table backsplash and centered it as best as possible along with bridging things so they don't fall out.

Initially the items that are solid were actually going to be cut out from the backsplash. But I didn't like how the rendered image looked so I sort of create a negative space and made the cutouts into a solid instead.

I know if I had gone the other route of using photo editing software and more, I'd get a much more detailed setup. But even at 30" wide, some details are really small so I can't be messing with such things.

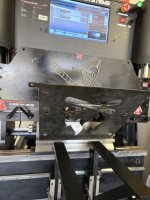
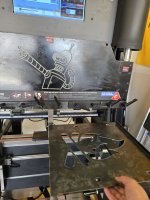
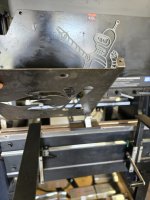
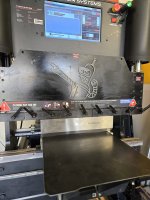
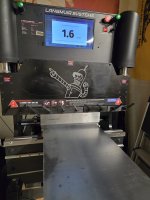
Bender on the bender is priceless! Really cool assortment of projects!

New to fusion how well does the canvas feature work?
 
To avoid these ads, REGISTER NOW!
Top Bottom