To avoid these ads, REGISTER NOW!

Lathe resurrection

Jim Johnstone

Well-known member
Joined
Apr 11, 2011
Messages
1,841
Location
Brantford, Ontario
I wasn't planning to do a thread on the resurrection of this lathe I acquired, but since I've been taking some pics along the way, I figured I might as well document it a bit.

Back story is my wife's grandfather bought this lathe when he retired from work as a tool and die maker, and had it to mess around with in his home garage. There was also a milling machine and surface grinder in there as well, but those will maybe be addressed in another thread.

So my father in law had this lathe in his garage ever since his dad passed away around 18 years ago, and other than maybe the occasional small item, it was never used. My father in law is a general contractor, and never really touched the lathe, and it was basically covered in sawdust and other dust and absolutely dried out with no use or lubrication for the last 15 or more years.

Seeing as I am a tool and die maker myself, when my in laws moved to a new house, we struck up a deal for the machines to move to my place.

First step...get it in the garage.e21dc8824c3555762a2812c8b5c53a81.jpgbe24e7c8d754f74ea5fae316a5292e60.jpga1b7bd53a30db73341d0d15ec526be18.jpg

Sent from my SM-G970W using Tapatalk
 

Attachments

  • e21dc8824c3555762a2812c8b5c53a81.jpg
    e21dc8824c3555762a2812c8b5c53a81.jpg
    605.2 KB · Views: 0
  • be24e7c8d754f74ea5fae316a5292e60.jpg
    be24e7c8d754f74ea5fae316a5292e60.jpg
    682.4 KB · Views: 0
  • a1b7bd53a30db73341d0d15ec526be18.jpg
    a1b7bd53a30db73341d0d15ec526be18.jpg
    623.6 KB · Views: 0
To avoid these ads, REGISTER NOW!
OP
J

Jim Johnstone

Well-known member
Joined
Apr 11, 2011
Messages
1,841
Location
Brantford, Ontario
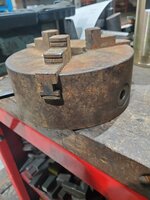
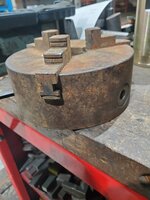
So its not currently in place where I want it in my garage, but I'm taking advantage of that, so I can get all around it and clean it up and lubricate it. First up was the 3 jaw chuck that was so stiff I actually broke the square off the chuck key trying to get it moving. 8eb8563e09b637b038c981346927ddab.jpg5cb71dccc533f9119afbf4b6f91f81ec.jpg

Sent from my SM-G970W using Tapatalk
 

Attachments

  • 8eb8563e09b637b038c981346927ddab.jpg
    8eb8563e09b637b038c981346927ddab.jpg
    617.7 KB · Views: 0
  • 5cb71dccc533f9119afbf4b6f91f81ec.jpg
    5cb71dccc533f9119afbf4b6f91f81ec.jpg
    560.2 KB · Views: 0
OP
J

Jim Johnstone

Well-known member
Joined
Apr 11, 2011
Messages
1,841
Location
Brantford, Ontario
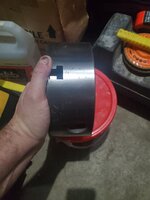
I brought the chuck to work with me, and dropped it in the parts cleaner and left it there for a few days and was able to get the chuck moving and get the jaws out.

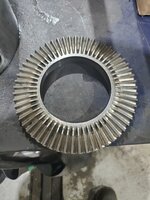
Once I managed to get it fully disassembled, I saw partially why it was so hard to move. The scroll was absolutely caked in thick hard congealed grease and the jaws were rusted in the t slots of the chuck body.

More soaking of the individual parts and loads of elbow grease and the scroll and spur gears cleaned right up.c139a748f0d4ded493a30f90164b733d.jpg20eb113ff3c0a9e90d886529a009bd61.jpg3c13c7e730f511819a3475e114a86f21.jpg

Sent from my SM-G970W using Tapatalk
 

Attachments

  • c139a748f0d4ded493a30f90164b733d.jpg
    c139a748f0d4ded493a30f90164b733d.jpg
    668.3 KB · Views: 0
  • 20eb113ff3c0a9e90d886529a009bd61.jpg
    20eb113ff3c0a9e90d886529a009bd61.jpg
    562 KB · Views: 0
  • 3c13c7e730f511819a3475e114a86f21.jpg
    3c13c7e730f511819a3475e114a86f21.jpg
    619.1 KB · Views: 1
OP
J

Jim Johnstone

Well-known member
Joined
Apr 11, 2011
Messages
1,841
Location
Brantford, Ontario
I did a bit of bench work deburring various pieces that had a bit more production burrs than I liked, cleaned everything right up and reassembled the chuck with some grease, now it functions beautifully.

85c243ba02dec5ac28ca71d4634e57c0.jpghttp://cloud.tapatalk.com/s/5fd00bb222a12/20201127_134233.mp4

Sent from my SM-G970W using Tapatalk
dbd5d918e472d506c5b2c97fe4f387eb.jpgbd5c6fbd2ed9e0b699c857aadb0acbec.jpg
 

Attachments

  • 85c243ba02dec5ac28ca71d4634e57c0.jpg
    85c243ba02dec5ac28ca71d4634e57c0.jpg
    614.9 KB · Views: 0
  • dbd5d918e472d506c5b2c97fe4f387eb.jpg
    dbd5d918e472d506c5b2c97fe4f387eb.jpg
    510.8 KB · Views: 0
  • bd5c6fbd2ed9e0b699c857aadb0acbec.jpg
    bd5c6fbd2ed9e0b699c857aadb0acbec.jpg
    542.6 KB · Views: 0
Last edited:
OP
J

Jim Johnstone

Well-known member
Joined
Apr 11, 2011
Messages
1,841
Location
Brantford, Ontario
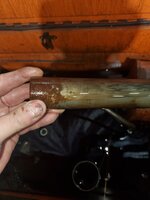
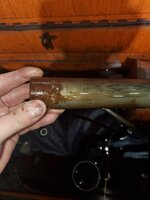
Next up, tailstock. You can see in the one photo of the lathe, that there was some surface rust on the quill. It was super stiff, could barely get the quill to move. Same deal, full disassembly, clean all the old grease, remove the surface rust and reassemble. df7e7263f9a30e40e53f168cc0f9de34.jpgcb3f6dbd02165b4ad79915699ad3293f.jpg

Sent from my SM-G970W using Tapatalk
 

Attachments

  • df7e7263f9a30e40e53f168cc0f9de34.jpg
    df7e7263f9a30e40e53f168cc0f9de34.jpg
    455.3 KB · Views: 0
  • cb3f6dbd02165b4ad79915699ad3293f.jpg
    cb3f6dbd02165b4ad79915699ad3293f.jpg
    528.4 KB · Views: 0

tarmy

Well-known member
Joined
May 28, 2014
Messages
4,755
Location
Nor Cal
Excellent thread OP...keep it going...

BUT...in that very first photo...is that your wifey coming out of the house with the “what the hell have you brought home now” look?:lol_hitti
 
OP
J

Jim Johnstone

Well-known member
Joined
Apr 11, 2011
Messages
1,841
Location
Brantford, Ontario
Excellent thread OP...keep it going...


BUT...in that very first photo...is that your wifey coming out of the house with the “what the hell have you brought home now” look?[emoji38]_hitti
oh dear God no, that's my mother in law! My wife actually wanted me to have it because she remembers her grandfather at the lathe all the time when she was a kid.

Sent from my SM-G970W using Tapatalk
 

tarmy

Well-known member
Joined
May 28, 2014
Messages
4,755
Location
Nor Cal
My wife actually wanted me to have it because she remembers her grandfather at the lathe all the time when she was a kid.

Sent from my SM-G970W using Tapatalk

Makes it an even better thread for that very reason...excellent.
 
OP
J

Jim Johnstone

Well-known member
Joined
Apr 11, 2011
Messages
1,841
Location
Brantford, Ontario
Tell us how you really feel!! Lol


Glad your wife is on board. Looking good so far. Little more than some elbow grease so far.
Yeah thats right, so far I haven't come across any damaged or severely worn mechanical bits, it all appears in good shape, just years of neglect. Some stuff is very stiff, like the carriage and cross slide, the 3 jaw was seized, havent even looked at the 4 jaw yet, but I have a feeling it's going to be more of the same. Lots of TLC and she'll be humming along in no time

Sent from my SM-G970W using Tapatalk
 

slowtwitch73

Well-known member
Joined
Apr 18, 2019
Messages
5,876
Location
Hellgate
That's an old one. Looks stout. Wonder if the old imports were better/worse than newer stuff. Looks better.
 
OP
J

Jim Johnstone

Well-known member
Joined
Apr 11, 2011
Messages
1,841
Location
Brantford, Ontario
That's an old one. Looks stout. Wonder if the old imports were better/worse than newer stuff. Looks better.
it's got a 1979 build date tag on it. I did find a 1979 catalog online, and it's listed as having hardened and ground bedways and hardened gears in the headstock, it also claims a weight of 2100 pounds, so its definitely pretty stout, especially considering its only a 2hp motor. Taiwanese made as well, as opposed to mainland China. Initial impressions are pretty good, my father in law said his dad seemed pretty pleased with its accuracy.

Sent from my SM-G970W using Tapatalk
 
To avoid these ads, REGISTER NOW!
OP
J

Jim Johnstone

Well-known member
Joined
Apr 11, 2011
Messages
1,841
Location
Brantford, Ontario
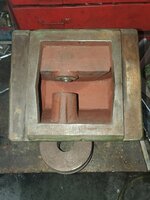
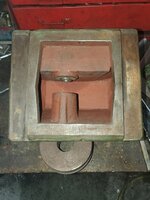
Not too much to add today. Did a bit of cleaning on the tailstock base, removing the surface rust and stoning the surfaces free of any dings and knicks, as well as the gib.

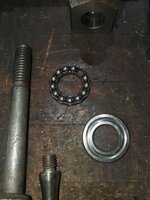
I had intended to reassemble today, until my ******* dropped the thrust bearing, and lost a ball from the bearing cage, pretty sure it rolled into that inter-dimensional vortex that exists under everyone's work bench. So once I get another thrust bearing, I'll get the tailstock put back together. 1a42d05bc9f618bb49b0900afefec2e3.jpgbf3a4c8c147269893ab8cd0108dbfbc6.jpg43883a180ce1f7fc2e7ac2d693062aff.jpg59dc774a48247936369de50782bacb4b.jpg

Sent from my SM-G970W using Tapatalk
 

Attachments

  • 59dc774a48247936369de50782bacb4b.jpg
    59dc774a48247936369de50782bacb4b.jpg
    595.3 KB · Views: 0
  • 43883a180ce1f7fc2e7ac2d693062aff.jpg
    43883a180ce1f7fc2e7ac2d693062aff.jpg
    603.8 KB · Views: 0
  • 1a42d05bc9f618bb49b0900afefec2e3.jpg
    1a42d05bc9f618bb49b0900afefec2e3.jpg
    595.7 KB · Views: 0
  • bf3a4c8c147269893ab8cd0108dbfbc6.jpg
    bf3a4c8c147269893ab8cd0108dbfbc6.jpg
    502.6 KB · Views: 0
OP
J

Jim Johnstone

Well-known member
Joined
Apr 11, 2011
Messages
1,841
Location
Brantford, Ontario
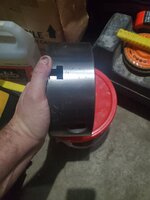
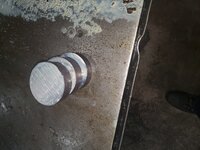
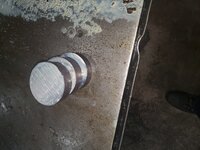
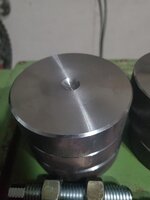
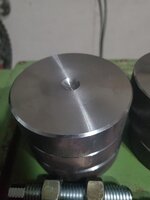
I did however, get started on making some leveling feet. I grabbed some 3.5" unknown round stock from our pile of unmarked material at work, saw cut some 1" thick pucks, and faced them on the lathe at work. Grabbed some 5/8" threaded rod on the way home from work and will cut and make adjuster screws for them.3571368e645fde0e546e76505f864425.jpg46309c8f0dccd9ee68cbd5df44f0fd69.jpg

Sent from my SM-G970W using Tapatalk
 

Attachments

  • 3571368e645fde0e546e76505f864425.jpg
    3571368e645fde0e546e76505f864425.jpg
    610.3 KB · Views: 0
  • 46309c8f0dccd9ee68cbd5df44f0fd69.jpg
    46309c8f0dccd9ee68cbd5df44f0fd69.jpg
    610.3 KB · Views: 0
OP
J

Jim Johnstone

Well-known member
Joined
Apr 11, 2011
Messages
1,841
Location
Brantford, Ontario
Feet are finished up. Faced the pads and milled a female radius in the center of the pads, took some 5/8" threaded rod and milled a hex on one end and a male radius on the other end. The 2 radius should fit together and I can use the hex to adjust the level and lock it down.49447b46a4b79516ef01f2ddca02d620.jpg727ffddac2931017230f982e071fdda8.jpg1204a183b0fc8593b7a0d43a2566cef6.jpgc3bfee8fe6ff4dc069dca3b6dc4c2d2b.jpg

Sent from my SM-G970W using Tapatalk
 

Attachments

  • c3bfee8fe6ff4dc069dca3b6dc4c2d2b.jpg
    c3bfee8fe6ff4dc069dca3b6dc4c2d2b.jpg
    563.4 KB · Views: 0
  • 1204a183b0fc8593b7a0d43a2566cef6.jpg
    1204a183b0fc8593b7a0d43a2566cef6.jpg
    503.9 KB · Views: 0
  • 727ffddac2931017230f982e071fdda8.jpg
    727ffddac2931017230f982e071fdda8.jpg
    508.4 KB · Views: 0
  • 49447b46a4b79516ef01f2ddca02d620.jpg
    49447b46a4b79516ef01f2ddca02d620.jpg
    491.3 KB · Views: 0

larry_g

Well-known member
Joined
Apr 28, 2007
Messages
16,928
Location
oregon
Feet are finished up. Faced the pads and milled a female radius in the center of the pads, took some 5/8" threaded rod and milled a hex on one end and a male radius on the other end. The 2 radius should fit together and I can use the hex to adjust the level and lock it down.k

Having used similar pucks and bolts I can say, Don't forget to add a bit of high pressure grease between the two if your turning the shaft of the screw. The two may gall quickly once you start to adjust things.

lg
no neat sig line
 
OP
J

Jim Johnstone

Well-known member
Joined
Apr 11, 2011
Messages
1,841
Location
Brantford, Ontario
Having used similar pucks and bolts I can say, Don't forget to add a bit of high pressure grease between the two if your turning the shaft of the screw. The two may gall quickly once you start to adjust things.


lg

no neat sig line
yep, that was the plan, definitely a risk for some wear and galling between them.

Sent from my SM-G970W using Tapatalk
 

JHuston

Well-known member
Joined
Feb 21, 2016
Messages
301
Location
Canton, Ohio
I reassembled one of those for somebody years ago ( it had been taken apart to move it without any wires bein marked, or hardware labeled; I was given a pile of parts and had to figure it out as I went), and can recall being impressed with how stout the machine was. I tip my hat to you, sir. That's going to be a nice machine, with a little bit of TLC.
-James Huston
 
OP
J

Jim Johnstone

Well-known member
Joined
Apr 11, 2011
Messages
1,841
Location
Brantford, Ontario
I reassembled one of those for somebody years ago ( it had been taken apart to move it without any wires bein marked, or hardware labeled; I was given a pile of parts and had to figure it out as I went), and can recall being impressed with how stout the machine was. I tip my hat to you, sir. That's going to be a nice machine, with a little bit of TLC.
-James Huston
thats good to hear, did you happen to find any documentation on this model of machine?

Sent from my SM-G970W using Tapatalk
 
OP
J

Jim Johnstone

Well-known member
Joined
Apr 11, 2011
Messages
1,841
Location
Brantford, Ontario
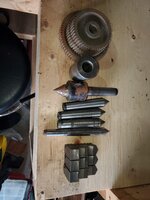
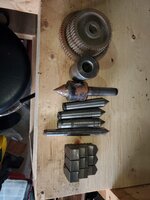
Did some digging through the boxes of stuff that came with the lathe, mill and surface grinder, and found some goodies. I've got all the change gears for metric threading, 3 shown in the pic, 2 more are in a vinegar bath, the spindle sleeve, a live center that needs some attention, 4 different dead centers, the concave jaws for the 3 jaw chuck, and not shown was a 1/2" capacity jacobs chuck for the tailstock. 2b4df511c430d3625fcd47aaf168045e.jpg

Sent from my SM-G970W using Tapatalk
 

Attachments

  • 2b4df511c430d3625fcd47aaf168045e.jpg
    2b4df511c430d3625fcd47aaf168045e.jpg
    554.4 KB · Views: 0

loganb

ALLIANCE MEMBER
Joined
Dec 29, 2011
Messages
5,719
Location
Omaha, NE
Great find on those QC gears...those often go missing as they're either used frequently or never by a prior owner and when you need them you often need them now!

Sent from The Garage Journal mobile app
 

JHuston

Well-known member
Joined
Feb 21, 2016
Messages
301
Location
Canton, Ohio
thats good to hear, did you happen to find any documentation on this model of machine?

Sent from my SM-G970W using Tapatalk

If I remember correctly, Jet had changed hands after that lathe was made, and documentation was a bit scarce, but the people on the phone were very friendly and helped as much as they could, including finding a wiring diagram for the power feed limit switch system. You might try them, although my experience was probably ten or twelve years ago.

-James Huston
 
OP
J

Jim Johnstone

Well-known member
Joined
Apr 11, 2011
Messages
1,841
Location
Brantford, Ontario
So after having a good look at the gear chart for threading, I realized I had a couple gears that weren't on the chart and I couldn't figure out why. I did some looking in the headstock and realized none of the gears were in the correct location, and the extras that weren't on the chart are supposed to be permanent gears, and not change gears. Infact the gear train is only setup with 3 gears when there are supposed to be 4. So I think I'll have to pull all the gears, might as well clean everything, sort out the permanent ones and leave them in place and then I can get the threading gears in place.

Sent from my SM-G970W using Tapatalk
 
OP
J

Jim Johnstone

Well-known member
Joined
Apr 11, 2011
Messages
1,841
Location
Brantford, Ontario
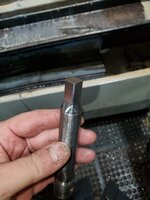
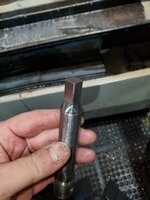
I mentioned in an earlier post that I snapped the square off the chuck key trying to free up the chuck. Was going to toss it, but it was the longer key, not the stubby one, so I took it to work and figured it was nothing that a few minutes in the CNC couldn't fix.e8b1577a9bf0604455b18f08e66cb531.jpg

Sent from my SM-G970W using Tapatalk
 

Attachments

  • e8b1577a9bf0604455b18f08e66cb531.jpg
    e8b1577a9bf0604455b18f08e66cb531.jpg
    492 KB · Views: 0
To avoid these ads, REGISTER NOW!
Top Bottom