To avoid these ads, REGISTER NOW!

Let’s build a new home for the Hercus

racingtadpole

Well-known member
Joined
Dec 3, 2011
Messages
2,029
Location
The far side of crazy.. but sometimes Australia
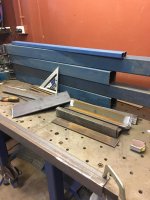
Been doing a bit of rearrangement and and consolidation recently. Sold off my smaller bench top lathe and decided to finally get off my backside and get the Hercus 9” lathe I bought through a mate onto a more user friendly space efficient stand. The original stand is old school period correct cool, but it just ***** for storage and the like, and at the moment at least, space is at something of a premium (and someone has offered me about half what I paid for the lathe for it so that’s also a motivator of sorts). I bought a toolbox a while back to solve this issue so it’s pretty much just a case of building a frame around it with supports in the appropriate places. I also have more steel laying around than I really need to store (I don’t really see the point in storing expensive material while it’s rusting itself to scrap so I generally buy as required) so my plan is to use what’s laying around and buy the minimum I need to complete the task. If some of the sizing looks a bit weird, that’ll be why..

Here’s a couple of photos of the the Hercus when I moved it from where I had it stored and as it sits today on its original stand.
 

Attachments

  • 1BA78775-5F21-4D54-96F5-791CD13BE8E4.jpg
    1BA78775-5F21-4D54-96F5-791CD13BE8E4.jpg
    111.3 KB · Views: 133
  • E0EBA55D-63C4-4F43-BF06-F21D4DA2C24B.jpg
    E0EBA55D-63C4-4F43-BF06-F21D4DA2C24B.jpg
    85.6 KB · Views: 139
To avoid these ads, REGISTER NOW!
OP
R

racingtadpole

Well-known member
Joined
Dec 3, 2011
Messages
2,029
Location
The far side of crazy.. but sometimes Australia
The general plan is to take a two door, three drawer roll cab and build it into the stand. I figure the the larger door section will be good for housing the chucks and steadies etc, and and if my memory serves me correctly it has a small section of peg board built into each door so I think I might use this as a place to store chuck keys and things of that ilk. The smaller drawer I am intending on using to store my micrometers, calipers and dials in, while the two larger drawers will be home to the tooling (although in this age of insert tooling being readily accessible to the mere mortal I don’t have anywhere near as much as I did when everything was done with ground HSS). I’ll get a photo of the box tomorrow.

The legs will be 75x75x2mm wall, these are left overs from the posts my folks bought to hang a shade sail from a couple of years ago, they’ve been sitting in the corner waiting for me to get off my backside since. The rest of it will be built from angles, channel and square tube left over from other things I’ve done in the last couple of years.

To top it off, I have a full sheet of structa-floor that I’ll probably cut up into a couple of layers edged and backed with some pine, although the jury is still out on getting a thin sheet of metal to cover it. I don’t use coolant flooding (I prefer compressed air for cooling, it makes a metric **** load less mess and doesn’t stink when it goes rancid) so the timber will probably be ok with a coat of paint on it.

I still have a heap of 1” UNC x 8” long hockey puck levelling feet I made last time I made some so four of those will go on the bottom (kind of important because where I want to put it I have a step of around 40mm in the concrete that I need the adjustment for)

I had a bit of a brain storm this morning and after looking through what I had I came up with a plan that meant I only had to buy a metre of 150x6 flat bar.

After a trip to pick up the box from storage and the metre of flat I spent the rest of the afternoon cutting material and grinding bevels into stuff so I have a sporting chance of building something that won’t fall apart (I’m not really geared toward heavy structural steel work). I had enough time before she who must be obeyed got home and got most of the top tacked up in shape.

Enough rambling.. more pictures!

Tomorrow I do battle with the cruel mistress that is my welders duty cycle.. stay tuned!
 

Attachments

  • 4B5D02CB-94AB-4977-982C-21EE3336777E.jpg
    4B5D02CB-94AB-4977-982C-21EE3336777E.jpg
    130.9 KB · Views: 48
  • 75236511-39E3-4314-B4D5-5D842BA3CB98.jpg
    75236511-39E3-4314-B4D5-5D842BA3CB98.jpg
    99 KB · Views: 48
  • 88FB1C21-7675-4EA0-A64B-11B2723174E6.jpg
    88FB1C21-7675-4EA0-A64B-11B2723174E6.jpg
    99.3 KB · Views: 53
  • 0FC05B48-F0BE-4C50-A7E4-0155A8491C1D.jpg
    0FC05B48-F0BE-4C50-A7E4-0155A8491C1D.jpg
    112.4 KB · Views: 52
  • 6BBDB9FD-BE40-4EB5-8FBE-5F492C32CCBE.jpg
    6BBDB9FD-BE40-4EB5-8FBE-5F492C32CCBE.jpg
    147.1 KB · Views: 53
  • 42A46FC2-B162-42F7-BD00-D6DB45FAEEBE.jpg
    42A46FC2-B162-42F7-BD00-D6DB45FAEEBE.jpg
    86.5 KB · Views: 54
Last edited:

fiftyv8

Well-known member
Joined
Dec 29, 2018
Messages
237
Location
Perth
I have exactly the same lathe/model, I'll be watching with interest from Perth.

Just a side question, what size is that channel you used under the platform???
 

fiftyv8

Well-known member
Joined
Dec 29, 2018
Messages
237
Location
Perth
Thanks for that, so it is available in your neck of the woods.
I recently tried purchasing some over here and was told nobody stocked it any more...
 
To avoid these ads, REGISTER NOW!

fiftyv8

Well-known member
Joined
Dec 29, 2018
Messages
237
Location
Perth
Me too, but used it and when I went back for more I was told no more stocked.
Damn shame for the little home hobby guys...
 
OP
R

racingtadpole

Well-known member
Joined
Dec 3, 2011
Messages
2,029
Location
The far side of crazy.. but sometimes Australia
Got a bit done today while she who must be obeyed was sleeping off a mates birthday last night.. suffice to say the other half and sambucca shots don’t really mix :lol:

Took a bit to get the top finish welded, and in a couple of spots it’s not really to the normal quality I like to turn out. I hit the duty cycle on the machine and in a few spots it cut out at the most inappropriate time and the restarts left a few less than perfect looking welds. Is what it is, I don’t have my big 250A industrial unit anymore, but then I don’t have the electric to run it either.

After setting the top out to cool off I started on the base to hold the tool box. After some measuring, and double checking of measurements and just for shits and giggles more measuring I finally stopped overthinking how to do it and came up with plan of just a simple square tube frame and four risers that bolt where the wheels would normally go to bolt it up.

Picture the finished up top, and the tube frame bottom for your amusement.
 

Attachments

  • 5E6A395F-3782-443A-9003-83E80B304EBF.jpg
    5E6A395F-3782-443A-9003-83E80B304EBF.jpg
    103.3 KB · Views: 42
  • 8CCBE915-2CC3-46F1-99C3-92B9993FAE54.jpg
    8CCBE915-2CC3-46F1-99C3-92B9993FAE54.jpg
    96.9 KB · Views: 38

NASTYZEN

Well-known member
Joined
Jun 11, 2010
Messages
2,823
Location
St-Colomban,Que. Canada
That is going to be plenty stout. Make sure to tie it down well if you ever need to transport it in your ute. It may cause more trouble than your drill press did..
 
To avoid these ads, REGISTER NOW!
Top Bottom