To avoid these ads, REGISTER NOW!

let's see your craftsman block grinders

MrKona

Active member
Joined
Dec 29, 2011
Messages
34
Awesome work!

What's your preferred way to strip the original paint off?

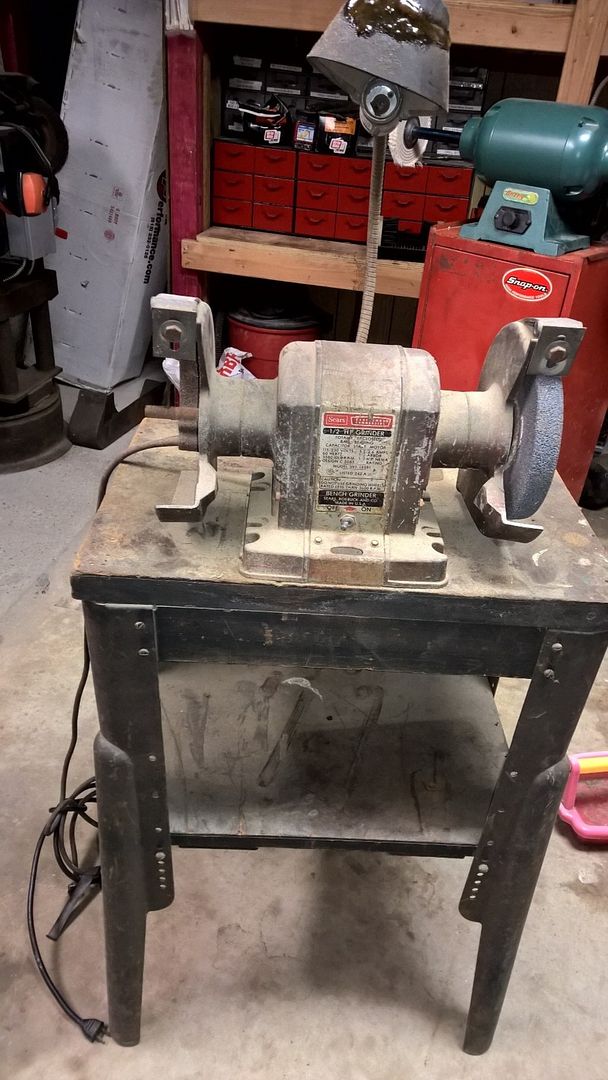
Thanks. For this one, first stripped a lot of the blue paint with a mild stripper (Citristrip) and then bead blasted off what was left.

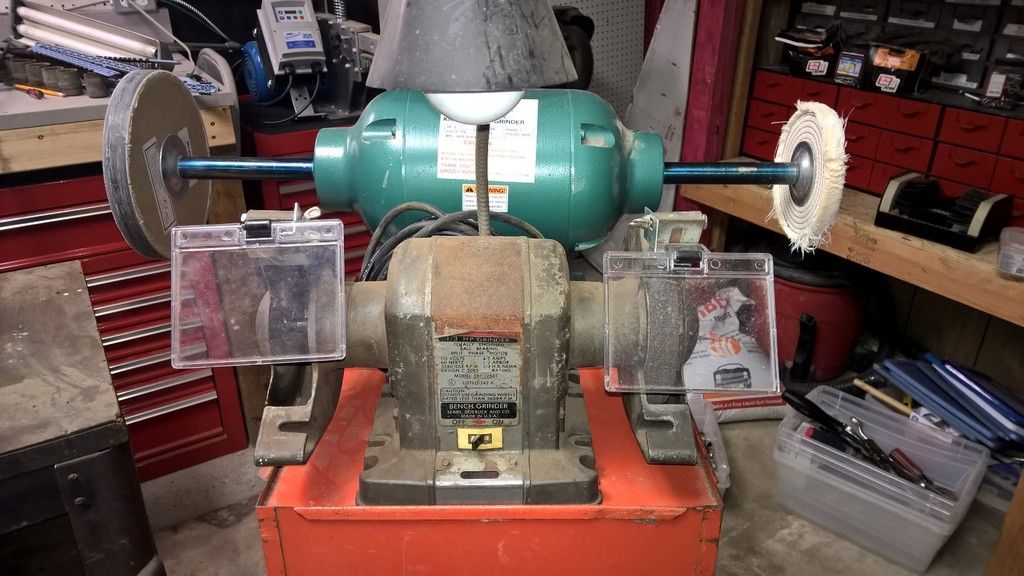
I cheated (got lucky) with the badge. Right around the time I started the restoration, I saw an auction on Ebay for just the center sheet metal section including a nice badge and switch, same model number. I won the auction and swapped out the badge.
 
To avoid these ads, REGISTER NOW!

MercLSU

Well-known member
Joined
Oct 17, 2015
Messages
1,110
Location
Baton Rouge, LA
Picked up a 1/2 HP commercial block grinder earlier today with a nice stand for very cheap. Runs very well but is missing the quench tray, tool rests, eye guards, and end caps. The first three I think I can source or make fairly easily; how impossible will it be to find the end caps?

DS8.jpg


DS10.jpg
 

torqueman2002

Well-known member
Joined
Jun 3, 2009
Messages
6,139
Location
SE Michigan
Nice Blocks! My comments are in Blue.
I don't think I ever posted my 'after' pictures...
MrKona, nice color choice and great job! :thumbup:

Picked up a 1/2 HP commercial block grinder earlier today with a nice stand for very cheap. Runs very well but is missing the quench tray, tool rests, eye guards, and end caps. The first three I think I can source or make fairly easily; how impossible will it be to find the end caps?
Nice Block, your 1st?

You might find those parts used on this site, or eBay.

The quench tray is still available new from SearsPartsDirect website link - --> http://www.searspartsdirect.com/
and eReplacementParts website link - --> http://www.ereplacementparts.com/craftsman-grinder-parts-c-158286_159871.html

My guess is CL for a 'parts' Block is going to be your best/cheapest/fastest bet.


Also, see the links in my signature line for more resources.
 
Last edited:

exmaxima1

Well-known member
Joined
Jun 25, 2011
Messages
6,341
Location
Midwest
Also missing the left hand nut and washers, plus the lamp looks pretty beat. I'd say you will find another grinder before you find all the missing parts. But if the price was really low, you have a decent parts grinder
 

Outlawmws

Well-known member
Joined
Aug 9, 2011
Messages
39,195
Location
The Badlands
Ace hardware will often have the left hand nut. Match the RH threads and ask for the left hand nuts in that pitch/size Stone washers are easy to find.

End caps may be tough unless someone has a parts machine. Rests are no big deal.
 

exmaxima1

Well-known member
Joined
Jun 25, 2011
Messages
6,341
Location
Midwest
End caps may be tough unless someone has a parts machine. Rests are no big deal.

The rests on the commercial blocks are not nearly as easy to fabricate as the standard models. Duplicating the original support brackets can be tricky, as they are channels rather than basic bars or angles. I'm curious if someone has figured out a simpler alternative.
 

MercLSU

Well-known member
Joined
Oct 17, 2015
Messages
1,110
Location
Baton Rouge, LA
Nice Block, your 1st?

You might find those parts used on this site, or eBay.

The quench tray is still available new from SearsPartsDirect website link - --> http://www.searspartsdirect.com/
and eReplacementParts website link - --> http://www.ereplacementparts.com/cra...86_159871.html

My guess is CL for a 'parts' Block is going to be your best/cheapest/fastest bet.

Also, see the links in my signature line for more resources.

No sir, my second, actually. Though I've only owned the other for two weeks. The first is a 1/3 hp grinder that I got from Nine4GMC recently. It needs tool rests and a quench tray; I added some cheap shields from another grinder I had.

DS17.jpg


When I got both of these, he advised me to seek this thread out as it was my best bet to "learn" myself on these. Truly some great information here; I appreciate the time it took to put it all together.

Also missing the left hand nut and washers, plus the lamp looks pretty beat. I'd say you will find another grinder before you find all the missing parts. But if the price was really low, you have a decent parts grinder

It was a bundle deal on a number of things, but the discussed price for the grinder, stand (what I was originally after), and a 6" Ohio Forge grinder that was sitting behind it was $10. My guess is these won't be my last block grinders, so it will come in handy at some point.

Ace hardware will often have the left hand nut. Match the RH threads and ask for the left hand nuts in that pitch/size Stone washers are easy to find.

End caps may be tough unless someone has a parts machine. Rests are no big deal.

Thanks! Looks like I figured right on the end caps being hard to find. I went back to the sale I got it from today and tore the whole place apart but they were nowhere to be found. I thought about trying to make my own but for now I think I'll do a bit more searching.
 

torqueman2002

Well-known member
Joined
Jun 3, 2009
Messages
6,139
Location
SE Michigan
Nice buffer - Baldor, Grizzley, ...?
....

Thanks! Looks like I figured right on the end caps being hard to find. I went back to the sale I got it from today and tore the whole place apart but they were nowhere to be found. I thought about trying to make my own but for now I think I'll do a bit more searching.
Here's a thread about making the wheel guard covers/end caps.
http://tinyurl.com/nu58ce9
 

Outlawmws

Well-known member
Joined
Aug 9, 2011
Messages
39,195
Location
The Badlands
ExMax, I'm not sure I'm following you; if you look at McB's pic, its a flat slotted piece and an angled piece. neither should be difficult to fab up. :dunno:

The rests on the commercial blocks are not nearly as easy to fabricate as the standard models. Duplicating the original support brackets can be tricky, as they are channels rather than basic bars or angles. I'm curious if someone has figured out a simpler alternative.

Merc,

Here is a near all original 397.19591 like yours. Notice the side covers and tool rests for the commercial cap start is different than your 1/3hp split phase. I hope you can track down the parts.

View media item 41515
 

Kaervak

Well-known member
Joined
May 12, 2010
Messages
826
Location
Cleveland, OH
I have a 397.19590 1/2HP Commercial one with the same tool rests. I'll pull one off and get some detailed pictures and some measurements. The second 19590 I bought doesn't have either tool rest and I'm thinking of making a set just to have. Doesn't seem to terribly difficult, but we've all said that before. :D
 

exmaxima1

Well-known member
Joined
Jun 25, 2011
Messages
6,341
Location
Midwest
ExMax, I'm not sure I'm following you; if you look at McB's pic, its a flat slotted piece and an angled piece. neither should be difficult to fab up. :dunno:

I'm familiar with McB's grinder---it looks like the one I sold him several years ago. The slotted bracket has lips that engage the trapezoidal boss on the guard. It allows it to slide rather than fall down when you loosen the bolt. You could make a simple slotted bar, but it will not adjust as easily and will likely need alot more bolt tension to keep it locked in place. If I was making one from bar stock, I would mill a groove into the bar to emulate the original design.
 

Outlawmws

Well-known member
Joined
Aug 9, 2011
Messages
39,195
Location
The Badlands
I'm familiar with McB's grinder---it looks like the one I sold him several years ago. The slotted bracket has lips that engage the trapezoidal boss on the guard. It allows it to slide rather than fall down when you loosen the bolt. You could make a simple slotted bar, but it will not adjust as easily and will likely need alot more bolt tension to keep it locked in place. If I was making one from bar stock, I would mill a groove into the bar to emulate the original design.


OK that makes sense, Thanks. I'll have to look at mine (stored...), I always assumed that was just tension fit.
 

Kaervak

Well-known member
Joined
May 12, 2010
Messages
826
Location
Cleveland, OH
Got a few pics of the right hand side tool rest from my grinder. Also took a bunch of measurements. I'm going to look for a free CAD program and dust off my drafting skills and get a set of "prints" drawn up for anyone that wants to try fabbing their own set.
 

McBrownie

Well-known member
Joined
Mar 27, 2014
Messages
1,827
Location
Cleveland, OH
I'm familiar with McB's grinder---it looks like the one I sold him several years ago. The slotted bracket has lips that engage the trapezoidal boss on the guard. It allows it to slide rather than fall down when you loosen the bolt. You could make a simple slotted bar, but it will not adjust as easily and will likely need alot more bolt tension to keep it locked in place. If I was making one from bar stock, I would mill a groove into the bar to emulate the original design.

Ex,

It's the same one. Like you said, the straight bar part of the tool rest is stamped so that it has a flat groove on the side that contacts the wheel guard. Looking forward to seeing kaervak's drawings.
 

cheechi

Well-known member
Joined
Feb 29, 2012
Messages
4,384
Location
Triad, NC
How hard is it to either put a longer gooseneck lamp on one of these or to put on a lamp that has none (anymore?)

May be picking up one with a pedestal that doesn't appear to have a lamp anymore. was it optional on some models? This is 397.1949
 

torqueman2002

Well-known member
Joined
Jun 3, 2009
Messages
6,139
Location
SE Michigan
See my replies in Blue.
How hard is it to either put a longer gooseneck lamp on one of these or to put on a lamp that has none (anymore?)
There is a 'knock-out' for mounting the goose-neck lamp. The lamp is mounted with an electrical (pipe thread) nut and washer (2nd picture, bottom center).

Some lamps have their own power switch, others do not and are powered ON/OFF with the grinder power switch.

Neutral (ribbed/
grooved/white/silver screw) wire to relay neutral and hot (smooth/black/brass screw) to appropriate side of power switch.

May be picking up one with a pedestal that doesn't appear to have a lamp anymore. was it optional on some models? This is 397.1949
The lamp was an 'upgrade' on slightly more expensive models.

CM05HP39719591b.jpg


ae1d2165-73a8-49e3-83bc-c4cf40ecd005.jpg
 
Last edited:

cheechi

Well-known member
Joined
Feb 29, 2012
Messages
4,384
Location
Triad, NC
My neighbour is an electrical guy much more than me. We swapped the original for another I had with the more 'T' style bulb cover. Not quite as long of a neck but certain angles its better for light. Anyway I am 'familiar' with the wiring and the wiring diagram on the bottom cover is definitely helpful.

However I'd like a longer neck on all of them. And one doesn't have a switch so it will be getting replaced at least at the bulb end with a switching receptacle. Just wasn't sure if there was a common source for the metal goose neck to make these in custom lengths.
 
To avoid these ads, REGISTER NOW!

torqueman2002

Well-known member
Joined
Jun 3, 2009
Messages
6,139
Location
SE Michigan
My neighbour is an electrical guy much more than me. We swapped the original for another I had with the more 'T' style bulb cover. Not quite as long of a neck but certain angles its better for light. Anyway I am 'familiar' with the wiring and the wiring diagram on the bottom cover is definitely helpful.

However I'd like a longer neck on all of them. And one doesn't have a switch so it will be getting replaced at least at the bulb end with a switching receptacle. Just wasn't sure if there was a common source for the metal goose neck to make these in custom lengths.
A Google search turned theses up, haven't tried them.
http://www.flexible-gooseneck.com/index.html
http://www.grandbrass.com/

Good luck, and we'd love to see your Block and the changes/improvements.
:)
 
Last edited:

jakemac

Well-known member
Joined
May 21, 2013
Messages
9,035
Location
New England
How hard is it to either put a longer gooseneck lamp on one of these or to put on a lamp that has none (anymore?)

May be picking up one with a pedestal that doesn't appear to have a lamp anymore. was it optional on some models? This is 397.1949

Those numbers look like it might be a pre-Block. It might not have a knockout for the lamp. You'll have to make a hole to attach the gooseneck. Not that big of a deal, but just one more step to get the job done.
 

Kaervak

Well-known member
Joined
May 12, 2010
Messages
826
Location
Cleveland, OH
After all these years I can still use AutoCAD. I'm impressed with myself.


Here's a link to a couple pictures of the tool rests:
http://imgur.com/a/Hag9N

And here's a link to the DWG files for the brackets:
http://wikisend.com/download/982750/Block.zip

The link is only good for seven days, if someone has a more permanent solution please let me know. In the mean time, I'll update the link as needed.

If anyone has questions about the drawings, ask away. :)
 
Last edited:

cheechi

Well-known member
Joined
Feb 29, 2012
Messages
4,384
Location
Triad, NC
A Google search...
so that tells me people aren't commonly doing this. That's also useful information so thanks again twice.

I will get some photos once I have a flat place to put them again. got new toys during the holidays (third grinder included) so haven't got them a home again yet.
 

McBrownie

Well-known member
Joined
Mar 27, 2014
Messages
1,827
Location
Cleveland, OH

exmaxima1

Well-known member
Joined
Jun 25, 2011
Messages
6,341
Location
Midwest
After all these years I can still use AutoCAD. I'm impressed with myself.


Here's a link to a couple pictures of the tool rests:
http://imgur.com/a/Hag9N

And here's a link to the DWG files for the brackets:
http://wikisend.com/download/165942/Block.zip

The link is only good for seven days, if someone has a more permanent solution please let me know. In the mean time, I'll update the link as needed.

If anyone has questions about the drawings, ask away. :)

Most people can't open a DWG (ie, I only have Autocad at my office). And unless someone needs to pick dimensions directly off the file, a simpler format will suffice. Copy Screen/Paste it with Paint, and make a JPG that you can directly post.

Thanks for doing this:beer:
 

Kaervak

Well-known member
Joined
May 12, 2010
Messages
826
Location
Cleveland, OH
Most people can't open a DWG (ie, I only have Autocad at my office). And unless someone needs to pick dimensions directly off the file, a simpler format will suffice. Copy Screen/Paste it with Paint, and make a JPG that you can directly post.

Thanks for doing this:beer:


Oh duh, a screenshot is a great idea! No idea why I didn't think of that. :D

Here they are:
http://imgur.com/a/UARoi
 
Last edited:

exmaxima1

Well-known member
Joined
Jun 25, 2011
Messages
6,341
Location
Midwest
Oh duh, a screenshot is a great idea! No idea why I didn't think of that. :D

Here they are:
http://imgur.com/a/XccE1

I would add the width and depth dimensions of the groove in the backside of the slotted bar. Those dimensions are critical to the bar clamping correctly to the wheel guard. That would also help determine if a square tube could be cut down as someone suggested.
 

Kaervak

Well-known member
Joined
May 12, 2010
Messages
826
Location
Cleveland, OH
I knew I forgot something. I'll have to get a measurement on those again, I vaguely recall 1/16" being it. I'll make an update with the measurements tomorrow.
 

MercLSU

Well-known member
Joined
Oct 17, 2015
Messages
1,110
Location
Baton Rouge, LA
Merc,

Here is a near all original 397.19591 like yours. Notice the side covers and tool rests for the commercial cap start is different than your 1/3hp split phase. I hope you can track down the parts.

Thanks! That's a beauty. I'll probably hunt around for a few months and see what I come up with without spending too much.

Nice buffer - Baldor, Grizzley, ...?

Here's a thread about making the wheel guard covers/end caps.
http://tinyurl.com/nu58ce9

It's a Grizzly G1061Z. I'd been looking for a lower RPM buffer for a while and this popped up on Craigslist last year and I scooped it up.

And thank you very much for the link...pretty cool idea using the welding bottle cap. These would be a little harder as they have an exhaust port but it would definitely be a fun project.
 
To avoid these ads, REGISTER NOW!
Top Bottom