WhoWhatNow
Well-known member
^^ Holly Sh*t! That is beautiful!^^


 How could you even THINK of scratching or denting it?!?!!?
Chipmunk- that is NOT a work bench... its a work of art.
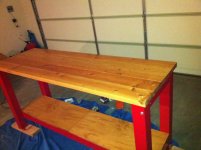
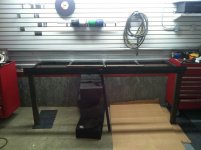
Here is mine. My garage is a 2-car 20.5" X 21", so I tried to pack stuff.
I had 3 Craftsman base I bought for the purpose of making a workbench unit. Then I managed to find on local internet classified ads a maple butcher top. I sanded it and applied varnish. It turned out pretty nice, I think.
The top piece measures 9.5 ft X 29 inches. I removed the caster wheels from the bases and used small pieces of wood to act as little foot.
On the left hand, I drilled 3 holes, ready to mount my vise. On the left side, I added a used Snap-On side cabinet I bought.
Since the 3 bases are not as deep as the top, I made a little shelf in the back where I stored jack stands
Above this unit, I have 3 NAPA metal cabinets.
Last thing I'd like to do on this, aside the vise, is to add a thin drawer mounted (ideally same as the base) just under the top maple, just above the stool. Finding a single drawer seems pretty difficult!!!
Thanks


That looks really nice, gtcs1
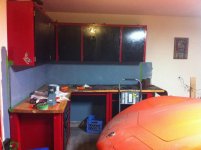
Where did you buy your wall mural that is behind the bench?
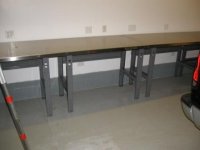
In the evolution of my benches, I got a jump start when I got a great deal on some stainless tops. These legs from Global Industrial costs only $20 each and were a great interim solution until I got some cabinets underneath them.
I've been looking at those same workbench legs from Global Industries. Could you tell me what their measurements are from leg-to-leg (outer edges). I only have 24 inches of depth to work with and I think if I trimmed the top they might work.
Here is mine. My garage is a 2-car 20.5" X 21", so I tried to pack stuff.
I had 3 Craftsman base I bought for the purpose of making a workbench unit. Then I managed to find on local internet classified ads a maple butcher top. I sanded it and applied varnish. It turned out pretty nice, I think.
The top piece measures 9.5 ft X 29 inches. I removed the caster wheels from the bases and used small pieces of wood to act as little foot.
On the left hand, I drilled 3 holes, ready to mount my vise. On the left side, I added a used Snap-On side cabinet I bought.
Since the 3 bases are not as deep as the top, I made a little shelf in the back where I stored jack stands
Above this unit, I have 3 NAPA metal cabinets.
Last thing I'd like to do on this, aside the vise, is to add a thin drawer mounted (ideally same as the base) just under the top maple, just above the stool. Finding a single drawer seems pretty difficult!!!
Thanks

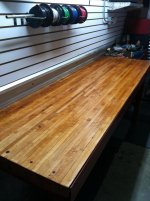
Man, I am loving those bowling lane bench tops. I have to find some of that to make a woodworking bench with.


mines still a work in progress
Scored this rock maple butcher block from a kitchen under renovation...cut down to 22" x 72", sanded and polyurethaned. Total height is 42 1/2". 2x4 construction with ledger acting as rear legs due to the stem wall. Just finished last night, and getting the same 'perfectly blue' paint this afternoon.

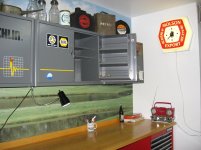
BlockBuster, what is the purpose of the blue blocks on the wall under your cabinets?
In the evolution of my benches, I got a jump start when I got a great deal on some stainless tops. These legs from Global Industrial costs only $20 each and were a great interim solution until I got some cabinets underneath them.
I've been looking at those same workbench legs from Global Industries. Could you tell me what their measurements are from leg-to-leg (outer edges). I only have 24 inches of depth to work with and I think if I trimmed the top they might work.
They are exactly 24" at the floor. The upper flanges extend 2 1/2 inches. You could easily whack the flange off.
Good luck
I made mine with two layers of laminated 3/4, 2x6s and 2x4s. wanted to keep it all off the floor.

Sourced the bits from good 'ol McMaster-Carr:
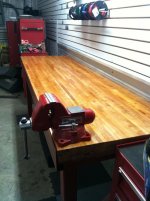
 - but I hope that vice is not bolted down. It's pretty much useless there.
 ")


nice bench. very clean

They are exactly 24" at the floor. The upper flanges extend 2 1/2 inches. You could easily whack the flange off.
Good luck
Thanks! I really appreciate the info.
While I like the bench "off the floor", it limits your shelf space....


I disagree, this is why I pulled the wheels off and slung my cheapo rollyround under there:
.

Sourced the bits from good 'ol McMaster-Carr: