

You are using an out of date browser. It may not display this or other websites correctly.
You should upgrade or use an alternative browser.
You should upgrade or use an alternative browser.
Lets see your workbench
- Thread starter speedingpenguin
- Start date
TheClaw
Well-known member
Five Star! Nice Work.
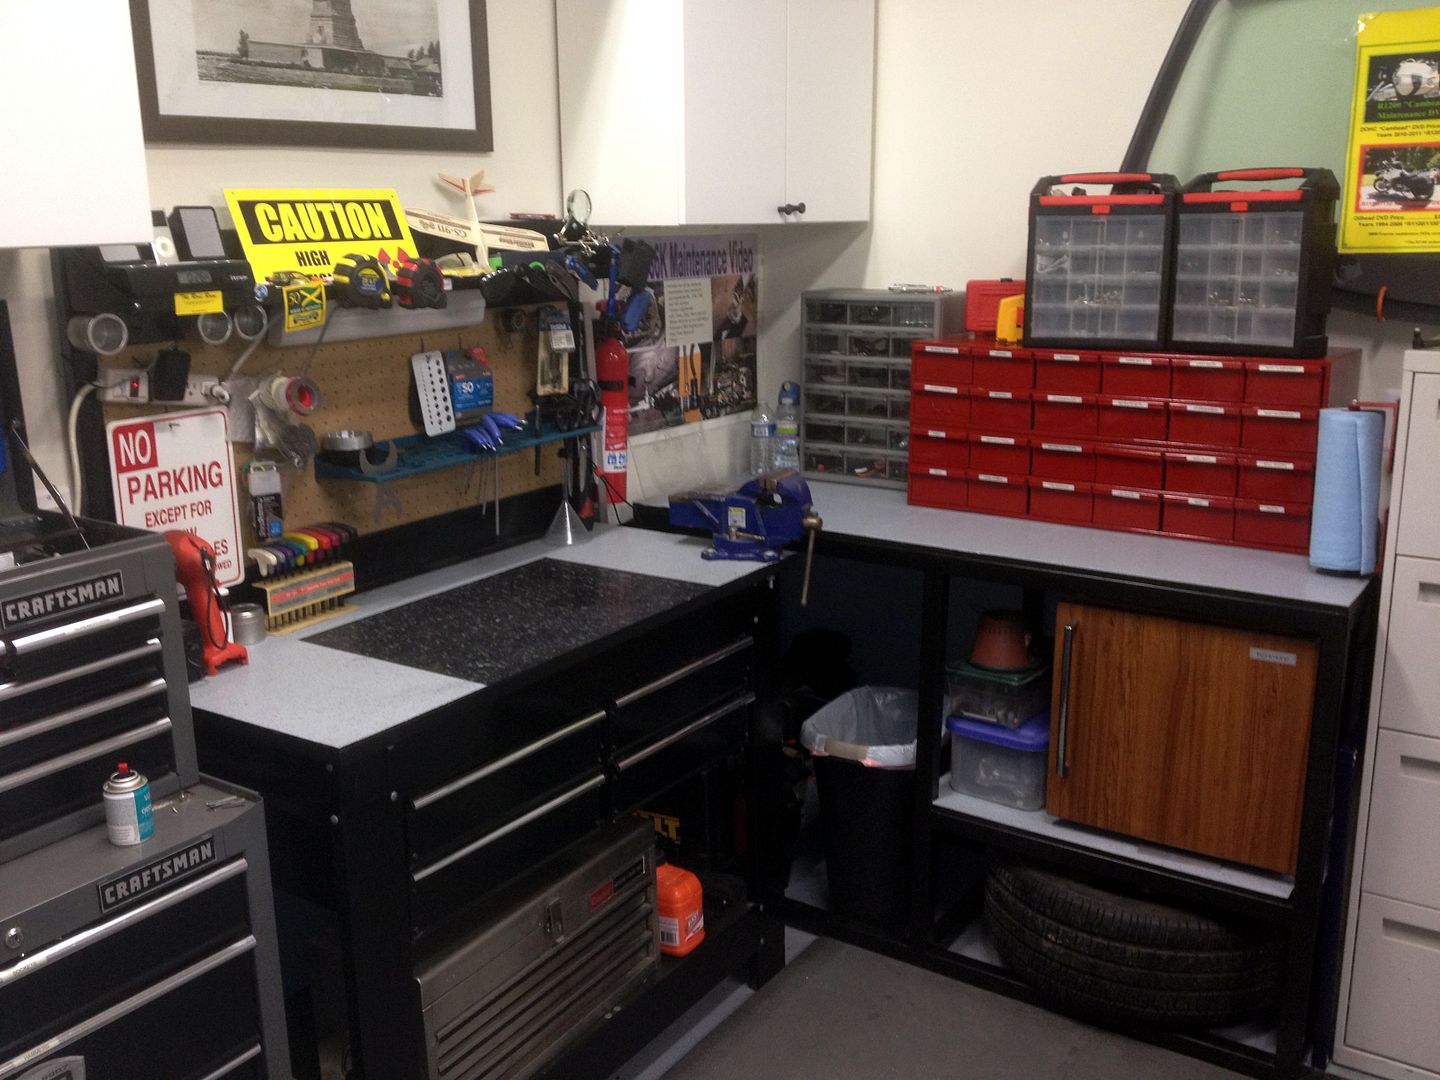
Are those cabinets painted or are they coated with something?
odie
Well-known member
Five Star! Nice Work.
Are those cabinets painted or are they coated with something?
Thank you.
Cabinets are just painted. Sanded down and three coats of paint to match the trim.
bullfrog123
Well-known member
alpinewhite..... yes that is a HF box under the bench. I painted the drawer faces black to match the Crapsman stack.
JMartel
Well-known member
Some assembly required.
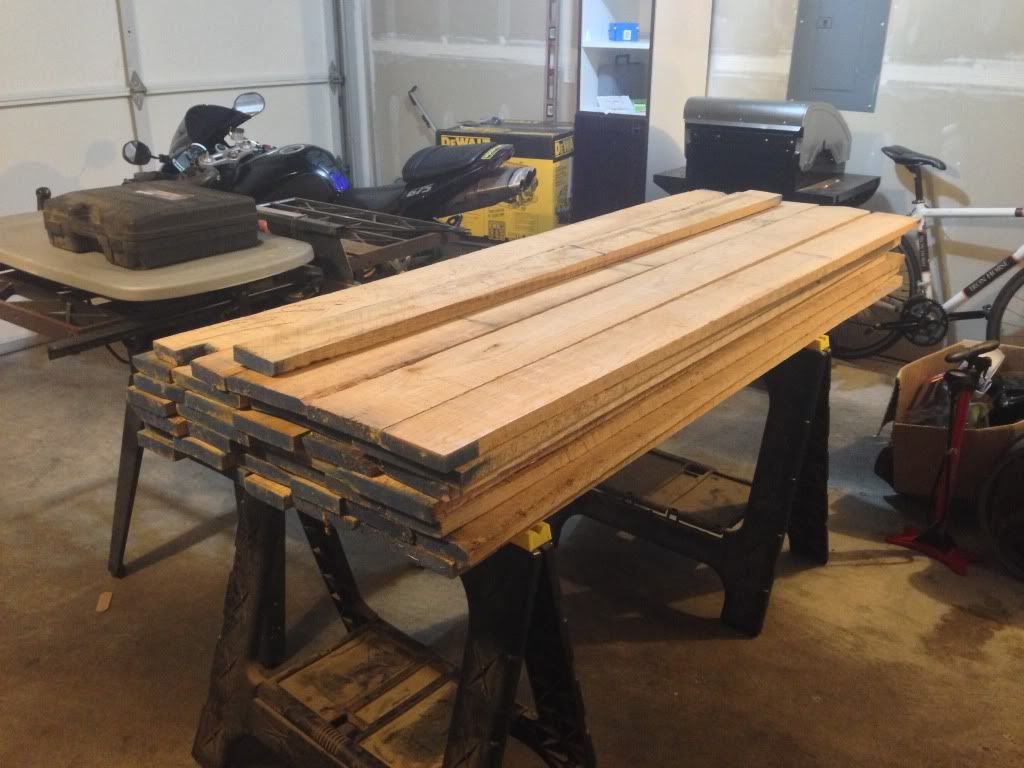
Should look similar to this when finished. Hopefully. If I don't mess it up too badly. It'll have a thinner top (2.5-3" thick likely), shorter at only 6', and probably a toolwell between the two slabs.

Should look similar to this when finished. Hopefully. If I don't mess it up too badly. It'll have a thinner top (2.5-3" thick likely), shorter at only 6', and probably a toolwell between the two slabs.
Responder
Well-known member
Some assembly required.
Should look similar to this when finished. Hopefully. If I don't mess it up too badly. It'll have a thinner top (2.5-3" thick likely), shorter at only 6', and probably a toolwell between the two slabs.
Very nice! Am I correct in saying that the bench is inspired by the "New Yankee Workshop"?
JMartel
Well-known member
Very nice! Am I correct in saying that the bench is inspired by the "New Yankee Workshop"?
It's a modern take on an old 1800's French Roubo style bench.
thundermug
Well-known member
This is my workbench, as previously posted. I think it's from the 30s-50s.
https://sphotos-b-ord.**.fbcdn.net/hphotos-prn1/q71/s720x720/282872_646415372072_2047054034_n.jpg
It bears this logo, which I don't recognize. Anyone know what it is?
https://sphotos-a-ord.**.fbcdn.net/hphotos-prn2/1098493_646415402012_1504349145_n.jpg
https://sphotos-b-ord.**.fbcdn.net/hphotos-prn1/q71/s720x720/282872_646415372072_2047054034_n.jpg
It bears this logo, which I don't recognize. Anyone know what it is?
https://sphotos-a-ord.**.fbcdn.net/hphotos-prn2/1098493_646415402012_1504349145_n.jpg
1/2 Cup
Member Emeritus
I feel a new workbench coming on!
Vintage cast iron. Very heavy.
Gears are turning in my brain.
This one's going to be good.
Nice, let your imagination run wild on this one, I just love old cast iron stuff

I just finished this one today, they're made using the Simpson Strongtie kit, with some added material. The top is five 2X6s for a depth of 27", length is 8'. The bottom is birch plywood. I have a total of four of them, they will all receive steel tops over the 2X6s as funds allow. I lag bolt them to the garage wall studs, and they don't move a bit.

How much overhang is that? That would be the distance from the top past the upper stretcher and side rails. Some people call the upper stretcher and side rails an apron.
QwikKotaTx
Well-known member
What does everything think about cantilevered benches? I have an unfinished garage with exposed studs and bottom sill making the frame and supports very easy to tie in. I assume the lack of outward legs allows for more freedom of motion and storage but please correct me with real world expectations. A CAD image of what I had in mind is attached. Top would be 1 or 2 layers of 3/4 ply with 3 side overhang for clamping.

It has 2.5" overhang in the front, and 2" on each end. The five 2X6's will give you a 27.5" deep bench top.
Thank you sir. I appreciate the info.
zoomzoomjeff
Well-known member
What does everything think about cantilevered benches? I have an unfinished garage with exposed studs and bottom sill making the frame and supports very easy to tie in. I assume the lack of outward legs allows for more freedom of motion and storage but please correct me with real world expectations. A CAD image of what I had in mind is attached. Top would be 1 or 2 layers of 3/4 ply with 3 side overhang for clamping.
I think they can be strong as hell. I made a wall length garage workbench/storage area for a friend at his house, tied it into the outside wall studs, as outlined in your image. Was built like a brick **** house.

HoustonDan4591
New member
This workbench was crafted in France
during the mid to late 1800's. The condition of the bench is far superior to other simliar models seen on the Internet or in antique shops. This piece has not been glazed with stain or urethane as most other workbenches have. It is in its original, unadultered condition. Even the vice works seamlessly as it did over 100 years ago.
Length 78 1/2 inches
Width 25 1/4 inches
Height 33 1/2 inches
QwikKotaTx
Well-known member
I think they can be strong as hell. I made a wall length garage workbench/storage area for a friend at his house, tied it into the outside wall studs, as outlined in your image. Was built like a brick **** house.
Well I was hoping my HF tool chest would fit underneath but with the garage having a lip and the frame under the top being 2x4 the top surface of the workbench would be at 48"! Damn! Too high, 42" would probably be my max. Even if I take the wheels off and use the top of two tool chests as the top mount, it's a bit too tall due to that pesky cement lip.
alpinewhite
Well-known member
It's called a "footing" for the foundation wall.....to that pesky cement lip.
Last edited:
QwikKotaTx
Well-known member
It's called a "footing" for the foundation wall.
Even when it's 40" wide?? All of the detached garages here have them, my old attached did as well. Seems to be more of a spot to allow for level entry with the door. The right side of the garage where I park does not have it.
automobiliben
Well-known member
I feel a new workbench coming on!
Vintage cast iron. Very heavy.
Gears are turning in my brain.
This one's going to be good.
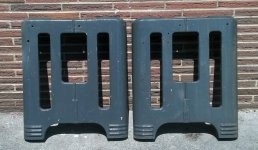
I have two of these that I use for benches. Too bad you didn't get the cast top...

Seen in the background here with my Wilton installed on the big one.

Ben
Kevin54
MEMBER EMERITUS
What does everything think about cantilevered benches? I have an unfinished garage with exposed studs and bottom sill making the frame and supports very easy to tie in. I assume the lack of outward legs allows for more freedom of motion and storage but please correct me with real world expectations. A CAD image of what I had in mind is attached. Top would be 1 or 2 layers of 3/4 ply with 3 side overhang for clamping.
That's the way I have my benches. I like it in that you can sweep out beneath the bench with no obstructions.
alpinewhite
Well-known member
I'm not sure about yours but in mine, I only have this protruding portion of the footing on exterior walls. I believe it's because there is a minimum width for this footing. As a result, the 2x4 framing for the exterior wall is lined up with the outside edge of this footing. That makes the extra width of the footing appear on the garage side of the wall. The walls whose other side is the house, however, don't have these protruding portions because the 2x6 wall framing was lined up with the edge of the concrete.Even when it's 40" wide?? All of the detached garages here have them, my old attached did as well. Seems to be more of a spot to allow for level entry with the door. The right side of the garage where I park does not have it.
I hope this helps.
Vintage cast iron. Very heavy.
Scott, could you show the other side? I ask because because they look more like a stamping to me than a casting. I'm just trying to learn more. Thanks!
Last edited:
Some assembly required. It'll have a thinner top (2.5-3" thick likely), shorter at only 6'
Measure twice, cut once! If you are not limited by space, I would strongly encourage you go at least 7' and preferably closer to 8'. I think you'll have a better, stronger bench that will be more versatile. Post up a project page!
Last edited:
jhn_plsn
Member
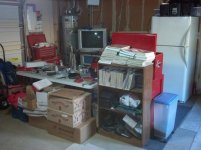
It is hard to see the actual workbench here, but it is holding up that anchor of a TV. Its a machinists table and weighs in so heavy 6 fair sized guys would rather not have to lower it down out of a truck. I do mostly hobby projects and that fold out table is actually my main work station. The two roll away tool boxes and heavy workbench have all supplies within reasonable reach. There is also a small air compressor for airbrushing in the corner next to the water heater.
Temporary lighting improvements are in the plans, but of course those plans may change.
Temporary lighting improvements are in the plans, but of course those plans may change.
Attachments
automobiliben
Well-known member
Scott, could you show the other side? I ask because because they look more like a stamping to me than a casting. I'm just trying to learn more. Thanks!
They are the same legs as my benches, definitely cast iron...
Ben
They are the same legs as my benches, definitely cast iron...
Ben
Yes, I could see it in your pics. Thanks!
automobiliben
Well-known member
Yes, I could see it in your pics. Thanks!
No problem! I can't imagine using them as is for a bench, they are much too short (and I am only 5' 6"). The casters mounted on the 2x4 make all the difference.
Ben
TOOL_MONGER
Well-known member
nkachur
Well-known member
I built these 2 benches over the last couple days. The first one has already turned into a shelf for all my wood cuttings. But I am hoping to get rid of a bunch of them into shelves over the next couple months.

But it did allow me to move stuff out of the middle of the floor.
I also built a bench for the miter saw so I am not moving it a 100 times a month. I actually got some progress picks of the build process for a change.


This one will still get the tops replaced with I am figuring some mdf once I figure out exactly how I want it.
Last edited:
zoomzoomjeff
Well-known member
Lookin' good nkachur! I know what you mean about moving that miter saw 100 times, and then also using the ground to use the miter saw. Did that enough, finally got the greenlight from the wife to buy a stand for it. Nice looking benches though. Progress.
Lookin' good nkachur! I know what you mean about moving that miter saw 100 times, and then also using the ground to use the miter saw. Did that enough, finally got the greenlight from the wife to buy a stand for it. Nice looking benches though. Progress.
One of the best investments I made early this year was the DeWalt rolling stand for my miter saw. Now, I don't dread needing to use that saw.
dittle fart around
Well-known member
Lookin' good nkachur! I know what you mean about moving that miter saw 100 times, and then also using the ground to use the miter saw. Did that enough, finally got the greenlight from the wife to buy a stand for it. Nice looking benches though. Progress.
View media item 11096
View media item 10576
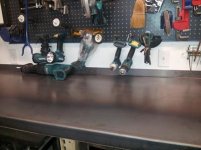
Made a couple of bases out of scraps for my miter and table saws. The work surface is the same height as my workbench. Great for long lengths on the miter and the perfect run off table for the table saw. My wife might look happy in the photo but she hates helping with my projects.
REALGRAVEROBBER
New member
- Joined
- Oct 28, 2010
- Messages
- 2
I think this is my first listing on this fine forum.
Bought this Kobalt workbench at a yard sale for $40 2 years ago or so. They sell new for $200. I'm very impressed with it, and think few people would need more than this for what a person actually does. Here are some photos:


I was moving this from a workshop into storage, and took the photos for a for-sale ad hence the measurement pictures. Would not hesitate to buy another new, I think it's a fine buy and product.
The taylor-made stuff is really nice, and I doubt I'll make my own homemade workbenches again (providing I have the funds to buy).
I see a lot of folks here have the expen$ve sort of hutch over their large bottom toolbox as a sort of workbench, but I think that is a very expensive choice and usually just fills with clutter. Just my opinion, not meaning to thread-jack.
Keep up the great work on this fine forum everyone.
Bought this Kobalt workbench at a yard sale for $40 2 years ago or so. They sell new for $200. I'm very impressed with it, and think few people would need more than this for what a person actually does. Here are some photos:
I was moving this from a workshop into storage, and took the photos for a for-sale ad hence the measurement pictures. Would not hesitate to buy another new, I think it's a fine buy and product.
The taylor-made stuff is really nice, and I doubt I'll make my own homemade workbenches again (providing I have the funds to buy).
I see a lot of folks here have the expen$ve sort of hutch over their large bottom toolbox as a sort of workbench, but I think that is a very expensive choice and usually just fills with clutter. Just my opinion, not meaning to thread-jack.
Keep up the great work on this fine forum everyone.
JimVonBaden
Well-known member
That looks a lot like mine!
For any big or heavy work I use my motorcycle lift.
jim
For any big or heavy work I use my motorcycle lift.
jim
Here's a picture of mine. 2x4 and OSB special set me back <$50 in raw materials originally.
As inspired by this forum, I was cleaning out the garage/shop and needed to get rid of an old table I'd built, that was my first real wood working project 10 years ago. I couldn't bring myself to throw away the top, so we repurposed it for my work bench.

As inspired by this forum, I was cleaning out the garage/shop and needed to get rid of an old table I'd built, that was my first real wood working project 10 years ago. I couldn't bring myself to throw away the top, so we repurposed it for my work bench.
green2kgt
Well-known member
I picked up this really dirty countertop with backsplash from work for free and after an hour of 409 and scotchbrite I got it looking BRAND SPANKIN NEW! Then I hit the drawing board... I mean Solidworks, lol. This is going to go ni my basement, not my garage...
https://sphotos-b-ord.**.fbcdn.net/hphotos-ash3/q88/s720x720/1010603_10151760622848360_731555947_n.jpg
https://sphotos-b-ord.**.fbcdn.net/hphotos-ash4/q72/s720x720/1001581_10151760622793360_1118795102_n.jpg
This is the plan... Cheap cabinets from Menards already drawn up to size to fit between the steel Ibeams in the basement.
Last edited:
allinon72
Well-known member
Made a couple of bases out of scraps for my miter and table saws. The work surface is the same height as my workbench. Great for long lengths on the miter and the perfect run off table for the table saw. My wife might look happy in the photo but she hates helping with my projects.
That will hold a table saw or small aircraft.
zoomzoomjeff
Well-known member
That will hold a table saw or small aircraft.
I know! I like how he slightly overbuilds. Nothing wrong with that though. I do the same thing on most projects. WAYYYY overbuild something so it will last 50 years after I'm done with it.