TheClaw
Well-known member
Nice work jacob!


Here is my recently completed "Stevo" workbench.

")


bhays. Did you fasten the two boxes to each other? I was thinking about two HF 44" together and changing the casters to 2 fixed and 6 swivel type.


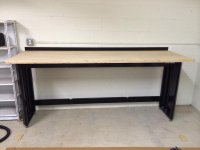
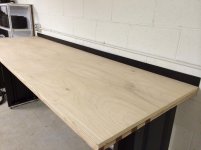
I'm in the process of rebuilding my workbench. It's a solid wood core door I'll be using for the bench.
I'd like input here on how to handle the edges.
I'd like to put an aluminum edge strip all around it for protection.
Anyone do such a thing?
<mytubeelement data="{"bundle":{"label_delimitor":":","percentage":"%","smart_buffer":"Smart Buffer","start_playing_when_buffered":"Start playing when buffered","sound":"Sound","desktop_notification":"Desktop Notification","continuation_on_next_line":"-","loop":"Loop","only_notify":"Only Notify","estimated_time":"Estimated Time","global_preferences":"Global Preferences","no_notification_supported_on_your_browser":"No notification style supported on your browser version","video_buffered":"Video Buffered","buffered":"Buffered","hyphen":"-","buffered_message":"The video has been buffered as requested and is ready to play.","not_supported":"Not Supported","on":"On","off":"Off","click_to_enable_for_this_site":"Click to enable for this site","desktop_notification_denied":"You have denied permission for desktop notification for this site","notification_status_delimitor":";","error":"Error","adblock_interferance_message":"Adblock (or similar extension) is known to interfere with SmartVideo. Please add this url to adblock whitelist.","calculating":"Calculating","waiting":"Waiting","will_start_buffering_when_initialized":"Will start buffering when initialized","will_start_playing_when_initialized":"Will start playing when initialized","completed":"Completed","buffering_stalled":"Buffering is stalled. Will stop.","stopped":"Stopped","hr":"Hr","min":"Min","sec":"Sec","any_moment":"Any Moment","popup_donate_to":"Donate to","extension_id":null},"prefs":{"desktopNotification":true,"soundNotification":true,"logLevel":0,"enable":true,"loop":false,"hidePopup":true,"autoPlay":false,"autoBuffer":false,"autoPlayOnBuffer":false,"autoPlayOnBufferPercentage":42,"autoPlayOnSmartBuffer":true,"quality":"default","fshd":false,"onlyNotification":false,"enableFullScreen":true,"saveBandwidth":false,"hideAnnotations":false,"turnOffPagedBuffering":false}}" event="preferencesUpdated" id="myTubeRelayElementToPage"></mytubeelement><mytubeelement data="{"loadBundle":true}" event="relayPrefs" id="myTubeRelayElementToTab"></mytubeelement>

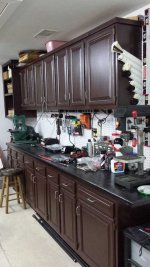
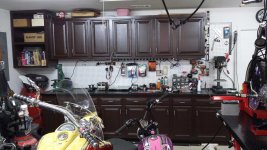
Refinishing my grandfather's bench. Upgraded the front legs to 4x4s with galvanized post bases. The originals were 2x4s that were rotting on the bottom after being in contact with the concrete for 50 years. Drilled holes on the right side to mount my Columbian No. 4 and i'm currently restoring the big Parker that my grandfather had mounted on the left side. Sanded the top down starting with 60 grit and finishing with 220. I'm going to put danish oil on it when it gets a little warmer.
I would have loved to see it before you sanded all the patina off of it.
.

I would have loved to see it before you sanded all the patina off of it.
.