flat tire
Well-known member
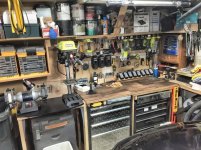
 it looks so bare and lonely
 it looks so bare and lonely
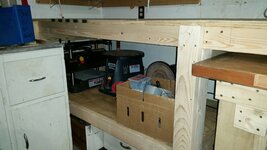
Can you tell us about those steel cabinets on either side of your bench? I haven't seen anything like those, before.
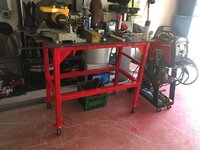
my work bench is a bit hard to see back there but it has 3 layers of plywood under it and the top itself is 1/8 steel i believe which was bent and cut down to fit so now its a solid piece that spans the entire bench.

Sorry, your shop is too clean, you need to get out there and protect your man card.
Sorry, your shop is too clean, you need to get out there and protect your man card.
I was thinking the same thing. Looks great but just a little too neat for me. I'm all about being organized but this looks like it belongs in a doctors office.Still need to finish the dust collection system.View media item 68247http://www.garagejournal.com/forum/picture.php?albumid=5516&pictureid=68249
http://www.garagejournal.com/forum/picture.php?albumid=5516&pictureid=68250

Anyone have reloading bench pictures?
Got my stuff on order and need some ideas
Sent from my iPhone using Tapatalk
I can post a couple of mine tomorrow. I got a lot of info and inspiration from the reloading subforum on ar15.com (under the armory tab)
There is an entire mega thread on reloading benches. I believe it's a sticky.
All of the key attributes are the same. Make it sturdy. Instead of a vise you're adding a press. Make it comfortable so you can work at it standing and sitting. Make sure there's tons of light. Ensure you can clean spilled powder from it.

The top is reclaimed bowling alley, stripped and then the 2 part epoxy coating applied. A gallon and a half of the stuff. It will always be that shiny (unless its damaged) and quite tough as well.
The bench frame is coated with truck bed liner.
Half of it. Still need to finish the other half


Hybrid wins... That is awesome... Reclaimed Bowling alley top... mini fridge... power & air reels... and I'm loving that stack of organizer bins... The Husky toolbox is just icing on the cake.


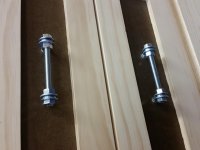
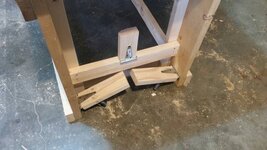
I really like your lift table. Do you have any more pictures or details on how you built it?


Thanks, i cant take design credit as i copied it off something i seen on pinterist. I couldn't really track down an original design either. Just copy of copies but it does work pretty nice.Tjdux - that caster locking setup is very slick!
Just finished mine last week. 41" tall. I'm 6'7" and finally no love longer have to deal with a sore back every time I work in my shop. I'll probably add a few coat of danish oil when I get a chance.
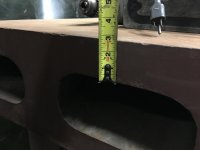
I recently purchased this work bench. The top is 6' 6" by 3' by 10". Anyone seen anything like it before?
I'd love to know some history on it, and what it may have been made out of, or what it was originally for. Seems like it was fabricated out of something else at some point in it's history.
Tag says property of USN. the top and bottom of the slab is a minimum of 2.5" thick. I guess it weights somewhere close to 2 tons.
Just finished mine last week. 41" tall. I'm 6'7" and finally no love longer have to deal with a sore back every time I work in my shop. I'll probably add a few coat of danish oil when I get a chance.
")
STAM: no clue what that might have been originally, but how the heck did you move it?
i'm guessing it could have been made for some other piece of Navy equipment like a ship or sub or something pretty big.
NICE WORKBENCH!!