To avoid these ads, REGISTER NOW!

Lets see your workbench

Varty Yo

Well-known member
Joined
Sep 4, 2016
Messages
97
Location
Sask Canada
I agree .250 (1/4 inch) 2x2 is pretty stout and it could maybe hold a 1 inch steel plate top on it. i'm sure you'd be ok with .125 (1/8th) if you are just building a tool cart and there is .1875 (3/16th) sizing too if you want to get it in the middle.

post up pics when you are finished or if you need any other help just ask

Yes im thinking 1/8" will be plenty stout. Thickest plate for top will be 3/8 at most. See what kinda price i can get on that. This is for a 16' long bench that will be built 1st
 
To avoid these ads, REGISTER NOW!

drivesitfar

Well-known member
Joined
Oct 23, 2013
Messages
35,988
Location
Pacific Northwest
VARTY: if you are going to do pounding or need it to carry a lot of weight at times instead of beefing up the thickness you should just add support under the 1/8th inch plate and I bet it will be plenty stout.

in one of my storage units I have commercial racking and even though some of the 8 foot wide shelving has 3/4 inch or maybe it's 1/2 inch pressboard the metal cross supports every foot allowed me to put 3,000 pounds of steel gym weight plates on couple shelves. the cheap pressboard NEVER WAS close to failing, but after years of sitting with about that much on the shelves as I removed and replace weight plates the 8 foot beams have a bend in them.

So the key is the structure and with it having 1/8th instead of 1/4 or 3/8th it will be much lighter if you want to move it.
 

lis2323

Well-known member
Joined
Dec 25, 2016
Messages
3,234
I built my bench back in 1983. Two eight foot sections like you are planning. I used Handi angle configured to manufacturer’s specs topped with double 3/4” plywood and capped with 16 gauge galvanized steel.

If the two sections were side by side they have a 7000# load rating.

Here it is today still in use.

0dfbe8f14d2b8c943d6df1e5291c2531.png
 

Attachments

  • 0dfbe8f14d2b8c943d6df1e5291c2531.png
    0dfbe8f14d2b8c943d6df1e5291c2531.png
    3 MB · Views: 37

Varty Yo

Well-known member
Joined
Sep 4, 2016
Messages
97
Location
Sask Canada
Great looking bench there lis! Id love to find some angle stuff like that to use but likely wont be able to anywhere
 

lis2323

Well-known member
Joined
Dec 25, 2016
Messages
3,234
Google Handi Angle. My friend used to be the distributor for BC until manufacturing went to China. I’m certain all components are available at industrial shelving and racking suppliers.


IMO this is the way to go. At the end of the day it still has value. Unbolt it stuff it into a minivan for a handful of cash. No matter how well built you design and weld one up it’s still a homemade bench.

Save your square tube and plate for real projects.
 
Last edited:

cderalow

Well-known member
Joined
Nov 13, 2011
Messages
1,326
Location
Potomac, MD
sorry for the HI JACK everybody, but I can't have our best locksmith in pain cause he's too young to go thru some of the **** I (we) had to.


ALL: my bride's new office has motorized desks so wondering if any of you have bought or made one or several of your workbenches with a motor to raise and lower it.


It’s a viable solution for a light duty bench. Most of the commercially available desk/furniture legs are designed with a relatively low maximum weight loading (think a person’s weight)

They’re also designed to function in fixed pairs at maximum distances from one another (think 72-84” max).

They only have a max height of around 48” too, so it wouldn’t be a huge gain for most of us with counter or bar height benches already.


Sent from my iPhone using Tapatalk
 

drivesitfar

Well-known member
Joined
Oct 23, 2013
Messages
35,988
Location
Pacific Northwest
CD: I agree that an office desk that moves up and down with a motor is probably too LIGHT DUTY for most of our needs, but Jeff i'm guessing does a lot of light duty lock and key type work.

Jeff: my bride has bought cushions for the floor in our kitchen and she's got one in front of each sink and stove. I have 1.5 inch rubber gym mats on my shop's floor so see if you can maybe find some medium soft rubber or padding to stand on that will also help some of those aches and pains. nice thinking so far and just trying to help and give you a few more ideas cause as i get older it gets harder to stand for long periods of time.

ALL: so maybe some member has heard the Tim Allen comedy where he put a V8 on a dishwasher to get the roses off his bride's plates? well any one built a motorized bench yet or maybe any in the plans. i bet this 3/4 HP Baldor motor would be a good start, but a 1.5 HP would be better.
 

Attachments

  • Baldor industrial .75 motor.jpg
    Baldor industrial .75 motor.jpg
    147.9 KB · Views: 220

MrDayne

Well-known member
Joined
Jul 14, 2017
Messages
46
Location
South Florida
I think I can blame Tim Allen for a lot of my adult shenanigans, I especially loved the man bathroom with like 18 shower heads lol (a future project of mine haha)

Lis2323, thats a great looking sturdy setup. One year older than myself, and in better shape too lol. Thanks for sharing the idea.
 

Varty Yo

Well-known member
Joined
Sep 4, 2016
Messages
97
Location
Sask Canada
screenshot.jpg

So this is my design I've worked on to lay out my benches. The large 34" opening I will tuck my 2 welders into. Im torn on the space beside the 34" opening on weather to put a shelf there or leave it fully open. I had thought of maybe a small mobile welding cart i can tuck away under it. I dunno so many choices haha.
 
Last edited:

BoilermakerFan

Well-known member
Joined
Apr 17, 2006
Messages
2,188
Location
Indianapolis, Indiana
ALL: so maybe some member has heard the Tim Allen comedy where he put a V8 on a dishwasher to get the roses off his bride's plates? well any one built a motorized bench yet or maybe any in the plans. i bet this 3/4 HP Baldor motor would be a good start, but a 1.5 HP would be better.

:pimpflash Maybe...

Mine is still not 100% finished, but it has electric height adjustable legs:


20170612_194856.jpg


20170613_121425.jpg
 

nitroracer20

Well-known member
Joined
Feb 25, 2018
Messages
238
Location
NY
Finished this up recently! 1/2” plate top. Im on fence about adding dog holes for clamping.
 

Attachments

  • 0B942E6A-7018-481A-BEED-9858852381DD.jpg
    0B942E6A-7018-481A-BEED-9858852381DD.jpg
    82.8 KB · Views: 373
  • 7717197B-4AC6-4383-A1F1-89474D409B9B.jpg
    7717197B-4AC6-4383-A1F1-89474D409B9B.jpg
    157.5 KB · Views: 395
  • 74DA20CD-C7FE-4EAC-B033-F4651221C660.jpg
    74DA20CD-C7FE-4EAC-B033-F4651221C660.jpg
    121 KB · Views: 369
  • 8249A277-96AC-4C57-899B-C0EF61FEA0F8.jpg
    8249A277-96AC-4C57-899B-C0EF61FEA0F8.jpg
    159.1 KB · Views: 366
  • 67953941-47BF-4E3F-BB51-9BF4D449CC15.jpg
    67953941-47BF-4E3F-BB51-9BF4D449CC15.jpg
    143.9 KB · Views: 401
  • 33E60B3B-CFC9-4562-B990-051EA9B78DD8.jpg
    33E60B3B-CFC9-4562-B990-051EA9B78DD8.jpg
    147.1 KB · Views: 463
  • 0E2462B7-F952-4D88-852E-EC9917DA1D80.jpg
    0E2462B7-F952-4D88-852E-EC9917DA1D80.jpg
    123.1 KB · Views: 374

drivesitfar

Well-known member
Joined
Oct 23, 2013
Messages
35,988
Location
Pacific Northwest
Nitro: I can't see any casters on your nice looking bench. are there any? since it's going to be up against a wall using the edges to clamp stuff down might be enough cause I can't imagine you doing a lot of welding that needs all the extra holes with a bench that close to a wall. if it does have casters then your call, but use it for a bit and see how you like it.

BM: WOW that is PURDY. how do you you like how it works?
 

QwikKotaTx

Well-known member
Joined
Aug 10, 2013
Messages
967
Location
Seabrook, TX
I see some great benches but I would make sure you can get your feet under the front edge to avoid leaning over too far.

Sent from my VS987 using Tapatalk
 

drivesitfar

Well-known member
Joined
Oct 23, 2013
Messages
35,988
Location
Pacific Northwest
Qwik: great point. I also put down some 1.5 inch thick rubber gym type padding that is on top of the 3/4 inch rubber horse mats. at least standing for a few hours at the bench doesn't give me so much back pain. that said I'm still trying to solve my FSD (flat surface disease) so I don't have to spend 20 minutes clearing off the bench to do any work.

for you guys (and gals) that spend a lot of time in the kitchen you can buy rubber mats that look pretty decent and my bride has 3 of them in our kitchen to stand on that really helps her back and feet. they are about 2x3 foot and maybe an inch thick.
 

Attachments

  • WP_20161025_015.jpg
    WP_20161025_015.jpg
    123.3 KB · Views: 288
  • WP_20161025_010.jpg
    WP_20161025_010.jpg
    161.5 KB · Views: 266
  • Fein tool cutting 1.5 inch rubber 2x2.jpg
    Fein tool cutting 1.5 inch rubber 2x2.jpg
    149 KB · Views: 270

John in OH

Well-known member
Joined
Jun 2, 2007
Messages
2,444
Location
SE Ohio & Eastern Virginia
Variety is the spice of life … so, here is a little bit different spin on a work bench!

As, a secondary hobby, I have built a few old-style muzzleloading rifles. A lot of the work associated with building such a rifle is the shaping of the stock, fitting and inletting of components, engraving, and carving. While do-able, this work is rather difficult to perform on a traditional workbench/machinist vise arrangement.


To address this problem, I copied a “gun bench” designed and built by a fellow enthusiast. His was built out of cherry and is truly a beautiful work of art; however, mine is far more utilitarian and is built from salvaged 6x6 chestnut timbers sandwiched between Lowes building lumber and held together via 3/8” through-bolts. A simple pine 2x10 top finishes it off. Added a gun makers vise at one end, a rotary machinist vise at the other, an adjustable support arm and a movable tool tray.

Nothing fancy, but it will allow access to both sides of the entire rifle and should make for a more flexible work configuration.

IMG_5502 (Large).jpg IMG_5503 (Large).jpg
 

Dru

Active member
Joined
Jan 23, 2020
Messages
37
Location
Istria
This is the first bench for my new garage, and my first welding project at home.
Material is steel 30x50mm from my father in law's junk pile, top of the bench will be beech about 1.5" thick that my dad made for my workbench some time ago. It is not yet finished, primer was painted and I need to paint it with hammerschlag paint (metallic hammered effect). Any ideas how to protect the wood? Maybe oil it...?
 

Attachments

  • IMG_20200126_125713997.jpg
    IMG_20200126_125713997.jpg
    152.1 KB · Views: 200
  • IMG_20200126_125707903.jpg
    IMG_20200126_125707903.jpg
    150.7 KB · Views: 187
  • IMG_20200121_174123308.jpg
    IMG_20200121_174123308.jpg
    95.9 KB · Views: 186
  • IMG_20200126_173625.jpg
    IMG_20200126_173625.jpg
    90.3 KB · Views: 191
Last edited:
To avoid these ads, REGISTER NOW!

drivesitfar

Well-known member
Joined
Oct 23, 2013
Messages
35,988
Location
Pacific Northwest

dayid

Well-known member
Joined
Jun 13, 2010
Messages
84
A friend of mine moved into an apartment probably 10 or 12 years ago and didn't bring this 2x4 bench with him. So I got it with the little wood clamp on it.

Over the years I've added my main little Reed 23 vise, a bike stand/vise, an old drill-press vise that I use for random other types of clamping, wheels, and a few other things that have come and gone.

I've intended to build a larger, more focused workbench for years. In that time I've moved 4 times through 3 states and over 2000 miles - and everytime I try to come up with time/effort/good reason to make a new bench - I just don't have one.

Perfect example of things that "just work".
 

Attachments

  • IMG_2450.jpg
    IMG_2450.jpg
    154.2 KB · Views: 513

lis2323

Well-known member
Joined
Dec 25, 2016
Messages
3,234
A friend of mine moved into an apartment probably 10 or 12 years ago and didn't bring this 2x4 bench with him. So I got it with the little wood clamp on it.


Over the years I've added my main little Reed 23 vise, a bike stand/vise, an old drill-press vise that I use for random other types of clamping, wheels, and a few other things that have come and gone.


I've intended to build a larger, more focused workbench for years. In that time I've moved 4 times through 3 states and over 2000 miles - and everytime I try to come up with time/effort/good reason to make a new bench - I just don't have one.


Perfect example of things that "just work".


Nice[emoji481]. You are right. If it works don’t mess with it !
 

BoilermakerFan

Well-known member
Joined
Apr 17, 2006
Messages
2,188
Location
Indianapolis, Indiana
Sorry guys, for some reason I didn't get a notification until today.


That is going to be a really sweet work table. Would you mind sharing your source for the legs?

They are Linak height adjustable table/desk legs. Bought them off eBay as a set when I discovered who made them at a customer of mine years ago. You have to have the controller/PSU for the legs you buy. Very hard to mix-and-match since the controllers are programmed. Each of those legs is rated for 800N of lifting force IIRC. I know all 3 can lift over 500lbs including the weight of the top. My top is a beast, weighs around 200lbs.

Don't bother with the small hospital bed actuators. Not enough stroke or force.

Hmmm. Must be a Purdue EE/ME dual major! (M81)

Close! Started out in ChemE. Switched to Tech, but I am a dual degree; Industrial Distribution and Industrial Tech: ID/IT '96. Ind. Tech. was hands-on from all the major fields: Const. Tech, TG, EET, MET, IT...


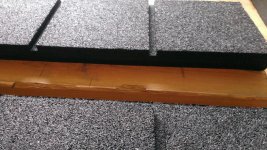
I like that top material! Is that hickory by chance?

Yep, the top is unfinished hickory 3/4" T&G flooring from Lumber Liquidators. I have solid 1x6 hickory for the trim on the sides. I'll dig up the pics with the unfinished trim on it.


IMG_20171104_003128.jpg


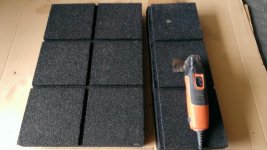
I'm putting T-Track into the top, but I haven't routed the grooves for it yet:


20180204_190130.jpg


BM: WOW that is PURDY. how do you you like how it works?

I love it. The main reason it's still not finished and moved into my basement is because I keep using it in the garage to complete or build other projects. Makes a heavy man lift too if I'm feeling particularly lazy. It's going to be my multi-hobby work table/bench. I'll build different stations to attach to the track for my main hobbies. I'll have a generic, sacrificial Masonite top for it too to protect it when I'm using it for any home improvement projects in the house.


Here it is in use when I built the center bookcase for our finished basement. I still have two more smaller, taller ones to build for each side.


20180527_230422.jpg


20180527_230504.jpg


20180528_195322.jpg


20180529_205435.jpg


I'm pretty sure there a lot more pictures in my Killing Time thread. I can't remember if i linked a video of it running in my thread or not.


And here is the internal framework of the top. All out of salvaged 2x4s from my old employer. Bottom skin is 3/4" maple ply. Top skin is 3/4" sanded A/B and the hickory plank. It's about 5.25" thick so the 1x6 boards are perfect for the trim.

IMG_20161031_171432.jpg
 
Last edited:

Rewind97

Well-known member
Joined
Feb 15, 2013
Messages
1,549
Location
Mississippi
And here is the internal framework of the top. All out of salvaged 2x4s from my old employer. Bottom skin is 3/4" maple ply. Top skin is 3/4" sanded A/B and the hickory plank. It's about 5.25" thick so the 1x6 boards are perfect for the trim.

IMG_20161031_171432.jpg

The internal framework layout seems odd to me any reason for the way you did it?
 

drivesitfar

Well-known member
Joined
Oct 23, 2013
Messages
35,988
Location
Pacific Northwest
Rewind: good question and my guess is because BM said he used SCRAPS from his jobs which might mean he used the pieces he had available. or maybe it's engineered too?

BM: how much are those legs/motor rated for since you mention you are using it sort of as a lift table too?
 

Rewind97

Well-known member
Joined
Feb 15, 2013
Messages
1,549
Location
Mississippi
Rewind: good question and my guess is because BM said he used SCRAPS from his jobs which might mean he used the pieces he had available. or maybe it's engineered too?

BM: how much are those legs/motor rated for since you mention you are using it sort of as a lift table too?

"Each of those legs is rated for 800N of lifting force IIRC. I know all 3 can lift over 500lbs including the weight of the top. My top is a beast, weighs around 200lbs."
 

QwikKotaTx

Well-known member
Joined
Aug 10, 2013
Messages
967
Location
Seabrook, TX
Qwik: great point. I also put down some 1.5 inch thick rubber gym type padding that is on top of the 3/4 inch rubber horse mats. at least standing for a few hours at the bench doesn't give me so much back pain. that said I'm still trying to solve my FSD (flat surface disease) so I don't have to spend 20 minutes clearing off the bench to do any work.


for you guys (and gals) that spend a lot of time in the kitchen you can buy rubber mats that look pretty decent and my bride has 3 of them in our kitchen to stand on that really helps her back and feet. they are about 2x3 foot and maybe an inch thick.
Definitely agree on the mat. I have a kitchen version with holes in it for restaurants. I have modified my bench and gotten rid of the cantilevered design as you guys recommended. Working on shelving and drawers. Will post pictures when done but it may be a while. Still doing insulation and OSB on the walls.

Sent from my VS987 using Tapatalk
 

dbowl79

Member
Joined
Jan 14, 2020
Messages
6
Location
Columbus, OH
Newbie here and love the tips / advice on this thread! I stole some workbench build advice from the "tube" and slapped together the following workbench out of prime 2x4's and a 3/4" sanded birch ply top. After reading some of the other posts, I applied some Boiled Linseed Oil (BLO) to the top surface of the plywood and painted the posts / legs with Valspar exterior porch & floor paint.

I'm now at the point where I need to make a decision on whether or not to glue or screw the 3/4" bench top to the base, or is it best to do both? I'll have a light-duty bench vise on the end furthest from the tool chest and I also have 6, 3" x 3/8" Lag Bolts screwed into the wall studs for support. From what I can tell, the base isn't going anywhere, but I need to decide what the best way is to secure the top to the base. Glue seems like more of a "permanent" solution and I'm concerned it may be a pain in the rear should I have to remove the top at some point down the road.

Any advice? Comments / Feedback? Thanks!
 

Attachments

  • Bench_3.jpg
    Bench_3.jpg
    78.8 KB · Views: 536
  • Bench_2.jpg
    Bench_2.jpg
    82.9 KB · Views: 468
  • Bench_1.jpg
    Bench_1.jpg
    91.8 KB · Views: 494

dbowl79

Member
Joined
Jan 14, 2020
Messages
6
Location
Columbus, OH
IMHO........you should just screw it down for the very reason you mentioned. Looks good BTW!!

Thanks Rewind! It was fun learning and better yet, gave me an excuse to get out of the house and test out the new miter saw! The hardest part (and perhaps most important) was getting 'er level so my guests don't spill their beers!

I'm going to throw some Howard Feed-n-Wax on 'er and give it hell! Any concerns with 2 1/12" decking screws and vise torque on the bench top?

Thanks!
 

crazyj7012

Member
Joined
Jan 18, 2020
Messages
6
Location
Arkansas
Here is the bench I built a couple years ago, the drawers are from an old dresser, with some drawer slides on them. And I have my most used dewalt stuff hung in PVC, and chargers next to it. Then on the peg board I have some wrenches, pliers, screwdrivers, and a nut and bolt bin. The vise is a rock island 574 that I recently restored.20200128_110203.jpeg20200128_110217.jpeg20200128_110226.jpeg

Sent from my SM-N970U using The Garage Journal mobile app
 

atch

Well-known member
Joined
Apr 4, 2006
Messages
842
Location
Columbia, Missouri
Thanks Rewind! It was fun learning and better yet, gave me an excuse to get out of the house and test out the new miter saw! The hardest part (and perhaps most important) was getting 'er level so my guests don't spill their beers!

I'm going to throw some Howard Feed-n-Wax on 'er and give it hell! Any concerns with 2 1/12" decking screws and vise torque on the bench top?

Thanks!
Are you saying you will attach the 3/4 plywood with 2 1/2" screws and then attach a vise or are you saying you want to attach the vise with 2 1/2" screws?

I'm assuming you meant the first. If that's the case then I say go for it. I have a 3/4" plywood bench top on a 2x4 frame with a vise attached on a corner. The plywood is attached with 8d nails about 12" on center. I didn't build it; it was here when I moved in 20 years ago. I've used and abused this thing for 20 years. The two dogs on the vise at the outer edge of the bench are attached with 3/8" x 3" lag screws that go down into the 2x4's. The third dog is bolted on with a 3/8" bolt through the 3/4" plywood. And like most vises there is no fourth dog.

EDIT: I don't know why the 3rd pic doesn't open in the thread. you can click on it to see it, though.
 

Attachments

  • CM vise 2.jpg
    CM vise 2.jpg
    117 KB · Views: 352
  • CM vise 3.jpg
    CM vise 3.jpg
    113.1 KB · Views: 339
  • CM vise 1.jpg
    CM vise 1.jpg
    19.4 KB · Views: 212

atch

Well-known member
Joined
Apr 4, 2006
Messages
842
Location
Columbia, Missouri
b-t-w; in the pix in my post above you can see some bench details that I'll explain.

1. the Sharpie mark with the number 1 above it is 1 foot from the bench corner. The other Sharpie mark between there and the vise is 6" from the bench corner. This is repeated the length of the ten foot bench with correct numbers at every other mark denoting how many feet from the corner. For anything that only needs to be cut to approximate length these marks are really handy. I also have marks on the shop floor from 0 to 20'.

2. the black stripe under the front of the vise is a magnetic strip. Very handy to hold the tools you're using instead of being in your way on the bench top. There are 2 more of them further down the front of the bench. I have the horizontal surface disease. Anything to keep some of the clutter off of the bench top is worthwhile. Think I'm joking? Look, at the lathe bench to the left.

3. something you can't see is the 4' power strip on the other side of the magnetic strip that has 12 outlets in it. Again very handy. note: the *********** strip on the end of the bench is used only to turn the radio on and off so I don't have to reach over the bench to the window sill to turn it on/off. In the pic there's something else plugged into it that's not there any more.

4. there's a compressed air outlet down on the bench leg. Before I put it in I had no idea how often I'd use it. The galvanized pipe attached to the wall above the end of the bench is there to hold the yellow plastic curly air hose that I use at the bench. Too bad it wasn't there when I took the pic.
 

HPRifleman

Member Emeritus
Joined
Nov 18, 2019
Messages
767
Location
Wayne, IL
Newbie here and love the tips / advice on this thread! I stole some workbench build advice from the "tube" and slapped together the following workbench out of prime 2x4's and a 3/4" sanded birch ply top. After reading some of the other posts, I applied some Boiled Linseed Oil (BLO) to the top surface of the plywood and painted the posts / legs with Valspar exterior porch & floor paint.

I'm now at the point where I need to make a decision on whether or not to glue or screw the 3/4" bench top to the base, or is it best to do both? I'll have a light-duty bench vise on the end furthest from the tool chest and I also have 6, 3" x 3/8" Lag Bolts screwed into the wall studs for support. From what I can tell, the base isn't going anywhere, but I need to decide what the best way is to secure the top to the base. Glue seems like more of a "permanent" solution and I'm concerned it may be a pain in the rear should I have to remove the top at some point down the road.

Any advice? Comments / Feedback? Thanks!

What are the dimensions of the worksurface?
 

Craig Balzer

Well-known member
Joined
Sep 21, 2005
Messages
854
Location
Colorado Springs
Last edited:

DetroitBird

New member
Joined
Jan 29, 2020
Messages
1
Location
Dearborn MI
Well this was my workbench up until about 3 hours ago. We're moving this weekend into a much nicer house but the garage is smaller by 6ft in width. Gonna have to adjust lol. Im gonna go with more of a "chilling " area this time. Im gonna start with insulation and sheeting the walls with osb. Thinking grey burgundy and black theme. Some type of epoxy floor. I have access to lumber and siding. Maybe half osb half siding.?? I don't know. :headscrat:confused:
 

Attachments

  • 20200128_211143.jpg
    20200128_211143.jpg
    116.2 KB · Views: 524

BoilermakerFan

Well-known member
Joined
Apr 17, 2006
Messages
2,188
Location
Indianapolis, Indiana
The internal framework layout seems odd to me any reason for the way you did it?

It is odd... I needed framing under the legs for attaching them solidly into framing. Then I wanted framing under the 4 locations where the T-Track will be installed since I will have some higher forces on the track with jigs attached.

The tracks are only 4' long so I only boxed in that section. I originally intended to mount the PS and wiring inside the bench on the open side on the bottom. I'm not doing that now. I will set a 30" wide top tool chest on top of the bench on the open side without the tracks for my hobby tool and T-Track clamp storage.

I originally planned to build a hanging cabinet under the bench. I may still do that, but the chest on top is faster and easier.
 

QwikKotaTx

Well-known member
Joined
Aug 10, 2013
Messages
967
Location
Seabrook, TX

They also have a scratch and dent outlet. The last time I ordered there were not really any scratches on the pegboard but the mounting flanges were bent/distorted. Not really hard to straighten them back out. They also sell cheap accessories but they are just thrown in a box together and get scratched up. I did not care as the price was so much lower than Amazon, etc.

https://cheappegboard.com/copy-of-8-pack-of-pegboard-scratch-dent-wall-control-16in-w-x-32in-t-blue-metal-pegboard/
 
To avoid these ads, REGISTER NOW!
Top Bottom