To avoid these ads, REGISTER NOW!

"Limitless Garage" 21'x25' Detached

BBSkylark

Well-known member
Joined
Nov 9, 2013
Messages
93
Location
Niagara Region, Ontario
Hi there,

New to the forum and to garage ownership, I just took possession of my first home last Friday and finally have a space to let my imagination run wild.

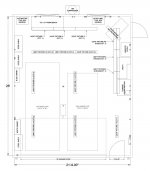
To start out its a 21' wide by 25' deep 8.5' tall detached garage with a block foundation and a poured concrete slab. Right now I am working with bare 2x4 walls with minimal wiring and one 60w light bulb in the ceiling (along with the garage door opener light).

It's got good bones and a clean slate for me to build this into a dream garage for myself. There is so much to learn about lighting, insulating, wiring, flooring.... The list goes on. (This is where I need planning help from you guys)

Plans are to wire roughly 4-6 20amp outlets on each wall and I was thinking of running 8-10 twin bulb 4' T8 lights.

The garage currently has a 30 amp circuit brought into it out of the house but I have plans to update the house to a 200 amp service and bring a piggy panel with a 100 amp breaker into the garage from that. :shocking: Specialty tool's that need to be fed are a 220V Mig Welder, bench top lathe and hopefully soon 60 gallon 5+hp air compressor and in the future I plan on getting a TIG welder. Heat wise I still do not know what to do but my house is forced air NG.

I really do not know what to do with flooring as it seems to have some pretty good cracks all the way around and has heaved a little bit in the center, it’s not too bad but I am open to solutions.

Now what the garage will be used for, it’s going to be my toy shop/build space. I am really into car's and snowmobiles.

I don't have very good pictures right now but here are a few for starters.


A few pictures of the projects that will live inside.


I can't wait to see what the outcome of this space will end up being! Not having a garage for a year has been driving me crazy :willy_nil

Thanks for looking!! :beer:
 
To avoid these ads, REGISTER NOW!

dubber

Well-known member
Joined
Dec 31, 2012
Messages
5,326
Location
Canada's Capital
Congrats on your first house. That's an awesome bare bones project to start. Looks like you also have a shed behind which is crucial to help you maximize the space inside here. My suggestion is do a bunch of reading on this site. Its such a wealth on solid information and is chalk full of awesome ideas fresh for the poaching. Good luck!
 
OP
B

BBSkylark

Well-known member
Joined
Nov 9, 2013
Messages
93
Location
Niagara Region, Ontario
Thanks for the welcome :beer:

Well I have been doing some more planning for the garage and finally put together an overall plan of how I would like to see the outcome and a general synopsis of a electrical/lighting plan.

Here is my conceptual design. I would like some feedback especially regarding the electrical/lighting portion. I have been doing a lot of reading regarding designing an efficient and effective space for myself but let me know what you think :) (Attachment at bottom of post)

The lights I am looking at using are "Canarm" 48" T8 Fixtures with 32W bulbs. I can get these fixtures for around $22 each (on sale currently from $45). Is this a good deal? They do not include bulbs but are -17 degrees C rated and energy star rated. Here is the link to the manufactures specs.

http://www.canarm.com/Residential/Residential_Lighting/Fluorescent/FW8482EE
http://www.canarm.com/UserFiles/Documents/Product/Cutsheet_FW8482EE.pdf

I would really like some feedback regarding the electrical as I am planning on buying all of this within the next few days (everything is on sale). I feel I have a pretty good plan but am open to any suggestions.

Here are some photo's of the garage itself in its current shape.

P1130755.jpg


P1130758.jpg


P1130756.jpg


P1130753.jpg


P1130752.jpg


Anyway's that's it for now... Hopefully I will have some time to dig into it and purge all the junk that was left by the previous owner!

*edit*
If anybody knows how to upload a larger file please let me know because you can barely read the attachment and it is at the size limit... I have it both in JPEG form and PDF form.
 

Attachments

  • Garage Layout Version 1 - Copy (2).jpg
    Garage Layout Version 1 - Copy (2).jpg
    132 KB · Views: 423
Last edited:
OP
B

BBSkylark

Well-known member
Joined
Nov 9, 2013
Messages
93
Location
Niagara Region, Ontario
So my basement renovation has been taking up most of my time but this past weekend I had a little bit of time to work on the garage. Something did not look right in the rafters of the garage and upon further inspection and consulting some structural engineers a beam was required to run down the center to help distribute load.

So I built a 3 ply 2x6 beam and ran it down the center of the garage tying the 2x4's into it. I can say what a difference, while leveling the beam and rafters the entire ceiling height raised roughly 4" in the center of the garage. Put the new structure through some testing of my own and it passes my inspection :thumbup:.

On the electrical end I ended up having my house main panel changed out with a new 100Amp Square D QO panel. I have decided that at the time being I will only need a 60 amp service to the garage and am looking for some 6/3 wire I can run in my existing conduit. I also ended up buying 11 of those T8 twin bulb lights that will be installed next (hopefully in the near future). Right now I am using two 150W equavilent CFL bulbs that have made a world of difference.

IMG_1260.jpg
]

IMG_1253.jpg


IMG_1265.jpg


So not a crazy amount of progress but it's something :beer:
 
Last edited:

clutch93

Well-known member
Joined
Jan 10, 2011
Messages
373
Location
Sacramento
Very cool workspace you have and SUPER nice rides! As soon as I saw the frame I knew Lemans or GTO, also a huge fan of subies! Congrats and good luck with the shop!
 

clutch93

Well-known member
Joined
Jan 10, 2011
Messages
373
Location
Sacramento
Thanks for the kind words :) But it's not a Pontiac... Its a 1970 Buick GS (all in the same family though "A Body's"). One day that thing will get done.

Whoops! my bad, I guess it's been too many years since I sold my Lemans, i've forgotten exactly what it looked like. Love the Buicks too, any A Body is cool in my book.
 
OP
B

BBSkylark

Well-known member
Joined
Nov 9, 2013
Messages
93
Location
Niagara Region, Ontario
So not much got done this weekend (installed new basement windows on the house) but I managed to spend a little bit of time on the garage Sunday placing some light fixtures up. I think I am going to be buying two additonal ones and adding them in between the ones that have been put up. This will be my work bench area and where most of the underhood work will happen on the cars. It will bring my total to 13 fixtures (26 4' F32T8 bulbs). Or should I skip that and just add "task lighting" attached to the bench or lower down on the bench?

IMG_1343.jpg


Hoping for some midweek progress this week.
 

jsherid1

Well-known member
Joined
May 28, 2009
Messages
1,272
Location
Lucas, TX
Task lighting is probably the next logical thing to do. One other thing that will help with overall light levels is drywall/osb. When I insulated and drywalled my garage in Michigan that was what seemed to make the biggest difference in interior brightness. The wood walls and open ceiling seemed to absorb every lumen before I did it!
 
OP
B

BBSkylark

Well-known member
Joined
Nov 9, 2013
Messages
93
Location
Niagara Region, Ontario
Thanks for the tip, do you guys suggest OSB or Drywall? I would think drywall would look alot better but can't really picture how OSB would come out after painting.

The plan is to get the lights going then wire all my outlets and run my new 60 amp service line from the main panel. Then Insulate/cover up the walls. The roof will be very last for me to seal up.
 

BikerDad

Well-known member
Joined
Apr 24, 2014
Messages
975
Location
Utah
Thanks for the tip, do you guys suggest OSB or Drywall? I would think drywall would look alot better but can't really picture how OSB would come out after painting.

The plan is to get the lights going then wire all my outlets and run my new 60 amp service line from the main panel. Then Insulate/cover up the walls. The roof will be very last for me to seal up.

OSB looks like **** after painting. If you're going to sheath the walls (a good idea), either go with drywall, or if you want to easily be able to hang stuff anywhere, use plywood or even better, slatboard. OSB isn't actually very strong, so any medium to heavy stuff should still be anchored to studs.
 
OP
B

BBSkylark

Well-known member
Joined
Nov 9, 2013
Messages
93
Location
Niagara Region, Ontario
Thanks for the tips, I was skeptical over the look of OSB once painted. I think I am going to go with a layer of plywood at working height so I can screw cabinets and what not into it. More than likly drywall everywhere else. Thats a way's away though. Still have to work out my electrical.
 
OP
B

BBSkylark

Well-known member
Joined
Nov 9, 2013
Messages
93
Location
Niagara Region, Ontario
So I have been plugging away at the electrical in the garage and finally hung all my lights and wired them up. I also got my new Square D QO 60 amp subpanel hung and ran temporary wiring from my existing garage service so the lights would work.

Next step is terminate my garage door opener circuit and place atleast two 20 amp circuits (empty double gang box by the panel) so I can have power when taking out all the existing mish mash electrical. Then comes my new 60 amp feed from the house. I have everything except the conduit I need for the indoor portion of my run.

The lighting is set up with two zones wired on one circuit. There are 11 twin tube 48" fixtures with diffusers. Each fixture has two 4100K 32W bulbs. I am so happy on how much light I now have in the garage.

Here are some pictures.

IMG_2321.jpg


IMG_2323.jpg


IMG_2322.jpg


I am sure it will get even brighter once it is sheeted and painted (two tone with white being the upper tone).

Let me know what you think.
 
OP
B

BBSkylark

Well-known member
Joined
Nov 9, 2013
Messages
93
Location
Niagara Region, Ontario
So a little bit more of an update. I have been able to purge, re-organize and work away at the electrical in the garage over the past month or so. Currently I am working on installing my outlets (20 amp on 2 circuits) around the garage. I sourced a work bench, spare tool box that I had to massage back into working condition and a parts cleaner.

Here is the current state of the garage. Hopefully by the end of August the new electrical service will be in (take out that makeshift temporary power arrangement I currently have) and my wiring will be wrapped up. As you can see in the pictures (one with my car in the garage) I have bat insulation ready to hit the walls when the wiring is completed.

IMG_3066.jpg


IMG_3064.jpg


IMG_3085.jpg
[/URL]

IMG_3057.jpg


IMG_3080.jpg


I have come a long way this summer with this thing but have even further to go. Love seeing my dream come to life.
 
To avoid these ads, REGISTER NOW!

Trey T

Well-known member
Joined
Aug 3, 2011
Messages
3,749
Location
Houston, TX
Congrats!!

I suggest you create an attic space for storing seasonal tools and equipment. That task requires beefing up your girder and joists.

I have a garage similar to yours and that's what I'm doing with mine; I'm installing pine T&G boards above the joist and to obtain the exposed beam look. I'm starting today!
 
OP
B

BBSkylark

Well-known member
Joined
Nov 9, 2013
Messages
93
Location
Niagara Region, Ontario
Trey T - I am for sure making an attic space above to put all my seasonal sports equipment and abundent car parts I still have stashed at my parents place. One of the main reasons for installing the beam was to carry the load of anything placed in the rafters. Its a pretty small area with very low head room but it will be great for storage. Having exposed beams would look great! I am planning on a white tin ceiling for my space but that will be one of the last things I knock out (I know insulation up there should come first but I am working with what I have right now).

Sean - Car is a 1970 Skylark that I am making a GSX recreation out of. It will be a Stage 1 car with an M21. Motor currently is a 0.30 over 455 with iron heads, 10:1 running an old Poston SP2 cam and a 4150 style 950 carb. It will be a fun street motor with tons of torque. Right now I am getting the 1/4's done and should be in assembly mode within a year (I hope). I always dreamt of going "Pro-Tour" with it so thats where it is headed. I have C6 vette brakes and constucted my suspension with parts from hotchkis, UMI and Meteco. Was going to do the 5 speed/6 speed thing but the muncie parts fell into my lap at way too good of a deal. As you can tell from my other vehicle(s) boost is in my blood and when the car is "done"... The second phase will start to show its shape ;)

Thanks for the positive feedback everyone :)
 
OP
B

BBSkylark

Well-known member
Joined
Nov 9, 2013
Messages
93
Location
Niagara Region, Ontario
So, a little bit of an update.

The garage has taken a bit of a side step to basement Reno’s but I still have had some time to add some personal touches and keep it evolving.

One large step I tried to take was running my service feed to the shop. Unfortunately I found out the hard way my existing service is direct buried after stubbing into the ground and I won’t be able to run my new #6 wires until I dig a new trench in the spring time. On the bright side, now I have an excuse to run communications and gas to the garage at the same time :)

I have come to the conclusion that I won’t have it wired or insulated before winter so I thought I would put up some cabinets (post about these later) and signs in the meantime. I also figured out what to do with my flooring and ordered about 75% of my floor tile and laid it out.

I will let the pictures do the rest of the talking.


Garage14.jpg


Garage10.jpg


Garage9.jpg


Garage8.jpg
 

sean Buick 76

Well-known member
Joined
May 7, 2013
Messages
3,221
Location
Edmonton Alberta
Good progress! Regarding your walls, here is some input.... Like others are saying OSB is not the best option for painting. If you use plywood on the walls then you will want to use 3/4" if you want to hang cabinets and heavy stuff off of them.... The problem with 3/4" ply is the cost will be really high, and you really should hit the studs with all shelving and cabinet fasteners. I would use 1/2" plywood on the walls and just be sure to hit the studs when you secure anything to the wall.

Look into a NG furnace, I am really happy with ours.
 
OP
B

BBSkylark

Well-known member
Joined
Nov 9, 2013
Messages
93
Location
Niagara Region, Ontario
Thanks for the compliments, that’s a good call on the OSB board. I have pretty much ruled out OSB right now (would rather drywall myself). I am looking into the cost of doing the garage in 5/8" plywood but more than likely I am heading the drywall route. Too bad that won’t be until next year though. Also really like the idea of NG furnace in there. Originally I was going with electric heat but I guess some good things have come out of needing a new trench for that.
 

diggler306

Well-known member
Joined
Jan 25, 2012
Messages
227
Location
Saskatoon, SK
Nice project. Looks like you've got it at a nice leaving point for winter. Too bad you can't get it insulated before then but hey, that's life right. I spent 3 winters with an uninsulated garage (***** when you read garagejournal all day and just wanna work out there though!) I look forward to hearing how those lights hold up through winter. I've seen those fixtures and I'll be going the same route with the T8's so wondering how they'll hold up. Subscribed!
 
OP
B

BBSkylark

Well-known member
Joined
Nov 9, 2013
Messages
93
Location
Niagara Region, Ontario
Nice project. Looks like you've got it at a nice leaving point for winter. Too bad you can't get it insulated before then but hey, that's life right. I spent 3 winters with an uninsulated garage (***** when you read garagejournal all day and just wanna work out there though!) I look forward to hearing how those lights hold up through winter. I've seen those fixtures and I'll be going the same route with the T8's so wondering how they'll hold up. Subscribed!

I will for sure keep everyone updated through the winter and will let you know how they are holding up. So far I am really impressed with them.

BBSkylark, what brand flooring is that?

Its Ultralock Garage Tiling from Costco's website. So far I have been happy with it for the pricing.
 

ewang

Well-known member
Joined
Dec 9, 2009
Messages
75
Location
Central WI
What made you decide to add the 2x6 beam? We're the trusses sagging prior?
I ask because I'm rehabbing a shed (thread coming soon) that has homemade trusses that I'm concerned about once I add sheathing to the ceiling.
 

muddy tires

Well-known member
Joined
Jun 3, 2011
Messages
58
Location
Toronto, Ontario
SkiDoo! Where do you ride? I hit the New Liskeard area whenever I can.

I currently have an MXZ in pieces with a track swap half completed and a GSX waiting for the same treatment.
 
OP
B

BBSkylark

Well-known member
Joined
Nov 9, 2013
Messages
93
Location
Niagara Region, Ontario
What made you decide to add the 2x6 beam? We're the trusses sagging prior?
I ask because I'm rehabbing a shed (thread coming soon) that has homemade trusses that I'm concerned about once I add sheathing to the ceiling.

I used 2x6's for the beam vertically placed. It is 3 ply wide (3 2x6's) with staggered joints spanning the entire garage. The existing rafters then tied into this beam. Before I did this work the center of the garage was roughly sagging 4", however from the outside it looked normal.

SkiDoo! Where do you ride? I hit the New Liskeard area whenever I can.

I currently have an MXZ in pieces with a track swap half completed and a GSX waiting for the same treatment.

I ride mostly out of Oro-Medonte (My cottage is there). We go anywhere North, East, South or West from there. If there is snow I’ll be out on the trail.

Right now I am currently rebuilding the 800 out of my sled. It finally let go with 12,000 km on the clock.
 

HSpencer

ALLIANCE MEMBER
Joined
Nov 28, 2010
Messages
2,854
Location
South Central US
I think your garage is looking great! I especially like the matting in the last photos.
You have already done a great job on the lighting and arrangements. You are going to have a super shop. I like the first photos of the house, driveway and garage. I like that very much and I am sure your enjoying the home. Keep up the good work!!

Best Regards
Herb Spencer
 
OP
B

BBSkylark

Well-known member
Joined
Nov 9, 2013
Messages
93
Location
Niagara Region, Ontario
I think your garage is looking great! I especially like the matting in the last photos.
You have already done a great job on the lighting and arrangements. You are going to have a super shop. I like the first photos of the house, driveway and garage. I like that very much and I am sure your enjoying the home. Keep up the good work!!

Best Regards
Herb Spencer

Thanks for kind words Herb, I have taken a look at your space and it is absolutely amazing!

Well it has been a while since I have posted anything on here but progress (in my head) has been steadily going forward. The garage itself looks similar, however packed with material and tools from our basement Reno. It looks like the basement will be complete by April 2015 so I can switch focus to the garage once again.

A few new things have come around for the garage. For starters I acquired a large Lista cabinet, Lathe and working on a Milling machine. The machinery is currently set up for Euro 380V 3 Phase, however a couple new motors and VFD's should do the trick to allow me to run it off of single phase 220V.

Here is where the updates come in, I made three new potential layouts for equipment and storage in the garage and want to hear your feedback (click on the tabs below). With these changes, I decided a little bit more light was needed, it is reflected by moving two of my existing fixtures and adding three more 4 tube trough style T8 light fixtures. Everything is drawn to scale and hopefully the designs are legible enough.
 

Attachments

  • Feb 2015 Option A.jpg
    Feb 2015 Option A.jpg
    81.4 KB · Views: 149
  • Feb 2015 Option B.jpg
    Feb 2015 Option B.jpg
    82.5 KB · Views: 113
  • Feb 2015 Option C.jpg
    Feb 2015 Option C.jpg
    87 KB · Views: 114
OP
B

BBSkylark

Well-known member
Joined
Nov 9, 2013
Messages
93
Location
Niagara Region, Ontario
Well spring has sprung and my basement is finished. I finally have the OK to go back and work on my little slice of heaven.

On the May long weekend I finally tackled a real milestone and finished by 60 amp service feed to the garage. After two day's of digging and pulling my shop finally has the power I felt was "necessary". After completing this I have roughed in the 20 amp general outlets as-well.

Right now I am balancing making a tabletop and coffee/side tables for our basement and refurbishing a nice Delta table saw. Along with constant progress on the shop of course :thumbup:.

I'll post some pics shortly but it definitely has become more of a work space/staging ground for construction.

Here is a pic of the one cabinet that I cleaned up showing the old and new. Could not believe how well it came out in the end.

10f06248-eecb-4604-a83c-f0a93ba56c16.jpg


There should be more progress as the weeks come!
 
OP
B

BBSkylark

Well-known member
Joined
Nov 9, 2013
Messages
93
Location
Niagara Region, Ontario
The Buick is coming along steadily, it is right now in paint jail with the 1/4's being replaced. I am hoping to get the garage into an insulated and heated condition so when the car is done I can go full boar on it in the fall/winter.

I managed to rough in all my 110 wiring and finish terminating some of it (neon sign circuit) this weekend. Did a major clean up and finally got my garage back into a work space and not house reno dumping ground.

I picked up a floor model drill press last week that I am pretty excited about as well. Hopefully this weekend I will be bringing my Lista cabinet home from our machine shop at our cottage.

Here are some pics after finishing everything this weekend.

Garage%201.jpg


Garage%202.jpg


Garage%203.jpg


Here is my latest completed project from the shop. A rustic cherry wood tabletop for an entertainment unit in my basement.

Cherry%20Table%20Top.jpg


Enjoy!
 
To avoid these ads, REGISTER NOW!
Top Bottom