To avoid these ads, REGISTER NOW!

Little Fixit Shop

itstippy

Well-known member
Joined
Nov 30, 2014
Messages
98
Location
Madison, WI
EDIT
This thread is a reconstruction of my earlier Little Fixit Shop thread. The PhotoBucket fiasco destroyed the earlier thread, so I'm doing it over using Garage Journal as the image host. As such, I'm limited to seven photos per entry and I can't insert them into the text like before. They'll be thumbnail inserts at the bottom of each post. Also, all previous comment posts are lost.

Please hold off on comments until I get this thread rebuilt. I'll have to use multiple posts to get all the old text and pictures where they belong. Thanks.
/EDIT

This thread is dedicated to guys like me who don't have a big shop and a big budget, and can only look at the awesome shops on GJ and fantasize like a teenager looking at the Sports Illustrated swimsuit issue.

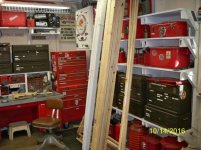
The structure is 22' deep and 20'wide. It's big enough to be a "squeezy" two-car garage, but the way it sits on the lot there's only room for one bay. One third of the space is taken up by a three season porch, currently utilized as a covered area to store heaps of "stuff". The garage proper consists of a bay 12' wide and 22' deep, and an alcove 8' wide and 8'deep.

I'd wanted my own garage since I was a wee boy, and when we bought this house in 1998 I was ecstatic to have a garage of my own. I still am. i grew up in a time and place where it was very common for men to have garage workshops. Someone who fixed their own stuff and maintained their own vehicle was not considered a "Do it yourselfer", but was merely a typical guy.

The shop has evolved over the years, and it's still changing. Here are some pictures from yesteryear:

1) Me in the alcove working on something, with my nieces goofing around. Look at that grin! I love my shop.

2) A good shot of the alcove

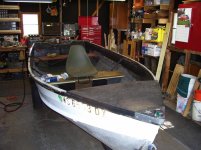
3) RatRod Boat under construction

4) The back of the bay

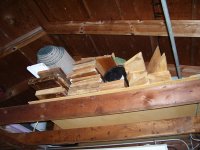
5) Overhead storage

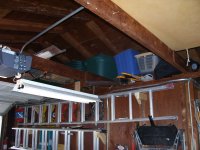
6) More storage, including water skis and a tote of Halloween decorations

 

Attachments

  • 208690_1573092661202_3882101_n (1).jpg
    208690_1573092661202_3882101_n (1).jpg
    110.9 KB · Views: 71
  • 100_0946.JPG
    100_0946.JPG
    112.9 KB · Views: 64
  • 100_0117.jpg
    100_0117.jpg
    143.4 KB · Views: 59
  • 100_0942.JPG
    100_0942.JPG
    106.3 KB · Views: 59
  • 100_0945.JPG
    100_0945.JPG
    91.9 KB · Views: 49
  • 100_0947.JPG
    100_0947.JPG
    93.4 KB · Views: 47
To avoid these ads, REGISTER NOW!
OP
I

itstippy

Well-known member
Joined
Nov 30, 2014
Messages
98
Location
Madison, WI
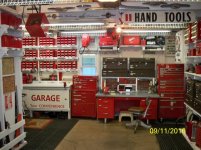
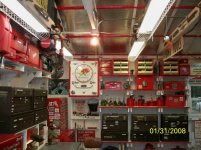
Here's the shop today. I didn't clean it up for the photoshoot, but you'll see how things have evolved over the years.
 

Attachments

  • 101_1313.jpg
    101_1313.jpg
    146.9 KB · Views: 60
  • 101_1312.jpg
    101_1312.jpg
    152.4 KB · Views: 62
  • 101_1311.jpg
    101_1311.jpg
    142.3 KB · Views: 60
  • 101_1310.jpg
    101_1310.jpg
    143 KB · Views: 61
  • 101_1309.jpg
    101_1309.jpg
    146 KB · Views: 67
  • 101_1307.jpg
    101_1307.jpg
    142.1 KB · Views: 71
  • 101_1308.jpg
    101_1308.jpg
    143.1 KB · Views: 68
OP
I

itstippy

Well-known member
Joined
Nov 30, 2014
Messages
98
Location
Madison, WI
People commented on the lunch boxes and other bins.

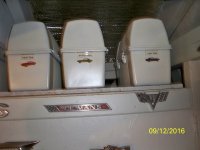
Both Alladin and Thermos sold millions of those black lunch boxes in the '60s - '70s. They're very durable with good latches and handles, made for blue collar guys to tote their lunch to the steel mill or construction site. Now I find them at yard sales for a quarter. I'm addicted to making "kits" and these lunch pails are perfect. For the shop I sprayed a coat of Zinser Bullseye 123 and then a coat of Plastikote to make them white.

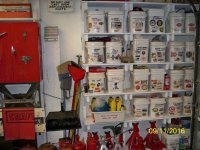
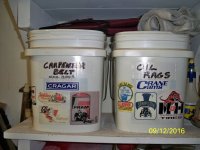
Same deal with the rectangular plastic buckets in a different picture. Our Kitty Litter used to come in these great, durable buckets (now it comes in cardboard boxes). I didn't like having my storage shelf look like the Kitty Litter aisle at FoodFlood, so I painted them white. Then I found someone's cool collection of old hotrod stickers online, copy & pasted them into Word, printed them on photo stock, cut them out and used spray adhesive to put them on the buckets. One final clearcoat, and good-to-go. I label them with a strip of white duct tape so when I change contents I can just slap on another strip.

Our coffee used to come in great steel coffee cans; now it comes in plastic containers. I had a couple dozen old steel cans full of stuff, so I painted them red and put magnetic labels on them. I'm always looking to reperpose good stuff (and get by cheap).

 

Attachments

  • 101_1318.JPG
    101_1318.JPG
    127.9 KB · Views: 23
  • 101_1319.JPG
    101_1319.JPG
    126.2 KB · Views: 26
  • 101_1316.JPG
    101_1316.JPG
    121.9 KB · Views: 24
  • 101_1315.JPG
    101_1315.JPG
    105.5 KB · Views: 25
OP
I

itstippy

Well-known member
Joined
Nov 30, 2014
Messages
98
Location
Madison, WI
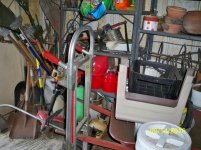
A lot comments on how clean and organized my shop is; I have a confession to make. You see, the garage has two primary functions: 1) A place for Mrs. Tippy to park her car, and 2) My FixIt shop. Missing from that list is 3) A place to store all the stuff that a guy normally stores in the garage. So just where IS all the "stuff"?

I built a ladder rack on the back of the garage to store the extension ladders. It's nice. I get a good mark for that.

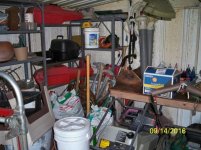
I have an incredibly ugly 12' X 12' steel shed. It desperately needs to be replaced by a bigger (and taller) stick-built, but for now it is what it is.
 

Attachments

  • 101_1323.jpg
    101_1323.jpg
    72.1 KB · Views: 17
  • 101_1322.jpg
    101_1322.jpg
    85.7 KB · Views: 19
  • 101_1321.jpg
    101_1321.jpg
    79.4 KB · Views: 19
  • 101_1320.jpg
    101_1320.jpg
    84.5 KB · Views: 19
  • 101_1329.JPG
    101_1329.JPG
    126.9 KB · Views: 19
  • 101_1324.JPG
    101_1324.JPG
    144.7 KB · Views: 20
OP
I

itstippy

Well-known member
Joined
Nov 30, 2014
Messages
98
Location
Madison, WI
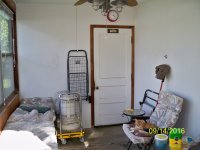
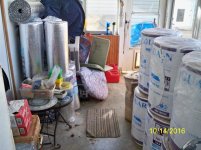
Then there's the three season room portion of the garage. So that's where I put that cat! I've been looking for Ringo.

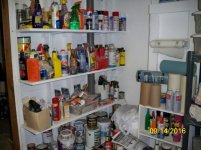
The temperature-sensitive consumables are stored in the basement. The shop gets well below zero degrees Fahrenheit in the winter, and up to 100 degrees in the summer.

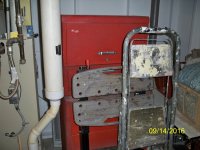
Of course there's other garage stuff stored in the basement also, Like my painting ladder and a cool old Kennedy roller box set I'll be refurbishing this winter.
 

Attachments

  • 101_1328.JPG
    101_1328.JPG
    137.6 KB · Views: 19
  • 101_1327.jpg
    101_1327.jpg
    71.3 KB · Views: 20
  • 101_1326.JPG
    101_1326.JPG
    133.7 KB · Views: 17
  • 101_1325.JPG
    101_1325.JPG
    108.4 KB · Views: 18
OP
I

itstippy

Well-known member
Joined
Nov 30, 2014
Messages
98
Location
Madison, WI
The Little FixIt Shop continues to evolve. A recent project has been to better insulate the place. As is my usual pattern, one project led to another so there are were other changes as well.

In the early days the shop was a very cold and dark place. The black Cellotex walls absorbed light like a black hole, and all attempts at heating went straight to the ceiling and out the open ridge vent. There was no insulation at all, and the old windows looked cool but acted COLD.

One summer I took everything in the shop and piled it into the middle of the bay, covered it with old sheets, bought two five-gallon pails of Zinser undercoat and two pails of cheap white topcoat, and went to work with a Wagner sprayer. Everything in the shop became white except the roof sheathing. I had light!

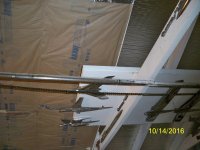
The next summer I bought a dozen rolls of Reflectix and a pile of 1X4s, ripped a bunch of 3/4" square and 8' long strips, and insulated the ceiling with Reflectix hanging between the rafters 3/4" below the roof sheathing. That gave outside air a path from the eves soffit to the ridge vent but kept the garage interior sealed off. It worked - I had heat! Not very effective heat since all the walls were still uninsulated and the ceiling only had a thin 3/8" layer of Reflectix between it and Mother Nature, but when I needed to work on something in the Winter I could heat the shop enough to get the job done.
 

Attachments

  • 101_1332.JPG
    101_1332.JPG
    129.5 KB · Views: 18
  • 101_1334.jpg
    101_1334.jpg
    72.1 KB · Views: 22
To avoid these ads, REGISTER NOW!
OP
I

itstippy

Well-known member
Joined
Nov 30, 2014
Messages
98
Location
Madison, WI
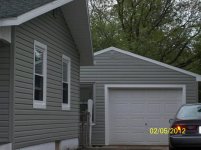
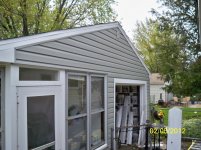
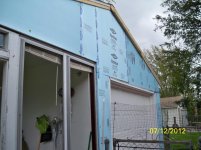
Four years ago we had the house resided, new windows, and dense pack cellulose put into the walls. I had the garage sided as well, with a layer of 1" polystyrene underneath. Also new double-pane windows.
 

Attachments

  • moms 90th birthday_02.jpg
    moms 90th birthday_02.jpg
    137.9 KB · Views: 15
  • 101_0886.jpg
    101_0886.jpg
    143.2 KB · Views: 15
  • 101_1092.jpg
    101_1092.jpg
    144.9 KB · Views: 14
  • 101_1014.jpg
    101_1014.jpg
    145.3 KB · Views: 14
  • 101_1087.jpg
    101_1087.jpg
    140.4 KB · Views: 15
  • 101_1009.jpg
    101_1009.jpg
    148.8 KB · Views: 15
  • 101_0900.jpg
    101_0900.jpg
    144.9 KB · Views: 16
OP
I

itstippy

Well-known member
Joined
Nov 30, 2014
Messages
98
Location
Madison, WI
At some point I'd put a plywood "floor" in above the screen porch, and had the foresight to insulate with 6" fiberglass batts underneath. So now the weak points were the 16' wall between the screen porch and the garage bay, the 8' wall between the screen porch and the garage alcove, and the inadequate ceiling insulation. It still took a LOT of Kerosene and electricity to heat the shop - too much to heat it very often as it was a costly luxury.

Well, as I mentioned earlier, I retired last year and I wanted to be able to spend a lot more time in the shop. Time to finish the job!

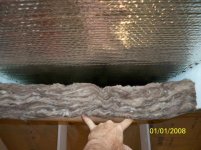
I bought a bunch of R13 Kraft-faced mineral wool insulation, Reflectix, and lumber. I modified how the existing Reflectix met the walls to create "pockets" for my insulation but still retain the air flow from the soffit to the ridge vent. I don't want moisture problems. I installed the Kraft-faced insulation between the 2X6 rafters, which left a 3/4" air gap between the existing Reflectix and the mineral wool insulation. This allows the radiant power of the Reflectix to do its thing. Then I put a new layer of Reflectix over the Kraft-faced, and installed battens to keep everything tight and ship-shape. Hundreds of staples hold first the insulation and then the Reflectix - maybe thousands - but the battens cover the seams and make it look tidy.
 

Attachments

  • 101_1342.jpg
    101_1342.jpg
    87 KB · Views: 23
  • 101_1343.jpg
    101_1343.jpg
    95 KB · Views: 20
  • 101_1333.JPG
    101_1333.JPG
    123.7 KB · Views: 17
  • 101_1338.jpg
    101_1338.jpg
    69.3 KB · Views: 17
  • 101_1335.jpg
    101_1335.jpg
    79.6 KB · Views: 16
  • 101_1331.jpg
    101_1331.jpg
    80.3 KB · Views: 16
  • 101_1330.jpg
    101_1330.jpg
    80.6 KB · Views: 16
OP
I

itstippy

Well-known member
Joined
Nov 30, 2014
Messages
98
Location
Madison, WI
During this process I had to get at the ceiling, obviously. Above the screen porch was a 16'X8' plywood "floored" area perfect for jamming **** into. Above the alcove was a 6'X6' "storage area" made of tag board that I'd reinforced with plywood. Filled with stuff. Above the back of the bay was another similar "storage area", this one 8'X8'. I had so much junk stored up in the rafters it was incredible. Nothing was accessible except the stuff on the edges. As more "stuff" accumulated, the existing "stuff" got pushed back further and further out of reach. This had been going on for over 15 years. Egad.

I got all that stuff out of there, hauled a bunch to the dump, gave a pile of it to a friend who does art welding using old tools & implements, and stored a heap (too much, I'm afraid) in my big garage an hour away. I have literally got a doxen 5-gallon pails full of old tools stored out there. Way too good to get rid of, but way too many to use. I continue to accumulate, too.

Anyway, above the screen porch are now big metal Lyman bins with labels as to what's in them. There's a 2'X4' shelf above the alcove and another above the bay. That's it. The shop is much more open and pleasant.
 

Attachments

  • 101_1344.jpg
    101_1344.jpg
    88.3 KB · Views: 20
  • 101_1346.jpg
    101_1346.jpg
    83.1 KB · Views: 19
OP
I

itstippy

Well-known member
Joined
Nov 30, 2014
Messages
98
Location
Madison, WI
I also took care of the uninsulated walls between the screen porch and the shop. I cleaned out the porch, did some creative work around the door and corners, and installed 1" R6 foil-faced polyiso sheets and some panelling. The existing T1-11 siding was only R0.6, so I increased the R value by over 10X. I also made a nice spot for my saws, router, etc. so they're handy and I don't have to drive an hour away to the big garage, load them up, drive them home and use them, then haul them back to storage. The saws usually reside under a thick old comforter to protect them from condensation and prying eyes. I took the cover off just to take the picture (smile for the camera!).

The difference is remarkable. I can heat the shop for 3 days on one 2.5 gallon jug of kerosene. I only use the 220V overhead electric heater and the big kerosene heater to bring it up to temp in the morning - maybe 20 minutes. After that I run the little kerosene heater on its lowest setting, and I sometimes have to shut it down because its too warm in the shop. And I like to be warm.

I'll never get the shop insulated enough to heat 24/7, what with puny wall insulation (by home standards), a drafty bay door, and a cement slab floor. However, I can now heat it when I want to without going broke on fuel costs, choking on kerosene fumes, and listening to the roar of the overhead electric. I'm ready for the coming Wisconsin winter!
 

Attachments

  • 101_1341.JPG
    101_1341.JPG
    143 KB · Views: 19
  • 101_0764.jpg
    101_0764.jpg
    131.8 KB · Views: 23
OP
I

itstippy

Well-known member
Joined
Nov 30, 2014
Messages
98
Location
Madison, WI
That's as best as I can do for recreating the Little Fixit Shop thread. I'm sad to lose all the nice comments and input I got on the original thread. PhotoBucket wasn't a very resposible member of the corporate community to leave all us forum members stranded like they did.

There have been more changes since my last post, so I'll get some fresh pictures up soon. We're getting a new concrete driveway in three weeks, which will be a HUGE improvement over the lunar landscape of broken asphalt we have now.

Time to get off this computer and get out in the shop!!!
 
To avoid these ads, REGISTER NOW!
Top Bottom