To avoid these ads, REGISTER NOW!

Long overdue garage project

Mussel Kar

Active member
Joined
Nov 13, 2008
Messages
38
I started this in 05 and it has been a long journey. This is from a blog I had on a car forum.


PIMP MY GARAGE

Its time for an extreme makeover for my garage. It is extra deep but also filled with garden and yard tools, mowers, and just plain ol junk. I needed to assemble my own Extreme Makeover Team (EMT), yours truly as the leader. I hope to finish the site work and close it in before winter, hopefully before Dec. Almost every sq ft of my house and yard will be going through this Extreme Makeover, but I will only bore you with the garage.

So sad looking with peeling paint.
oldgfront.jpg


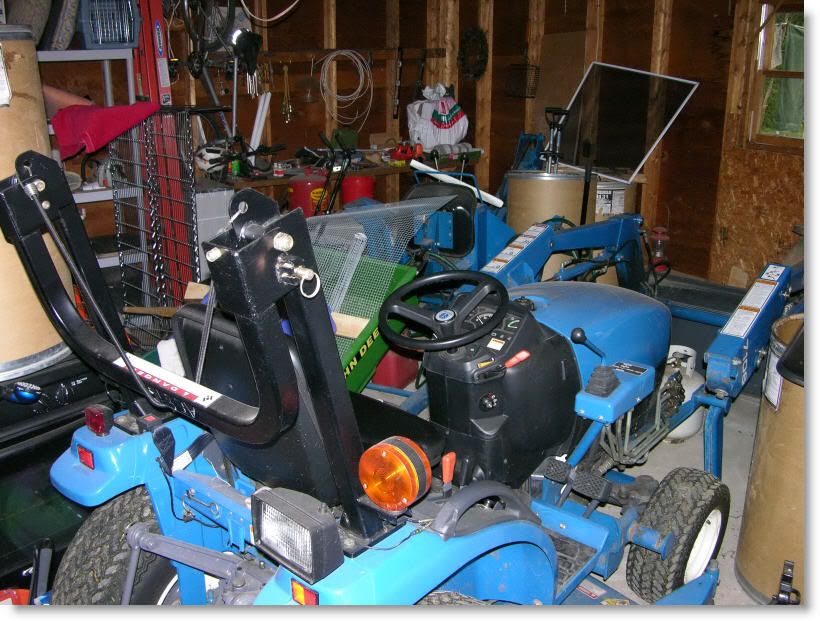
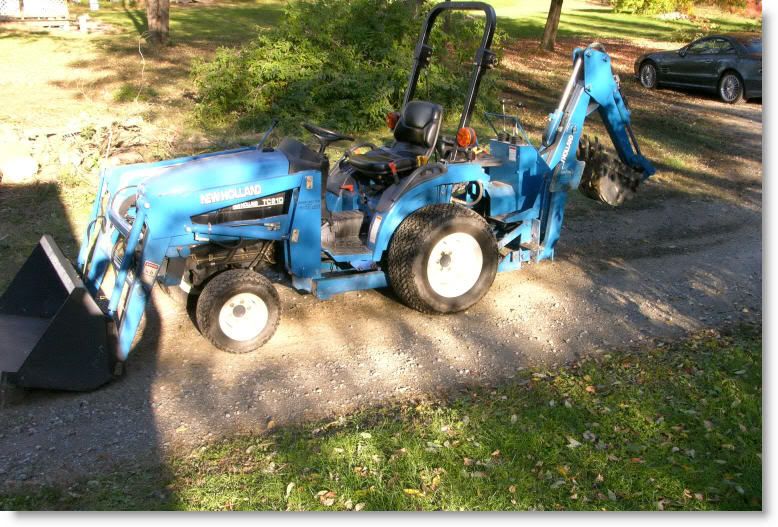
Jammed with stuff. That’s my idea of a home lawn mower, a New Holland TC-21D Compact Tractor with a 52” belly mower (removable). Got a 4’ front end loader and a backhoe attachment too. Wifey gets very nervous when the backhoe attachment is on, with good reason.
oldleftinside.jpg


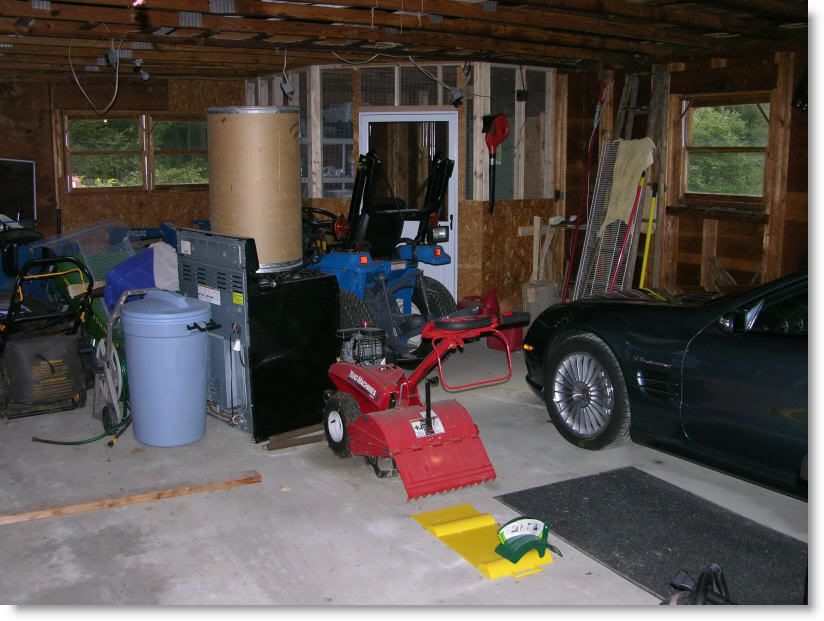
Another view of more ****.
oldrightinside.jpg


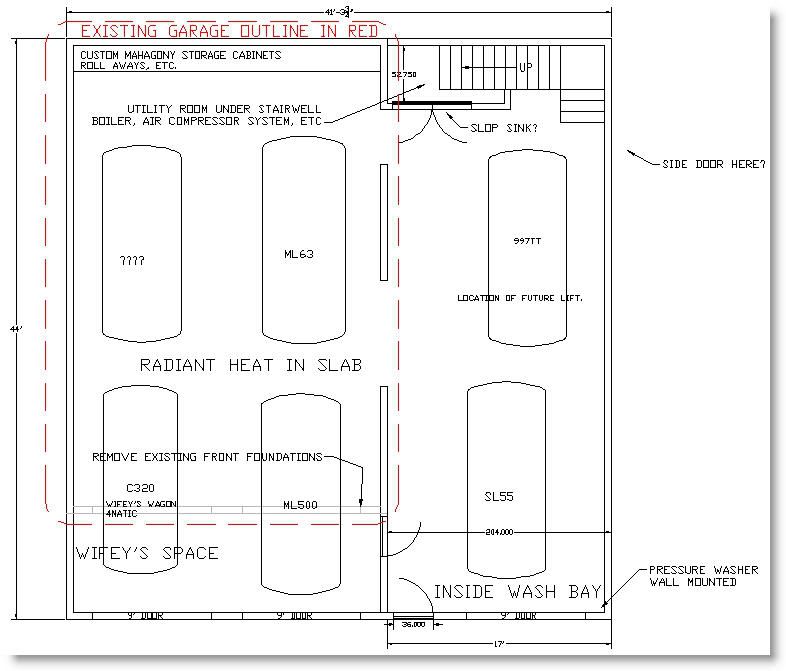
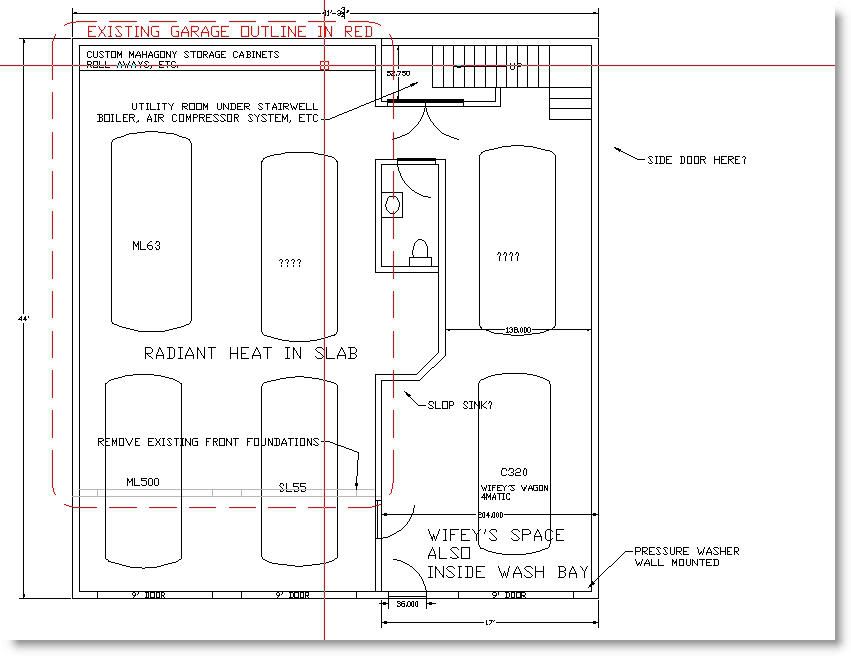
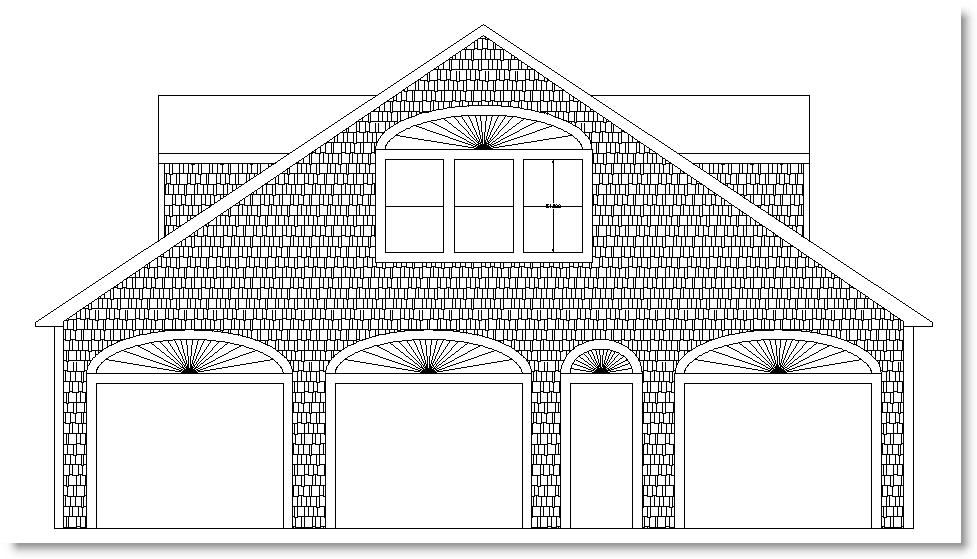
The new floor plan drawn by the EMT Leader, me.
GFLOORPLAN.jpg


And a front section view.
GFRONTSECTION.jpg


gshed.jpg


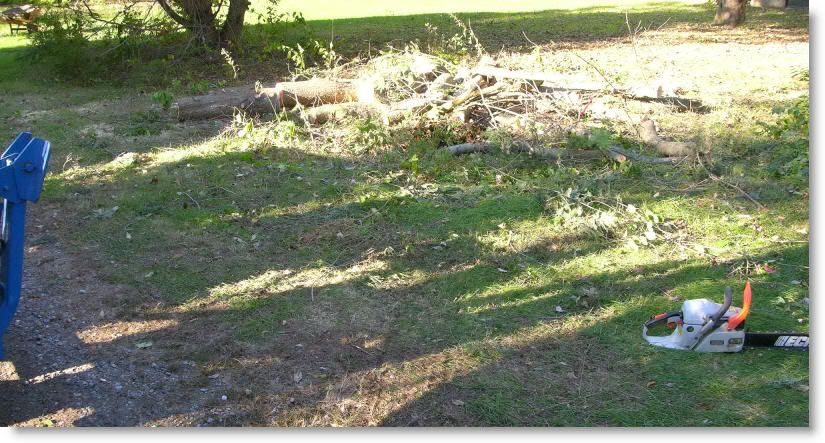
Sunday with a chainsaw.

Here is what’s left of a fir tree. I dragged the rest into the forest to rot.
tree.jpg


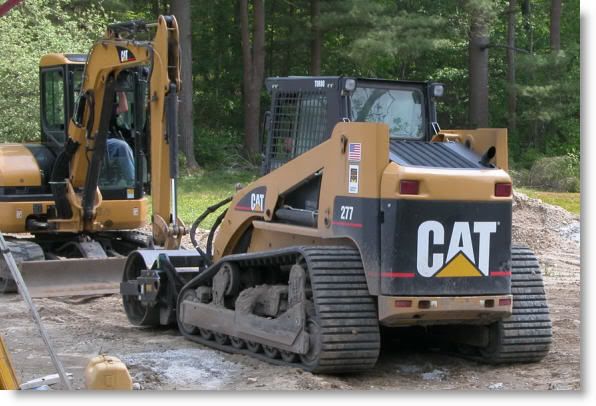
Handy tool for yard mayhem. You can jack up your lawn in min with these attachments.
tractor.jpg


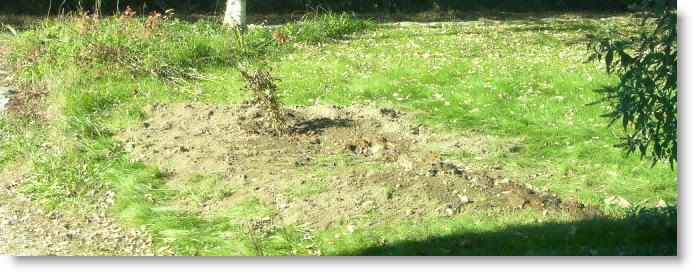
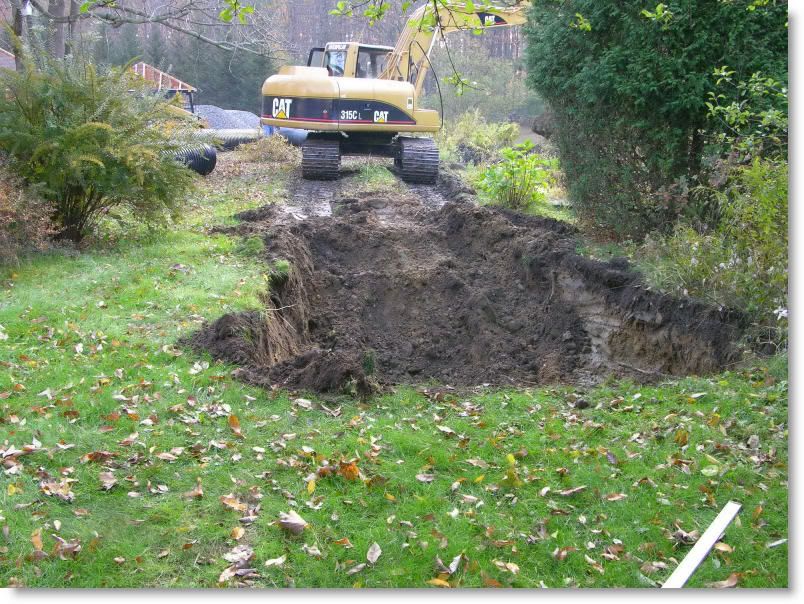
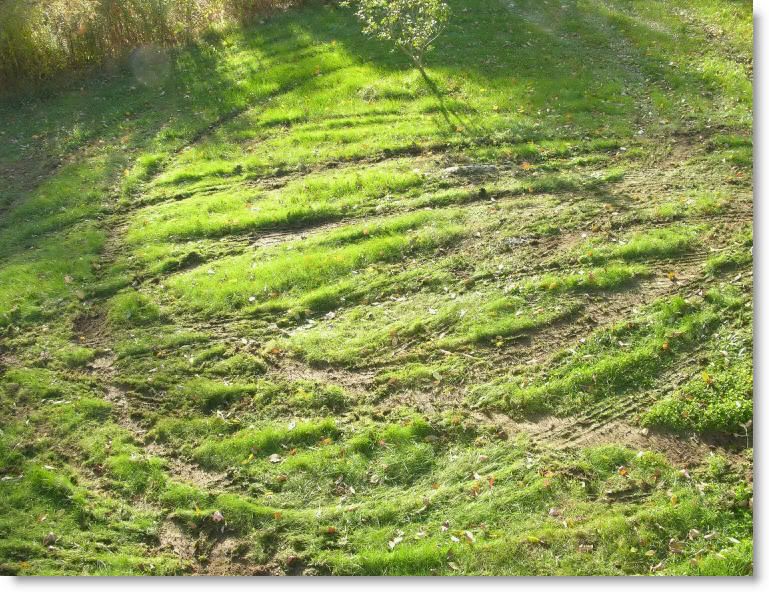
Wifey wanted me to relocate her Peonies, dig a trench she said. This is the only area of our yard that was not supposed to have heavy equipment grind across it, so I messed it up myself. This mess looks far worse than the pic. I swear I was not on drugs, but it looks like it in person.
plantmayhem.jpg


I applied for my building permits today. Hope it goes smoothly.

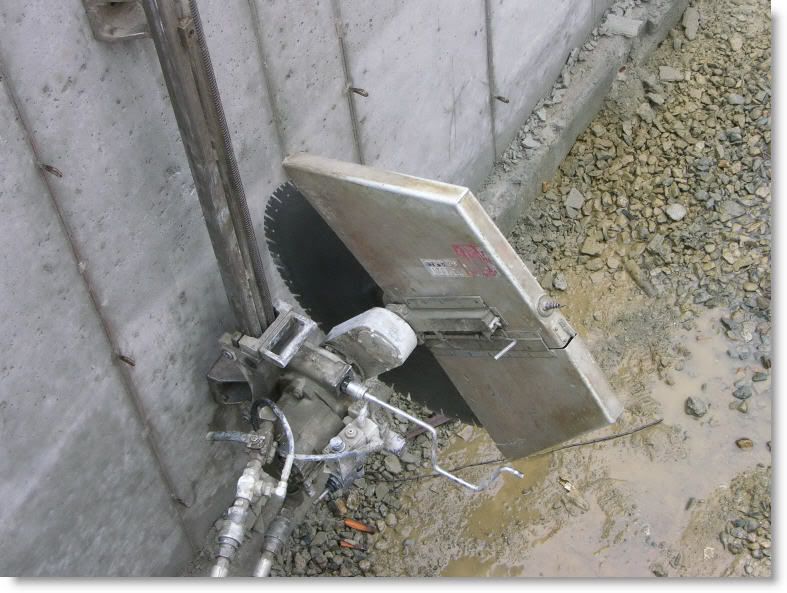
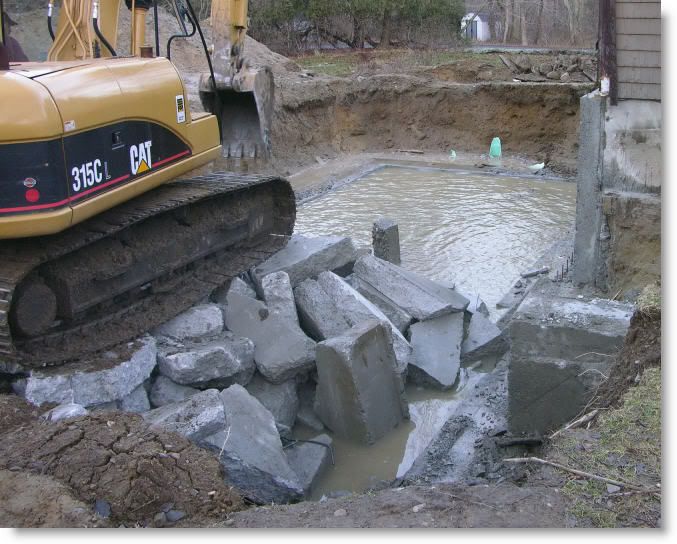
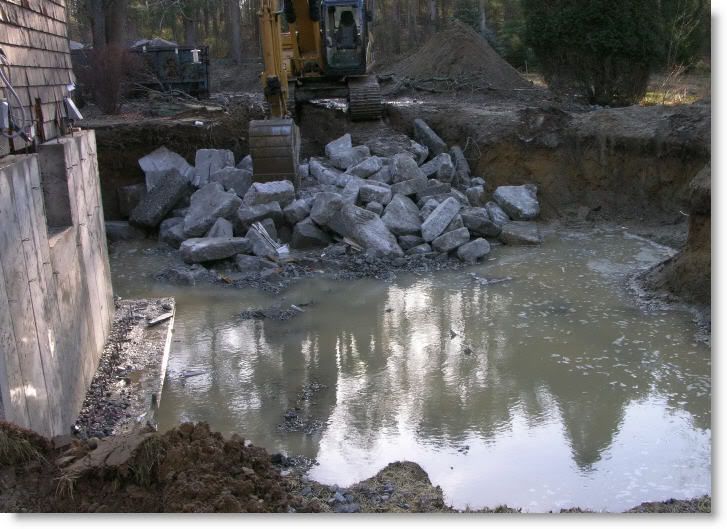
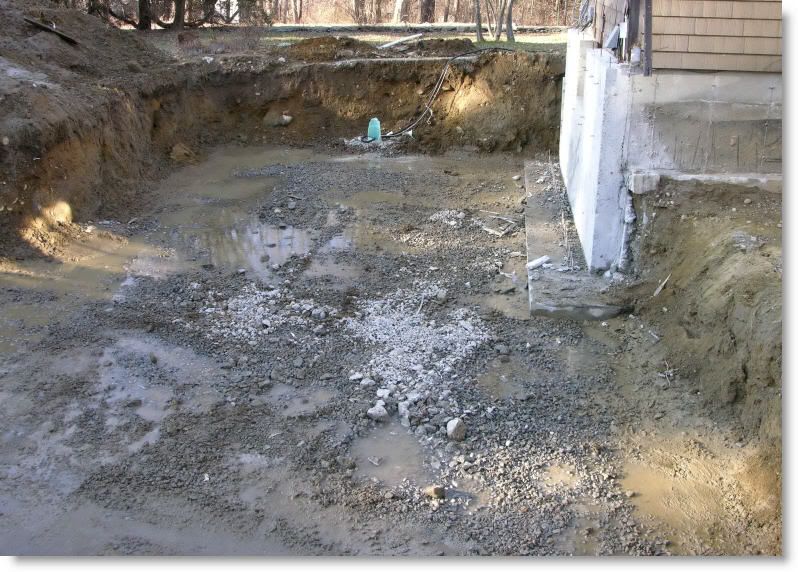
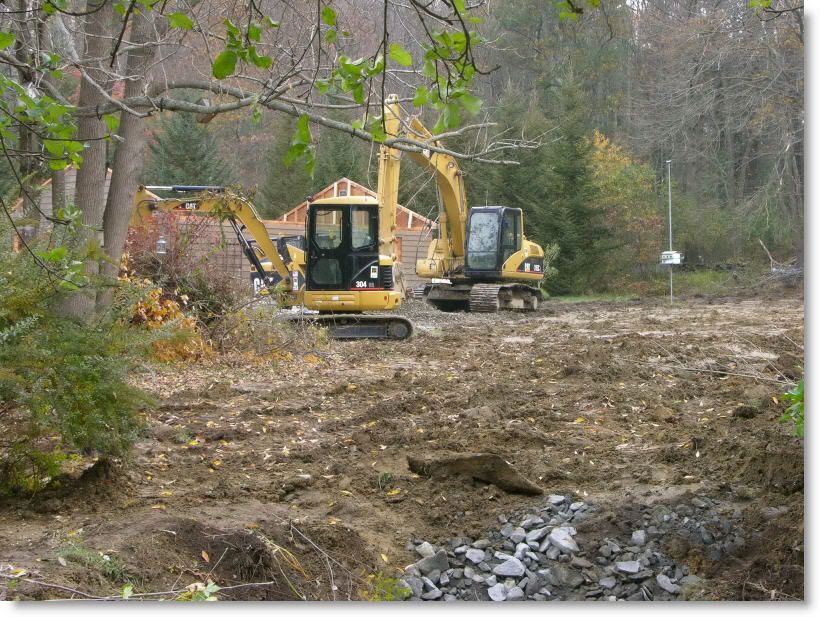
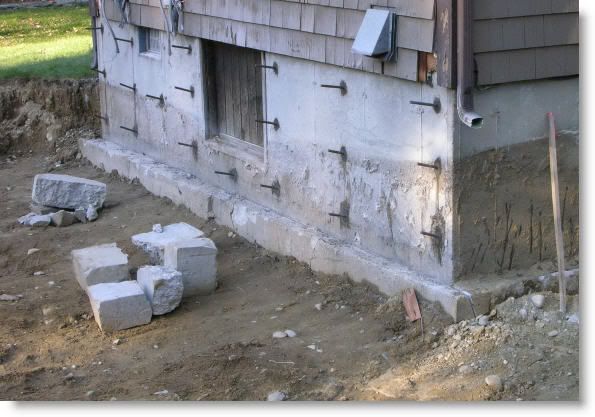
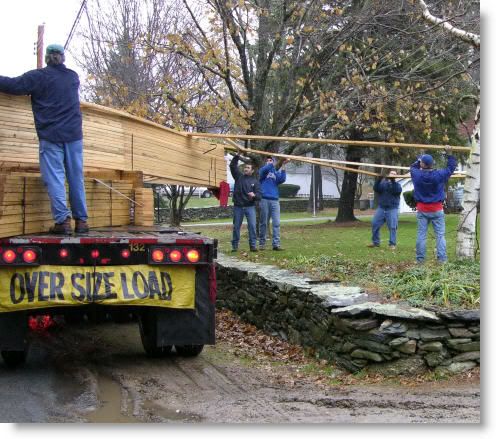
Salvage and demolition start.

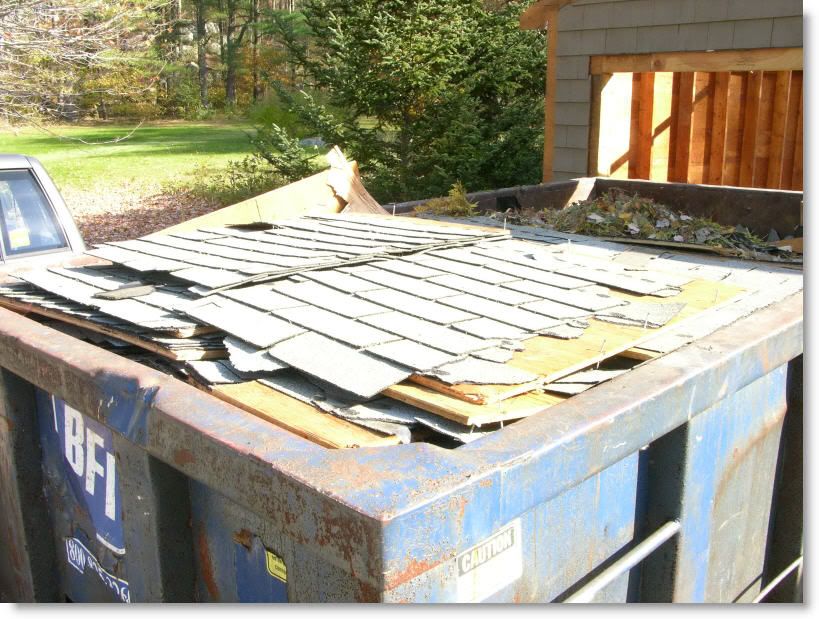
It took about 3 hours for three men to strip the roof and pack it in a dumpster.
DEMO1.jpg

DEMO2.jpg

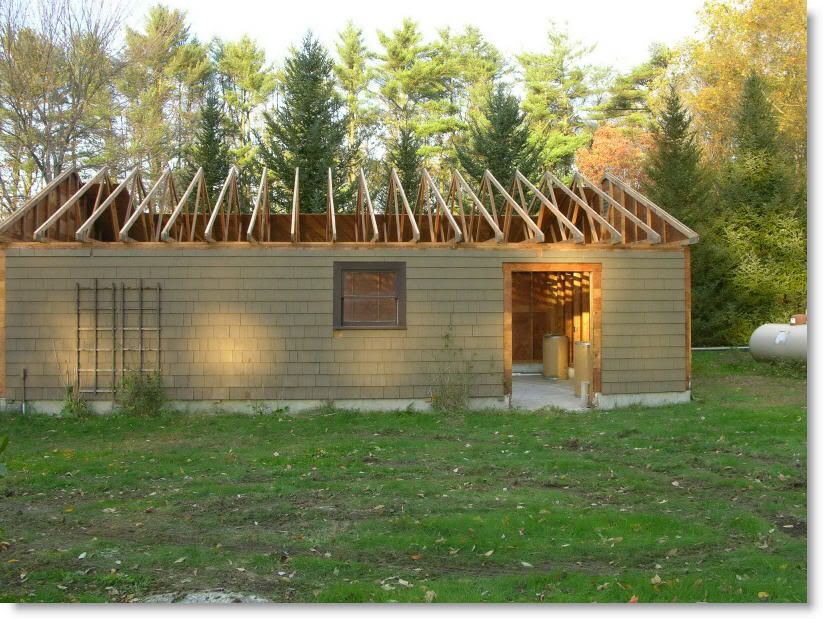
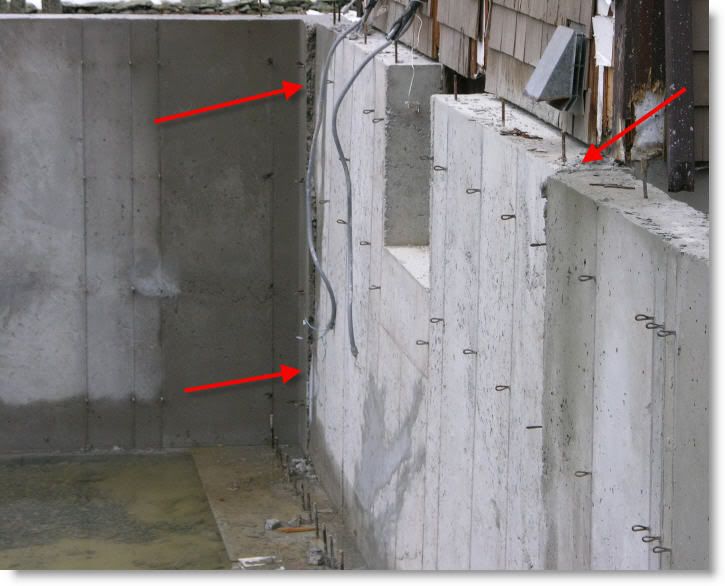
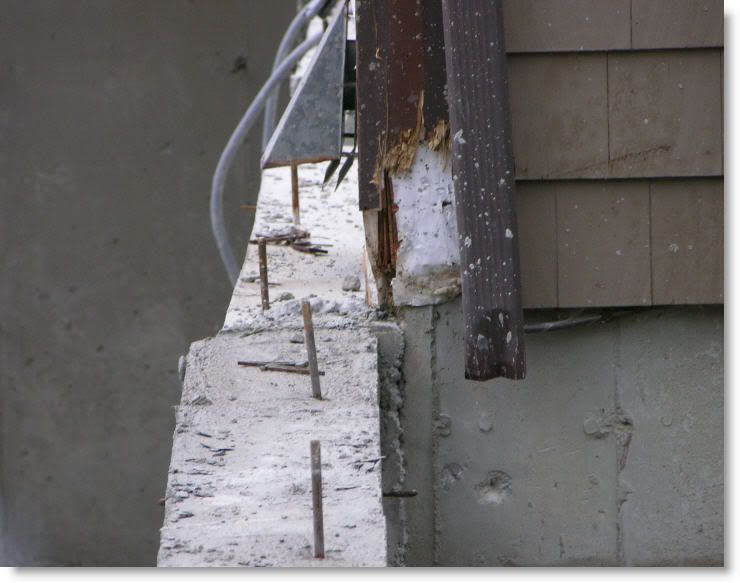
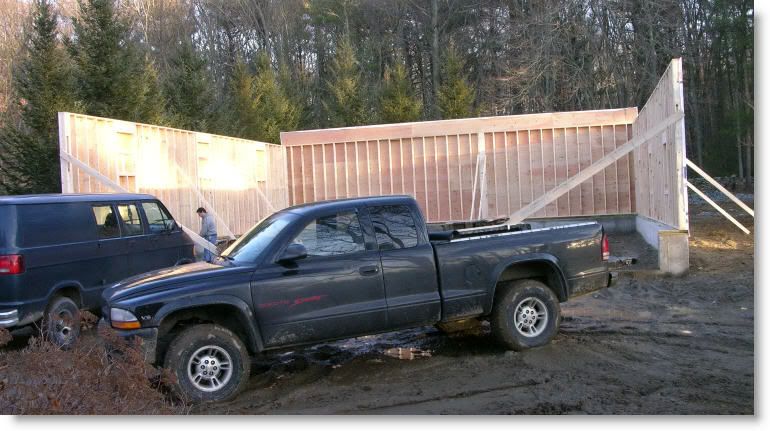
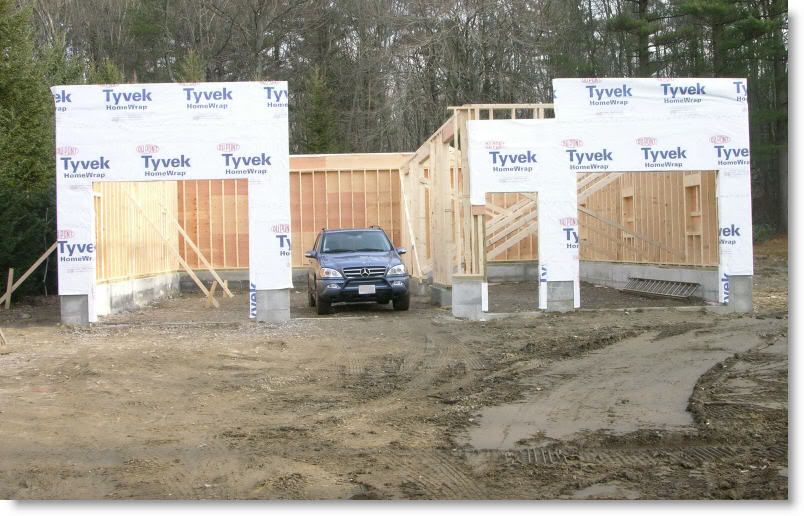
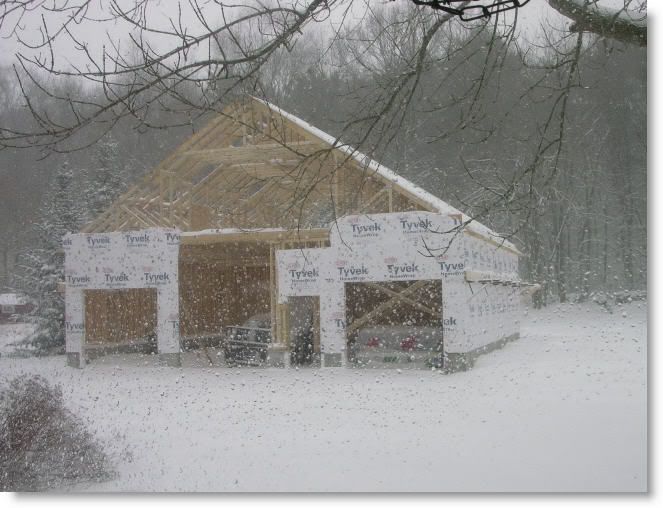
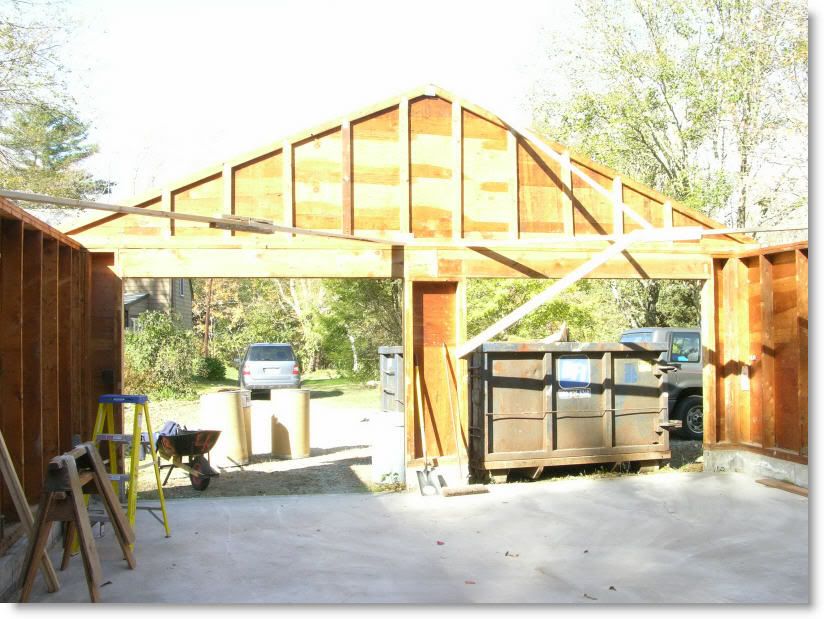
The trusses were carefully removed and stored for later re-use. It sure makes the garage light inside.
DEMO3.jpg

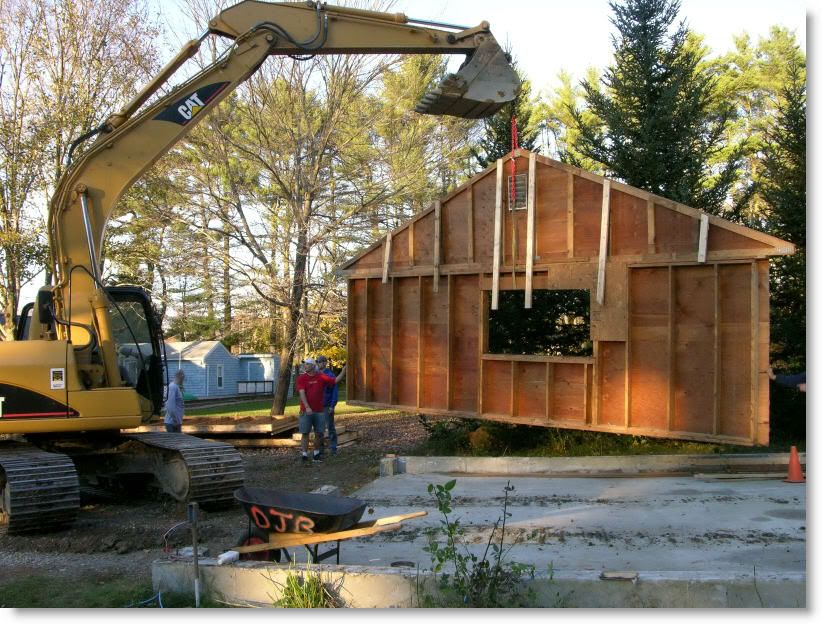
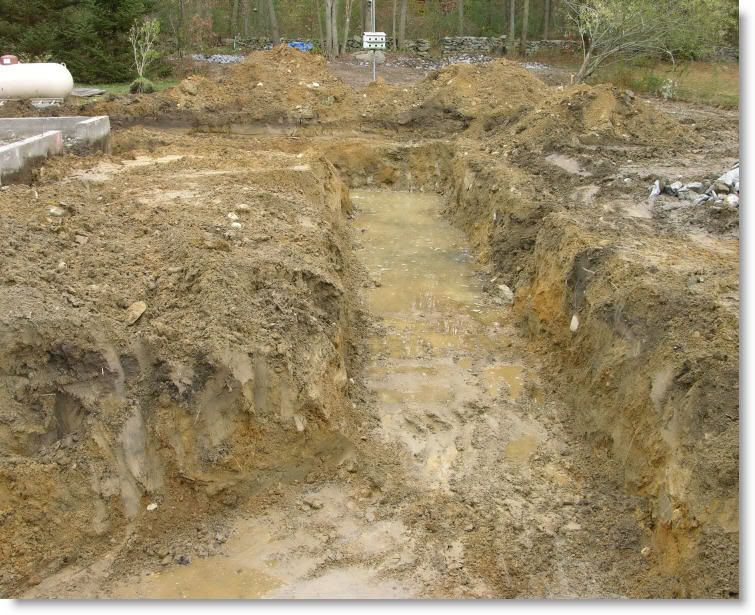
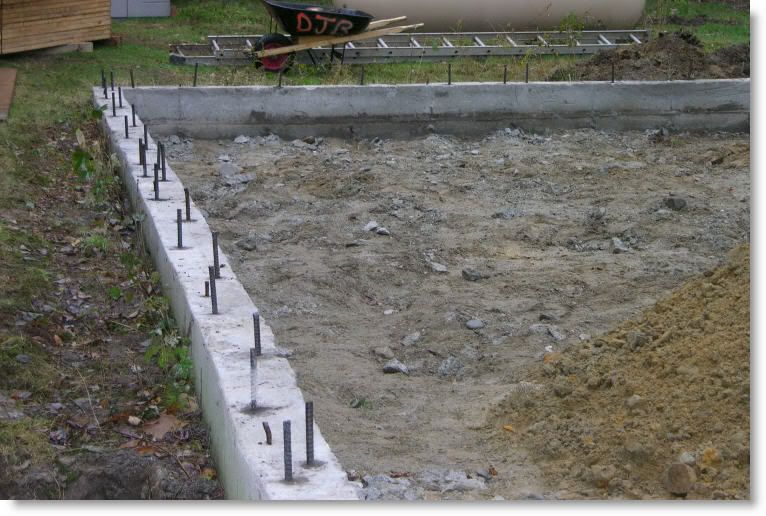
The walls were separated, removed, and stacked. Waiting for the garden shed foundation to be ready. The shed foundation was dug today. If things go smoothly I should have the shed re-assembled sometime late next week.
DEMO4.jpg


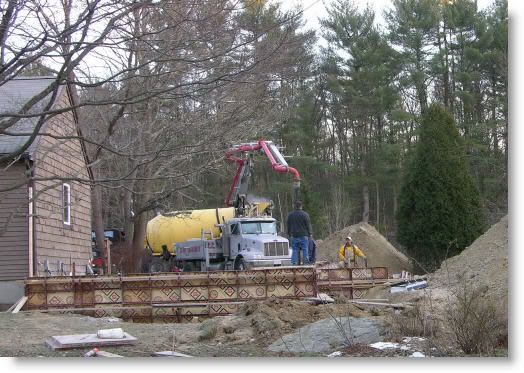
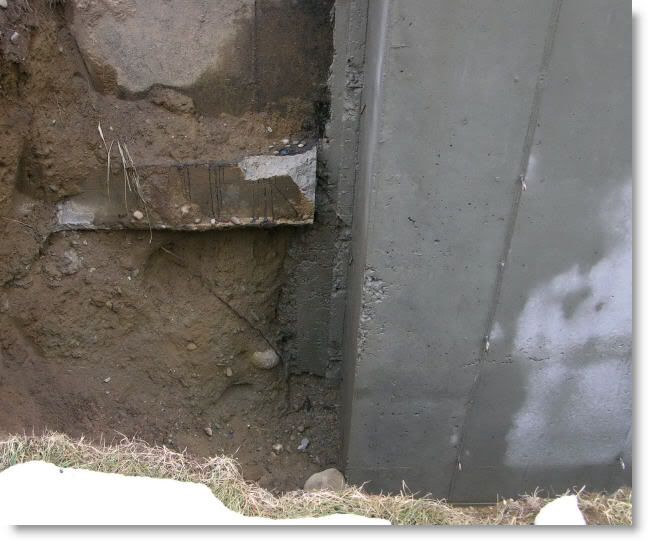
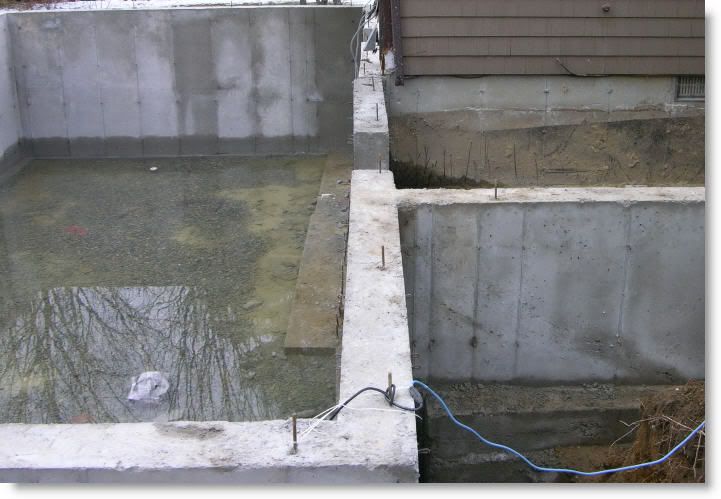
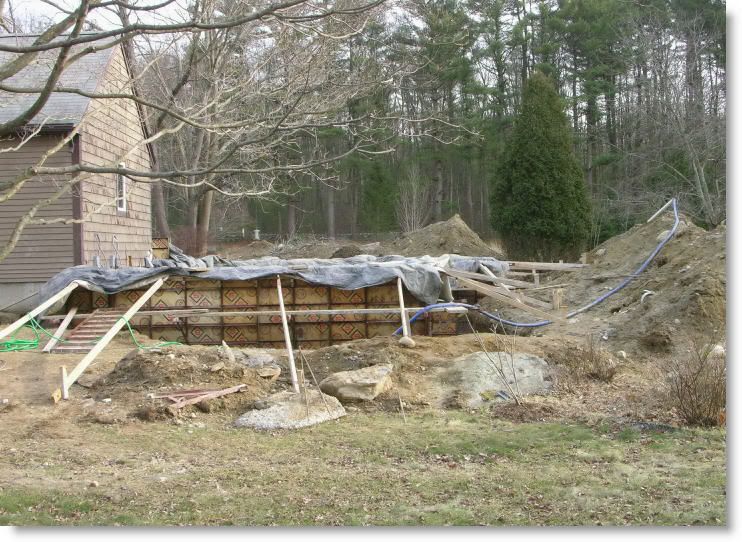
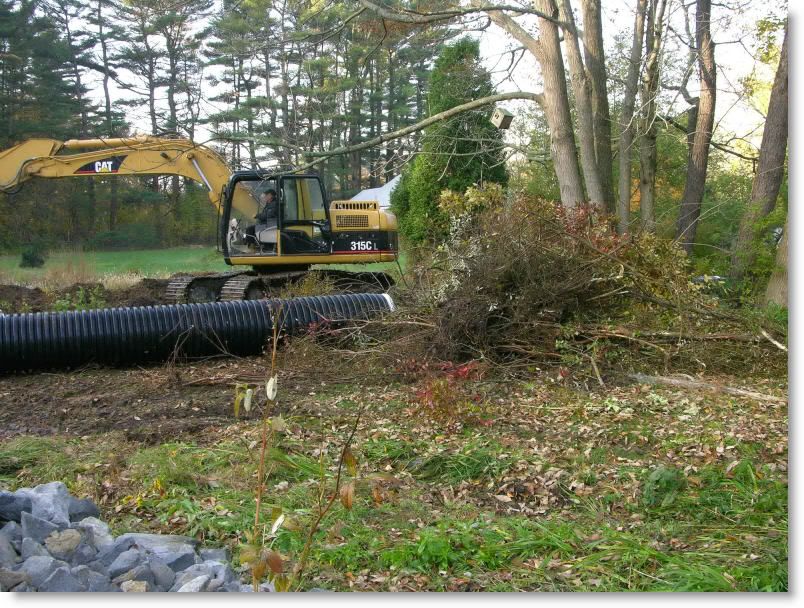
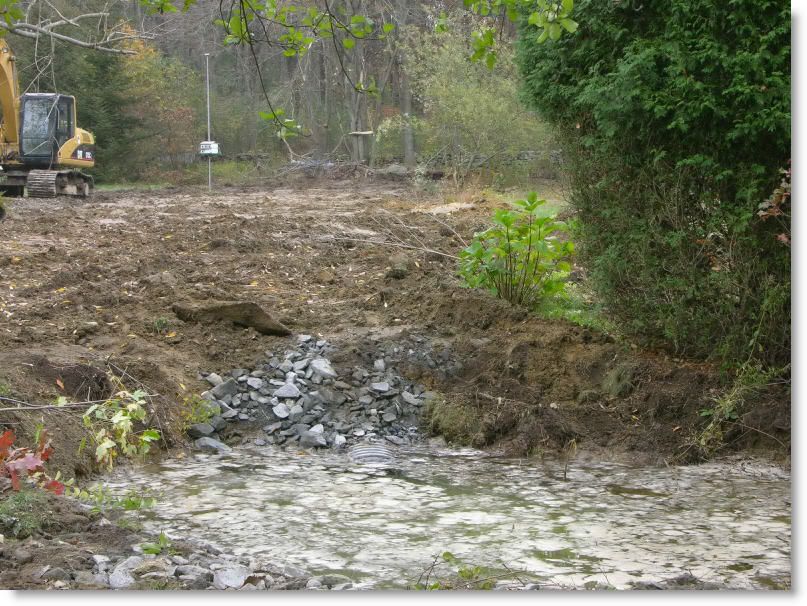
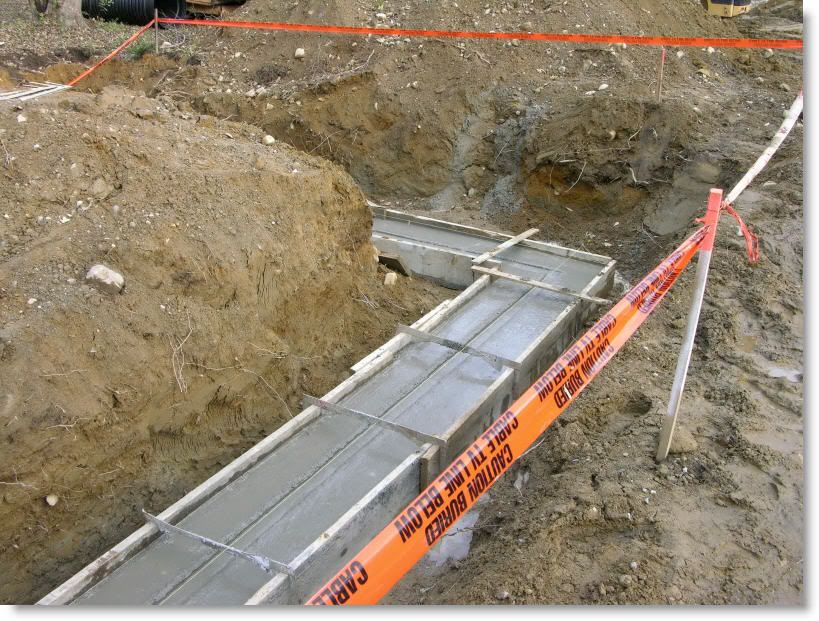
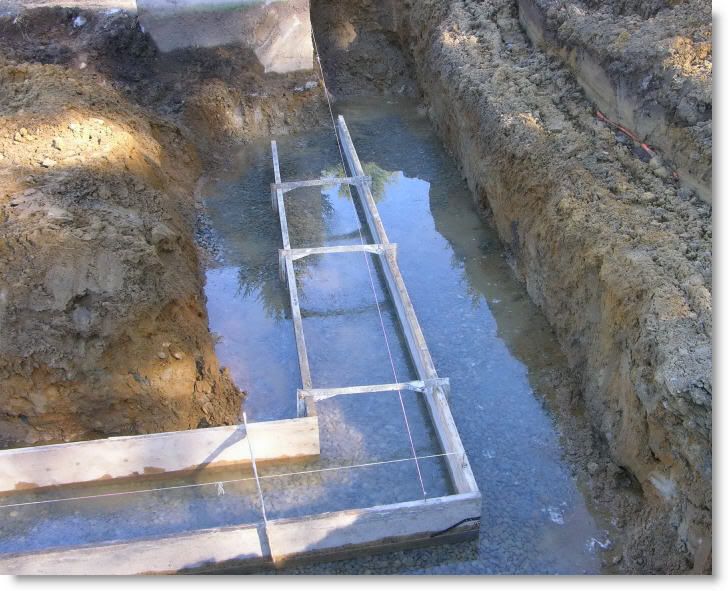
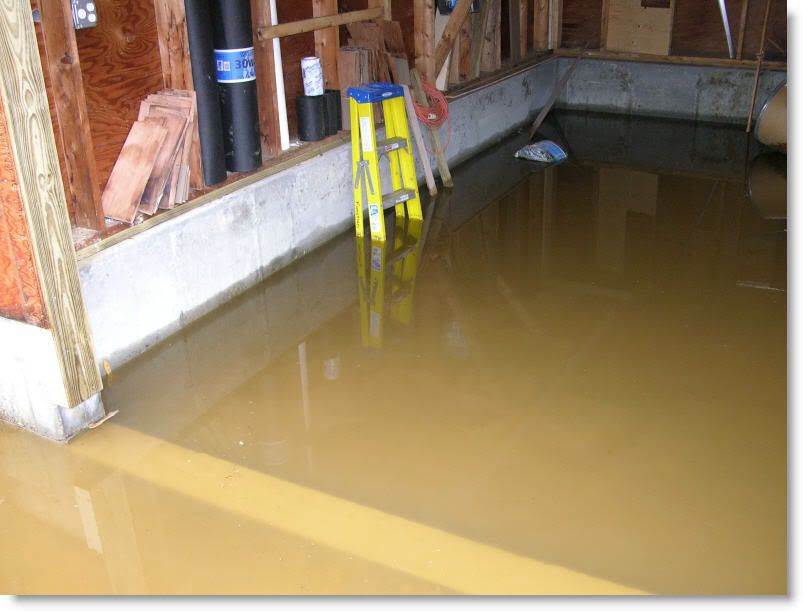
A drainage problem is being addressed here.
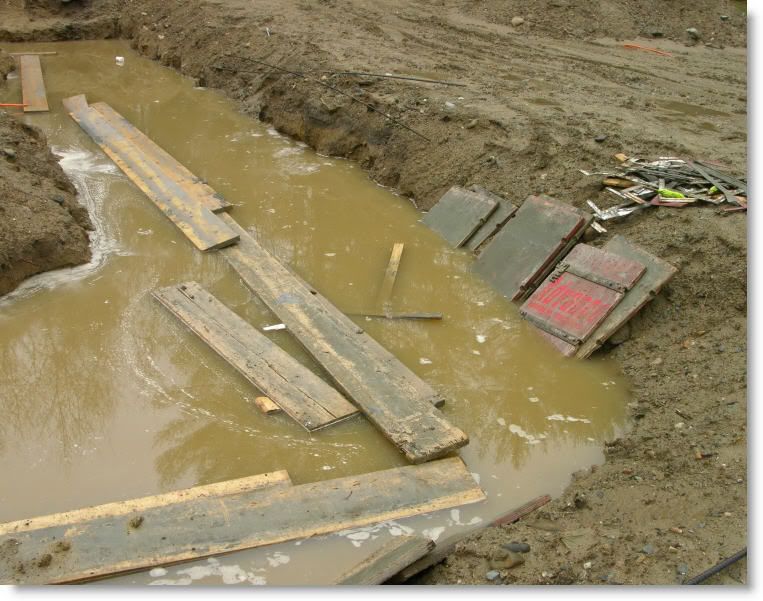
Starting the run at the lower level. About 170 lin ft of 24 inch pipe was used.
PIPESTART.jpg

PIPESTART3.jpg

CAT315C.jpg

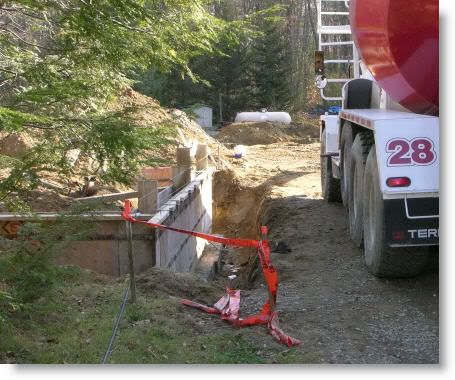
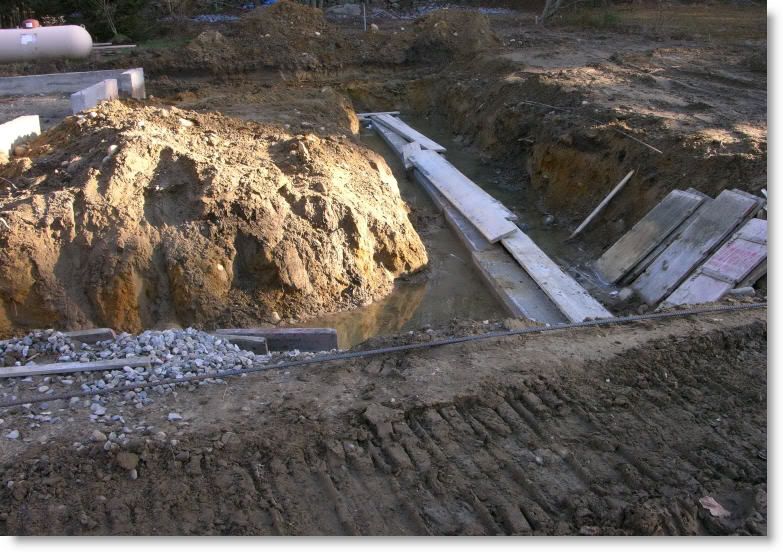
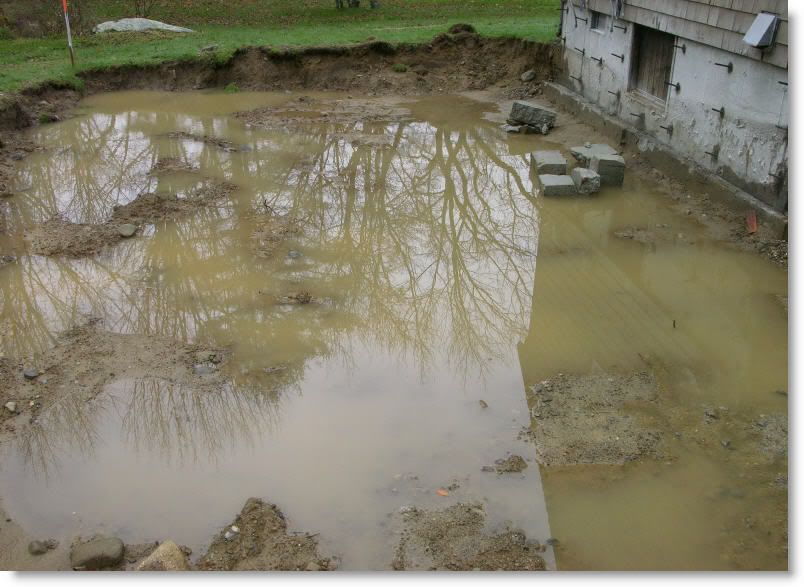
The almost finished lower level. The rip rap lined pool is to slow the water velocity down before it crosses onto the neighbor’s property. There is a similar collection swale at the top of the pipe run.
PIPESTART2.jpg

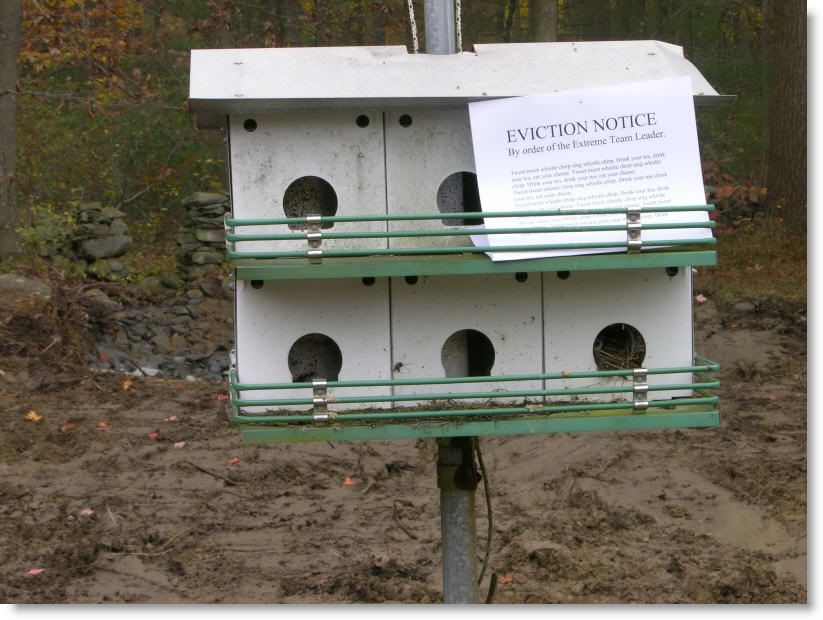
I needed to do a bit of avian relocation for this project.
EVICTION.jpg

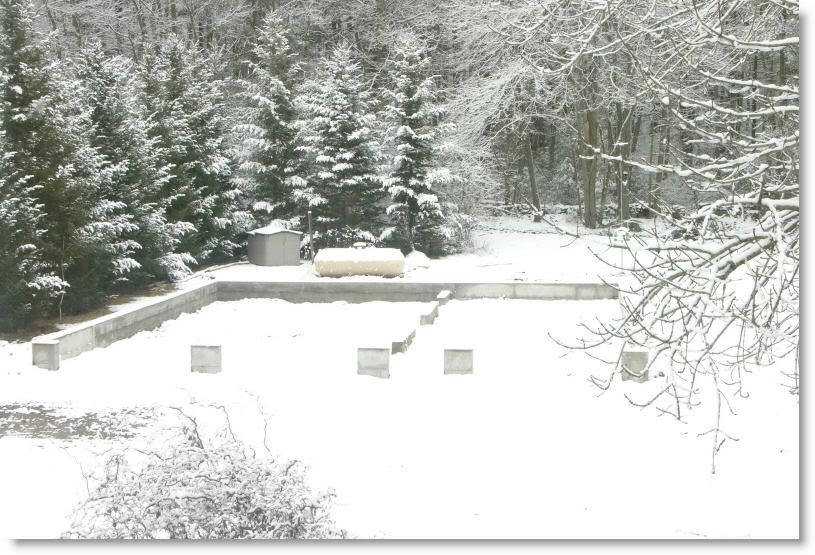
Wifey was upset because on Thursday I did a few donuts in the yard and flower garden. The pics above show what that area looks like now.
DONUTS.jpg
 
To avoid these ads, REGISTER NOW!
OP
M

Mussel Kar

Active member
Joined
Nov 13, 2008
Messages
38
Baby sitting time.
The foundation turkeys(so soon to call them that) and I went a few rounds about how deep the footings were to be for the garage addition. It seems that they did not have 5' forms for the walls. They wanted to fill in the hole and raise the new footings. NFW I told them. The land elevations would get very screwed up if they did that. After a few rounds they "magically" found their 5' forms.
They stripped the footings of the garden shed and put up the wall forms. I had a load of stone put into the garage footing trench to fix a water seepage problem we were having and they were getting that area ready to pour the footings today.
I examined the shed forms and found the steel re-bar missing. 2 at the top and 2 at the bottom were in the spec. They were planning to pour the shed walls and the garage footings today. Hmm... There was no steel on their truck soooo.... I went up to the lead man and asked where the steel was. &&$#@$^*$ Yup! They were SOL for pouring today. I may make them take the shed forms apart to get steel at the bottom of the wall, as per spec.
I need to keep an eye on these turkeys.


A layer of washed stone solved this problem. Note the bird house is still standing. I don’t know how because there is no grass at the base, wiped out by machine movements.
waterintrench.jpg
 
OP
M

Mussel Kar

Active member
Joined
Nov 13, 2008
Messages
38
The latest progress report.
The shed footings were poured on Monday, November 14.
SHEDFOOT1120.jpg

Does this form look about 2 feet short? This was why the form guy was swearing, his screw up.
GARF11120.jpg

I made the turkeys open up the shed forms and put the re-bar in. The walls were poured on Tuesday. They poured the garage footings on Tuesday as well.
SHEDPOR1120.jpg

Late Thursday afternoon we started to reassemble the shed on its new foundation. By the end of Saturday it was up and ready for roof shingles, and was wired with 110 and 220 volt power. You can see the underground feeds in the photo.
SHEDUP1120.jpg

Garage footings stripped.
GARF21120.jpg

I needed to raise the existing footings by 12”. Here you see the “dowels” that we drilled into the old concrete, to bond the new with the old.
GARF31120.jpg

The ring saw was used again to cut part of the house footing away.
RING11120.jpg

Dowels into the side of the house foundation. Another wall will be poured here for a large house addition. This addition will have a full basement, unlike the rest of the house.
RING21120.jpg

This was a rock that stuck up in my front yard. Not anymore. They used the demo hammer and destroyed the top 12” of it.
ROCK1120.jpg
 
OP
M

Mussel Kar

Active member
Joined
Nov 13, 2008
Messages
38
Project on hold.
I’m off to Barbados for a few weeks, and this will prob be the last post until late December, early January.
The concrete form crew were absent from the job since Monday of last week. Their absence screwed up the excavator’s schedule and he was forced to pull his idle equipment off the job, wasting his time and mine. I was told that they would “try” to get there Monday. Yeah right. Tuesday it rained in a heavy downpour and flooded the site. I called for a pump out Wednesday AM and the crew arrived at 7:30 and started the pumps. By 10:30 both the shed and the garage were pumped out. I was told that the garage walls were to be formed and poured today(Wed), and the excavator(pump people also) were told the same thing. I waited……..I waited…….. I was getting pissed and kept waiting. They finally arrived at 2:30 in the afternoon. I waited until they parked their truck and I went up to the window. Are you really going to form and pour these walls today? I asked. Are you kidding, its 2:30! Do you have room on your truck for the few forms that are in the hole? I asked. Then pack them up and leave. I sacked them. Enough is enough. The garage footing was now under 2 feet of water, and the hole was caving in at places. Beautiful weather wasted by the form turkeys. The shed was coming along nicely and the roof in now complete and some of the siding has been repaired. The inside has not been backfilled, and was left with muck from the rain.
By turkey day there was 6” of water over the garage footing, and by today there was a foot or more. Monday I will know when the new form company starts.

Water inside the shed.
SHEDFLOOD11125.jpg


Floating forms at the garage footing. Darn good thing the footing got in before the rain.
GARFLOOD11125.jpg


Flooded house excavation. If we had dug the full depth 6 more feet) the house would have caved in. We did not trust the form turkeys to dig the whole thing, rightly so.
HOSFLOOD11125.jpg


Water streaming down the drive.
DRIVEFLOOD11125.jpg


The trusses arrived during a break in the rain. The two top bundles are mine.
TRUSS21125.jpg

I had to call in for the extreme crew members to hand unload these because the low overhead wires prevented the use of the truck mounted crane. About 450 pounds each, wet.
TRUSS31125.jpg


Any thoughts on the garage front? I need to play with the fans a bit more.
GARAGEWSHAKES1125.jpg


Finally some progress.

Design changes.
The toilet and shower will be located on the second floor, not the first. This will allow me to put a lift in the back of the large bay, as the ceilings are now 12’ plus at the first floor. The 9’ wide garage doors are going to be 8’ high instead of 7’, and most likely r15 insulation.
 
OP
M

Mussel Kar

Active member
Joined
Nov 13, 2008
Messages
38
I still have a ton of stuff to post as this project started in the fall of 05.
 

WireGeek

Active member
Joined
Aug 18, 2005
Messages
25
Location
Louisiana
Looks like it was a fun project. Sorry to hear about the form guys. I see the layouts for the Benz;s, but Im also wondering what it the Mussel Kar?
Looking forward to the rest of the story!
 

MXtras

Well-known member
Joined
Aug 17, 2005
Messages
1,356
Location
On the Right Coast
Thanks for sharing.

I might have missed the why-cuz, but is your water control issue temporary or are you going to have a flooded shed everytime it rains hard?

Looking forward to the continuation.

Scott
 
OP
M

Mussel Kar

Active member
Joined
Nov 13, 2008
Messages
38
WG
The Benz on the right is the Mussel Kar. Modded SL55 AMG pushing close to 600 hp, 628 fp torque.

MX
No problems in the shed. That pic is before backfill and slab. One of my guys actually walked in there after the water went away, sunk in to the mud up to his hip.
 
OP
M

Mussel Kar

Active member
Joined
Nov 13, 2008
Messages
38
More from the diary.

05 Year end progress report.
The garage foundation was finally finished, and we backfilled it New Years eve. This pic is a few days old, as the sills are on now and I am ready to start the walls. The replacement concrete people are very professional, one of the top 100 largest in the country, but their workers are hacks. 42 jacket size 2 hat, you know the type. The right garage wall drops ¾” in the first 6 feet, and rises up an inch higher at the back corner. The last turkey put in footing and foundation for the garden shed plus the garage footing, without getting a dime from me because he screwed up the schedule. This company will be no different. They already know that the work is sloppy and I think they are going to sack the jobsite leader.
GARFOOTINGS.jpg

The walls for the house required a concrete pump because of difficult access. $750.00 for 4 hours. Ouch!
WALLPOUR.jpg

The existing house has a 5 foot crawl space, no basement. The addition will have a full depth basement for utilities and storage. This pic shows a bit of the underpinning involved.
UNDERPIN.jpg

The wall between the arrows is called a “one sided pour” as it was poured first to underpin the existing foundation. Note the sloppy alignment of the walls that came after.
ALIGNMENT.jpg

They stripped the forms and we can see the new foundation. Can you see anything wrong with this picture?
WHATSWRONG.jpg

A bit closer.
WHATSWRONG2.jpg

The distance between the string and the block is how far the new foundation is out of square with the existing house, 2.5” in 12 feet!
STRING.jpg

They also left huge corner slags that show from outside of the house, and these must be removed. Concrete is easy to deal with when wet, but a b!*ch to remove when hard.
SLAGCORNER.jpg

And finally, two days before Christmas they broke a window when stripping the forms. Wifey came home with groceries around 4PM and felt a cold breeze when she removed her coat. She turned and found the window broken, and the screen partially pushed in. Luckily, the screen contained almost all of the glass, and stayed mostly in place keeping our curious Burmese cats inside and safe. No one called us, they didn’t call their office, and they made no attempt to board up the window. The owner of the company grilled these two jerks for a hour before one of them fessed up to it. He fired both of them. Its not like they didn’t know they broke it, as glass was shot 10 feet away onto the piles of stripped forms.
BROKENWINDOW.jpg

I have a meeting with the top 3 honchos from the form company on Monday at 7:00AM. Things are going to get reeeel interesting.

On a happier note, the garden shed now has a nice concrete floor, and the doors and windows are installed. It’s now my material staging/workshop area for the rest of the job. It has power now, and will have lights next week.
 
OP
M

Mussel Kar

Active member
Joined
Nov 13, 2008
Messages
38
The foundation is being replaced because the owner of the form company was horrified by what this “cowboy” had done. Their attitude was very professional and to the point. They want the job done right.
You sometimes wonder when someone tells you they are going to “make it right” just how long they are going to make you wait. I told the owner of the form company that I could wait until spring to get the foundation replaced. Nope. They think they will have it done by the end of next week. Damn! Their management people are real stand up guys, no bs at all. The sawing company made a few clean saw cuts to keep the good/existing walls yesterday, and the excavator demolished the bad walls today. I thought this was going to be a difficult process. Not so. The machine started at 7:30 AM and by 2:00 in the afternoon the whole thing was gone from the site, and the hole bottom was graded and ready for new walls. Demo was made very easy because the cowboy forgot to put the steel in the walls and footing. We could see this as the walls broke easily. Yikes. I will be posting video of the demolition this weekend.

This is the rail saw that cut the walls, cuts darn fast too. 30-30 inch blade I think, about three min to make each cut, and a half hour to setup each cut.
RAILSAW1.jpg


Below is what the site looked like after 15 min. The operator pulled down the walls, lifted the big pieces very high, and dropped them to break things up. He used the rubble as a ramp to reach further into the hole.
NOWUCIT3.jpg


A few hours into it and this is all that is left, gets loaded into the dumpster behind.
NOWUCIT4.jpg


By 2:00 it’s all gone.
NOWUCIT2.jpg


And progress is being made on the garage. We have three walls up.
3WALLS.jpg
 
OP
M

Mussel Kar

Active member
Joined
Nov 13, 2008
Messages
38
1/21/06 Progress report
A few progress steps made.
A pic of the previous form setup.
WALLPOUR.jpg

And the formwork done yesterday. Note the bracing every 6 feet. Little or no bracing on the forms the last time. This thing will be a work of art when they are done.
formsagain.jpg

And I finally get to park in my new garage.
firstparking.jpg


1/27/06 Progress report
This concrete job is going to hell in a hand basket.
This pic is of the jacked up walls that were torn out. Note the terrible alignment.
WHATSWRONG.jpg

Here is the new wall. Notice how well everything lines up. Something else seems different too, something missing. Can you find it? Answer on the next caption.
127newwall.jpg

THEY FORGOT AN OPENING! That’s ten inches of concrete to cut open! The concrete cutting company will be back again. I hear he is almost like an employee now, cowboy f***ed up a lot of other jobs too.
Here’s my observation. On the day of the pour the foreman, project manager, and the owner of the company were present. When the walls were uncovered not one of those people walked the job with the prints in their hand. I inspected after they started pouring, and found one wall with the steel missing at the top, I made them stop pouring and get the steel in.
On Wednesday the forms were stripped and removed from the site. Time to inspect the new walls. What do we have here? Bug holes in the concrete? Inside and out, the walls are completely covered with huge air pockets. They used a concrete ******** when they poured, I have pics of it. WTF? The vertical lines are two feet apart so you can see how big they are. My waterproofing contractor said he cannot waterproof walls like this, too many holes.
127bughole1.jpg


127bughole2.jpg


Here is a visual of the walls poured by the cowboy who got fired.
127spacer1.jpg

The framed wall is dead straight, and spacers are needed to fill in under each stud. A close up, some spacers are ¾+ thick. We also found the openings for the garage doors out of place. I hade them cut 2 ½ inches from one side of an opening so that the garage door would fit.

127spacer2.jpg


And another cowboy wall in front. Gonna be fun to build on this roller coaster. Luckily it’s not too long.

127wigglwall.jpg


I have a meeting at 7:00 AM on Monday morning with the project manager, the general manager, and some poobah from the concrete supplier. We think they entrained too much air in the mix or it was just a bad mix. They are a state certified concrete supplier, and their computer controlled batch mix records are filed with the state. Every single truckload gets recorded. They are bringing a printout to the meeting. We will see what the concrete looks like on the inside when they cut the opening.
On the plus side, the new walls checked out to be nice and square and straight. It should be real easy to build on them, if they stay that is.
 
To avoid these ads, REGISTER NOW!
OP
M

Mussel Kar

Active member
Joined
Nov 13, 2008
Messages
38
I finally got a break in the weather and manpower available at the same time soooo..…Time to have a roof raising.

We started assembling the first two pairs to go up on Tuesday. One set for a dormer and another for the stairwell. The trusses cannot be cut so we double them up on each side of any opening and ladder frame between them. I needed 4 sets assembled like this. We set up two in the back and I had to pick the second set and lift it over the first set to start off. This was the trickiest part because the right front wheel was sinking into the ground as the boom extended out. Lucky for me that this machine can tip itself left or right. It sank a total of about 18” and would have tipped over without this feature. It has 4 wheel drive, front wheel steering, all wheel steering, and crab steering. Just push a button to select.

LULL1.jpg


A view from the operators (me) cab. The black ball in the tilt gauge shows how far the machine is tipped. It’s almost level now.

LULL2.jpg


End of the day on Wednesday. Not bad considering that the machine arrived around noon time.

LULL3.jpg


Mid morning on Friday, day three. I put the ML in there to show the scale.

LULL4.jpg


The last one goes up and gets secured.

LULL5.jpg


And it would not be complete without the topping out tree branch secured to top of the last truss.

LULL6.jpg


An upstairs shot from the house completes it.

LULL7.jpg


I hope to get the roof decking well under way tomorrow because there is a winter storm coming, 8-12 inches of snow plus strong winds. The decking will make the roof system very strong.

Follow up work on the porous concrete work has come to a standstill. Too much air and too much vibrating were the culprits. They sent 2 men to start filling the air pockets in the wall. They worked part of the day last Wednesday and never returned. I cannot waterproof the walls with the holes unfilled, and I cannot backfill with the walls not waterproofed. No show, no call, nothing. Another one bites the dust. No more Mr. Nice Guy. They’re going to find their check extremely light.
 
OP
M

Mussel Kar

Active member
Joined
Nov 13, 2008
Messages
38
The second turkey concrete company is behind me now and things are starting to roll. I have decided to fill the holes and cut the opening myself because I just don’t want any more losers here.

We finished erecting the trusses on Friday and on Saturday two of my men got one side of the roof decked while I plywood decked most of the second floor. Here is a pic of the snowstorm that hit us on Sunday. Near “white out” conditions at times.

TYVECSNOW.jpg


We cleaned the snow from the roof half, truss framing, and the deck on Monday in prep for safe working conditions. The second half of the roof was decked while I built the end walls with the window openings. We’re closing up the front here. I take the pics and drive the blue machine. Two days after the storm and one of my men is wearing only a T shirt.

tyvek.jpg


We covered the roof with a tarp to keep the inside dry and we ran the Tyvek wrap over the window openings to keep the weather out. Putting the tarp on the roof was no fun at all. There were strong wind gust and a severe wind weather alert. We almost lost it several times before finally secured it in place.

TYVEC1.jpg


A view from the end of the second floor. This room is 18 feet by 43 feet long.

TYVECINSIDE.jpg


These are the openings for the dormers. You can see the dormer walls framed up and ready to go. At the next weather break the tarp will be cut and the dormers assembled. Once the dormers get their exterior trim I am ready for roofing, followed by the upstairs windows.

TYVECDORMER.jpg
 
OP
M

Mussel Kar

Active member
Joined
Nov 13, 2008
Messages
38
Warm weather progress.

I took advantage of a warm Saturday to strip the tarp and pop out the dormers. The side walls and trusses were upstairs and all I needed was to frame the end walls and go for it. It was a very productive day starting at 7:30 AM and stopping a bit after 5:00 PM. A lot of the earlier work was done by my crew, but this time I was very hands on. Almost all of the framing was by my hands and walls were being placed almost as fast as I could build them. I followed by putting the trusses up on all 6 dormers, and getting the dormer roof sheathing and final framing set up. A real roof will be on it soon and the dormer windows soon after. Once it is sealed to the weather more inside work will get underway. WOOT! WOOT!

A view from partway down the drive.
DORMER1.jpg

Shot from the top of a pile of backfill.
DORMER2.jpg

And a shot from ground level.
DORMER3.jpg


An up to date progress report. 5/9/06
Progress came to a halt in mid March after the roof went on. I hired a roofer who came highly recommended. At a site meeting I told him that he needed to roof only up to the eve line of the dormers so he could put his flashing on and we would be able to put our trim boards in place to cover the aluminum flashing. My guys are only a min away and would not hold him up, as he could start the other side. Everything was pre cut and sitting upstairs. He started the job on a Saturday and never called. He had one side completed and the other side 1/3 of the way done. Wifey and I were away in Vegas (work) and came home on the red eye Sunday AM. At first I was happy to see that the roof was almost done, but after unloading the limo and looking closer I started to loose it. @$#&%^WTF, nothing to do but try and get some sleep, as I cannot sleep on a plane and was beat. On the following Monday I called the roofer over and had a few words with him. After a few min he knew it was his FU. Twenty min later his crew stripped the roof back down to the eve line, and they had to replace every bit of drip edge on all of the dormers. By the end of the day the roof was fully completed and the mess cleaned up. He apologized for the mistake too. The house foundation is now waterproofed and backfilled too.

The garage with the roof.
0509roofwind.jpg
 
OP
M

Mussel Kar

Active member
Joined
Nov 13, 2008
Messages
38
Interior shot showing the radiant heat tubing.
0509radiant.jpg


There will be a utility closet under the stairs at the back of the wide bay. The stack is for the lav the second floor, with shower.
0509utility.jpg


Today I took two bids for the floor slabs. I’m using fibremesh concrete, 4000# mix. I hope to have the floors done maybe late next week.


5/11/06
I knew I was out of synq when I started looking for the trenching pics, somehow I put them in the wrong folder. Found them today. This post belongs before the last one or two. Late March or early April we started digging for the garage utilities. This required us to give up most of our driveway. Parking on the lawn was no problem for wifey and I.

Electric for the garage and the house. More lines were needed to go around the front of the house to the new panel location. We hit the line to the shed in the process, but that was easily fixed.
511TRENCH2.jpg


Power, data and com lines here enter the garage on the far left.
511trench1.jpg


One 2 inch pipe is for power, the other is for the generator behind the garage. 18KVA ought to do it. 3 more smaller pipes for tele, data, and a spare? We had to core drill the foundation here, and also the existing foundation 10 feet in, and then bend the lines to the right to come up in the utility closet.
511TRENCH5.jpg

511TRENCH3.jpg


Water enters in the center. Sewer (not shown) is at the far right of the building, better shot to the tank.
511TRENCH4.jpg


And a pic from the second floor.
511SUV.jpg


The latest floor plan. The lav was relocated to the second floor. This made more room width and will allow for a future car lift.
511REV1STFLOR.jpg


A progress drawing of the second floor. Two possible toilet locations shown.
511REV2NDFLOOR.jpg


And some ideas I was playing around with. I think the fan over the second floor window will be there. I am thinking of extending a section of roof out just over the garage doors. Maybe even blend it into the wall above with a curved roof pitch. Extend maybe 4 feet out. This would allow me to put recessed down lights there, and keep us out of the rain if we are using the pass door to enter the garage.
511REVRENDER.jpg
 
OP
M

Mussel Kar

Active member
Joined
Nov 13, 2008
Messages
38
I can’t have all bad luck. I got a bid from a slab man that came highly recommended. He came to the site and said he would get right back to me. Two days later I call him, yup, get right back. After four days and another call I got my bid. $11,500.00 for the work. Hmm….it’s a one day job for a four man crew, and materials would run about $5,000.00. He must think I’m stupid. I called two more slab men and got two more quotes with me buying the material. One man was recommended by a contractor friend who uses him all of the time, he quoted $2,400.00 for the labor. The other man was someone who was looking to buy the house next door, and he came over and gave me his card because he saw the work going on. I told him then that I was all set (I had not sacked the second crew yet). His quote was $2,600.00. I used my instincts this time and went with him because my instinct told me he would do a great job. He had no qualms about any of the specs and picky details of the job, unlike the other man. My instincts turned out to be right, they usually do.
We set a date of May 18 and after weeks of rain the 18th came with sunshine. He showed up on time and went to work. Things are looking better. $4,500.00 plus $2,600.00 puts me at $7,100.00, 44 big ones less than the first guy.

We decided to do the 6’ apron later to avoid possible damage to it from the heavy equipment when the septic system gets redone next week (I hope). The forms were staked out to grade and rebar was placed to tie the apron to the main slab.

0520FORMS.jpg


Steel stakes were set with a cross nail at the proper grade height. The floor will be 3 inches higher in the back to allow and melting snow from the cars to drain to the doors.

0520STAKE.jpg


What a beautiful site, concrete at last. This is the first mixer load. I’m using 4000# fiber mesh concrete with Super P to make it handle better. You can also see the grade stakes in many places.

0520POURING.jpg


It didn’t take long to place the concrete. Now to let it set enough to start the finishing process. They poured the addition slabs next.

0520POURDONE.jpg


The first pass of many many passes with the power trowel. A burned or polished finish takes many passes with waiting in between. The man in the foreground is cleaning up the edges by hand. Doing a nice job too.

0520FINSTARTING.jpg


The next day we can see the finish. The pic is a bit blurry but you can see the reflection in the concrete. The slab is dry even though it looks wet. My shoes even squeaked when I walked.

0520REFLECTION.jpg


Relief cuts were done early the next morning to make the concrete crack where we want it to.

0520CUTS.jpg


After the cutting I hosed it down and covered it with a tarp for a good wet cure. The tarps will stay till I need to start working in there again, maybe in a week or so.

0520CURE.jpg


The garage doors have been ordered and will be installed in about two weeks. I specifieded R15 with insulated lites at the top row.
 
OP
M

Mussel Kar

Active member
Joined
Nov 13, 2008
Messages
38
Last Saturday BobK sent a crew over to tie in the waste line from the garage, and prep for the apron in front of the garage. They also leveled and compacted the driveway. I had scheduled concrete work for the apron, AC condenser pads, and generator pads to be done Tuesday afternoon. My concrete guy didn’t make on Tuesday as planned, but he was there Wednesday AM. I was starting to panic because I was hoping to get the driveway paved on Friday. The pads and apron got done and they were finished by 1:00. It’s a darn good thing it got done because the paving company showed up a day early. I could see why this guy is so busy because of the quality and speed of their work. They showed up at 11:00 and were finished before 1:00. As I got to the site they were unloading a backhoe from one trailer, and a paving machine from another. The dump trucks that pulled the trailers were full of asphalt. Three men were already in the driveway with shovels doing the hand work. The backhoe did the final grading and a roller arrived from the previous site and did the final compaction. I took off for 20 min to get my camera and when I got back the paving was half way done. They did an excellent job on the final grading because there was a downpour last night and there was not a single puddle on the driveway this morning.

A few of BobK’s smaller yellow machines.

0603a.jpg


Two of his crew got the Bobcat set up with a vibrating roller compactor.

0603b.jpg


A plate compactor was used for the close in work.

0603c.jpg


By the afternoon they were done and the driveway was prepped.

0603d.jpg


The asphalt starts going down.

0603e.jpg


The roller packs it down.

0603f.jpg


Another plate compactor is used for some close in work.

0603g.jpg


They’re just about done, not too bad for less than 2 hours of work. They put down about 450 sq yards of binder.

0603h.jpg


The garage doors should be in next week. After the leaching field gets done we will get the paver back for the finish layer of asphalt, and get our landscaper in to finish putting our yard back together. Once the doors are installed, most of the garage work will come to a halt and I will start building the house addition. Gotta keep the war department happy.
 
OP
M

Mussel Kar

Active member
Joined
Nov 13, 2008
Messages
38
The garage doors were installed on Thursday. The two man crew arrived at 9:30 and were done by 1:00. Later that day I brought the SL55 home for the first time since October, and programmed all cars for the openers.

The doors are made by Garaga in Canada I think.
0612door1.jpg


A view of the front.
0612door2.jpg


The second floor is good spot for overhead pics because of the height.
0612door3.jpg


Now that summer (and fall) are over it’s time to get back in gear. At the end of July I nearly had a stroke putting a few truss’s up just to get the AC hooked back up for the existing house. It was really hot. Just in time too, as we had a major heat wave just as the AC was being hooked up. Note the lumber is starting to turn a bit gray now from the weather.

12061.jpg


The house engineered lumber/truss package arrived shortly after the paving and it fit neatly in the garage and I still had room to park in front of it.

12062.jpg


I rented the ring saw again and cut the opening that the concrete turkeys forgot to put in. I tipped the chunk over and broke it up with a sledge. My little backhoe easily hoisted the chunks out.

12061A.jpg


Part of the first floor deck of the house is capped and the addition starts going up. The forks on the tractor make material handling a lot easier.

12064.jpg


The back of the garage is starting to get slowly emptied out. I have two floor trusses’ left over because I changed the end truss detail to “stick built”
12063.jpg


As the back of the garage gets cleaned out the front two bays get filled with lumber. My 997TT and SL55 are safe in the wide right bay. Wifey was not too pleased that she lost her garage slot, but she got over it. Lumber = progress.

12065.jpg


The garage floor plan has changed a bit. I relocated the lav upstairs to make more room for a lift with walking space all around it.

12067.jpg


The house is the big priority now, but the garage MUST see some major progress inside before February. (Arrival of the GT3 RS). I also have a place at work to store it. May not be such a bad idea because I could look at it every day while it snows outside.
 
OP
M

Mussel Kar

Active member
Joined
Nov 13, 2008
Messages
38
That is all from mostly 06 as the house addition is still taking most of the little time that I have to spare.
 
OP
M

Mussel Kar

Active member
Joined
Nov 13, 2008
Messages
38
11 08 Progress report.

I spent most of the good weather of 07 at autocross and started back on the house late in November, that’s just the way it worked out. I built 7 sets of stairs in the house and just after New Years wifey could walk into the addition and walk upstairs too.
Spring of 08 I started back on the garage as I was mostly done framing the addition interior. First thing to do was to remove the construction door and put in a new steel unit. Space next to the garage also makes a nice parking place for the trailer. BTW, I am becoming VERY good at backing that sucker up. Just look back and check out the entrance to my driveway. No way to turn it around so I just back it in.

1108DOOR.jpg


New septic system was put in last year and we have some crappy grass growing. Much better than the piles of dirt that were there,

1108LAWN.jpg


Put a pad out back for an 18 KVA LP generator. Not shown is the 1000 gal LP tank. Very painful to fill that sucker for the first time. Got enough power to run the entire house, almost.
1108GEN.jpg


Next on the agenda was to frame the utility room under the stairs enough for the electrician to put the service panel and automatic transfer switch in place. I also cut and installed the stairs at the same time. I wanted a landing halfway up but I did not want to cut through the center wall, so no landing. I ended up maxing out the code for the rise and everything just fit in.

1108STAIR1.jpg


Panel on left, transfer switch on the right. Power lines also continue from here to the house, house has its own transfer switch.

1108STAIR2.jpg


And of course any open space quickly fills with junk. Most of this is construction related and will be disposed of when it is no longer needed.

1108JUNK.jpg


When I framed the center wall I was not really sure where I would want any openings between the two sides, so I left some options open by heading off in a few areas. Back will most likely get a 3’ door. Center is unknown at this point. Front will also get a 3” door that swings away from the car to the left, location to be determined.

Back two openings.
1108OPENING1.jpg


Front opening.
1108OPENING2.jpg


And that is where she stands at the present. Only other thing I will do this year is rip off the garage door wood trim and replace it with solid PVC trim. PVC trim boards are white so I won’t need to paint them.
 

nuttynil

Active member
Joined
Nov 12, 2008
Messages
34
hi great project those concrete turkeys messed it all up for you .......i hope u charged them for the saw hire .....neil
 

WireGeek

Active member
Joined
Aug 18, 2005
Messages
25
Location
Louisiana
I should have realized when I asked the question about your user name. The spelling makes sense in German!
Looking good. Now get it done!
 

kincheng

New member
Joined
Nov 28, 2013
Messages
2
I will forever think of your turkeys when I have concrete work done for me! I would have liked to see how your finished ceilings and lighting looked. Much respect for riding the turkeys!
 
To avoid these ads, REGISTER NOW!
Top Bottom