To avoid these ads, REGISTER NOW!

Machining a metal instrument panel?

MushCreek

Well-known member
Joined
Jan 14, 2015
Messages
9,826
Location
Upstate South Carolina
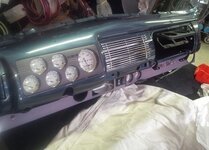
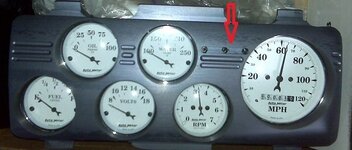
Maybe somebody here has a clever way to do this safely. I have an instrument cluster out of an F600, which bolts right into my '72 F-250 for a real old-timey look. It took a while to find a fair deal, as these are sought after now. It has the speedo and other gauges. Here's the question- I want to install a clock and a tach. As you can see, there are two spots for other gauges stamped into the panel, but no holes. How do I SAFELY cut holes of about 3-5/16" diameter for these gauges? The trick is gonna be holding it so it can't shift. I was thinking of screwing it down with plugs to fit the four small gauge holes. That way it can't shift or lift. Then what? Hole saw? Rotary table? Fly cutter? Jigsaw? I have a Bridgeport mill, so I have the ability to control the cut. The main thing is that I don't want to ruin a valuable piece, nor do I want to end up in the emergency room when it flies out and sticks into my forehead. Ideas?
IMGP5853.JPGIMGP5854.JPG
 
To avoid these ads, REGISTER NOW!

BLUE72CAMARO

Well-known member
Joined
Jan 1, 2014
Messages
911
Location
IL
Is the back of the panel flat? Hard to tell in the picture and not a ford guy at all. If so could you carefully screw the panel to a piece of lumber? 2x8 or some nominal size and then clamp that down on the table of your bridgport to cut with hole saw?
 

txvwnut

Well-known member
Joined
Jan 1, 2015
Messages
7,657
Location
Bedford, Texas
My suggestion is to find a way to attach a piece of wood to the back side of the panel then use a holesaw to make the hole. You’ll want to fixture it so it won’t move while doing the cutting op.
 

The Cobbler

Super Moderator
Staff member
Joined
Oct 24, 2013
Messages
25,967
Location
Niagara Region, Ontario, Canada
I agree on the hole saw. and backing up with apc of plywood to keep the center drill location from walking out . I might be inclined to holesaw a template that can be clamped on to the front too , and forget the center drill
 

slowtwitch73

Well-known member
Joined
Apr 18, 2019
Messages
5,876
Location
Hellgate
I would use a boring head.

Your idea of using existing holes is a good one...

I have done lots of this kind of thing.. the thing about large dia hole saws is they have so much contact they create enormous twisting forces on the work. If you go that route make sure your setup is rock solid, and just peck at it.. use cutting fluid, evacuate chips, and as mentioned have a soild backing behind hole.
 

36truck

Well-known member
Joined
Jul 13, 2010
Messages
980
Location
UP of Michigan
Bolt it down to some wood then clamp that to the table. Drill a 1 " hole the use a fly cutter to get the size hole you need. A hole saw is not the best way to to this. They like to walk around and don't make a clean round hole. Plus the tear out/grabbing the piece.
 

isb cornbinder

Well-known member
Joined
Nov 3, 2010
Messages
7,073
Location
Pacific South West, BC, Canada
I milled a fitted gauge panel for my 1940 Ford. It fits the OEM opening and the OEM studs hold it in place. I tunneled the panel and mounted the gauges from behind to try and avoid reflections on the convex glass faces.
The high/lo, left and right indicators are fiber optic with the light source from remote LEDs
 

Attachments

  • HOME-MADE DASH INSERT.jpg
    HOME-MADE DASH INSERT.jpg
    77.9 KB · Views: 29
  • gauges back side.jpg
    gauges back side.jpg
    40.1 KB · Views: 32
  • DASHBOARD 3.jpg
    DASHBOARD 3.jpg
    84.7 KB · Views: 28
  • DASH INSERT BILLET.jpg
    DASH INSERT BILLET.jpg
    78.2 KB · Views: 26
  • ASHTRAY KNOB 1 (2).jpg
    ASHTRAY KNOB 1 (2).jpg
    51 KB · Views: 24

DGersic

Well-known member
Joined
Mar 12, 2017
Messages
6,374
Location
DeKalb, IL
Carbide hole saw, slow speed, heavy pressure. Fix the piece to drill press table so it can’t move. Done in a few seconds.
 

isb cornbinder

Well-known member
Joined
Nov 3, 2010
Messages
7,073
Location
Pacific South West, BC, Canada
Maybe somebody here has a clever way to do this safely. I have an instrument cluster out of an F600, which bolts right into my '72 F-250 for a real old-timey look. It took a while to find a fair deal, as these are sought after now. It has the speedo and other gauges. Here's the question- I want to install a clock and a tach. As you can see, there are two spots for other gauges stamped into the panel, but no holes. How do I SAFELY cut holes of about 3-5/16" diameter for these gauges? The trick is gonna be holding it so it can't shift. I was thinking of screwing it down with plugs to fit the four small gauge holes. That way it can't shift or lift. Then what? Hole saw? Rotary table? Fly cutter? Jigsaw? I have a Bridgeport mill, so I have the ability to control the cut. The main thing is that I don't want to ruin a valuable piece, nor do I want to end up in the emergency room when it flies out and sticks into my forehead. Ideas?
IMGP5853.JPGIMGP5854.JPG
I would really like to have a gauge panel like the one you posted. I can see it with a clock and tachometer to the left and right. Speedo in the center with gauges around. Autometer have a good selection of styles.

There ae a couple of ways to improve the OEM gauge holes and make the new ones. I have a millling machine. I would likely set up my boring tool. The gauge panel should be secured to a 3/4" piece of plywood then fasten the PW to the mill table.
I think it would be a good idea to wire the dash in the bench and terminate the wires in Weather Pac connectors.
 

Attachments

  • WEATHER PAC.png
    WEATHER PAC.png
    60 KB · Views: 9
  • MAC WEATHERPAC.png
    MAC WEATHERPAC.png
    48.2 KB · Views: 9
Last edited:

gorilla

Well-known member
Joined
Dec 13, 2007
Messages
1,656
I would make a template in a hunk out of plywood and cut it out with my plasma cutter.
 
To avoid these ads, REGISTER NOW!
OP
M

MushCreek

Well-known member
Joined
Jan 14, 2015
Messages
9,826
Location
Upstate South Carolina
I'd be worried that a chassis punch might distort the raised ridge around the opening. It's not flat there, but a raised ridge to simulate a gauge bezel. The chassis punch would probably crush that detail before cutting through. When I was working as a tool maker, I either would have made a custom punch that fit the contour, or more likely, would have just cut it out on the wire EDM.

First, I need to buy the gauges so I know exactly what size to cut, and how much the bezel covers so I can see how perfect the hole needs to be. I might be able to hack it out with a cut-off wheel in a Dremel, and then just clean it up in the mill. I want a fairly low RPM tach for the big six; maybe 5000 RPM. I already found a clock that has a dial that matches the original speedo and gauges pretty well.
 

Snip's

Well-known member
Joined
Apr 29, 2017
Messages
1,865
Location
Ohio
Consider marking out the two holes once you verify the gauge size...
Use your cut wheel in the Dremel for a rough cut inside the marked line...
Use a 1/2" or 3/8" belt sander and remove the remaining metal up to the line...
The belt sander will be slower but you'll have better control without distorting the panel...
My big concern would be using a fly cutter or hole saw that catches the sheetmetal and damage your panel...
 

helterskelter

Well-known member
Joined
Mar 26, 2010
Messages
296
Trepan tool in the boring head or helical interpolate the hole in a cnc mill (you could do the same operation manually with a rotary table). Comes down to how valuable and rare the workpiece is. I'd toss it on the cnc mill personally.
 

4 FN 27

ALLIANCE MEMBER
Joined
Oct 19, 2015
Messages
4,635
Location
Minnesnowta
I'd make a simple fixture from .120 CRS with some stand-offs to mount the dash so the cutting plane is perpendicular to the Z-Axis on one of our "Sheet Dragger" Lasers.

Faro Arm time, Solidworks and programming about an hour or 2. An hour to build the fixture and about 1 minute to cut the holes in the dash.
 

danielbuck

Well-known member
Joined
Apr 15, 2014
Messages
931
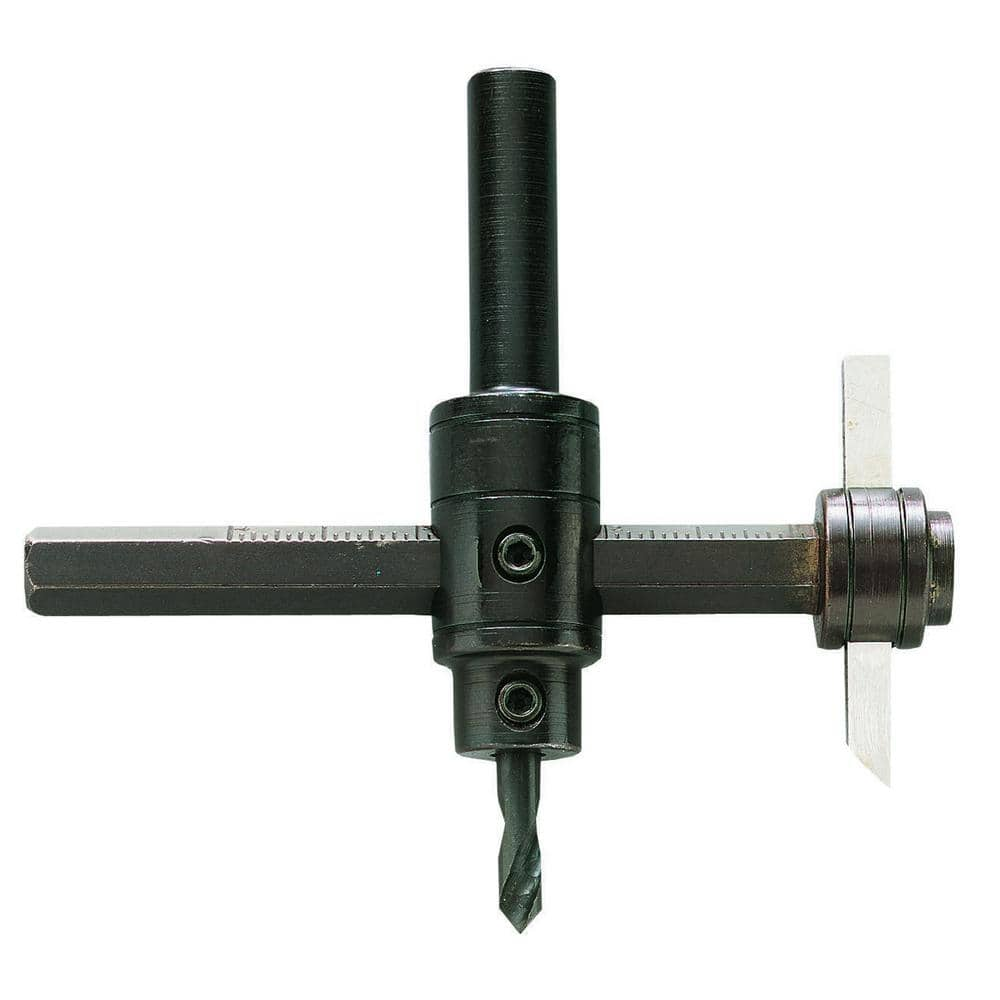
I'd use one of these circle cutters, if you have a drill press. Or whatever the equivalent tool would be for your bridgeport. I generally use it for wood, but it works fine on sheet metal. make sure it's sharp, and the work piece is clamped down tightly against a wood backer. you'll get a very clean hole.

I would try to get the dash piece as flat to the wood as you can. Which might mean after clamping it, also screwing the dash to the wood (on the inside of the circle that you intend to remove)

You might need to cut it from the back side, if part of the dash overhang gets in the way of the cutter. lower the drill press table enough so that you can get a chunk of 4x6 (or whatever) wood under there to support the dash.


paulsomlo

Well-known member
Joined
Jul 16, 2013
Messages
3,911
Location
Northern Colorado
I'd make a simple fixture from .120 CRS with some stand-offs to mount the dash so the cutting plane is perpendicular to the Z-Axis on one of our "Sheet Dragger" Lasers.

Faro Arm time, Solidworks and programming about an hour or 2. An hour to build the fixture and about 1 minute to cut the holes in the dash.
This gets my vote - probably the safest way to do it.
 

Firebrick43

Well-known member
Joined
May 12, 2015
Messages
14,195
Location
West central Indiana
Use a hole saw the correct size to drill out a slug on a piece of wood. Remove slug carefully without cracking it and use it to center and mark the center pilot hole on the dash. Drill and bolt thru the pilot hole of the slug to the dash and use it guide the holesaw (with the center pilot drill removed) to cut the dash. Run the hole saw backwards cutting through the dash and it wont catch and bind.

If you do it this way it removes all need to hold or clamp anything to the complex shape of the dash.
 

Monza Harry

Well-known member
Joined
Dec 29, 2018
Messages
1,433
Location
Windsor ON
When I was a youngster I would have drilled close to the needed dia. with an ⅛ drill bit in the hand drill. Then I would have drilled multiple holes nearly touching other around the undersized dia. This next part as a kid with no tools was the hard part: that was cutting between those first few holes so I could then with the one handed/open ended hack saw cut out the center. Today Dremels are no longer a week or 2's wages so this secondary part is easier/cheaper. Not to mention step bits exist now for easier sheet drilling (I was ~30 before I ever seen one). This is time consuming but with sharp tools and some [OK a lot] of patience e superb job can be achieved. Back then a "rat-tailed" file massaged to shape. Now a sanding drum carbide burr on/in your drill, Dremel or your other favorite rotary tool. Just part of how I came upon my skillset. No money and REALLY BIG Dreams! Harry
 

dutchgray

Well-known member
Joined
Sep 28, 2014
Messages
6,469
Location
Dorset. England.
You have a Bridgport mill so it should be easy, set it up on something to space it off the table, gently clamp it with some soft pads under the clamps so they don't mar or use the holes you have and something made up to hold it.
Select a suitable diameter piece of drill rod and chuck it in a collet chuck which you will use to carefully centre your spindle over the centre of the new gauge cutout, they have helpfully provided a raised section in the middle and you will get plenty good enough by eye with some care.
Then either drill a small hole and use a boring head to take it out to full diameter or just the boring head with a trepanning tool.
Cuts will be kept light so there will be little chance of it going wrong.
 

rsanter

Well-known member
Joined
Dec 22, 2007
Messages
18,523
Location
visalia ca
Need more info.
How clean of an edge do you need? Will the edge show and the gauge go in from the back or will the gauge have a lip on the front to cover the edge?

If the gauge will go in from the front and cover the edge then you can drill a hole in the center and use a nibbler to get close then a die grinder to trim to the line. Once the gauge fits then the edge will be covered.

If you need a clean edge that will show and the gauge goes in from the back then I would make a good fitting oak piece to fit on the back, dowels through the existing holes and a top piece of wood covering the front.
Clamp to the table through the existing gauge holes. The wood will spread the load out.

Use the mill with a trepanning tool or boring head. Cut the hole 70% out and then make several more passes creaping up on the final hole size. Debur that edge and you should be good
 
OP
M

MushCreek

Well-known member
Joined
Jan 14, 2015
Messages
9,826
Location
Upstate South Carolina
The cut edge will be covered by a bezel, but I don't know how much it will cover until I get the gauges in hand. The surface may be too rippled to use a nibbler, at least the cheap one I have. There are a series of concentric ripples. It's formed so that it could either be fitted with a 2" gauge, or the larger 3-3/8"
 

Old Man Roger

Well-known member
Joined
Apr 6, 2017
Messages
17,815
Location
Palm Coast Florida
I hate to be the one to say it, but I think you might need to buy a CNC water jet. :badteeth: God I love this place..lol


Seriously though, like mentioned above, screw it to a piece of wood and use what ever hole saw fits, or like also mentioned above a trapanning tool would probably be better if you have one.

How ever you choose to secure it to the wood, I would also put a couple screws in the part you’re going to remove just for some extra support.

Contrary to the advise given above, I’d go slow and not use a lot of pressure. The material is thin and won’t take long at all. The last thing you want is for the cutter to bite in and destroy the whole part.

All that being said, I’m pretty sure you already know how and what to do. I mean I ain’t sayin you be trollin, but I could see it..lol
 

Monza Harry

Well-known member
Joined
Dec 29, 2018
Messages
1,433
Location
Windsor ON
If you decide on a holesaw (old/worn) or trepaning tool re-sharpen for negative rake cutting edge to prevent/reduce the grabbiness at break through. Harry
 
To avoid these ads, REGISTER NOW!
Top Bottom