To avoid these ads, REGISTER NOW!

Made a sheetmetal workstation from scrap

Fatbrosracing

Well-known member
Joined
Feb 19, 2009
Messages
72
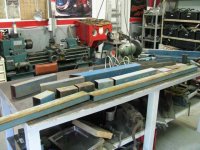
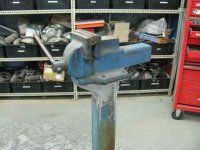
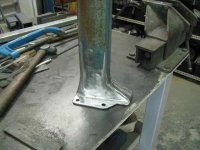
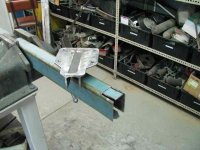
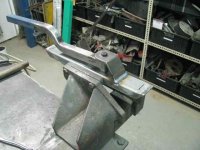
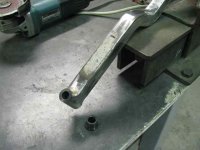
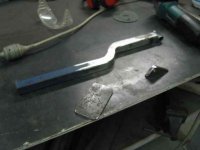
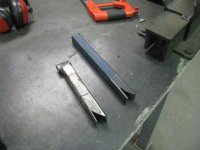
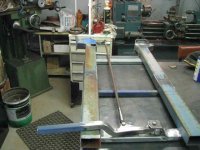
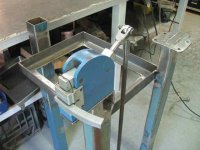
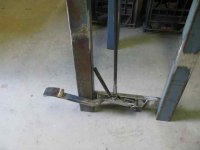
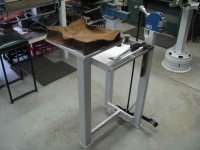
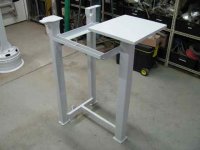
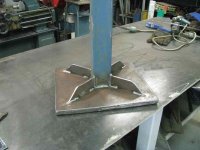
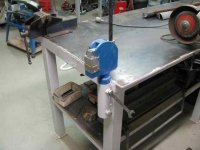
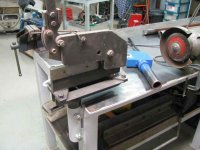
I've been kicking this idea around for a while. When I want to build something, but don't know exactly what I want, I let the idea buzz around in my head for a while and let it evolve. The idea for this was a multi purpose sheetmetal stand for making patch panels, and as my skills improve, some more adventurous items. The whole thing was made from stuff I had lying around. I wanted to spend as least as possible. Having already owned the shrinker/stretcher and the vise, the only cash outlay was for the heim joints. I have lots of build photos,if anyone is interested, not very exciting but it might help some-one to build something similar.
 

Attachments

  • stand-1.jpg
    stand-1.jpg
    65.6 KB · Views: 1,093
To avoid these ads, REGISTER NOW!

gorilla

Well-known member
Joined
Dec 13, 2007
Messages
1,652
Nice work, clever way to mount the shrinker-strecher on the tube.
 

z28snksknr

Well-known member
Joined
Jul 8, 2009
Messages
1,827
Location
Turnersville, NJ
That's a great little work station. In a small place like mine, I would have put wheels on it to store in a corner, but it's a clever design.

I want one.
 
OP
F

Fatbrosracing

Well-known member
Joined
Feb 19, 2009
Messages
72
That's a great little work station. In a small place like mine, I would have put wheels on it to store in a corner, but it's a clever design.

I want one.

I didn't plan on moving it much, I figured it would be more stable without wheels and if I need to move it, I'll pick it up with my engine hoist.
 
OP
F

Fatbrosracing

Well-known member
Joined
Feb 19, 2009
Messages
72
Here's the build. You can see by all the short lengths welded together, it was made from scraps/offcuts.
 

Attachments

  • stand-3.jpg
    stand-3.jpg
    37.4 KB · Views: 159
  • stand-4.jpg
    stand-4.jpg
    31 KB · Views: 150
  • stand-5.jpg
    stand-5.jpg
    28.7 KB · Views: 151
  • stand-6.jpg
    stand-6.jpg
    29.4 KB · Views: 152
OP
F

Fatbrosracing

Well-known member
Joined
Feb 19, 2009
Messages
72
I was going to make the 2nd leg into a stake pocket, but I felt it would be limiting. I used the vise so I can use T-dollies and other hand-made forms. I will make a stake pocket to fit in the vise later.
 

Attachments

  • stand-10.jpg
    stand-10.jpg
    30.4 KB · Views: 122
  • stand-9.jpg
    stand-9.jpg
    28.2 KB · Views: 127
  • stand-8.jpg
    stand-8.jpg
    31.1 KB · Views: 125
  • stand-7.jpg
    stand-7.jpg
    31.4 KB · Views: 138
To avoid these ads, REGISTER NOW!
OP
F

Fatbrosracing

Well-known member
Joined
Feb 19, 2009
Messages
72
Bending an old brake pedal crossed my mind, but making one from scratch was fun and it went with the whole idea of using up some scrap steel
 

Attachments

  • stand-14.jpg
    stand-14.jpg
    29.7 KB · Views: 97
  • stand-13.jpg
    stand-13.jpg
    23.8 KB · Views: 85
  • stand-12.jpg
    stand-12.jpg
    17.5 KB · Views: 96
  • stand-11.jpg
    stand-11.jpg
    21.3 KB · Views: 92
OP
F

Fatbrosracing

Well-known member
Joined
Feb 19, 2009
Messages
72
Like I said at the start, the only cash outlay was for the heim joints, and of course, just after I bought them a friend showed me his big box of them and said I could have used as many as I needed .... oh well
 

Attachments

  • stand-15.jpg
    stand-15.jpg
    30.5 KB · Views: 110
  • stand-16.jpg
    stand-16.jpg
    27.3 KB · Views: 115
  • stand-17.jpg
    stand-17.jpg
    17.9 KB · Views: 106
Last edited:
OP
F

Fatbrosracing

Well-known member
Joined
Feb 19, 2009
Messages
72
The plate for the bag, I found in the garden. It was rusty and the surface was a bit pitted to use for anything much. I cut it in half and welded one plate to the other to get the thickness. I have a good friend who is a trimmer and he made the bag for me to the size of the finished plate. A coat of paint ( leftovers from my workbench ) and it's done. I have what I consider to be a fairly large workspace for a hobby, but as usual, I try to cram as much in it as possible. Everything has to be on wheels or have a small footprint. This turned out great and I hope some-one can benefit from the photos
 

Attachments

  • stand-21.jpg
    stand-21.jpg
    25.5 KB · Views: 109
  • stand-20.jpg
    stand-20.jpg
    20.9 KB · Views: 102
  • stand-19.jpg
    stand-19.jpg
    35.2 KB · Views: 96
  • stand-18.jpg
    stand-18.jpg
    25.9 KB · Views: 106
Last edited:
OP
F

Fatbrosracing

Well-known member
Joined
Feb 19, 2009
Messages
72
This was my first mount for the shrinker and it worked very well and it was very versatile. New tools, just required another piece of tube with a collar.
 

Attachments

  • shrinker-1.jpg
    shrinker-1.jpg
    24.6 KB · Views: 115
  • shrinker-2.jpg
    shrinker-2.jpg
    28.7 KB · Views: 127

cello

Member
Joined
Sep 14, 2010
Messages
16
Location
Taylor, Michigan
SUPER GREAT I would love one for myself as I have even less room in my garage. Any chance you have a materials list or print around?
 
OP
F

Fatbrosracing

Well-known member
Joined
Feb 19, 2009
Messages
72
SUPER GREAT I would love one for myself as I have even less room in my garage. Any chance you have a materials list or print around?

Sorry, I don't have a list, this was very much a " work it out as I go " type of build. The height measurement was worked out using my elbow at right angles holding a hammer, apart from that everything else was determined by the material I had on hand and what I needed to mount. I'm glad my little project is of interest, thanks guys
 
To avoid these ads, REGISTER NOW!
Top Bottom