To avoid these ads, REGISTER NOW!

Made my order from Scotty Today.

amberjack1234

Well-known member
Joined
Dec 31, 2013
Messages
73
Location
Topsail Island, N. C.
Hi everyone;

All the stuff that I purchased from Scotty is suppose to arrive next week. I can't tell you everything that I ordered as I made some changes while on the phone with Scotty. But, I do have a list of everything written down and will list it all in my next posting. It's 4.18 AM on the east coast right now so I am getting a little fuzzy on details.

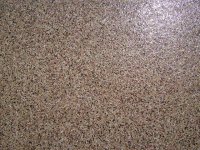
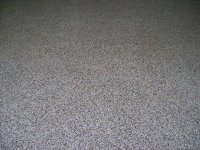
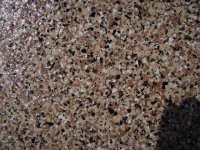
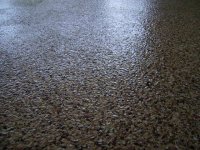
I want to make a decent write-up and show some pictures, that is if we do a good job,:D but I don't know how much time I'll have for pictures because there will be just the wife and I doing the work. I am using a 24" squeegee and 18" rollers so the job will go faster. The chips will be to rejection so I hope that hides some of my mistakes etc. I might have enough top coat for two thin layers as I know that it likes to go on thin. I even bought an new decent dehumidifier for the job because I live on the beach and there is always plenty of moisture here.

Scotty gave me such a good deal that I didn't even consider trying to get him to give me a better deal.

The floor is only 400 sq ft and is a year and a half old. So the wife and I should be able to do it with no problems as I am going to lay everything out as perfectly and systematically as possible before I even begin.

Wish me luck because I have read at least 1000 write-up on this and looked at least 200 videos as well as sending some PM's, mostly to Shaun Oriold, over the last 14-15 months.

I intend to go over it with a mild solution of Muriatic acid just in case because it has been setting so long even though it has been used very little. Then let it dry and using the dehumidifier at the same time for say 3 days.

It is not attached to the house. I have been waiting for a year and a half now so I am delighted that the day is near.

Hope that everyone got a good night's sleep.

Larry
 
Last edited:
To avoid these ads, REGISTER NOW!
OP
A

amberjack1234

Well-known member
Joined
Dec 31, 2013
Messages
73
Location
Topsail Island, N. C.
Well I promised a progress report. So here it is but it is not a full report for that I apologize. This was the only 3-4 day window of good rain free, low humidity, cooler days in the near future that I had. Remember I live on the beach so humidity is a big problem. I did use a dehumidifier that I purchased just for this job. It worked wonderfully.

First off I would like to say that Scotty is one super guy to do business with. I don’t see how anyone could ever wish to work with a nicer more helpful man than he is. He did a really big favor for me but I won’t tell what it was because I don’t know if he does that for every one or not but it was a great favor.

Thanks Scotty.

I know that I said that I was going to present pictures of each step with explanations for each one. But I just could not do that as I was just plain to tired at the end or the beginning of each step.

The steps were the same as most folks do anyway.

1. I acid washed the new concrete once with a 3:1 mix and was not satisfied with that
so the next day I washed it with 1:1. That came out perfect. Very well pleased
with that.

2. I mixed 2 cups of baking soda with 2 ½ gallons of water thoroughly and applied that and was satisfied with that.

3. I ordered everything that I needed from Scotty and waited for the weather.

4. First day We (the wife and I) applied the primer to the entire 400 sq ft as it has a 1 to 1 ½ hr. pot life. Good to go there but, I would liked to have had a little extra of the primer as it was hard for me to get it spread out evenly, thin enough and get the whole floor premiered. You just can’t fully describe how porous that your floor is over the phone so I can’t blame Scotty for that in any way.

5. Floor was very porous and I tried to fill in all the pores with primer to prevent bubbles as best that I could.

6. After 9 hours I applied the epoxy coat per the instructions(7-10 hrs.). I tried my best to keep in the time guidelines as possible. I did this in two steps. 200 sq ft at a time. And flaked each one to rejection and keeping a wet edge in order to continue on to the next 200 sq ft. Then just repeated the same thing for the other 200 sq ft. I was very pleased with that part.

7. Waited 9 more hours and applied the first coat of polyurethane, again complying with the time guidelines of (7-10 hrs.).

8. Waited 9 more hours and applied the second coat of polyurethane, again complying with the time guidelines of (7-10 hrs.).

9. Waited 9 more hours and applied the third coat of polyurethane, again complying with the time guidelines of (7-10 hrs.).

10. Waited 9 more hours and applied the fourth coat of polyurethane, again complying with the time guidelines of (7-10 hrs.). I was applying it THIN to avoid the little ridges at the end of the rollers that you get when you apply to much of a product whether it be polyurethane, paint or anything else.

11. Waited about 2 days to remove the tape and did all the clean up work and painted the outside apron with textured concrete paint. This was a separate garage from my home.

12. I wanted to wait until I finished the project to post any pictures and wanted to post better pictures. I wanted to put a water seal down under the door and paint the little apron with a textured concrete paint but it has been long enough so I am just going to supply what I have.

13. Thanks to everyone on this site for all the information because without all the information that I collected here my floor in all probability would not have turned out the way that I expected it to.


Here are the finished photos of the floor. I am not much of a photographer so the floor actually looks much better in person than in the photos. I did not have one single bubble or blemish anywhere that I could detect.
 

Attachments

  • IMG_0009.JPG
    IMG_0009.JPG
    97.8 KB · Views: 98
  • IMG_0010.JPG
    IMG_0010.JPG
    104.3 KB · Views: 81
  • IMG_0011.JPG
    IMG_0011.JPG
    105.7 KB · Views: 82
  • IMG_0012.JPG
    IMG_0012.JPG
    101.1 KB · Views: 94
  • IMG_0013.JPG
    IMG_0013.JPG
    101.1 KB · Views: 80

LegacyIndustrial

ALLIANCE MEMBER
Joined
Jun 7, 2010
Messages
7,994
Location
deerfield, IL
Amber: Congrats to you and your wife. Glad it worked out and we appreciate your business and kind remarks. Job looks like pro work!!

Please post some wider shots or at least send to me if you can.

Thanks again.
 

CallMeJarob

New member
Joined
May 22, 2015
Messages
1
What did you buy in your kit from Scotty? Im planning this out on my 60 year old garage now and yours looks great!
 
To avoid these ads, REGISTER NOW!
OP
A

amberjack1234

Well-known member
Joined
Dec 31, 2013
Messages
73
Location
Topsail Island, N. C.
Amber: Congrats to you and your wife. Glad it worked out and we appreciate your business and kind remarks. Job looks like pro work!!

Please post some wider shots or at least send to me if you can.

Thanks again.

Thanks Scotty. I'll try to get some in the morning if the sun is shining good where there will be some good light on it. I just have a cheap camera.
 
OP
A

amberjack1234

Well-known member
Joined
Dec 31, 2013
Messages
73
Location
Topsail Island, N. C.
What did you buy in your kit from Scotty? Im planning this out on my 60 year old garage now and yours looks great!

2 Gal. Standard Primer, tinted beige. As I said my concrete was very porous
so I would have liked to have had an extra gal. It would have been easier
for me to roll it out.
3 Gal. HD Epoxy Coating tinted beige
3 Gal. HD356VOC Urethane Gloss Coating
Saddle Tan Flakes. I bought 75 pounds but if applied with care you could use about 3 gal. less flakes.
 
OP
A

amberjack1234

Well-known member
Joined
Dec 31, 2013
Messages
73
Location
Topsail Island, N. C.
Well I promised a progress report. So here it is but it is not a full report for that I apologize. This was the only 3-4 day window of good rain free, low humidity, cooler days in the near future that I had. Remember I live on the beach so humidity is a big problem. I did use a dehumidifier that I purchased just for this job. It worked wonderfully.

First off I would like to say that Scotty is one super guy to do business with. I don’t see how anyone could ever wish to work with a nicer more helpful man than he is. He did a really big favor for me but I won’t tell what it was because I don’t know if he does that for every one or not but it was a great favor.

Thanks Scotty.

I know that I said that I was going to present pictures of each step with explanations for each one. But I just could not do that as I was just plain to tired at the end or the beginning of each step.

The steps were the same as most folks do anyway.

1. I acid washed the new concrete once with a 3:1 mix and was not satisfied with that
so the next day I washed it with 1:1. That came out perfect. Very well pleased
with that.

2. I mixed 2 cups of baking soda with 2 ½ gallons of water thoroughly and applied that and was satisfied with that.

3. I ordered everything that I needed from Scotty and waited for the weather.

4. First day We (the wife and I) applied the primer to the entire 400 sq ft as it has a 1 to 1 ½ hr. pot life. Good to go there but, I would liked to have had a little extra of the primer as it was hard for me to get it spread out evenly, thin enough and get the whole floor premiered. You just can’t fully describe how porous that your floor is over the phone so I can’t blame Scotty for that in any way.

5. Floor was very porous and I tried to fill in all the pores with primer to prevent bubbles as best that I could.

6. After 9 hours I applied the epoxy coat per the instructions(7-10 hrs.). I tried my best to keep in the time guidelines as possible. I did this in two steps. 200 sq ft at a time. And flaked each one to rejection and keeping a wet edge in order to continue on to the next 200 sq ft. Then just repeated the same thing for the other 200 sq ft. I was very pleased with that part.

7. Waited 9 more hours and applied the first coat of polyurethane, again complying with the time guidelines of (7-10 hrs.).

8. Waited 9 more hours and applied the second coat of polyurethane, again complying with the time guidelines of (7-10 hrs.).

9. Waited 9 more hours and applied the third coat of polyurethane, again complying with the time guidelines of (7-10 hrs.).

10. Waited 9 more hours and applied the fourth coat of polyurethane, again complying with the time guidelines of (7-10 hrs.). I was applying it THIN to avoid the little ridges at the end of the rollers that you get when you apply to much of a product whether it be polyurethane, paint or anything else.

11. Waited about 2 days to remove the tape and did all the clean up work and painted the outside apron with textured concrete paint. This was a separate garage from my home.

12. I wanted to wait until I finished the project to post any pictures and wanted to post better pictures. I wanted to put a water seal down under the door and paint the little apron with a textured concrete paint but it has been long enough so I am just going to supply what I have.

13. Thanks to everyone on this site for all the information because without all the information that I collected here my floor in all probability would not have turned out the way that I expected it to.


Here are the finished photos of the floor. I am not much of a photographer so the floor actually looks much better in person than in the photos. I did not have one single bubble or blemish anywhere that I could detect.
The top shot on the right and the bottom right was with fluorescent lighting.
The others are with sunlight so they show the true colors and shine much better.
 
OP
A

amberjack1234

Well-known member
Joined
Dec 31, 2013
Messages
73
Location
Topsail Island, N. C.
Scotty, I tried the pictures again early this morning when the sun was shining into the open garage but can't say that they were any improvement. Just don't have much of a camera to work with. I use to have a very good and expensive camera and then the digital age took over about 3 years later and killed it.

Sorry about not getting you any better pictures. All of the close up pictures were good I thought I though.

Larry
 
To avoid these ads, REGISTER NOW!
Top Bottom