To avoid these ads, REGISTER NOW!

Making the 'big-boy bed' a little bigger

Jack Olsen

Super Moderator
Staff member
Joined
Mar 22, 2009
Messages
6,678
Location
Los Angeles
I wrote about this in my main garage thread. But I thought I'd also post it here. It's a small project, but it does show how handy it is to have a welder and a garage to use it in.

My wife and I were given a twin bed for our three year old. We wanted to get a second one to match -- since we've got another baby due in the next couple weeks -- but we found out the model of bed isn't made anymore. So I came up with the idea of going vertical -- since a kid is going to like that more and it will also eat up less floor space in his room.

Here's the steel. My Jeep is only 12' long, but the rack I made lets me carry 20' lengths on it.

bunksteel.jpg


I'm a hack welder, honestly. But I don't let that slow me down.

bedweld.jpg


I moved my drill press onto the folding-down welding table for the holes for the threaded fittings I was welding in.

drillpress.jpg


Doing all the welding on one side of the threaded-hole side warped the uprights. I used my cheapo HF roll bender to straighten them back out.

straightening.jpg


Getting closer:

beddingy.jpg


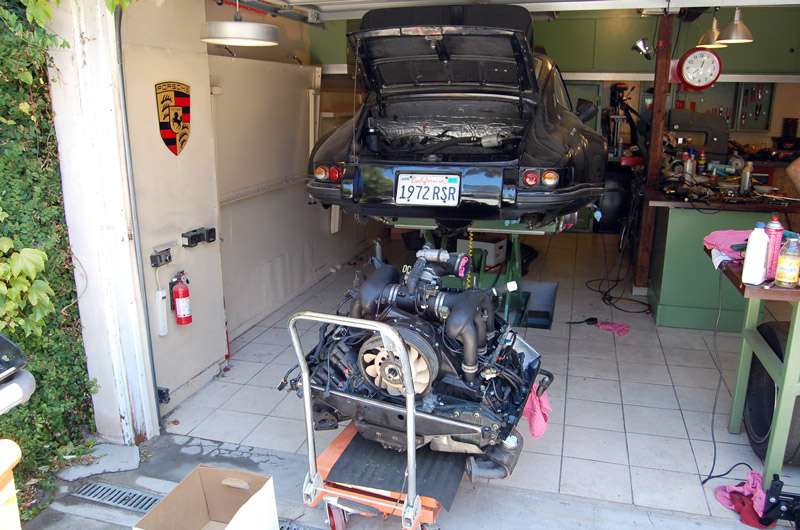
The thing I like about my little two-car garage is that right before I started on the bed, I'd been very deep in work on my track car. As it happens, the next project is a set of wood storage shelves. With a little clean-up in between, the garage works okay for wood, metal and automotive stuff.
humpty.jpg


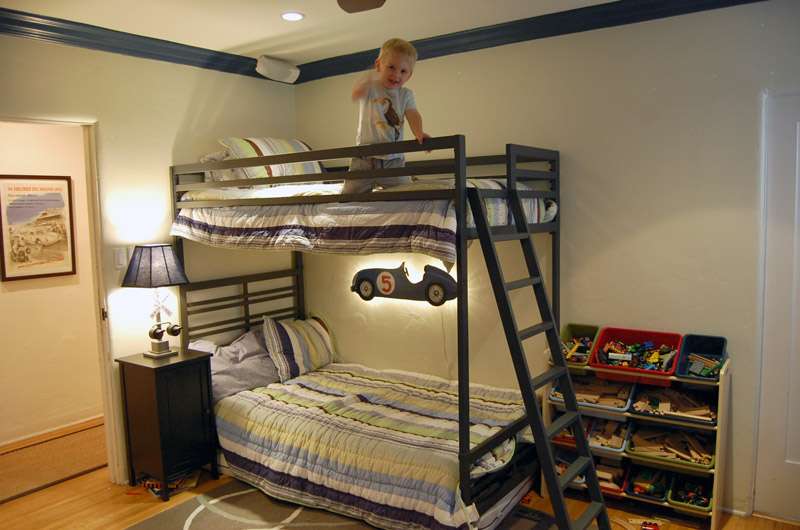
Here's the bed. And also a picture of the new owner, who was pretty thrilled about his new-found ability to touch the ceiling.

bunk01.jpg


bunk02.jpg
 
To avoid these ads, REGISTER NOW!

Omphaloskeptic

Well-known member
Joined
Oct 11, 2008
Messages
2,346
Location
Ultima Ratio, Wa.
Jack, for a 'hack welder', you do some mighty fine design and fabrication! You've just racked up a ton of 'honey-do' points with the missus, and no doubt, you have morphed in SUPERDAD to young master Olsen.:thumbup:

P.S. - WOOD SHELVES!?! Oh Mr. '12-gauge', say it ain't so!:lol_hitti
 

Steve from Socal

Well-known member
Joined
Jan 27, 2009
Messages
3,533
Location
Hutchinson Ks.
WHAT!

The bed is not JO green, the kid doesn't have a strong hold toy box and there is no tile anywhere.

Very clever Jack; I hope number one son enjoys.

Steve
 

rickairmedic

Well-known member
Joined
May 31, 2005
Messages
4,165
Location
louisville ,Ky
Jack once again your have done a great job turning a pile of stuff into something usefull . Looks built well enough he will be able to take it off to college with him :D.


Rick
 
OP
J

Jack Olsen

Super Moderator
Staff member
Joined
Mar 22, 2009
Messages
6,678
Location
Los Angeles
Thanks very much, guys.

I added one more piece, which is a slip-fit piece to provide more rail where the ladder comes up. Our babysitter thought he might slip through that opening in the rail, so I used my little vise press brake to make a little piece to keep him in there. (No picture, I'm afraid.)

Today I got most of the way through the shelf unit for some of his toys. I cut the lumber, got everything fitted together and then took it apart to prime it. Now it's been put in place in the room, although it's still in gray primer. I'm going to make one more change (a thin piece covering the floor) and then paint the whole thing blue to match the trim.

In the picture, we were testing to see what would fit on it.

shelves.jpg


I know, no green. What am I thinking? :)
 
To avoid these ads, REGISTER NOW!
OP
J

Jack Olsen

Super Moderator
Staff member
Joined
Mar 22, 2009
Messages
6,678
Location
Los Angeles
Jack, how did you finish the steel ?

It was funny. Initially, I painted it Rustoleum brown gloss, which was 100% the wrong color. When my wife pointed out that the original bed was actually grey (and with a flat finish), I mixed a few colors together to match it, all latex enamels. The thing that nudged me to a latex final coat was the 'known to the state of California to cause cancer' verbage on the Rustoleum. It probably doesn't mean anything, really, but I knew the steel was protected with the first coat. I used the second coat -- in the correct color -- to (I hope) protect the kid.
 

Altec

Well-known member
Joined
Jun 17, 2011
Messages
1,011
Location
SoCo, MD
Do the vertical corner posts have any sort of caps on them? If not, you can get plastic caps. Keep him from stuffing stuff in the tubing, hitting them in a painful way. I know I'd probably do both, even now. haha.

Great job! :)
 
OP
J

Jack Olsen

Super Moderator
Staff member
Joined
Mar 22, 2009
Messages
6,678
Location
Los Angeles
Mikeatrpi, he keeps the red lights on the railroad crossing lamp flashing all night long. I don't know how he sleeps.

Altec, I used 1"x1/8" stock to make welded-on caps, which let me round the hard corners off with a grinder. Plastic caps would have been simpler, but I worked with what I had on-hand.

Today I spackled and painted the shelves for the little nook in the kid's room.

shelves.jpg


It's that color to match the cabinets on the opposite wall in there. I'm not crazy about them, but I don't want to tear them out since I thing they date back to 1925.

opposite.jpg
 

littletoes

Well-known member
Joined
Nov 9, 2010
Messages
1,244
Location
NE Washington
Awesome work, but I don't see any table saw, nor saw dust! Can't imagine it in your shop!

Layout is KEY...I think that is my weekness, I LOVE layout. Its a challenge to just get everything RIGHT, the first time.

Can't wait to see your next project, too nice, no wonder your Son likes it! ;)
 
OP
J

Jack Olsen

Super Moderator
Staff member
Joined
Mar 22, 2009
Messages
6,678
Location
Los Angeles
Thanks, guys.

Zen, you're right. The odd thing on the shelving project was how handy the floor lift turned out to be as a platform for painting. You throw a drop cloth over it, and then you can raise and lower the piece to get into the nooks and corners without having to touch it.

On the bed, here's the piece I made for the off chance that the kid might roll out through the gap in the railing while he's asleep. I have a little brake that fits in my vise which is nice to have for quick jobs like this.

newpiece.jpg


It slides down over the vertical piece and then rests on the horizontal section on the other side. The nice thing is that he can move it if he absolutely needs to get down.

inplaceg.jpg


And here's the new shelving thing after the wife got a chance to fill it up.

loadedq.jpg


We learned the new about-to-be-baby-girl is already 7-1/2 pounds as of yesterday -- so we're just about at the buzzer for getting these little things wrapped up.
 
Last edited:

Altec

Well-known member
Joined
Jun 17, 2011
Messages
1,011
Location
SoCo, MD
Altec, I used 1"x1/8" stock to make welded-on caps, which let me round the hard corners off with a grinder. Plastic caps would have been simpler, but I worked with what I had on-hand.

T

Bangin'! I suggested the caps incase you hadn't done anything. Little late to weld on caps now, if you hadn't. :) Welding on plugs, and using the extra material to soften the edge is exactly what I had in my head for how I would do it! :beer:

Good job!
 
To avoid these ads, REGISTER NOW!
Top Bottom