To avoid these ads, REGISTER NOW!

Making vise jaw pads from old copper pipe

Beerhippie

Well-known member
Joined
Oct 13, 2023
Messages
10,047
Location
Far NE Oregon
Yesteday, @Outlawmws put an idea in my head about using copper pipe scraps to make vise jaw pads or caps. Sounds easy enough! I could have them done by bedtime.

I'll start with my Roughneck vise.

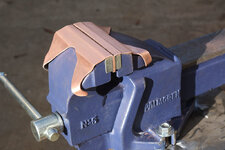
Scraps of copper pipe are something I have no shortage of, so I went out to the scrap copper bucket and picked out the best-looking pieces of 1 1/2" pipe I could find ;) Cut them to length of the jaws--this is my first try, so maybe I made them too short--and cut them lengthwise:

53668094185_55870cc364_b.jpg

A 4 1/2" cut-off wheel in an angle grinder goes through copper like a hot knife through butter!

Now I need to anneal the pieces of pipe, which means a lot of heat over a large area. What the hell do I have that can do that?

Oh, yeah:

53667851678_35878f7610_b.jpg

Turn the old 500 up to thermonuclear and:

53667633081_438df57136_b.jpg

That oughta' do it.

Hot working the copper onto the jaws of vise requires some very specialized tools:

53668094215_9bc13d03e8_b.jpg

and the copper (pipe is actually not 100% copper, but an alloy) work-hardens FAST, so there are many trips back to the stove to get the fit right.

53668094200_dc9037550d_b.jpg

Getting closer.

53667989109_57e37310b4_b.jpg

That's where I'm going to leave it for tonight. I need to trim some of the excess off and figure out just what I want them to look like when done, then do some cleaning and polishing on them. Then think about version 2.

To be continued....
 
To avoid these ads, REGISTER NOW!
OP
B

Beerhippie

Well-known member
Joined
Oct 13, 2023
Messages
10,047
Location
Far NE Oregon
This morning I realized I was going about it all wrong, so I started over again.

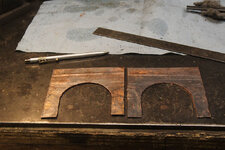
I re-heated both pieces and flattened them out. Then made a Q&D pattern and scribed.

Broke out the Hippie vertical bandsaw (Port-A-Band in a vise):

53669816655_6727f189c8_b.jpg

Crude, but it works.

Rough cut:

53669820105_063725210f_b.jpg

I'll rig up a drum sander on my drill press and smooth the edges out after I make a few more measurements and cuts.

After lunch....

I took a look at some factory-made vise jaw pads and decided mine could look just a little more refined.

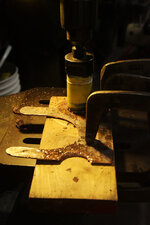
Think a little... 1 1/2" hole saw in the drill press, long rod for a reference, block of wood w/1/4" hole... make a shallow cut in the wood with the saw for another reference....

53668632742_4a343e624a_b.jpg

I'd scribed a mark 1" down from the top edge where I'll be making my bend. That was one guide. The edge of the copper against the rod another and the cut in the block of wood another.

53669957650_1cf10e504c_b.jpg

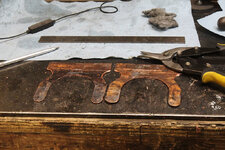
Aviation shears for a little coarse trimming, then the Hippie disk grinder for the final shaping:

53669957625_5989548a44_b.jpg

A 3/4" drum in the DP to smooth out the inside curves:

53668632767_b031433907_b.jpg

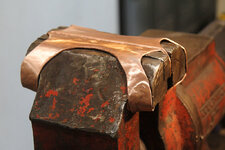
A little work with a couple of hammers for final fitting, a quick polish with a blending pad in the angle grinder and:

53669857339_b3446fdb9c_b.jpg

53669716053_e1082ff0e0_b.jpg

Perfect? Not by a long sight. Will they work? Yep. Purty? Kinda, for now.

On that old Roughneck vise, it's the proverbial "lipstick on a pig".

I've learned a lot for the next time--and got to play with a passel of shop tools. If I want to make a set for my 1911 Reed, I'll have a good start on doing it right.

Now for the clean-up... shaping copper with an angle grinder and flapdisk sends coarse copper dust everywhere.
 
OP
B

Beerhippie

Well-known member
Joined
Oct 13, 2023
Messages
10,047
Location
Far NE Oregon
Fun little project. But show us more of that Coleman 500, @Beerhippie. My old 502 Sportster does not look like that.
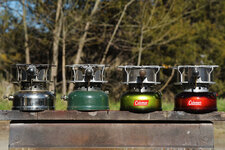
Coleman made two versions of the big, cast-iron burner single stove back in the day. I just happen to have a small sub-collection of them.

53669952193_911c427652_b.jpg

L-R: Nickel-plated 500, B (late) '47. Painted 500, B 51. 500As, both are Feb. '55. Both are custom paint jobs, as the paint was mostly missing. Stainless wind screens are mine, two versions. They make a real difference when cooking outside.

Now that my camping vehicle is a Toyota Corolla instead of a Vanagon, I carry two or three of the 500 series instead of one 3-burner 426 suitcase stove. Easier to pack and actually more versatile.

I also tend to use them as shop tools, as they crank some serious heat when I need to get something large really hot in a hurry. They're the Coleman rosebud.
 
Last edited:
OP
B

Beerhippie

Well-known member
Joined
Oct 13, 2023
Messages
10,047
Location
Far NE Oregon
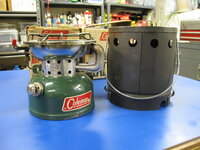
Yep--and with the heat drum, which I also have, a nice little space-heater. I use mine under my desk in the poorly-insulated shop in the cold months.
 
OP
B

Beerhippie

Well-known member
Joined
Oct 13, 2023
Messages
10,047
Location
Far NE Oregon
While finishing a job like this is satisfying, I could hear the old Reed 404 1/2 over on the opposite corner of the bench grumpin' and grumbling: "A hundred years working my *** off, gettin' beat on and cut by every monkey that came along, two World Wars, a dozen police actions, three factories, lost under a bench for two decades and the FNG gets the nice jaw covers! Ain't that just life for you?"

So, feelin' all guilty and ****, I got back to it.

This time, I used my nickel-plated 500 stove to anneal the pipe pieces and the bandsaw for almost all the shaping. I even made a real pattern this time around!

53673019319_a4db6b3400_b.jpg

I then used my bench grinder with blending disks for the final work, so I didn't scratch up the fine finish on the Reed ;) I used soft mallets for most of the fitting so the covers don't look quite so beat-up and:

53673119690_0a8e0438f1_b.jpg

Hope the old guy is happy now.

Now to clean the shop up... again.
 
Last edited:

cmandp

Well-known member
Joined
Dec 22, 2011
Messages
1,290
Location
New Jersey
They look great. Are these really piece's of 1/2" pipe? I know the circumference is deceivingly large when unfolded but it's breaking my brain right now.

I'm also saving the camp stove trick in the back of my mind for heating up metal parts like this. I have a knock-off butane one I can try.
 
OP
B

Beerhippie

Well-known member
Joined
Oct 13, 2023
Messages
10,047
Location
Far NE Oregon
They look great. Are these really piece's of 1/2" pipe? I know the circumference is deceivingly large when unfolded but it's breaking my brain right now.

I'm also saving the camp stove trick in the back of my mind for heating up metal parts like this. I have a knock-off butane one I can try.
Those are 1 1/2" copper tubing--tubing because it's measured by OD, not ID like a pipe. This is type L, meaning the wall thickness is 1/6". More common household copper plumbing would be Type K, with thinner walls, but would still work.

When flattening out the split pieces of pipe, you really do have to get them red-hot, then strike while the copper is hot! "Hard copper" is well named. Unless you do a lot of bending while shaping the pieces, you shouldn't need to anneal them again.
 

cmandp

Well-known member
Joined
Dec 22, 2011
Messages
1,290
Location
New Jersey
Ah, I missed the '1' in 1-1/2" and that it was tubing not pipe. Good to know the wall thickness you used too. I think I have some 1-1/2" pipe couplings that could work for this.
 
OP
B

Beerhippie

Well-known member
Joined
Oct 13, 2023
Messages
10,047
Location
Far NE Oregon
Ah, I missed the '1' in 1-1/2" and that it was tubing not pipe. Good to know the wall thickness you used too. I think I have some 1-1/2" pipe couplings that could work for this.
All sweat fittings for copper tubing--what everyone calls pipe--are Type L, so 1/16" wall thickness.

Measuring the nominal tubing size by OD rather than ID is why you can use one set of fittings for all Types.

Nominal pipe sizes are ID. In theory.
 
To avoid these ads, REGISTER NOW!
OP
B

Beerhippie

Well-known member
Joined
Oct 13, 2023
Messages
10,047
Location
Far NE Oregon
They look great. Are these really piece's of 1/2" pipe? I know the circumference is deceivingly large when unfolded but it's breaking my brain right now.

I'm also saving the camp stove trick in the back of my mind for heating up metal parts like this. I have a knock-off butane one I can try.
A 5" piece of the 1 1/2" tubing unrolls to just about square, 5" X 5". It's a little longer in circ. than 5". Using a pipe cutter to cut the copper gives me two straight edges to work off to square up my somewhat clumsy longitudinal cuts.

I have a propane converter for an old two-burner Coleman 413 stove that had no tank when found. I use that in the shop when I need even more heat and/or more burners. It takes up a LOT more bench space than the 500, which is why I used the 500 on this project.
 

rlitman

Well-known member
Joined
Oct 18, 2010
Messages
24,686
Location
Long Island
...This is type L, meaning the wall thickness is 1/6". More common household copper plumbing would be Type K, with thinner walls...
K is the thickest copper, and has green markings. You're thinking of M, with red markings. L is in the middle with blue markings. Regardless, the wall thickness varies with the diameter, and thicknesses are stated in ASTM B88 table 1. Your 1-1/2" type L should be just under 1/16". Man I wish I had a scrap bin like you. :)

Anyway, nice vise thong. I'm sure it will serve you well. Soft jaws come in handy all the time.
 
OP
B

Beerhippie

Well-known member
Joined
Oct 13, 2023
Messages
10,047
Location
Far NE Oregon
Correction: The 2" tube lays out to 6 3/8", not 6 5/8'!

I cleaned up the rough edges and did a little fine-tune with an angle grinder and 220 grit flapwheel mounted in the vise. There are drifts of copper dust around the vise--where I just need to sweep if off the pavement instead of hiding in every nook and cranny of the shop--which is why I built a portable vise stand.

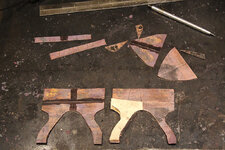
Now get the copper blank clamped in the vise on my lay-outs:

54203604347_08ba374b01_b.jpg

Get out my fine metal-working tools:

54203604327_cf3e5abced_b.jpg

Hippie bending break--a piece of 3/8" steel strap and BFH.

Fitted:

54204920585_c279152532_b.jpg

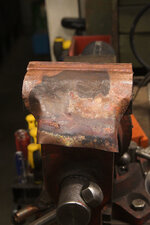
Finished:

54204748694_c50f61188f_b.jpg

A nice use of an unseasonable 55 degree sunny day! The last two weeks have been in the teens to low thirties with a mix of snow, slush and freezing rain.

Beer thirty!
 
Last edited:
OP
B

Beerhippie

Well-known member
Joined
Oct 13, 2023
Messages
10,047
Location
Far NE Oregon
I'm glad I used my "window of opportunity" yesterday! We had an inch of snow last night and now it's 35 and still snowing.
 
OP
B

Beerhippie

Well-known member
Joined
Oct 13, 2023
Messages
10,047
Location
Far NE Oregon
Copper pads look really good..... I take a much lazier approach for my soft pads..... I just use aluminum angle.....

LynnW
I've done that, too. I also have some cheap magnetic pads from the Jungle that have the most miserable cheap copies of RE magnets that barely stick to anything. I wanted something that didn't fall off every time I bump them. These take some effort to remove.

Besides, they look cool and the project kept me off the streets for an afternoon.
 

ER70S-2

Well-known member
Joined
Jan 2, 2015
Messages
806
Damn, that's like $50 in copper! I just 3D printed a set of very soft jaws for mine (I already have an aluminum set).
 
OP
B

Beerhippie

Well-known member
Joined
Oct 13, 2023
Messages
10,047
Location
Far NE Oregon
Damn, that's like $50 in copper! I just 3D printed a set of very soft jaws for mine (I already have an aluminum set).
T a spot price of $3.50/lb for clean copper tubing, it's more like a buck in copper. I'm getting these tube sections from my copper scrap bucket. We don't use much copper anymore, but the original build-out of the brewery involved what seems like miles of it, from 1/2" up to 3", so lots of off-cuts piled up over the years.
 
OP
B

Beerhippie

Well-known member
Joined
Oct 13, 2023
Messages
10,047
Location
Far NE Oregon
I took the vise huggers off and weighed them: 11 oz. So, @ $3,50/lb for clean copper tube, that's $2.41/pair by weight. Add in three hours of puttering around the shop at... well, whatever.

Why buy new when I can make it myself for four times the price?
 
OP
B

Beerhippie

Well-known member
Joined
Oct 13, 2023
Messages
10,047
Location
Far NE Oregon
I replace the jaws on all my vises with aluminum bar stock.
I am finding that I rarely remove the jaw pads. It seems that there just aren't that many occasions where I'm thinking "Hey, let's just mash the hell out of this part." Especially nice when working on threaded parts.

Welding slag doesn't stick to the copper--bonus.
 

CHRIII

Well-known member
Joined
Jun 12, 2020
Messages
234
Location
NE TN
Those copper jaw pads look great! I made some that are a simpler design for my Reed 2C that I posted in the vice repair thread. Great work on yours, Beerhippie!
 
To avoid these ads, REGISTER NOW!
Top Bottom