To avoid these ads, REGISTER NOW!

Makita Flashlight ML903

8alonzo8

Member
Joined
May 28, 2018
Messages
10
Location
Houston, TX
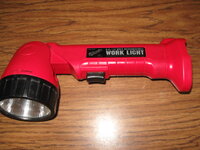
I have an old Makita flashlight (ML903, 9.6V) that I would like to take apart to check, clean, and put back in service (pics and diagrams attached). I have taken apart all kinds of tools but I cannot figure out how to take this one apart. Based on the diagram, there are no wires and the battery connection is made via spring loaded contacts which also hold the head to the body. Anyway, it looks well designed and way too cool for any landfill!

Has anyone ever taken one of these apart or know how?

Makita ML903 1.jpeg

Makita ML903 3.jpeg

ML903-Diagram.png
 
To avoid these ads, REGISTER NOW!

Provincial

Well-known member
Joined
Sep 21, 2011
Messages
6,856
Location
Near Salem, OR
I have had one apart. You have to compress the spring-loaded axle (part numbers 20, 21, and 22) enough to slip it off the pivot points of the body. Get one side disengaged and tip the head enough to keep the pivot from re-engaging the recess in the head. Then repeat for the other side.

When reassembling, the head has tapers that help compress the axle spring.

Clean the contact surfaces gently. The shiny plating is extremely thin, and any sort of abrasive will damage it. I use DeOxit for things like this. If the contacts are rusty, don't expect much.
 
OP
8

8alonzo8

Member
Joined
May 28, 2018
Messages
10
Location
Houston, TX
The spring is quite strong and I was having a difficult time keeping the first axel part out of position when switching to the work the other side. Perhaps a little more patience, and maybe move my tongue to the other side during my next try. DeOxit is great and I'll be sure to be gentle with those contacts. Thanks for the tips!
 

Provincial

Well-known member
Joined
Sep 21, 2011
Messages
6,856
Location
Near Salem, OR
It has been almost 40 years, but i remember that I used sharp-edged tools (knife or wood chisel) in pairs. I used the second tool to hold the progress while I repositioned the first tool. I may have gently wedged the ears apart a little with a thin flat screwdriver to get more working room. Be careful if you do this, as the plastic is probably more brittle after all this time!
 
OP
8

8alonzo8

Member
Joined
May 28, 2018
Messages
10
Location
Houston, TX
Ok, got it. Your information pointed me in the right direction. Tools used and a brief description follow.

First, I set the flashlight head to the 45 degree angle which seemed to be the most open and relaxed angle for the job. Next, I used the black plastic spudger as a wedge to create working room on one side, then slipped in the thin screw driver to work one axel side.

Once I had the axel part pulled out of its seat, I slipped in a small cutting from an old business card which was strong enough to keep the pivot from springing back into place but thin enough to give me room to work the other side (it's a tight space and anything else might have been too thick).

Next, I pulled the spudger out to wedge the other side and start working the other pivot in the same way. As soon as I got the pivot out of place, I just wriggled it around enough and pulled it right out.

I'll take a few pics of the inside and show the end results. I don't have a battery at the moment, but I will test connection with a meter and power supply. If all goes as planned, I'll order a fresh battery and, hopefully, this little unit will be around a little while longer.

Makita ML903 4.jpeg
 

RTM

Well-known member
Joined
May 13, 2019
Messages
13,093
Location
SF Bay Area
While you are dinking around with it, put an LED bulb in it. Much more drop proof that way. I have the stick battery 9.6v ML902, and dropped it and broke the bulb almost immediately.. The LED has survived many trips to the floor.
 

bonneyman

Well-known member
Joined
Apr 22, 2010
Messages
8,772
Location
Desert SW
Love the pivot head Makita flashlight! I converted two flashlights to 9 volt transistor batteries - a whole lot easier and faster to get full charge than the old expensive and hard to find stick batteries. Left one full size one original as I've since gotten a bunch of batteries, chargers, and drills.
The stick Makita tools are considered passe' and passed over these days - you can usually find them for cheap at thrift stores. Still trying to get a drill converted to LiPo batteries. That'll update the things. I keep accumulated them - gotta do something with 'em. lol
 

Attachments

  • IMG_7611.JPG
    IMG_7611.JPG
    99.2 KB · Views: 8
  • IMG_7609.JPG
    IMG_7609.JPG
    135.3 KB · Views: 7
  • IMG_7567.JPG
    IMG_7567.JPG
    120.2 KB · Views: 10
Last edited:
To avoid these ads, REGISTER NOW!
OP
8

8alonzo8

Member
Joined
May 28, 2018
Messages
10
Location
Houston, TX
Nice collection bonneyman!

I have my dads old 7.2V router and a drill. He used the heck out of his gear, but kept everything in top condition and they work great. I was also given a box of 9.6V drills and a very nice 7.2 drill kit in a case along with two chargers and batteries. The 9.6V batteries need replacing, but the 7.2V and both chargers work great. A couple of the drills look like they were put up wet and will need a little TLC, but I get a kick out of working on that kind of stuff and look forward to getting those back into working order.
 

bonneyman

Well-known member
Joined
Apr 22, 2010
Messages
8,772
Location
Desert SW
Thanks 8! I find that having spares of such things - especially older stuff that's fallen out of favor - is wise if nothing else than having spare parts! And I keep an eye out for empty blue cases - even without tools those Makita carrying cases are nice to have. (Especially when full of Makita tools)! Can usually be had for just a few bucks when empty.
I have both a 9.6v and 7.2v angle drill. I need to get them converted to LiPo just because.
 

Attachments

  • IMG_7612.JPG
    IMG_7612.JPG
    123.2 KB · Views: 7
  • IMG_7639.JPG
    IMG_7639.JPG
    121.9 KB · Views: 6
OP
8

8alonzo8

Member
Joined
May 28, 2018
Messages
10
Location
Houston, TX
I have a case with a 6172D drill with two 7.2V stick batteries and charger in very nice condition. There is a place for a flashlight (which I don't have) and I bet it was an ML902. It's great to see these units have a pretty deep following. Finishing up my flashlight cleanup this weekend.
 
OP
8

8alonzo8

Member
Joined
May 28, 2018
Messages
10
Location
Houston, TX
Finished up this little project. Below are a few pics of the inside and the final results. I ran a few searches on the innerwebs, but couldn't really find a date of manufacture. Simple, effective engineering is easy to maintain and underappreciated.


Makita ML903 Final.jpg
 
OP
8

8alonzo8

Member
Joined
May 28, 2018
Messages
10
Location
Houston, TX
My original goals was to get this back to original working condition. Next, I'll see if I can source a suitable LED replacement. I might also consider tearing down an old 9.6V battery and use the carcass as a container for a much cheaper battery alternative while keeping the look of the original.

Thanks to everyone for your comments, help, and awesome suggestions!
 

bonneyman

Well-known member
Joined
Apr 22, 2010
Messages
8,772
Location
Desert SW
My original goals was to get this back to original working condition. Next, I'll see if I can source a suitable LED replacement. I might also consider tearing down an old 9.6V battery and use the carcass as a container for a much cheaper battery alternative while keeping the look of the original.

Thanks to everyone for your comments, help, and awesome suggestions!
While not a Makita tool I did do a swap-out switcheroo on this Milwaukee 9 volt flashlight, adapting a B&D battery pack to it stuffed with 9v transistor batteries. Looks weird but works great. I'm sure you could do something similar with a Makita carcass - just get creative!
 

Attachments

  • IMG_6186_1.JPG
    IMG_6186_1.JPG
    109.7 KB · Views: 2
  • IMG_6194.JPG
    IMG_6194.JPG
    103.6 KB · Views: 2
  • IMG_6195.JPG
    IMG_6195.JPG
    95.4 KB · Views: 2
To avoid these ads, REGISTER NOW!
Top Bottom