BigKev
Member
I am new here, but I thought I would post pictures of my own garage project.
My wife and I bought this (our first) house about 2 years ago. I had bought a '54 Packard Clipper to restore. The car was in pretty rough shape when I found her, but that is what I wanted so I could teach myself all the aspects of restoring one these old cars. So she let me have the entire garage for this process.
The house and garage were built in 1959 and are typical of a California ranch style home from that period. The garage is attached to the front of the house, but has no other door other that the main roll up door. The garage only had 1 double outlet for power that was shared with the bedrooms on the shared attached wall.
Also the garage has really ceiling rafters. It has a vaulted type celing with just 4 or 5 rafter coming across for stability, and a single rafter coming the other way to tie them all together. It does have the standard roof rafters, the roof was covered in 1x6 boards, with asphault shingles on top of that. That is the standard construction for just about all the garges in this neighborhood. While I like the open feeling of the celing, it gives you no overhead storage.
So the first thing I did was build 3' x 8' loft that is lag bolted into the wall studs about 7' off the floor. I am 6'4" so this allows be to walk under it without banging my head, and yet I can reach most things without needing a ladder or step stool. I later built another one that run the length of the back wall and comes out 24".
The next issue was the electrical. I ran a 50amp subpanel into the garage. I needed a 20amp dedicated feed for the Craftmens Professional Compressor. I also ran an abundance of outlets along attached wall as that is where a workbench runs the length of that wall.
I ran another circuit for the ceilling lights and garage door opener, and finally another circuit for outlets along the other two walls.
I also installed electrical and air reels from the ceiling. So it I always have electrical and air at a moments notice, and the hoses and cords selfwind back up into the ceiling.
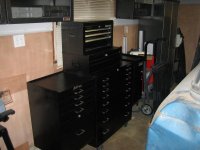
The wifey has been pretty supportive. She has replaced all my off-shore china made tool with their Craftsmen version over the last year or so. She recently bought me a set of Gladiator Garage cabinets. I have those mounted right now, but they will come down soon as I need to sheath the inside of the garage to finish it out. Here are the current (and messy) pictures. I have no other storage except a small shed I built in the backyard. So I have to move stuff around in the garage as I work it.


Hopefully the next pictures I will post will be after the walls are finished.
My wife and I bought this (our first) house about 2 years ago. I had bought a '54 Packard Clipper to restore. The car was in pretty rough shape when I found her, but that is what I wanted so I could teach myself all the aspects of restoring one these old cars. So she let me have the entire garage for this process.
The house and garage were built in 1959 and are typical of a California ranch style home from that period. The garage is attached to the front of the house, but has no other door other that the main roll up door. The garage only had 1 double outlet for power that was shared with the bedrooms on the shared attached wall.
Also the garage has really ceiling rafters. It has a vaulted type celing with just 4 or 5 rafter coming across for stability, and a single rafter coming the other way to tie them all together. It does have the standard roof rafters, the roof was covered in 1x6 boards, with asphault shingles on top of that. That is the standard construction for just about all the garges in this neighborhood. While I like the open feeling of the celing, it gives you no overhead storage.
So the first thing I did was build 3' x 8' loft that is lag bolted into the wall studs about 7' off the floor. I am 6'4" so this allows be to walk under it without banging my head, and yet I can reach most things without needing a ladder or step stool. I later built another one that run the length of the back wall and comes out 24".
The next issue was the electrical. I ran a 50amp subpanel into the garage. I needed a 20amp dedicated feed for the Craftmens Professional Compressor. I also ran an abundance of outlets along attached wall as that is where a workbench runs the length of that wall.
I ran another circuit for the ceilling lights and garage door opener, and finally another circuit for outlets along the other two walls.
I also installed electrical and air reels from the ceiling. So it I always have electrical and air at a moments notice, and the hoses and cords selfwind back up into the ceiling.
The wifey has been pretty supportive. She has replaced all my off-shore china made tool with their Craftsmen version over the last year or so. She recently bought me a set of Gladiator Garage cabinets. I have those mounted right now, but they will come down soon as I need to sheath the inside of the garage to finish it out. Here are the current (and messy) pictures. I have no other storage except a small shed I built in the backyard. So I have to move stuff around in the garage as I work it.
Hopefully the next pictures I will post will be after the walls are finished.


 it would make a pretty sharp wood ceiling. Grid it off into 4' x 4' squares