To avoid these ads, REGISTER NOW!

Mark's Monster Garage....3800 sq ft

SR=25

New member
Joined
Jun 28, 2010
Messages
1
Location
Omaha, Nebraska
Here are todays results!! The car is now less motor, transmission, and subframe. We rolled the car around back and tomorrow the serious sanding starts. I guess you can also see the inside of this garage is no longer a pretty picture!:)

Ahh yes, NOW its starting to look like my garage. :D:D:D
 
To avoid these ads, REGISTER NOW!

e-tek

Well-known member
Joined
Dec 19, 2007
Messages
10,690
Location
Saskatoon, SK
Either that shell is really HEAVY, or we need some air in them dolly wheels!:lol_hitti

Are you doing patch panels or full quarters?
 
OP
I

IGO2XS

Well-known member
Joined
Apr 24, 2012
Messages
1,415
Location
Sarasota, FL
Either that shell is really HEAVY, or we need some air in them dolly wheels!:lol_hitti

Are you doing patch panels or full quarters?

ha ha, we did a tire change right after this photo!! :lol: Guess we'll do a patch panel.......I will show some photos when we get to that....probably this week.

I just checked out your website and I am very impressed. Very well thought out and enjoyable to read.
 
Last edited:

tskills10

Well-known member
Joined
Sep 14, 2011
Messages
353
Location
Painesville, Ohio
I'd have to put a V8 with a manual trans in that car. But I understand her wishes also. Car looks really clean. Looking forward to seeing this project move along. Also we need some pics of the "working" garage.
 
OP
I

IGO2XS

Well-known member
Joined
Apr 24, 2012
Messages
1,415
Location
Sarasota, FL
I'd have to put a V8 with a manual trans in that car. But I understand her wishes also. Car looks really clean. Looking forward to seeing this project move along. Also we need some pics of the "working" garage.

Alright, I hate showing all the mess but I will give you some down and dirty photos tomorrow. It ain't pretty!!
 
OP
I

IGO2XS

Well-known member
Joined
Apr 24, 2012
Messages
1,415
Location
Sarasota, FL
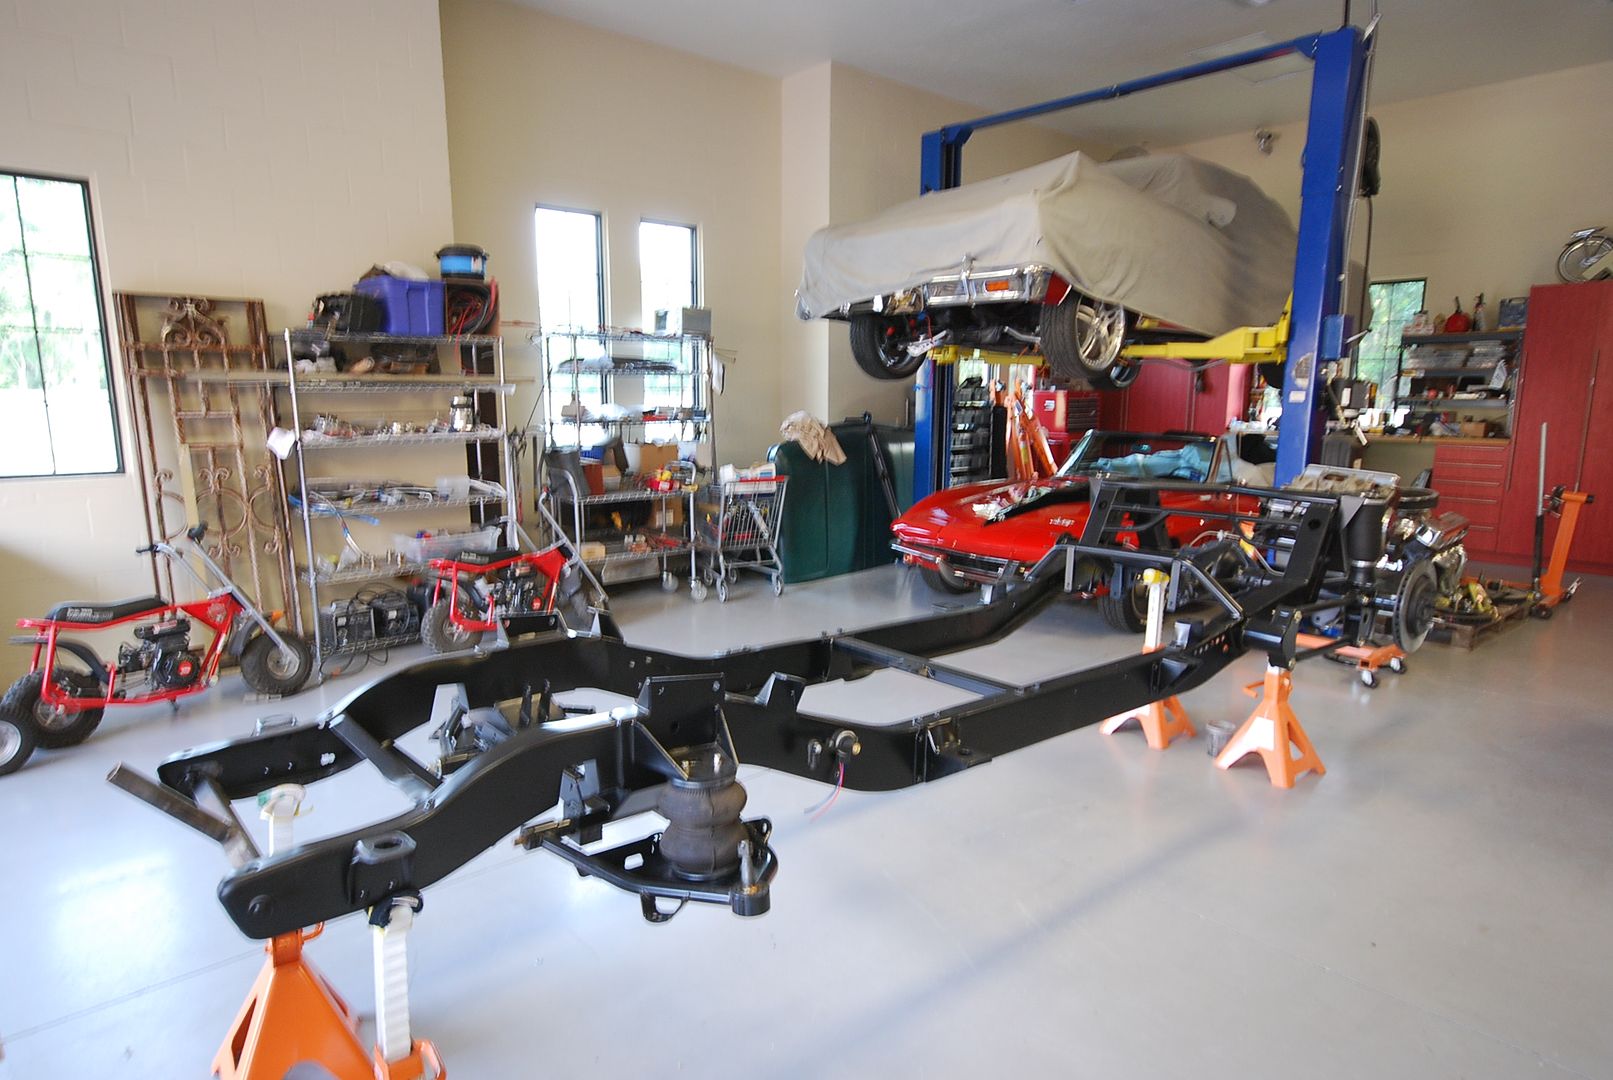
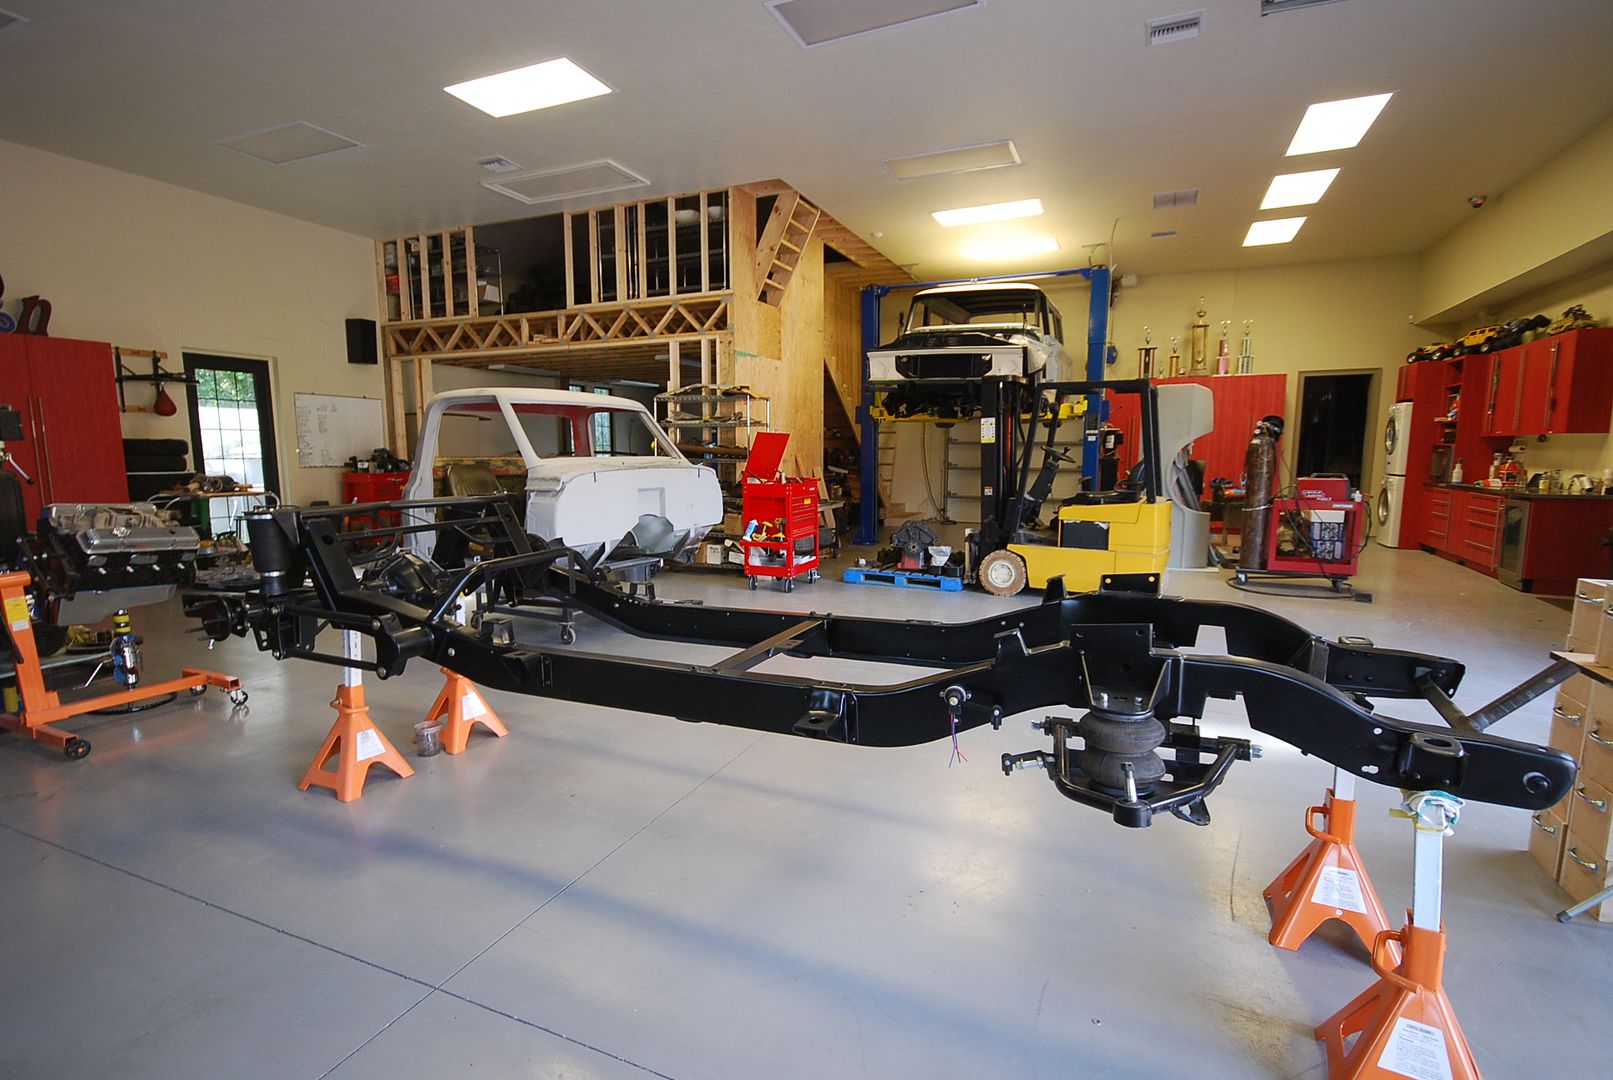
As promised I snapped a few photos today showing project status. I did sweep the floors a bit first. We finally got the frame for the 69 chevy pickup on jack stands today. This has been a long time coming. I bolted in the 4 link bars, rear end, and air bags. I had most of the brake, air, fuel lines in before all was disassembled for paint. I am not in a hurry but it is so nice to finally be working on final assembly of something in the garage.:thumb up: The frame is void of most holes and partially boxed so it really is looking great.

DSC_0120.jpg


As most obvious in the picture the loft is not finished. I did get some lighting installed in the build room and plenty of parts and such are already in the loft. Quite honestly I want the completion of this loft to be done at a time when I can enjoy the finish work. I still need to install a 100 amp panel in this room to service additional outlets and a welder circuit. I have air close but not directly in this room yet. The c10 truck cab is waiting for me to get the lines run in the frame so we can set the cab on the frame.

On the lift is the suburban and last week we did get the motor and transmission installed. I am picking up the driveshaft tomorrow and I am hoping to fire up the engine on Saturday. When finished the suburban will most likely become a casualty and be sold. I have told the wife I would tone down the garage activity down to just taking on more than I can do instead of trying to take on the impossible.:lol:

DSC_0119.jpg


And finally the Camaro. It has been a week of nasty sandblasting and priming. I personally spent about 3 hours in the sandblasting tent this afternoon and later spent 15 minutes cleaning sand out of every orifice of my body. Bob shot some metal etch primer on the clean metal. Next week hopefully patch panels, welding, and body work.
DSC_0118.jpg
 
OP
I

IGO2XS

Well-known member
Joined
Apr 24, 2012
Messages
1,415
Location
Sarasota, FL
Man, I wish you lived closer. I'd love to stop by and play.

I wished you lived closer too!! Bob talked to me at the end of the day and asked me if I was helping sandblast because I thought it was going slow. I said I was helping because some jobs just go better with two people....particularly jobs that are a pain in the ****. I wouldnt have Toolfool do any sandblasting but there is plenty to do around here. ;)
 

EOC_Jason

Well-known member
Joined
Jun 25, 2012
Messages
11,388
Location
Bentonville, AR
What... no bowling alley? lol... Seriously though, both the garage and house look awesome! I really like the fake brick / worn wall style in the house and the exterior lighting.
 
OP
I

IGO2XS

Well-known member
Joined
Apr 24, 2012
Messages
1,415
Location
Sarasota, FL
What... no bowling alley? lol... Seriously though, both the garage and house look awesome! I really like the fake brick / worn wall style in the house and the exterior lighting.

thanks:thumb up: not much time for bowling around here......too much work to get done!!
 
OP
I

IGO2XS

Well-known member
Joined
Apr 24, 2012
Messages
1,415
Location
Sarasota, FL
A little progress on the Camaro. The hood here is (almost) the last body panel to be primed. The trunk lid was the sheet metal with the most rust and it has been left behind so far in terms of getting it ready.

2deee01d.jpg


Here is the front fender well and Bob has cut out a bad area located just below where the battery tray sits. He is pretty good at forming sheet metal. This gets cut in and welded tomorrow. The last picture shows doors, fenders, cowl, and other parts that have been repaired and primed. I forgot to take photos of the repairs made but it was all done by hand forming metal and welding in. We did not use any pre-formed patch panels. The body is the last bit of metal to handle and we have been waiting on a rotisserie so we can sandblast it and prime. I am hoping we can get the rotisserie set up by the weekend. I will keep you posted.:)

71aa72be.jpg


8b54c34b.jpg
 
OP
I

IGO2XS

Well-known member
Joined
Apr 24, 2012
Messages
1,415
Location
Sarasota, FL
I thought I would check in with a little progress. We picked up the rotisorie and bolted up the Camaro. We have spent the better part of two days sandblasting. If it isn't hot enough in Florida to add sand and dust has not been pretty. Metal etch primer went on late today so she is ready for body work.

file-5.jpg


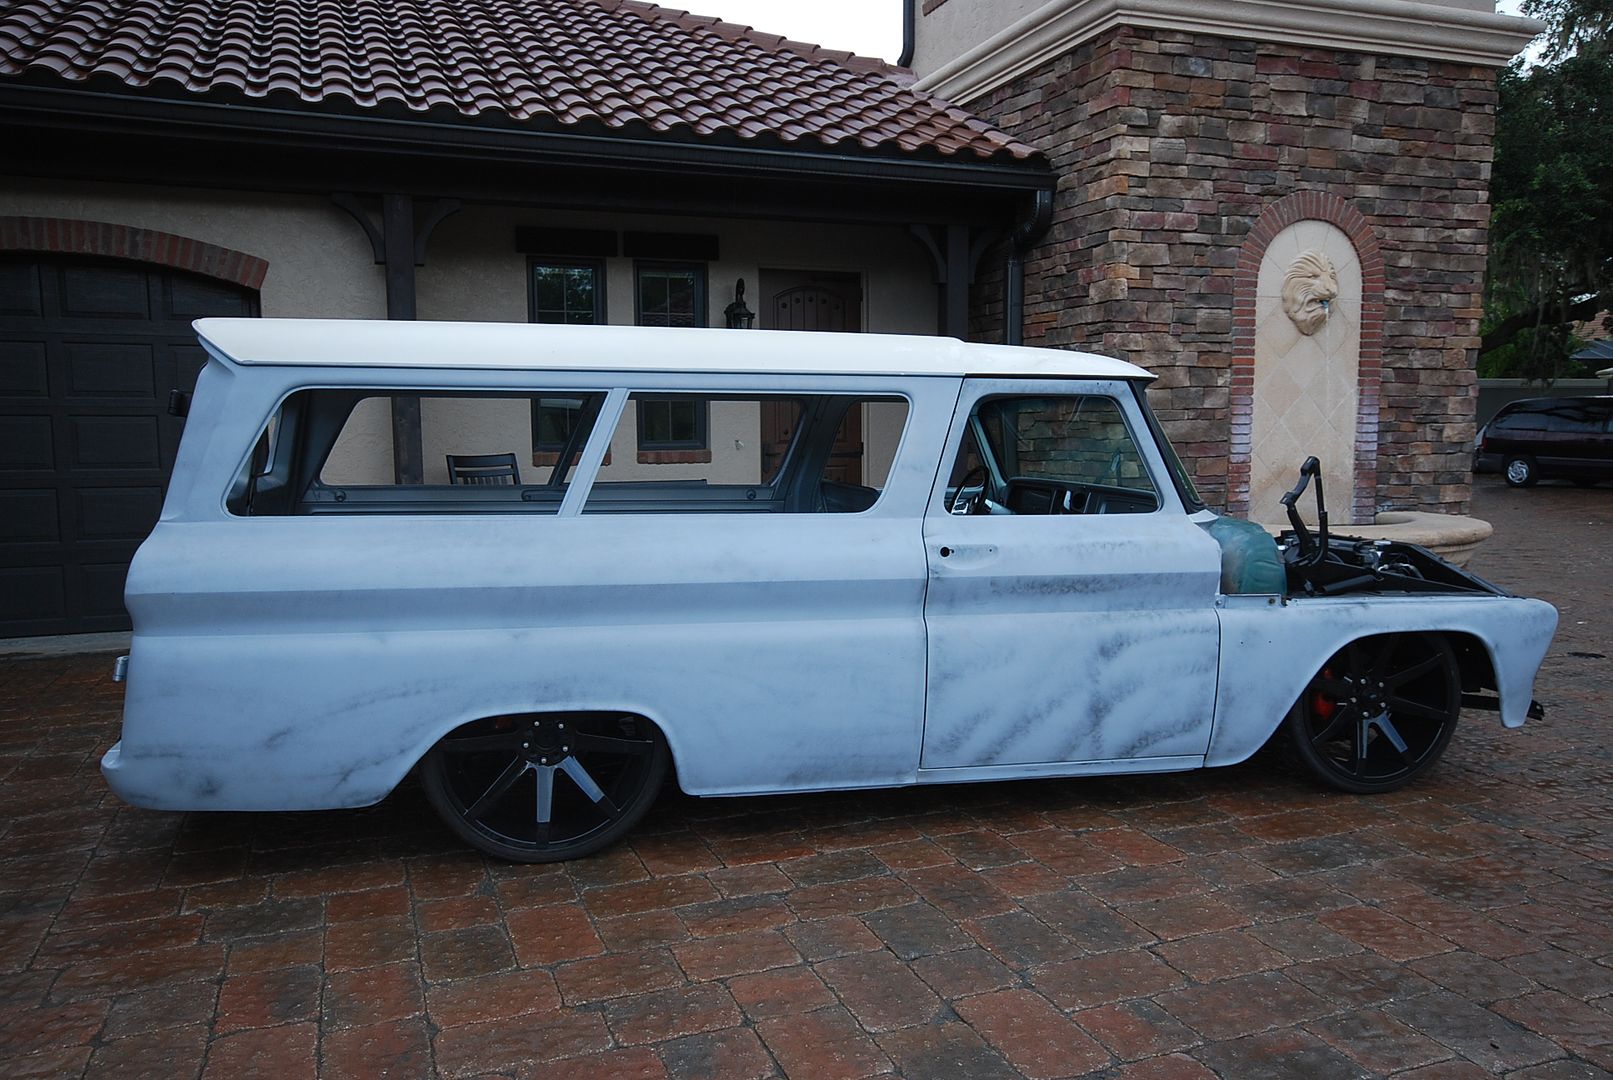
Big progress on the Suburban as well. The motor is installed and for the first time the in many months the wheels are back on. We will be installing doors and such and getting it ready to paint. Still need carpet and new upholstery but at least the truck is moving. I bet this truck has not moved under its own power in 6 months!

file-2.jpg
 
Last edited:
OP
I

IGO2XS

Well-known member
Joined
Apr 24, 2012
Messages
1,415
Location
Sarasota, FL
Almost forgot to show the bling. It's a little dusty but we managed to get a little shiny stuff on the motor. It has a beautiful Billet Specialties polished aluminum serpentine pulley system. We still have more detail but it's a good start.


file-1.jpg
 
OP
I

IGO2XS

Well-known member
Joined
Apr 24, 2012
Messages
1,415
Location
Sarasota, FL
How long ago did you build it? Sounds cool all living together!

We have worked on the property for the last 3 years. Our home was the last to be built and we just moved in November 2011 so it is all still new to use. The great part is I get to see my mom everyday. I work with my brother and wife so we all get to spend a lot of time with each other. We love having all of the family over to hang out, ride golf carts, fish in the pond.......
 
To avoid these ads, REGISTER NOW!
OP
I

IGO2XS

Well-known member
Joined
Apr 24, 2012
Messages
1,415
Location
Sarasota, FL
had a problem with the hydraulic ram on my grapple bucket so we brought it in the garage. It has developed some corrosion on the chrome piston. It ended up pushing the seal out so I removed the ram and dropped it off for repair. Just because it had the "Bobcat" name on it the price goes up.....$300 for a new tube and while I was at it I replaced the four 14" hydraulic hoses that supply the rams......another $85. I can't imagine the ticket if I would have dropped it off for repair.
4afc1b09.jpg
 
Last edited:

EOC_Jason

Well-known member
Joined
Jun 25, 2012
Messages
11,388
Location
Bentonville, AR
I knew a guy with a Case backhoe/loader where the chrome was flaking off the pistons. Apparently a wide spread factory defect with that particular model. He got it repaired and all, but shortly thereafter traded it in and bought a different model that has *knocks on wood* given no problems.
 
OP
I

IGO2XS

Well-known member
Joined
Apr 24, 2012
Messages
1,415
Location
Sarasota, FL
I knew a guy with a Case backhoe/loader where the chrome was flaking off the pistons. Apparently a wide spread factory defect with that particular model. He got it repaired and all, but shortly thereafter traded it in and bought a different model that has *knocks on wood* given no problems.

you have a much better description.....the chrome was flaking off as you said.
 

EOC_Jason

Well-known member
Joined
Jun 25, 2012
Messages
11,388
Location
Bentonville, AR
I would flush the lines and replace the hydraulic filter too while you are doing this work. You never know if those flakes made their way to your reservoir. :(
 

shopnut

Well-known member
Joined
Feb 22, 2006
Messages
4,237
Location
Florida
<snip>
Metal etch primer went on late today so she is ready for body work.
<snip>
Have you had good luck with the primer in Florida's climate (i.e. does it prevent future rust with our humidity)? Can you share some details (brand, number, etc.)? Thanks.
 
OP
I

IGO2XS

Well-known member
Joined
Apr 24, 2012
Messages
1,415
Location
Sarasota, FL
Have you had good luck with the primer in Florida's climate (i.e. does it prevent future rust with our humidity)? Can you share some details (brand, number, etc.)? Thanks.

We have been using a PPG product. It does have a rust inhibitor in it and I would think this would work well where ever you live. This is used on raw metal so if you have sandblasted or stripped its great. This stops rust, do your bodywork over this then prime. This is not meant to be used over paint or body work. The Camaro had been painted years ago and there was rust under the primer. This is a semi transparent primer so you can see what your working over as primer covers it. A lot of guys just spray an epoxy primer over metal. There are many ways to accomplish the same idea, we found this the best.

Update......not recommended on media blasted metal. sanding is recommended before applying this primer.
5036d166.jpg
 
Last edited:

hidollartoys

Well-known member
Joined
Jul 15, 2008
Messages
594
Location
K. C. Metro area
I might recommend a two part epoxy primer. It seems to be the choice for "rat rods" in this area where the primer is actually the finish paint. It is supposed to seal the surface unlike the single part primers.
 

DEEDDUDE

Well-known member
Joined
Jan 9, 2012
Messages
161
Location
Beach City, Texas
My wife and I just went through this thread again. All I can say is that is a BAD *** garage and the cars and trucks are BAD *** also. :thumbup:

The pics of the kitchen gave us a few ideas that I may try to incorporate into our kitchen. The hanging candle tray or something similar who go well in ours.

Thanks for posting.
 
OP
I

IGO2XS

Well-known member
Joined
Apr 24, 2012
Messages
1,415
Location
Sarasota, FL
I might recommend a two part epoxy primer. It is supposed to seal the surface unlike the single part primers.

I agree there is more than one way to skin a cat. I just wanted to show you how we did it. We'll have a heavy primer for sanding and blocking and then a primer coat before the paint......both different products. We just like the way we do it.:)


My wife and I just went through this thread again. All I can say is that is a BAD *** garage and the cars and trucks are BAD *** also. :thumbup:

The pics of the kitchen gave us a few ideas that I may try to incorporate into our kitchen. The hanging candle tray or something similar who go well in ours.

Thanks a bunch. The candle lighting came from Restoration Hardware as well as many different other decorating treatments. Check out their website. They have a ton of really cool stuff.
 

ZRX61

Well-known member
Joined
Aug 15, 2006
Messages
28,716
Location
Solar Blight Valley, SoCal
We have been using a PPG product. It does have a rust inhibitor in it and I would think this would work well where ever you live. This is used on raw metal so if you have sandblasted or stripped its great. This stops rust, do your bodywork over this then prime. This is not meant to be used over paint or body work.
Filler doesn't adhere to wash/etch primers & the PPG tech sheet says not to use it on sandblasted metal ;)
 

dunes7

Member
Joined
Jul 10, 2012
Messages
13
had a problem with the hydraulic ram on my grapple bucket so we brought it in the garage. It has developed some corrosion on the chrome piston. It ended up pushing the seal out so I removed the ram and dropped it off for repair. Just because it had the "Bobcat" name on it the price goes up.....$300 for a new tube and while I was at it I replaced the four 14" hydraulic hoses that supply the rams......another $85. I can't imagine the ticket if I would have dropped it off for repair.

Hello Mark from England :)

As many have said to you, your garage is fantastic and must certainly inspire people.

With regards to the rams you had fail, over here there are people who recon them and re-plate the chrome, is that not an option over there? Though I appreciate that $300 might not be too large a sum for a straight replacement and saves you the downtime....
 
OP
I

IGO2XS

Well-known member
Joined
Apr 24, 2012
Messages
1,415
Location
Sarasota, FL
Filler doesn't adhere to wash/etch primers & the PPG tech sheet says not to use it on sandblasted metal ;)

whoops:D . We did sand every area that was sandblasted but I will read the tech sheet again. I thought it said you could use it over properly sanded metal. I appreciate your point and will take into consideration not making blanket claims of a product without disclosing all of the details for use.
 
Last edited:
OP
I

IGO2XS

Well-known member
Joined
Apr 24, 2012
Messages
1,415
Location
Sarasota, FL
Hello Mark from England :)
As many have said to you, your garage is fantastic and must certainly inspire people.

With regards to the rams you had fail, over here there are people who recon them and re-plate the chrome, is that not an option over there? Though I appreciate that $300 might not be too large a sum for a straight replacement and saves you the downtime....

Hello England:D this was a repair as they replaced the chrome cylinder and put installed new seals. If the entire ram was replaced I think it was around $600 if purchased through Bobcat. I dont earn much of a living with this machine. I bought it at the beginning of our construction project to use on the property. I did all of my own grading and with the backhoe attachment put in all my underground utilities. I have done some driveway demo's and got to tear down a mobile home with it:rocker: so every now and then I get to play on it and earn a few bucks. I have quite a few attachments for it and at times have thought about selling it. However, I then find another reason to use it and then change my mind.
 
OP
I

IGO2XS

Well-known member
Joined
Apr 24, 2012
Messages
1,415
Location
Sarasota, FL
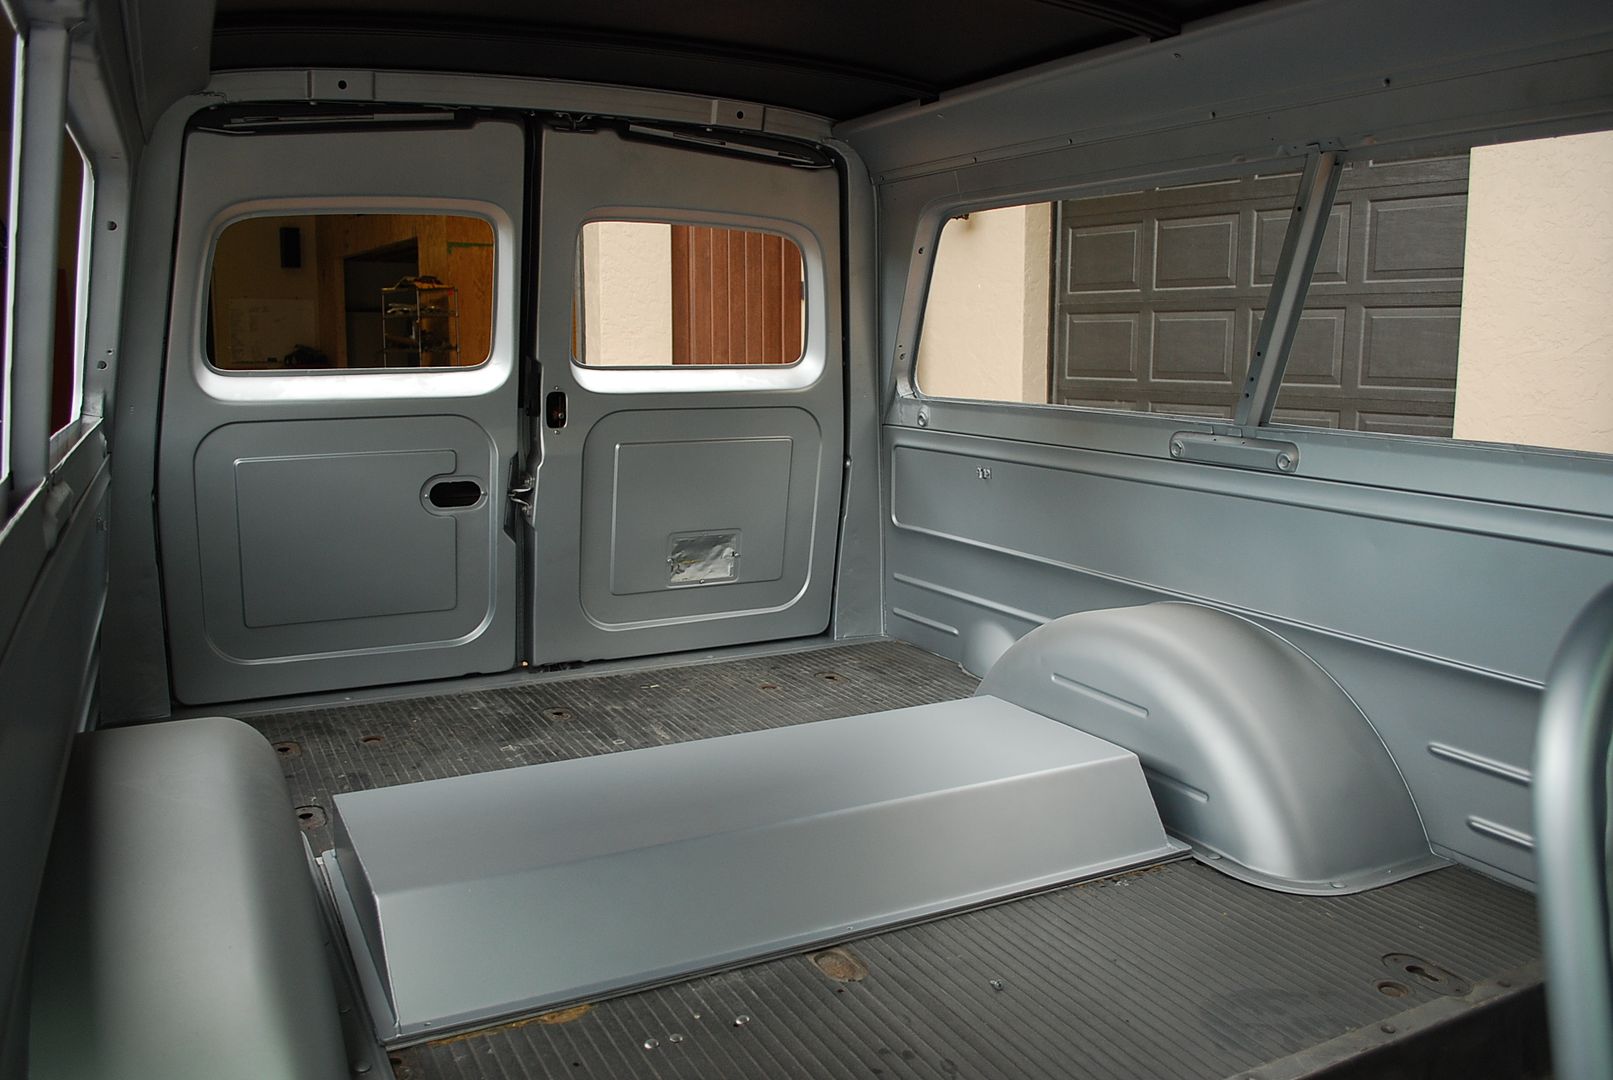
I finally have some progress pictures on the burb. This past week we really hit it hard and got quite a bit done. I was waiting to put the dash back in until I had the A/C working. I had a couple unknown wires to figure out and the ductwork to install. We gased it up and we got some nice cold air. Because the interior is silver I thought black would be a nice complement color on the dash. I didn't want to be too crazy with it but I am very happy the way it turned out. Going to pull the steering wheel out and paint it black. I was going to put custom gauges in it but I opted to stay with the factory dash.

DSC_1020.jpg


On the paint we will be painting from the bottom of the windows to the top a satin black. From the bottom of the windows down (including hood) it will be a semi-gloss or lower luster silver. Not to dull and not too shiny.

DSC_1023.jpg


Then there is that trailer hitch........

DSC_1024.jpg


There is another bench seat that sits just in front of the wheel wells. The entire interior is satin silver and I am thinking of doing torch red seat upholstery for the front and rear seats. That is not final but I think it would look cool with the silver.
DSC_1030.jpg
 
OP
I

IGO2XS

Well-known member
Joined
Apr 24, 2012
Messages
1,415
Location
Sarasota, FL
While I am posting photos I wanted to show the 69 Chevy C10 frame I have been working on assembling. I wanted to keep hidden as many of the lines as possible (brakes, fuel, air ride) .

I am running AN-3 lines for the brake lines. Wow, they are so much easier to flair and the fittings are beautiful. I used all chrome Russell fittings........only negative side is the cost. I did want to run bulkhead fittings where ever I had a frame penetration. I just think they look cool. I also used 3/8 bulkhead push fittings for the airline for the air ride suspension. You might notice the rather large 14" rotor. This truck is getting a set of Z06 brakes.......14" front, 13.5 rears...............it should stop!!!

DSC_1029.jpg
 
OP
I

IGO2XS

Well-known member
Joined
Apr 24, 2012
Messages
1,415
Location
Sarasota, FL
It finally happened. I have been nursing my forklift battery for a few months. I jumped on the forklift the last night, put in in forward, and one of the battery's exploded. :mad: I guess as many times as I have had the battery cover open it could have exploded in my eyes so I count myself lucky. I got a good price on batteries from a member of GJ. I am barely getting hall passes from the wife with all the car parts I have been buying so I will probably have to wait until next month to get a new set of batteries for the forklift. I do have forks on the bobcat if necessary but I really do miss my forklift!!


4e712957.jpg

8aa7eb81.jpg
 

shopnut

Well-known member
Joined
Feb 22, 2006
Messages
4,237
Location
Florida
Wow - what a mess! And I thought it was bad when my car battery was leaking on my driveway. I wonder what would cause one to blow like that.

Good luck getting her back rolling again.
 
To avoid these ads, REGISTER NOW!
Top Bottom