To avoid these ads, REGISTER NOW!

Mark's Monster Garage....3800 sq ft

Skyline

Well-known member
Joined
Nov 11, 2008
Messages
3,586
That article pertains to lights above the waterline. All the lights mark installed will sit below the waterline. They will only produce a glow in the water. They will not actually produce a visible source like the nav lights. Also they are all located near the stern of the boat.

Very informative article though. This has been becoming much more of a problem as manufacturers are going for a much more streamlined look and do not want to add the protrusion of nav light housings.

If you're looking at a boat from several hundred yards away at night, you will not be able to perceive the height above the water, especially in a little chop. LEDs can be pretty bright, and these can give the wrong information. For example, if you see a red light, with or without a white running light above, that is supposed to indicate a boat approaching, headed toward your port side, and will pass you on your port side; perhaps indicating that you should steer somewhat to starboard. Instead, this could be the rear, or starboard side LED light you are seeing, and a very quick boat could be headed across your bow (left to right), causing you to steer right into it. Nighttime navigation is VERY tricky in the best of circumstances.
 
To avoid these ads, REGISTER NOW!

e-tek

Well-known member
Joined
Dec 19, 2007
Messages
10,690
Location
Saskatoon, SK
While I agree that these should not be used while in motion, if you forget, and leave them on, it's an invitation for a Coast Guard summons, or worse, could cause an accident.

While I understand your concern for safety, having been a boat user and owner for over 40 years, with experience in many different waterways from Vancouver to Los Angeles, I have to take umbrage with your statement above and especially, with you throwing around of the "it could cause an accident" comment.

With recreational boat users making up a HUGE part of any water-going population, you'd be hard-pressed to find anyone - amatuer or professional - who would rely soley on nav lights to determine right of way on the waterway. 90% of recreational users do not know what they mean and will pass by on either side, based more on space and courtesy.

I would also go so far as to say that leaving those "fun" lights on would never be cause for concern for any other boater, save for the one that has an ax to grind, or a point to make - Coast Guard included.
 

Audicon

Well-known member
Joined
Apr 12, 2009
Messages
139
Well put e-tek.

I have also been a boater in one form or another nearly 30 years. Looking for my next one now. I might even put some underwater lights on it:D
 
OP
I

IGO2XS

Well-known member
Joined
Apr 24, 2012
Messages
1,415
Location
Sarasota, FL
Mark,

How are the port/stbd lights attached? Just the 2 screws, or did you use an adhesive as well?

It should look cool though. Don't see them on go fasts too often.

Chevelle looks great.

I applied a 3m 4000 marine adhesive/sealant behind the fixture then screwed them in using stainless steel screws in my pre-drilled pilot holes. The sealant's adhesion is between removable and permanent so I am sure it will hold the lights on......I hope:)

Mark, I have no inkling of how many hours of shop time it took, but DAMN, it certainly has been time (and money) well-spent!

The static pics are great, the setting is 'The Catzazz', but you've just GOTTA give us a thrill. Break out the video cam, put the top down and capture some slow drive-by's (preferably carried out by a carload of bikini-clad-beauties)! lol

I will see if I can get a few babes to take some pictures for you guys
:thumbup:

I guess I'm expecting too much for the trailer to have a matching spare tire with a miserly budget like that.

I hear you loud and clear:D

Mark,
I ate something that gave me a head-to-toe case of hives last week so I'll be spending time on the computer for the next few days. I'm happy to help in any way I can but for now I've had enough itching without playing with fiberglass.

Although $308,000 sounds like a lot for that Go-Fast boat, close to half of that money is in the twin Mercruisers. Those puppies list for $60,252.00 a piece.

I couldnt agree with you more Bob. The boat is 3 years old now so its probably worth $100,000. The bigger the price of the boat the harder they fall. Us car guys think we take a loss..........just buy a boat!!


Not sure what Mark's shop rate is, but around here, if you had that car done by a body shop you'd pay about $100/hr. A professional build (in a retail autobody shop) would easilt run you $70K, plus major parts like wheels, crate engine, etc.

e-tek.......my shop rate is way too cheap!!! But you are so right about the cost of a build like this. I would imagine a retail price on a build like this could be $90K to $100K from buying the car to taking it to a professional shop, labor, parts, and material.

Mark;

When you installed those LED lights on the boat, did you consider maritime lighting regulations? Red (and green) lights serve a VERY particular purpose in nighttime navigation, and those might confuse another boat. I would change them to blue assuming you want to surround the boat with color.

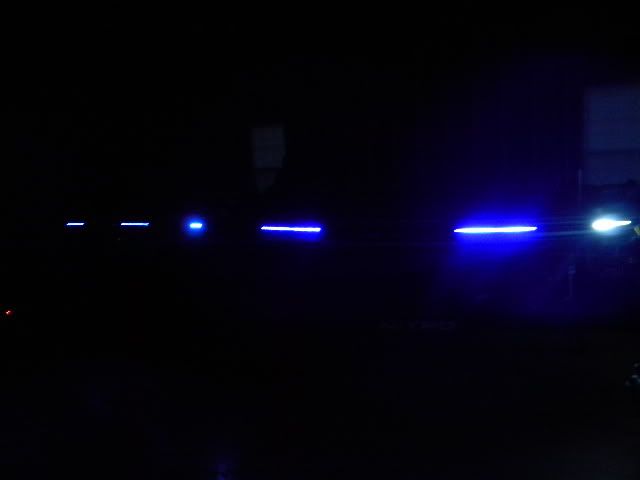
To answer you question I never gave it a thought about using these as navigation or driving lights. These are pretty much "party lights" used while docked or pulled up on a beach at night. These led lights are underwater so I dont believe you would even see these lights at a distance other than a glow.

Some of those you can change the colors. Not sure if those are the ones.

These dont change colors but they are blue in color. I think they will look pretty good in the water.

That article pertains to lights above the waterline. All the lights mark installed will sit below the waterline. They will only produce a glow in the water. They will not actually produce a visible source like the nav lights. Also they are all located near the stern of the boat.

Very informative article though. This has been becoming much more of a problem as manufacturers are going for a much more streamlined look and do not want to add the protrusion of nav light housings.

Great observation and I agree with you the lights shouldnt present a hazard as the light is in the water. It is a great article Skyline posted. Too many times there are amateurs driving these boats at night and it is quite dangerous if you dont know how to navigate.
 

Audicon

Well-known member
Joined
Apr 12, 2009
Messages
139
Forgot to ask and did not see what brand of boat it is? Nice looking boat though. Any chance we well see the after pics with the lights on?

Just be happy he did not want the flush mount lights. Would have been a lot more work.

I love the garage and the work that comes out of it. Nothing but the best.
 
OP
I

IGO2XS

Well-known member
Joined
Apr 24, 2012
Messages
1,415
Location
Sarasota, FL
Forgot to ask and did not see what brand of boat it is? Nice looking boat though. Any chance we well see the after pics with the lights on?

I love the garage and the work that comes out of it. Nothing but the best.

I will ask him to take a few pictures for us! I can go out on it anytime I want but I am too busy working in the garage!;)

Looks like a Sunsation 32' Dominator to me.

Awesome work as always, Mark! I really enjoy reading this thread, keep living the dream! :beer:

You nailed the boat on the head. http://www.sunsationboats.com I didnt realize they were based out of Michigan. Living the dream is alot of work and sometimes I think I should stop and check it out more but I am always thinking of the next step. Thanks for contributing to the thread. None of this is possible without all of us working together!!


Yesterday we got the Corvette in House of Kolors expoxy primer. A little sanding and one more coat of primer and its ready for paint.


Omphaloskeptic

Well-known member
Joined
Oct 11, 2008
Messages
2,346
Location
Ultima Ratio, Wa.
That vette even looks sharp in the 'sea foam green' epoxy primer!

For the shear number of projects 'Monster Garage' cranks out (even ignoring the superb quality of work done), I'd just bet that when the shop lights go out at night, an entire squad of dwarves leap out of their hidey-holes, sprinkle everything with magic pixie-dust while whistling the 'Hi-ho, Hi-ho' tune, and churn out another couple hundred man-hours of work before the sun breaks another dawn! lol
 
OP
I

IGO2XS

Well-known member
Joined
Apr 24, 2012
Messages
1,415
Location
Sarasota, FL
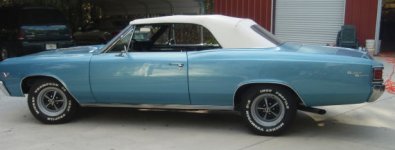
Hey fella's.....we are closing out this chapter of the 1970 Chevelle. Practically 7 months and 630 hours went into the restoration of this car. It doesnt seem quite possible we have made this journey without any major hiccups. Of course there were quite a few small obstacles and we have yet to get through every one. The shear amount of parts necessary for a build like this is phenomenal. UPS darn near has shown up at my office 4 out of the 5 days of the week. The last few months of the build have been the toughest. There are so many parts that need to come together and thank goodness for the internet. We even found out some parts were not even available and we were lucky to find the few no longer produced. The interior has been a challenge but so has the motor. I thought the A/C would be the toughest challenge but it was actually quite easy. Getting the motor running smoothly and not leaking fluids is always a test but we are closing in.

My friend is picking up the car this week. I am anxious to get the finished car out of the garage. However, I have told my friend it will be back..........at least once;) maybe more. It is just impossible to build a car bolt by bolt and everything work flawlessly the first time. The car needs to be driven, tested, operated and get the bugs to show their ugly head.

Overall I am very happy of the end result. My goodness the car is just drop dead gorgeous...... it is a head turner. The stance is perfect, tires and wheels perfect, and just an all around nice looking ride. The car sounds great and drives like a new Chevelle off the assembly line. Roll the windows up, turn the A/C on and cruise or just throw the top down for a nice open air ride.

It has been experience and another lesson learned. Hope you enjoy the pictures


[URL=http://s987.photobucket.com/user/markepierson/media/AUTOMOBILE%20BUILDS/1970%20Chevelle/DSC_0713.jpg.html]
 

Kevin54

MEMBER EMERITUS
Joined
Jan 12, 2005
Messages
29,341
Location
Urbana, Ohio
DSC_0728.jpg


Mark.....absolutely a beautiful car and fantastic workmanship. I know the owner will be very, very, proud of rollin' down the street in it with the top dropped.

Just out of curiosity, and I know that you have a lot of time and money in it, and so will the owner, but do you have any sort of idea what the appraisal value on a car of that caliber would be now? Would you estimate it to be in the six figure range?

I know it's hard to put a price on something, all for the fact that one had to take into consideration what they put into it to get it up to that point, but with it not being stock, but then again with it also being brand new but modified, it would make it tough.

I would guess maybe $125,000. Do you think I'd be close, or off by about $50,000 to high :dunno:
 

Wingnut65

Well-known member
Joined
Apr 21, 2010
Messages
3,170
Location
Tampa Bay, FL
Congrats on bringing another one back to life in Monster Garage Perfection!
7C80BE59-24EA-454C-BDB4-7BBEAC210F88-4211-0000022B15133874.jpg


DSC_0692.jpg


Mark, you and your crew do awesome work!

Keep living the dream so the rest of us can dream what you live! Can't wait to see the Vette and C-10 driving again!
 

Bob Heine

ALLIANCE MEMBER
Joined
Oct 24, 2009
Messages
10,708
Location
Boca Raton, Florida
I know it's hard to put a price on something, all for the fact that one had to take into consideration what they put into it to get it up to that point, but with it not being stock, but then again with it also being brand new but modified, it would make it tough.

I would guess maybe $125,000. Do you think I'd be close, or off by about $50,000 to high :dunno:
Kevin,
You're right about putting a price on something but I think Mark's experience with the Willys is good example of the difficulty of setting a price on a special car. If the right buyer sees it on the right day, you could be offered a real fair number.

A friend of mine in Inverness, FL did a ground-up re-build of a 67 Chevelle convertible. He did the powder coated frame and non-original but fresh 427 and added all the things needed to make an SS clone. It didn't have A/C so nobody in Florida even made an offer. He had about $80,000 invested in the car but a man from Sweden became the new owner for $55,000.
 

Attachments

  • Blue Chevelle.jpg
    Blue Chevelle.jpg
    45.1 KB · Views: 68

Kevin54

MEMBER EMERITUS
Joined
Jan 12, 2005
Messages
29,341
Location
Urbana, Ohio
Kevin,
You're right about putting a price on something but I think Mark's experience with the Willys is good example of the difficulty of setting a price on a special car. If the right buyer sees it on the right day, you could be offered a real fair number.

A friend of mine in Inverness, FL did a ground-up re-build of a 67 Chevelle convertible. He did the powder coated frame and non-original but fresh 427 and added all the things needed to make an SS clone. It didn't have A/C so nobody in Florida even made an offer. He had about $80,000 invested in the car but a man from Sweden became the new owner for $55,000.

Bob...that's what I'm getting at. I guess it does depend on the right buyer at the right day. The thing is though that it has to be appraised for insurance purposes. The make of the car, the style of the car, and so on makes it difficult for a person to appraise. I also expect a place like Florida to be different as worth than cars here in Ohio. I can look online, and we have a few dealers around here that sell the older muscle cars. What you see and figure might go for a stupid amount is actually affordable to most, but then what you don't think would be high priced is out of this world.

I was doing a search the other day for a couple of certain cars that I had in mind from back "in the day" that I had. A '63 1/2 Galaxie with bucket seats, a '64 Galaxie 500, and a '66 Mercury Comet Caliente. Good Lord, the Mercury's that I found online were close to the mid $30's. And most of the Galaxies were in the mid $20's. But then one dealer had the same models and was looking at the $60's and up for them. And they were decent resto's but nothing like Mark has done on the Chevelle. :dunno:
 
OP
I

IGO2XS

Well-known member
Joined
Apr 24, 2012
Messages
1,415
Location
Sarasota, FL
Mark,

The Chevelle is amazing. Great work.

Skyline.....just for your nice compliment I bought something from you last night on eBay......a tube bender!!!

Beauty! Move it on out, I can't wait to see what's next!

Very very nice. Thanks for posting the pictures :thumbup:

NEXT!!

Gentlemen, my feeling exactly!! Very funny Buzz!!!! really got a laugh:lol:

We paint the 66 Vette this week so there is plenty more coming.

Mark.....absolutely a beautiful car and fantastic workmanship. I know the owner will be very, very, proud of rollin' down the street in it with the top dropped.

I know it's hard to put a price on something, all for the fact that one had to take into consideration what they put into it to get it up to that point,

Thanks so much. You are right......it is hard to put a price on something. Unfortunately this car is not a 6 figure car as it is a SS clone. However, it is a damn nice car and damn nice cars are worth something to the right buyer. I am going to guess if you took this car I just did to a full blown restoration shop you could have $90K invested in the car and the restoration or more......my client has less than this invested......I am still too cheap on labor!! The real question is selling it. If I were selling this car I wouldnt take any less than $75K for it. Although its not numbers matching it is dang near new. The word frame off and the word restoration are relative terms as some people use these descriptions very loosely. We put around $30K in parts in this car and every bolt nut and part has been touched, redone, or replaced. I believe our car is truly a quality product.

Congrats on bringing another one back to life in Monster Garage Perfection!
Mark, you and your crew do awesome work!

Keep living the dream so the rest of us can dream what you live! Can't wait to see the Vette and C-10 driving again!

Wingnut, you are one clever guy and one good friend. I love how you sneak in at the right time and put the entire project in perspective with a few pictures.;)

AMAZING RIDE both literally and figuratively...THANK YOU for allow us along! GREAT WORK!

I really appreciate you guys helping me along with these projects....thanks!!!

Kevin,
You're right about putting a price on something but I think Mark's experience with the Willys is good example of the difficulty of setting a price on a special car. If the right buyer sees it on the right day, you could be offered a real fair number.

So true Bob. Like the old car saying goes "there is an *** for every seat" Unfortunately with the willys it is only desired by a very limited market. I cant tell you how many cars I have tried to personalize only to never see the money in the end. My friend who owns this car drives a Mercedes and has for years. You know what that costs!!! Like i told him the beauty of the classic car is it never goes out of style. You dont have to worry about a new model coming out the next year making your current car obsolete. He has about $75K in this car as it stands. What the heck, sell it in 4 years how much can you really loose??? Lets face it if we want to make money lets save it and invest it wisely. My theory is, why save.......piss it away on expensive cars and have fun!!
 

Wanna Ride

Well-known member
Joined
Jul 28, 2010
Messages
2,790
And last but not least I checked out this bike project today......30 inch front tire, air ride bagger!! I guess this is the "in" bike right now. Looking at doing the custom paint on it although I would love to build one!


Looks like Misfit Baggers trees, and custom neck and downtubes, maybe FBI drop seat kit, hard to tell fro mjust this pic. There's a heap of cash sitting right there. But love to see more pics! Sorry, for the thread-jacking, but I just got home from Sturgis, and was a judge at the Ultimate Bagger show, and have many friends with builds like this. I only run a 23" on my '08 FLHX. It takes a lot of commitment to go that big on a bike that gets ridden lots. Can't wait to see more pics of this one!

My '08 FLHX, as it sat about 12 weeks ago. Since added the new custom seat, but no good pics since then:

IMG_2652Small_zps9934b206.jpg
 
Last edited:
To avoid these ads, REGISTER NOW!
OP
I

IGO2XS

Well-known member
Joined
Apr 24, 2012
Messages
1,415
Location
Sarasota, FL
Looks like Misfit Baggers trees, and custom neck and downtubes, maybe FBI drop seat kit, hard to tell fro mjust this pic. There's a heap of cash sitting right there. But love to see more pics! Sorry, for the thread-jacking, but I just got home from Sturgis, and was a judge at the Ultimate Bagger show, and have many friends with builds like this. I only run a 23" on my '08 FLHX. It takes a lot of commitment to go that big on a bike that gets ridden lots. Can't wait to see more pics of this one!

My '08 FLHX, as it sat about 12 weeks ago. Since added the new custom seat, but no good pics since then:

Its all good man......thanks for sharing a picture of your bike. We do hot rods but I have two guys who are expert bike builders. We have a bike project on the drawing board but not sure if its going to take off or not. A judge huh......cool we might have to network with you on this.
 
OP
I

IGO2XS

Well-known member
Joined
Apr 24, 2012
Messages
1,415
Location
Sarasota, FL
Funny story.......first thank you all for the nice comments on the Chevelle. After a build like this you must drive the car...........any time you take every nut bolt and piece of metal off a car thinks are bound to happen. This morning was a morning I thought I would drive it to work. Within a few miles I already had a small list of things to check out. I noticed the car wasn't shifting into 1st gear. I was speeding up slowing down and look up and see a motorcycle cop. The next thing I see is the motorcycle cop following me with the lights on...........****! I pull over and obviously do not have on my seat belt ($150 fine), he approaches the car.....SHERIFF.. .."may I see your license, registration, and insurance?" MARK......."no, I have my license but this is not my car and I do not have the other documents". SHERIFF.........."did you know you where doing 52mph in a 35mph zone" ($200 fine). MARK........."no officer I didn't, this is my first test drive in this car, I built it for a friend of mine, I should know better as I lived on this road for 20 years and know police are frequent here". SHERIIFF..... "what year is the car" MARK........"1970". Officer is now walking back to motorcycle and halfway back when I stick my head out the window....................MARK.............."Oh sir, by he way the license plate on this car belongs on my 66 Suburban, I just put the plate on this car to drive it"..........The Sheriff comes back to the window.....SHERIIFF..... "Mark, since you were test driving the car I am going to let you go". Mark.........."Let me get out of the car and shake your hand!! I just had the best and worst part of my day in 5 minutes". END OF STORY.
 

transamz9

New member
Joined
Aug 19, 2013
Messages
4
Location
Lawrenceburg, Ky
While I agree that these should not be used while in motion, if you forget, and leave them on, it's an invitation for a Coast Guard summons, or worse, could cause an accident.

Check this out from BoatSafe.com:

Navigation Lights - Sidelights

Is your boat legal? Of course, you say...it is a brand new boat. Well you might want to think again after reading the following article. And remember, it is your responsibility, not the manufacturer's, to make sure your boat is in compliance with state and federal regulations.

During factory and boat show inspections we have observed that many manufacturers of recreational boats do not have a good understanding of the navigation rules governing proper installation of navigation lights. The requirements are found in the Navigation Rules, International-Inland, and in Parts 81, 84 and 89 of Title 33, Code of Federal Regulations. The problem appears to be particularly prevalent for manufacturers located in the western States. Since most manufacturers routinely equip the boats they produce with navigation lights, navigation light installations are routinely inspected and discussed during factory visits and boat shows.

One problem that has increased recently is the installation of flush mounted sidelights in the boat hulls, usually below the rub rail. Many manufacturers build boats using similar sidelight fixture installations. This is a dangerous trend which is likely to end up costing somebody a pile of money when a plaintiff's attorneys go after everyone who might have been for liable for a serious collision.

Sidelights that meet the rules are designed to cover an arc of the horizon, or sector, of 112.5 degrees. Intensities are required to attain a visible range of 1 mile for vessels less than 12 meters (39.4 ft.) and 2 miles for vessels 12 meters or longer. These fixtures are designed for intensities to decrease and reach practical cutoff between 1 and 3 degrees outside their prescribed sector. Sidelight fixtures must be installed parallel with the fore and aft centerline of the vessel and arranged to show an unbroken light from right ahead to 22.5 degrees abaft the beam, a total sector arc of 112.5 degrees.

Sidelights that are installed in the contour of the bow without providing a mounting surface tooled to be parallel with the fore and aft centerline of the vessel are not in compliance with the Inland or International Navigation Rules. Depending on the breadth of the vessel near the bow and how far aft from the vessel's stem the lights are mounted, this shift can be more than 20 degrees in some cases. Installing the fixtures too far aft of the vessel's stem may result in the sidelights not being visible from a position dead ahead.

Another factor in proper installation of sidelights is that they must maintain their required minimum intensity in a vertical sector from 5 degrees above to 5 degrees below the horizontal. They must also maintain at least 60 percent of their minimum required intensity from 7.5 degrees above to 7.5 degrees below the horizontal. Installing flush mounted sidelights, designed to be mounted to a vertical surface in the hull contour, without providing a mounting surface tooled to be vertical, shifts the vertical coverage sector. This also results in a noncompliance with the Inland or International Navigation Rules.

Additionally, most of these flush mounted sidelights are installed below the vessel's rub rail. International Navigation Rules require that sidelights be installed above the uppermost continuous deck. Therefore this configuration would not be in compliance with International Navigation Rules.

When separate red and green sidelight fixtures are used, the masthead or all-round white light, whichever configuration is installed, must be located as close as practical to the vessel's fore and aft centerline. For vessels less than 12 meters in length, the masthead or all-round light may be displaced from the fore and aft centerline providing that the sidelights are contained within a common fixture and mounted on the vessel's fore and aft centerline. The masthead or all-round light must be installed at least one meter (3.3 ft.) above the sidelights.

This article was written by the Coast Guard Short Range Aids to Navigation Division (G-NSR)

I don't have near the boat Mark is working on but Here's some pictures of the lighting I installed on mine inside and out. I don't run with inside lights on but I do run with the rub rail lights on an have never had a problem with the law.

DSCN2556.jpg~original


DSCN2557.jpg


DSCN2560.jpg


DSCN2276.jpg
 

Omphaloskeptic

Well-known member
Joined
Oct 11, 2008
Messages
2,346
Location
Ultima Ratio, Wa.
Mark, you are one lucky so-and-so that the sheriff let you go without so much as a slap on the wrist! If I were the one driving, I would probably still be waiting to make my 'one phone call'! lol
 
OP
I

IGO2XS

Well-known member
Joined
Apr 24, 2012
Messages
1,415
Location
Sarasota, FL
I don't have near the boat Mark is working on but Here's some pictures of the lighting I installed on mine inside and out.

Beautiful fishing boat!!

Mark, you are one lucky so-and-so that the sheriff let you go without so much as a slap on the wrist! If I were the one driving, I would probably still be waiting to make my 'one phone call'! lol

Ha ha. The man upstairs blessed me with a police officer who likes cars:thumbup:


UPS showed up today with the Corvette wheels. They didn't last 5 minutes until I opening them up. Wow they are hot.......20's for the back and 18's for the front.


Big day too as the Corvette was moved over to the paint shop. I have a buddy who has an awesome booth and I will rent it for 3 days. Exciting seeing this come together.


transamz9

New member
Joined
Aug 19, 2013
Messages
4
Location
Lawrenceburg, Ky
Beautiful fishing boat!!

Thanks Mark! You have one beautiful place and cars.:beer: I would have loved to been at your place when all the Vettes showed up. I have a C6 that I take out on the weekends when I'm not fishing. I have always had a week spot for Vettes. They are built right down the road from me.:thumbup:
 
OP
I

IGO2XS

Well-known member
Joined
Apr 24, 2012
Messages
1,415
Location
Sarasota, FL
Dwayne had a big day in the paint booth today.....he worked his tail off. Yesterday he painted the doors, rear hatch, and lights. Today he painted the body and hood 2 coats of base, striped the hood, and applied 5 coats of clear. It was one heck of a days work. This vette is straight as an arrow!!


GGB

Well-known member
Joined
Oct 26, 2011
Messages
388
This Vette is going to be beautiful. You and your crew are doing some righteous work.

GGB
 

Kevin54

MEMBER EMERITUS
Joined
Jan 12, 2005
Messages
29,341
Location
Urbana, Ohio
Damn that's nice!!!!!!

Just a little tip, you may want to talk your painter into at least a Tyvek suit when painting. I have a cousin that ended up getting isocyanate poisoning. Once you contract it, you will always have breakouts of a severe rash anytime you are around paint. I know the suits are a pain, but then so is contracting something you don't want.
 

noelalford

Active member
Joined
Jun 24, 2013
Messages
31
I am saddened by reaching the last page of this thread, can you post up another 70 or 80 pages real quick-like? Thanks!

Also, I have a couple of boats (down to just 2!) and will probably not sleep tonight thinking about the terror of drilling through the hull. The image of that drill just hanging there is haunting! I'm in the middle of refurbishing a single car garage with a 12 x 20 workshop area and while I am not really jealous of all the additional room you have since I would then have to fill it up with stuff, I am jealous of the height since there is no way I can fit a lift in here. Congrats on the successful GJ get together and the apparent tourist destination status as evidenced by the 30 Corvettes that just happened to drop by! I invited the internets to my house for an International Scout gathering about 8 years ago, boy was my wife surprised.
 

JCQuick

Well-known member
Joined
Nov 29, 2008
Messages
4,933
Location
Apopka Fla.
noelalfords 1st post in in this thread . that's cool. One day I'm going to get my sorry *** down that way and see this setup in person.

Seeing that vette being painted in a real nice booth I bet has ole mark thinking
 

egads74

Well-known member
Joined
Sep 1, 2008
Messages
87
"Dwayne had a big day in the paint booth today.....he worked his tail off. Yesterday he painted the doors, rear hatch, and lights. Today he painted the body and hood 2 coats of base, striped the hood, and applied 5 coats of clear. It was one heck of a days work. This vette is straight as an arrow!!"

Newbie questions:
1) you can paint, tape, and clear all in same day?
2) how long does paint take to dry before taping?
3) how soon after paint can you pull the tape?
4) Why no sanding or buffing after paint before clear?
5) am i asking dumb questions?
6) can i have any of these vehicles (1 dumb question)
7) in the pic after the rim... where the hood and doors are on stands unside down
what is the madness to the taping... do you finish paint the under and tape showing just the slightest of that finish and ultimately when painting the top have a slight overspay to complete the painted area?
 

steves_001

Well-known member
Joined
May 30, 2011
Messages
528
Location
Southern MN / Northern MN
I'm no expert but can give you some generic answers:

Newbie questions:
1) you can paint, tape, and clear all in same day?
Yes, or if you prefer you can clear coat later but after 24 hours you need to scuff the surface to get the clear to stick.

2) how long does paint take to dry before taping?
Depending on the reducer used, as soon as 20 minutes to 2 hours. Just have to be a little delicate to not smudge.

3) how soon after paint can you pull the tape?
I have usually pulled the tape after 30 minutes or so. You want to be sure to let the paint set a bit so it does not bleed, but long enough also so that the edges do not lift. Again somewhat depends on the reducer used for speed of drying.

4) Why no sanding or buffing after paint before clear?
If under the 24 hour time, the top coat will bond just fine. After 24 hours is usually to set to topcoat without scuffing the base.

5) am i asking dumb questions?
Never!!!! There are many questions to painting, especially if you are new to it. The more you ask questions and prepare prior to your first paint experience will save you a lot of frustration and time/money. There is a science to this bit of fun but generally pretty easy to do with a little practice.
6) can i have any of these vehicles (1 dumb question)
Sure, but I get first dibs 9if Mark lets us) lol
7) in the pic after the rim... where the hood and doors are on stands unside down
what is the madness to the taping... do you finish paint the under and tape showing just the slightest of that finish and ultimately when painting the top have a slight overspay to complete the painted area?

The idea is to eliminate overspray on the top surfaces. That way if they wait longer than the 24 hours they dont have to re-scuff the outer surface. The point to doing all your underside, jams and such prior to the exterior is to minimize the amount of prep again to finish coat the outside. Once the jams and under side are done, you typically scuff a little bit of the edge of the hood to flow the clear into that area. Such as the pinch welds on the hood, doors, trunk and so on. Then you would mask the underside and all compartments, jams etc when you top coat the outside to prevent overspray getting into these areas.

Masking a car is about 80% of the time spent doing a paint job. The actual spray time is pretty quick. Then you have the flash time between coats and all that to deal with timewise as well. Once you start you want to keep spraying until the final coat of clear is done.

One nice thing about the 2 tone done in base, when cleared there will be no hard lines between the colors.

Soapbox on:
I will also add, PLEASE - PLEASE wear protective gear when messing with this stuff. I've been sick from it a few times and it's no fun. I've known painters who even get a whiff of paint fumes and they are hacking up lungs trying to breath. I cant stress this enough. Ask yourself, how many old painters (or body men) do you know that did not wear the gear. Not to many in my case... Wear the paint suits, respiration etc... your body will thank you for it later. Same goes for priming, mudwork, sanding etc... not good to breath that **** in.
Soapbox off:
 

plain2car

Well-known member
Joined
Nov 27, 2008
Messages
514
Location
Gilbert, Arizona
...."Masking a car is about 80% of the time spent doing a paint job. The actual spray time is pretty quick. Then you have the flash time between coats and all that to deal with timewise as well. Once you start you want to keep spraying until the final coat of clear is done" .......

i learned this about 6mo ago when a friend (well aquantance now!) & i painted my '72 chevy truck. the masking took most of the morning (6:00 am till 10:00) & then WATCH OUT WHEN THE PAINTING STARTS!! I have never moved soo fast in all my life!! we sprayed 3 color coats & 3 clear coats!! we pushed the truck out of the booth around 6:00 pm & finally threw the truck in my garage a half hour later! i have a new respect for painters!! unfortunatly this experienced tought me the meaning of "paint prison"...... as always mark the pics i am sure do not do the labor & final product justice!! great job & thanks for the updates.
 
To avoid these ads, REGISTER NOW!
Top Bottom