To avoid these ads, REGISTER NOW!

Matty's Garage Projects (Aus)

To avoid these ads, REGISTER NOW!
OP
O

octane_matty

Well-known member
Joined
Jul 21, 2014
Messages
314
Location
Melbourne, Australia
1 month later!

Kitchen installers have swung by
0D2%21108977&authkey=%21AHcRf50eXgU76WY&width=1024.jpg

So you've probably noticed that's alot of self leveller to get to this point! :oops:
But there is little avoiding it due to the hump in the kitchen floor

During the process of mixing 24 bags of self leveller i've discovered i have a minor form of Allergic Contact Dermatitis from working with self levellers which makes it an itchy experience afterwards.

So i've decided i'll use ply to level the rest of the living room, not really much more expensive (even conisdering the extortion costs of ply atm) just a little more work laying it.

Wife came home puzzled seeing 33's in the living room 🤣
D2%21108978&authkey=%21AGtZCWUg-tvxyJw&height=1024.jpg

Alot of sheets, cutting, measuring later :oops:
Pretty much every sheet you see here is a different thickness 4,7,9,12,15,17,19mm sheets sometimes double thickness
0D2%21108981&authkey=%21AJlLbaQh2TtV-F8&width=1024.jpg

After many days feathering compound, sanding, planing and chiseling the floor is level to within ~1-2mm

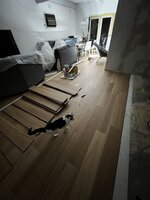
After about 2-3 days work we've got about 15 rows laid. Doesn't seem like much but this flooring is very tight tollerance so it's a slow process carefully aligning boards.

Chief supervisor joined the photo
D2%21109032&authkey=%21AKJSgAtSXE9vQgY&height=1024.jpg

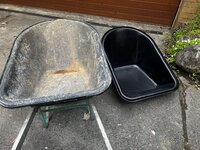
I've been a little rough with the wheel barrow lately and cracked the tub in multiple places
I was originally going to use Epoxy to glue it back together but it's too far gone.

Bunnings want $120 for a replacement and it's special order so a quick search on Marketplace and $40 later we're sorted :cool:
0D2%21109030&authkey=%21AMF_BHylDH8PW4s&width=1024.jpg

While the kitchen cabinets were installed we discovered the sink plumbing will need to be moved. Not a big task but access is a problem.
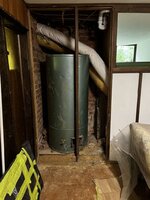
The sink waste is in the far left corner of this void downstairs that's mostly blocked by an old water heater (that's asbestos sheeting yaaay)
D2%21109028&authkey=%21AMNuUyvjDJpsHp4&height=1024.jpg

She's pretty big
D2%21109029&authkey=%21ALfciSlZFH-x9pQ&height=1024.jpg

The things you find when you look....💀
That brick was loose too :oops:
D2%21109034&authkey=%21ABjrQJn4AMQgiw0&height=1024.jpg
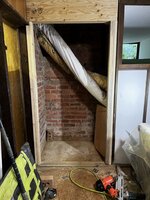
Whipped up some mortar and threw some bricks in there for piece of mind :LOL:

Threw in some pine and some LVL for Overkill Constructions inc here
Good access for the plumber, i'll deal with the ducting at a later stage.
Take a guess what you think will go in this void ;)
D2%21109031&authkey=%21ACVN_tIOSaJUKzg&height=1024.jpg

Kitchen Stone ETA: 27th Oct
New power feed getting connected 10th Nov

Todo list: kitchen bulkhead, painting, flooring, cladding, skirting

Recent tool purchases: Makita 16ga straight finish nailer
Would have preferred a Milwaukee angled 15/16ga but they seem to hold their value too much. Paslode was tempting also but gas + higher operating noise swayed me to a battery.

Recent tools sold: 20t Hydraulic press (Not much use these days and it takes up too much space)

Thanks for reading :cool:
 

hewey

Well-known member
Joined
Sep 5, 2014
Messages
1,681
Location
Blue Mountains, Australia
Nice work, there's a few hours in all of that.

Yeh sometimes when you start pealing stuff back you find things you didn't want to see, one of the things that scares us about our place :LOL:
 
OP
O

octane_matty

Well-known member
Joined
Jul 21, 2014
Messages
314
Location
Melbourne, Australia
Nice work, there's a few hours in all of that.

Yeh sometimes when you start pealing stuff back you find things you didn't want to see, one of the things that scares us about our place :LOL:

few hours :LOL: I left out so many things in this post :ROFLMAO:

Yeah the brick situation was not ideal, bit of panic set in thinking about the few hundred kg of stone about to be slapped ontop :oops:. In my rough calculations the window frame should hold just over twice it's expected load so i'm not too concerned. In the medium term i'll try improve the structure anyway, maybe brick up the window someday anyway since it's not very functional.
 
OP
O

octane_matty

Well-known member
Joined
Jul 21, 2014
Messages
314
Location
Melbourne, Australia
Two weeks later and a thousand small projects later :cool:

Flooring has significantly continued into the kitchen
Yes, i did laser line my flooring to be dead straight to the front doorway to hallway.
D2%21109075&authkey=%21AB-7brE8Jg31PxI&height=1024.jpg

Finally stone installed! if you're wondering its ceasarstone 20mm empira white
0D2%21109077&authkey=%21AHtQQqKoWQlAA-c&width=1024.jpg

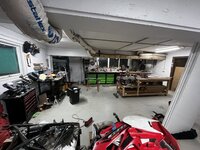
This is garage journal after all so a garage cleanup was greatly needed for woodworking space
0D2%21109076&authkey=%21ANJPUiKGlMkKta8&width=1024.jpg

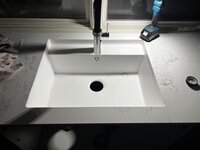
After some hole drilling, Tap installed into the sink & installed
The sink is Corian and Tap Caroma Liano 2.
The tap has a party trick that it can be activated touchless via a sensor on the side. Many other 'smart' taps require you to turn the handle first before you activate it by sensor.0D2%21109123&authkey=%21AFzf1xWzse-234g&width=1024.jpg

Long weekend prompted some QST
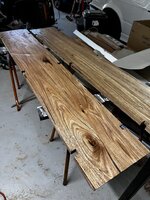
Fresh batch of 30mm Messmate picked up for some furniture for the living room (new shelves)
D2%21109127&authkey=%21AJBsBXN_As6uvsI&height=1024.jpg

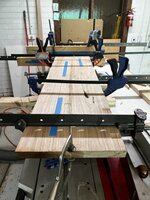
As always time to laminate some boards
D2%21109124&authkey=%21ALO0fuK9k9n6qA4&height=1024.jpg

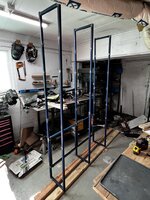
This is the start of the frame for the shelves, each tab is to hold part of a shelf
D2%21109128&authkey=%21ADMmoWbYxVvIhGc&height=1024.jpg

In hindsight there was a much easier way to achieve this but this was the best idea i had at the time 🤷‍♂️
D2%21109131&authkey=%21AI-hrCM8dFEVulM&height=1024.jpg

Not exactly straight but close enough :beer:
D2%21109129&authkey=%21ANsEmrn8XrJmmR8&height=1024.jpg

Assembled with some bracing to give you an idea of the setup
D2%21109130&authkey=%21AJ9V3bb_HvC7scc&height=1024.jpg

Mrs Octane reminder me we will haven't ordered some handles for the kitchen and the installers are coming back in a few days :unsure:

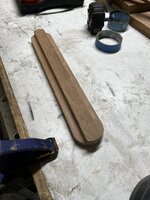
Rummaged around through some old offcuts and started to cut
D2%21109126&authkey=%21AILLaX8blxRfKMU&height=1024.jpg

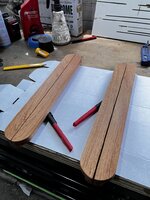
Slice down the middle and we're in business
D2%21109122&authkey=%21AIsrSjJQpnqStgo&height=1024.jpg

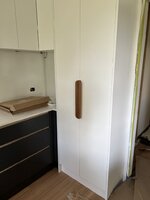
Installer came out and screwed them in
D2%21109138&authkey=%21ACvqCZmkEgWEz6M&height=1024.jpg

D2%21109139&authkey=%21AAfWR5cNyzCqoC0&height=1024.jpg
For an offcut and an hour or so work, can't complain! :cool:

Cheers for reading
 
OP
O

octane_matty

Well-known member
Joined
Jul 21, 2014
Messages
314
Location
Melbourne, Australia
A month later and only a few weeks to christmas!

Had to get a sneaky dirtbike ride in before Christmas :cool:
Unfortunately my Husaberg was still sporting some battle wounds from it's last crash
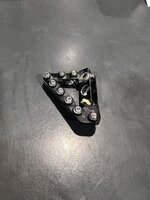
the worse of which is a snapped brake tip
D2%21109587&authkey=%21AKE-vNAFYT2whCQ&height=1024.jpg

Wasted an hour round trip to the local bike shop that had 1 in stock according to the website
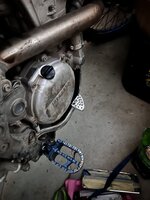
time for Plan B
D2%21109589&authkey=%21AGV6sSQELcoXFmc&height=1024.jpg

Done!, smashed through 60km of winding single trail no problem :cool:
D2%21109586&authkey=%21AM7sIkxeX4P6vWA&height=1024.jpg

With the impending baby arrival in a few weeks we've been looking at upgrading my Wife's car to something Auto & slightly higher/larger to facilitate baby seats.
We had a look at some different suitable cars on the weekend weekend; Hyundai Tuscon, BMW X1 & Mada CX-5, Mazda CX-30

Let me be clear....this wasn't my choice :LOL::ROFLMAO:

The Mrs decided on a fairly clear winner;
Purchased a second hand 2017 BMW X1 xDrive25i
2L Petrol Turbo B48 motor, Tan Interior, electric...everything
0D2%21109594&authkey=%21AILV3oxL_o7ta3U&width=1024.jpg
0D2%21109592&authkey=%21ACnOTNQPB9xuEVo&width=1024.jpg

Tuscon: Gearbox clunky, boaty,lots of warning noises/bells and nothing special.
Mazda CX-30: great sporty comfy on the inside, boot space ok but not amazing. The rear door access for baby seats was horrible and ultimately eliminated the car from selection.
Mazda CX-5 maxx sport: Door panels etc are very high in the cabin, buldge over the intstrument cluster wasn't great for forward vision.
Strange location for the multimedia controls very far back and towards the passenger.
My wife being on the short side approx 5'4 made the Mazda a tough choice. Coming from a Mazda 3 BL series we both assumed it would be the winner. Gearbox/powertrain on the mazda were also very good.

Then comes the BMW X1
We drove a diesel first: Great power and felt quicker than the 0-100 times claim.
100% diesel would have been the economical choice, they get stupid good fuel economy in the range of ~5L/100km
Gearbox was best of the lot and driving feel was the sharpest, it did everything you expected with ease.

The second X1 we drove later in the day is the blue one above we purchased
Slightly higher k's than all the others but didn't feel a day older.
Being a fully optioned model it has heads up display which was a massive sell over the others i believe.
Quicker than the diesel, sport seats, flappy paddles, estoril blue, M package...
The Aisin 8 speed steptronic isn't as nice as a DCT gearbox but you can feel it's almost as refined as a late model ZF 8HP
Road noise is higher than other models but Run flats,mismatched high treadwear tyres & 19" wheels aren't helping that situation.
Fuel economy is averaging 7.5-8L/100km around town. 6L/100 on the freeways
The wife struggled to admit she was a fan of the BMW and wanted to come across to the euro side :ROFLMAO:

Althought the drivetrain is pretty solid the B48 has some weak points I'll address soon :unsure:
I wasn't planning on wrenching on the Mrs car but i actually love driving it too :ROFLMAO:

Back to renovations; Flooring has continued into the hallway, was planning on getting more done but forgot to order alloy trims :cry:
D2%21109590&authkey=%21ALf-a6hKZKk_Adk&height=1024.jpg


Kitchen Lighting:
We struggled to find a suitable pendant light for the kitchen that's short enough and in the right style.
A big brand "Lantern" store wanted $1000 :oops::oops::oops: for an almost 2m LED strip mounted in some wood that's too big for our space :unsure:
I started making my own briefly before one showed up on marketplace for a few hundred.

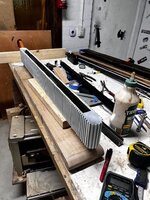
D2%21109585&authkey=%21ABfkSJ-PIMOuTXk&height=1024.jpg

Cut in half and glued back together
D2%21109588&authkey=%21AL1HTC53czkVY2w&height=1024.jpg

Fits the space quite well!
0D2%21109593&authkey=%21AFDYpRtaFb7MfJs&width=1024.jpg

Recent purchases: Parts for the X1 ;), Floor trims

ETA 21 days to to baby arrival so i need to get cracking on flooring/trim for the nursery :oops:

Thanks for reading
 

Geoff289

Well-known member
Joined
Nov 10, 2013
Messages
1,235
Location
Melbourne, Australia
All that home reno work looks great. I take it the primary client is happy with it?

That Bimmer is pretty nice. I'm increasingly considering the marque for my next daily driver as Merc are no longer bringing in what I think I'd want in my next one.
 
OP
O

octane_matty

Well-known member
Joined
Jul 21, 2014
Messages
314
Location
Melbourne, Australia
Merry Christmas and a happy new year all
D2%21109726&authkey=%21AFB8P2vHE17m1mk&height=1024.jpg

Towards the end of the year spent some time working on completing these shelves

Chamfers cut
0D2%21109723&authkey=%21AK3ep--G_O9o4Uw&width=1024.jpg

Oiled and cutout mounting bits
Yeah i know about that divet, tried to sand out a strange grain pattern but it seems to be deep into the timber.
Looks almost like the tree was wrapped with a steel wire at some point.
D2%21109719&authkey=%21AC2wcFV5Ny2gdOc&height=1024.jpg

Test fitment going pretty well
0D2%21109718&authkey=%21AAc8HkCUXsQ5hbo&width=1024.jpg

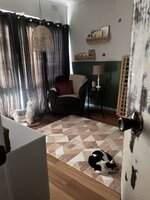
Spent a few days trying to smash out flooring in the master bedroom and baby room.
Resident supervisor approves of the additional sleeping locations.
D2%21109722&authkey=%21AMYKqxvVDoDy3_E&height=1024.jpg

As luck would have it, early morning the rumbling started and 10.5hrs later my lovely wife has given birth to our first born. :eek:
5lbs 13oz/2.66kg
0D2%21109727&authkey=%21AJPTj_mDd--lrBk&height=256.jpg
She and mum are both doing very well all things considered! Rocky start the first few days but we're getting the hang of it now.
Yeah i'm typing this at 3am :LOL:
If you're wondering about the name i won't type it out but i'll give you a hint;
The name of this hero car
10D2%21109728&authkey=%21AA2uDFZdo5ZwDOI&width=256.jpg

Recent purchases: bulk nappies
Recent sales: passed on the Mrs old Mazda 3 to it's new owner.

Thanks for reading
Hope everyone is working on their 2024 goals!
 
Last edited:
OP
O

octane_matty

Well-known member
Joined
Jul 21, 2014
Messages
314
Location
Melbourne, Australia
Well ah another month and what a crazy start to the year

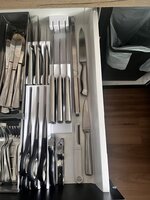
Few 3d printing projects to sort ou the kitchen utensils
D2%21111628&authkey=%21AGcsUCJHd4YaByc&height=1024.jpg

It seems Kitchen bins are both insanely expensive but also don't maximize space......
Sheet of ACP + some glue and routering later
D2%21111629&authkey=%21AGmiLU_3IMVMpL0&height=1024.jpg

Yeah i did assemble this at 11pm at night while the baby and wife were asleep :ROFLMAO:
D2%21111651&authkey=%21AGrPbpOCfE7vJ_M&height=1024.jpg

So space has been lacking in the garage with so many projects on the go as usual
I decided the best solution is to complete my brother in law's trailer top to bottom so i can once again park the daily in the garage
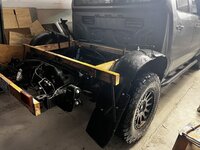
New sides are welded, leaf mounts raised 25mm to level it out0D2%21111630&authkey=%21AFiTzlUAZAffrBg&width=1024.jpgStarting to run out of spare steel so the tailgate is much more beefy than i planned :ROFLMAO: that top bar is 40x40x4mm
Not the greatest welds on show but functional
0D2%21111634&authkey=%21APL7mL3AETHoqoI&width=1024.jpg

Shortened and setup some new mud gaurds
0D2%21111635&authkey=%21AIZg0JSUU4nztzc&width=1024.jpg

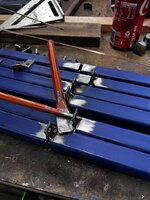
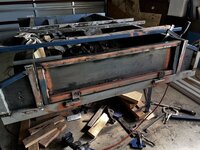
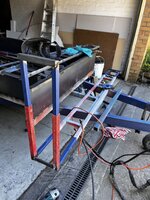
Welded up a motorbike ramp
D2%21111641&authkey=%21APQs4Ef27RX83NY&height=1024.jpg

This is a frame off the front to both mount toolboxes but also can hold a dirtbike
The ends are telescoping and has pins for length adjustment
D2%21111639&authkey=%21AOqOuas8Uw-mgZU&height=1024.jpg

Mudguards mounted and started to sheet the sides
0D2%21111638&authkey=%21AG0SZJHOLZbMbSE&width=1024.jpg

Just put some new rubber on the Husaberg so good time to test fit
0D2%21111644&authkey=%21AAuAWumKIzj8A14&width=1024.jpg
It has about a 200mm overhang each end, with a large car infront with mirrors it should look ok width wise hopefully
Adjusted the inner bars also so the final mount will have the tyres level with the bottom of the front frame.


It's a tight fit due to the width of the tub but seems reasonable to squeeze 4 bikes on this bad boy :cool:
D2%21111654&authkey=%21ACUIuhEqbdvj7NM&height=1024.jpg

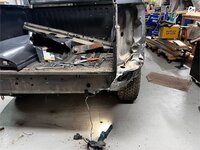
As luck would have it all these long hot days working on the trailer to give me space in the garage and BAM!
Early morning a driver had sun in his eyes coming up the street and rear ended the Amarok
0D2%21111647&authkey=%21AImVCiOUa-jKz_o&width=1024.jpg
Ripped the leaf hanger out pretty badly
D2%21111648&authkey=%21AG5ohkC8MELAQDU&height=1024.jpg

Amarok: "You should see the other guy"
0D2%21111650&authkey=%21AAD2RiUNPTWpnDk&width=1024.jpg
That's definately the end of that Holden Cruze :ROFLMAO:
Driver was ok, maybe a cracked rib or two since the airbag didn't go off (almost looks like the electrics ripped out before it could)

Now the fun of dealing with insurance companies :oops:

There's alot more projects on the go so stay tuned :ROFLMAO:

Recent purchases: 3d printer filament dryer
ETA to Project car registration: Given possibility the Amarok could be written off this might change the priority of things significantly over the next few weeks.

Thanks for reading
 

Geoff289

Well-known member
Joined
Nov 10, 2013
Messages
1,235
Location
Melbourne, Australia
Now the fun of dealing with insurance companies
Oh mate, that's no good about the Amarok, especially since you have to deal with insurance companies.

If you look back over the last few months of my thread you'll see that both I and my daughter have had to have this fun recently. While both claims ended up satisfactorily, the process of getting to the end was tedious to say the least - slow to act, poor/contradictory/belated/absent communication, trying to fob my daughter off with an inferior replacement vehicle, and various other shortcomings.

We are both with a company with a four letter name, first two letters being the same, and usually pronounced like a girl's name starting with A. This outfit used to have a major point of difference in that a human being answered the phone right at the start. Since they were taken over by basically a Qld based bank they no longer have this point of difference so dealing with the abovementioned crappy communication meant having to set aside a couple of hours to wait to talk to someone, during which they play really annoying music in the hope it'll drive you to hang up.

So good luck.
 
OP
O

octane_matty

Well-known member
Joined
Jul 21, 2014
Messages
314
Location
Melbourne, Australia
Oh mate, that's no good about the Amarok, especially since you have to deal with insurance companies.

If you look back over the last few months of my thread you'll see that both I and my daughter have had to have this fun recently. While both claims ended up satisfactorily, the process of getting to the end was tedious to say the least - slow to act, poor/contradictory/belated/absent communication, trying to fob my daughter off with an inferior replacement vehicle, and various other shortcomings.

We are both with a company with a four letter name, first two letters being the same, and usually pronounced like a girl's name starting with A. This outfit used to have a major point of difference in that a human being answered the phone right at the start. Since they were taken over by basically a Qld based bank they no longer have this point of difference so dealing with the abovementioned crappy communication meant having to set aside a couple of hours to wait to talk to someone, during which they play really annoying music in the hope it'll drive you to hang up.

So good luck.
Ahh i remember reading a little about that!
I too unfortunately are with the same double A insurance company and it seems my 'market' value doesn't really reflect the real world value currently given limited supply of cars and value is compared against most mid/low spec cars without leather.
Then you add on 10k of mods not including labour, upwards of 15k spent on maintenace over the years to get everything 100% and its depressing thinking about possibly re-doing all that work :oops:

I'm heavily considering not going through my insurance and dealing direct with the drivers insurance since i'm not at fault.

PS if anyone has any experience dealing with machined off engine numbers and getting engines re-stamped in VIC please comment
Police tell me it's a vicroads problem, Vicroads have a process for 'surrogate' engine numbers but this seems difficult given it's for the engine swapped E36. Supposably the Vehicle Fraud squad can re-stamp existing number but i'm struggling to get in contact.
 
OP
O

octane_matty

Well-known member
Joined
Jul 21, 2014
Messages
314
Location
Melbourne, Australia
Well it's been a busy few weeks so figure it's time to post an update before the long weekend projects start piling up :ROFLMAO:

Trailer has received 5 Litres of carbuilders TXT coating using their adjustable gun
D2%21112283&authkey=%21AMyuZC-G14Gu708&height=1024.jpg

Definitely sprays better than raptor liner, but i don't think it's as durable (1k vs 2k) and takes alot to get required coverage.
0D2%21112285&authkey=%21AC58lOhwkys_EEc&width=1024.jpg
Trailer has already been shipped back to my brother in laws and he's currently building a shelter/wood rack over it.

Living room shelves have had their final coat of oil
D2%21112289&authkey=%21AP_tQkp1oI7hLGA&height=1024.jpg

Assembled and installed in place
(There's meant to be a lower section that's projected to be built sometime later this year)
0D2%21112288&authkey=%21AK_-7HgqDGYT1qI&width=1024.jpg

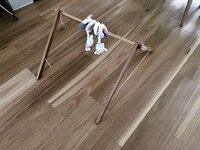
Mrs Octane requested a toy bar for our newest family member so quick few hours in the garage to whip this up0D2%21112377&authkey=%21APbltt9E3WeerMA&width=1024.jpg

I haven't been super happy with my previous E36 intake/heat shield setup so decided to start from scratch with a smaller 4" filter
D2%21112292&authkey=%21AAPo4nMYvq58368&height=1024.jpg

I'm still very new to aluminium welding so here's a shot of a 'lucky' weld and we'll have a gentlemans agreement to not look any closer at the other welds ok? :LOL:
D2%21112293&authkey=%21AO_q-9lRC6gbEag&height=1024.jpg


Butchered some parts from a VE V8 intake to try and create more clearance
D2%21112296&authkey=%21AAjj2efbA9HPnJQ&height=1024.jpg
Currently working on a lid/mounting as filters are required to be 'enclosed' for engineering.

Getting through alot of small projects on the E36 at the moment
This is a washer bottle setup from the Euro E36 M3 evo that mounts onto the bumper instead of in the engine bay.
Cleaner, lower CG, lighter wallet, what's not to like? :cool:
D2%21112382&authkey=%21AKj4Buz-tlVvkUk&height=1024.jpg

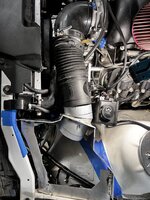
Things are very tight back here near the steering shaft but somehow i need to install a temperature sensor for the dash
D2%21112381&authkey=%21AP4qbKpKB5tUgsM&height=1024.jpg

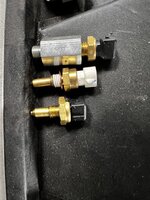
Top to bottom of what we're working with
Adapter that's too long with an M14x1.5 E36 sensor
Standard LS ECU sensor M12x1.5
Later model BMW sensor with correct M12x1.5 thread, fitted like a charm
D2%21112380&authkey=%21AIETWY8EfNHNVJQ&height=1024.jpg

Plenty of other undocumented things happening;
Changed over the Speed sensor to a steel reluctor ring (Hopfully fixing my speed sensor issues)
Changed the upper coolant hose to an E46 M3 one which gives better intake clearance.
Installed front bumper grille, added the M3 lower lip with some self tappers
Made a new mount for the bias valve to accept a new tamper prevention cover.
Replaced windscreen squirters and washer pump.


Amarok update:
It's been over a month since the independent assesor came and had a look.
Took over 3 weeks to receive an offer from insurance; plenty of excuses like "It's exceeded the figure i'm authorised to approve" and "it's been escalated to management"
The car is considered uneconomical repair and i'll most likely purchase the salvage rights and receive a payout.
But their assessment of the 'value' is currently around 5k below what my assessor valued the car at.
Their assessor has made comparisons to 3 cars with lesser factory options and mods, then they make adjustments to the value based on your modifications

Here is their list of how they adjust the estimated value of a similair vehicle when it's not included :ROFLMAO::ROFLMAO:
1711595166021.png
Unless you're buying snorkels and winches on aliexpress there's no chance that's fair value adjustment :unsure::ROFLMAO:
Plenty of strong worded emails and hopefully we'll come to a fair agreement in the next week or so.

Long weekend plans:
  • E36: Complete intake lid + Paint
  • E36: remount bumper, test washer reservoir, new tamper protection cover for the brake bias vavle.
  • E36: Find some door shims to re-align the doors.
  • House: Trim/Skirting everywhere
  • House: Re-install heating vents in the floor for winter
  • Gardening
  • Cook half a brisket + pulled pork
  • Take Mrs Octane our for lunch in the hills.
Happy easter everyone and thanks for reading :cool:
 

Lyndon

Well-known member
Joined
Aug 11, 2014
Messages
2,535
Location
Sydney, Australia
Matty

As part of my (now part time) responsibilities where I work I look after insurance issues and liaisons. In a fleet with over 1400 registrations, and 24 depots around Australia, I can assure you that there is a LOT of LIAISON with insurers. And I can tell you - never settle for first offers. Do your own comps, look at the market and fire back with what you find. I have had vehicles (I'm talking about prime movers here) moved several thousand kilometres from one repairer to another to get work done properly.....

And - I always get better accepted valuations after a fight.

So don't settle for less than you want.

Lyndon
 
OP
O

octane_matty

Well-known member
Joined
Jul 21, 2014
Messages
314
Location
Melbourne, Australia
Matty

As part of my (now part time) responsibilities where I work I look after insurance issues and liaisons. In a fleet with over 1400 registrations, and 24 depots around Australia, I can assure you that there is a LOT of LIAISON with insurers. And I can tell you - never settle for first offers. Do your own comps, look at the market and fire back with what you find. I have had vehicles (I'm talking about prime movers here) moved several thousand kilometres from one repairer to another to get work done properly.....

And - I always get better accepted valuations after a fight.

So don't settle for less than you want.

Lyndon

Appreciate it Lyndon, yeah we ended up settling in the middle of our numbers which is about what i expected.
Now to wait 2 weeks for the cheque to arrive and see if they bother listing it on the WOVR so i can jump through some hoops :unsure:
Either way looking forward to driving my 'beater' Amarok again :cool: MG rental car with CVT is grinding my gears :ROFLMAO:
 
To avoid these ads, REGISTER NOW!
OP
O

octane_matty

Well-known member
Joined
Jul 21, 2014
Messages
314
Location
Melbourne, Australia
Been a few busy weeks but heres some progress

Rolled/Sqeezed the Amarok into the garage
0D2%21112890&authkey=%21AMIcoKiTyH1LaFE&width=1024.jpg

Things looked pretty good after removing the rear bar/step
The rear step is mounted with 6mm steel and has a boxed 2.5mm structure
Can see from the bottom of this the chassis rail is untouched
0D2%21112891&authkey=%21AJp5U8BtgMc9XrI&width=1024.jpg

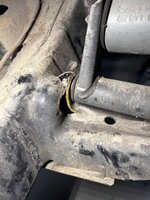
The worst part of it
D2%21112893&authkey=%21AABfVLWeUBN26Yk&height=1024.jpg

0D2%21112896&authkey=%21AJpK_tahqM0Yu5I&width=1024.jpg


whipped off the old mount
0D2%21112895&authkey=%21AG6rXqF7rquEPKo&width=1024.jpg

Was having a bad mig day for some reason so used the tig to clean it up a bit
I used a different weld through primer behind the bracket which made it hard i think.
D2%21112897&authkey=%21ABBezQ7kbGBbakw&height=1024.jpg

Few coats of subframe black
new shackles, new bolts, new Outback Armour Trail 35mm lift springs, new u bolts and bushings.
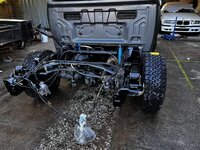
0D2%21112898&authkey=%21AA0Nf46FRzkNp9E&width=1024.jpg

New wheel/tyre mounted, pressure washed all the crud away and she looks younger already

Only have 1 shock at the moment since they sent me a mismatch set. These are 2" longer bilsteins made with thicker wall tubing. Hopefully should help the Amarok get a little extra flex
0D2%21112899&authkey=%21AAUVgXVkcWxkvT4&width=1024.jpg

In roughly 2 weeks hopefully i'll be jerry rigging some lights/mudguards to drive this thing to NSW to pickup a tub.
Just need to get the alignment checked to figure out if the rear axle is bent or any other issues.

Cheers for reading
 
OP
O

octane_matty

Well-known member
Joined
Jul 21, 2014
Messages
314
Location
Melbourne, Australia
Wow time flies it's 7 weeks since the last post so you know it's gonna be a big one!

After the last update i kept measuring the rear end of the amarok and things weren't quite straight enough!
Seems the rear right wheel was toe'd in a bit and tough to measure but potentially the axle tubes had shifted 5mm in the diff housing.

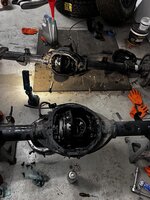
Few days later a stunning deal on a new diff/axle came up on marketplace at a local wrecker and i had it purchased and delivered in a few days.
I checked the stickers/part numbers as much as i could but hard to know with VW parts what you're looking at....
Amarok diffs come in 3 common ratios 3.7, 4.1, 4.3
After getting it home it seemed like the diff i purchased was a really low ratio of ~2:1 when turning the input shaft and counting the brake drum rotation. o_O
I was thoroughly confused for a day about this before i decided to whip the covers off. Teeth count matched between old and new so i slapped it into the car and all seemed ok!
I'm still greatly confused how the open center was multiplying the drive ratio somehow?!

D2%21113158&authkey=%21AF793oXfRQpMrXM&height=1024.jpg


Some trailer lights, scrap pine, steel & cable ties and we're "Legal'ish" :cool:
0D2%21113157&authkey=%21AABRBiLKid3PVeE&width=1024.jpg

I forgot to take any pictures on the trip but I was released from Jury Duty within 2hrs on Thursday and driving to NSW on Friday! Approx 1000km later, 1.5 Tanks of diesel & an overnight stay in Bulahdelah.

Picked up a barely used tub for a steal from a bloke in Nabiac
Even better he had a small excavator to help lift it and all the little nuts and bolts needed!
0D2%21113160&authkey=%21AGdmTDxjeFzDVvU&width=1024.jpg
Saturday drove back cannonball style 1145km just over 12hrs driving
Really some spectacular areas north of Sydney and the 18 degree weather was welcome comming from 10 degrees in Melbourne

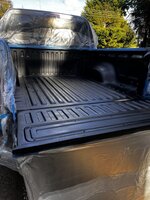
Few weekends later finally found a break in the clouds to raptor line the new tub
D2%21113525&authkey=%21AL5MApQ6IWun3Jo&height=1024.jpg
Took only 2L of product with the new carbuilders adustable spray gun

Mrs Octane has been after some hooks to hang brooms etc in the Laundry for a solid 4 years
I've had this piece of timber ready for 2 :LOL:
0D2%21113527&authkey=%21ABxz7oVp8VorH4U&width=1024.jpg

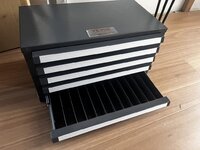
Recently purchased a drill bit drawer setup for the garage, for $75 can't complain
Might take me a while to fill it and figure out how to order things
0D2%21113524&authkey=%21AFjSWLeSsc3VwkY&width=1024.jpg


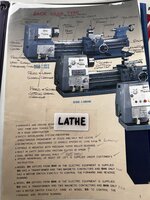
As you may know from previous posts my Grandfather passed away around 10 years ago now and i have since inherited his Lathe Herless SSB-10BS as shown below after my uncle no longer had use for it.
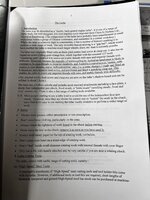
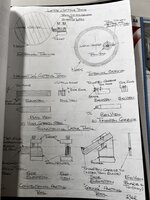
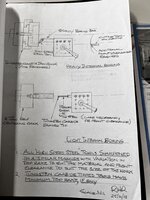
My uncle only just found this recently but before my Grandfather passed he wrote up essentially a small book on how to operate the Lathe for the next owner.
I figured i'll show you a few pages to give you old blokes an idea of the type of bloke my grandfather was
&authkey=%21AO5XrnbV28-G6BE&width=3024&height=4032.jpg


You might be thinking this was copied from Wikipedia or something but the more you read the more you realise this is 100% original.
&authkey=%21AOgcQNqIByokfZ0&height=4032&width=3024.jpg
&authkey=%21AJzC9fPHkfvLdGs&width=3024&height=4032.jpg

&authkey=%21AEdDgaviXgzhXxQ&width=3024&height=4032.jpg

&authkey=%21ANRRfLfNgH5y2_w&width=3024&height=4032.jpg
An incredible level of consistent, well structured diagrams i think anyone can appreciate.

My Grandfather worked for 44 years as an Engineer for a mining company and was involved in the design of the Gladstone QAL (Queensland Alumina Refinery) and Boyne Smelter. Today said mining company after many name changes is now known as Rio Tinto.

From what i understand from relatives my Grandfather had two mills at some point. The larger of which was given to a good friend & neighbor who was interested in watch making and may have already had a lathe.

The smaller mill/drill remains in the family and my Uncle is downsizing so it's time for a new home.
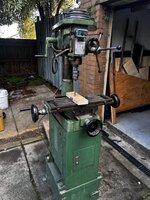
This is my Grandfathers 1984 Herless RF-25 Mill/drill
D2%21113526&authkey=%21ACg3n4DDIoHUEAU&height=1024.jpg

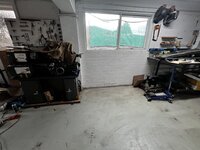
This space was always reserved for the potential milling machine at some stage
0D2%21113523&authkey=%21ALsvbL26iRA_fm4&width=1024.jpg

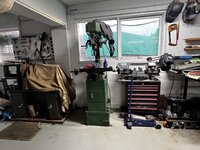
Reunited with it's older brother :cool:
Pitty i painted the bandsaw, it was the same green :LOL:
0D2%21113530&authkey=%21ANubyNh51_xE24I&width=1024.jpg

It's been quite some time since it was used as more than a drill so it's going to take some time to cleanup and back into smooth working order and re-tool.
It came with a few basic attachments but nothing to even hold these mill bits, i have a feeling they must have gone with the larger mill.
D2%21113528&authkey=%21ADzS5cdunSVAXNU&height=1024.jpg

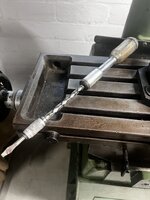
Bit of a cool Yankee? screwdriver it came with i thought i'd show
D2%21113529&authkey=%21AO9Q4GgqoXis95o&height=1024.jpg

It's a fairly light duty mill, slightly smaller version of the more common Rong Fu RF-30 Mill/drill but with the right speed/feeds there's no reason it can't cut just like the big boys albiet a little slower :D

Plenty of small projects in the works for the mill here's a rough list of where i'll start:
  • New belts
  • MT3-ER32 collet holder? maybe there's a threaded R8 drawbar inside?
  • Quill LED worklight
  • Digital quill travel measurement
  • Replace/upgrade the janky on/off switch
  • New motor tensioner adjustment
General tooling needed: new proper mill vice, dial indicator, hold down sets...etc etc tool donations welcome :LOL::LOL:
Maybe DRO? test the coolant pump burried in the stand? who knows


Recent Purchases: New Makita dual rapid charger + 5ah batteries (both my single Makita chargers have suddenly become unreliable)

Cheers for reading
 

Geoff289

Well-known member
Joined
Nov 10, 2013
Messages
1,235
Location
Melbourne, Australia
Few days later a stunning deal on a new diff/axle came up on marketplace at a local wrecker and i had it purchased and delivered in a few days.
I checked the stickers/part numbers as much as i could but hard to know with VW parts what you're looking at....
Amarok diffs come in 3 common ratios 3.7, 4.1, 4.3
After getting it home it seemed like the diff i purchased was a really low ratio of ~2:1 when turning the input shaft and counting the brake drum rotation. o_O
I was thoroughly confused for a day about this before i decided to whip the covers off. Teeth count matched between old and new so i slapped it into the car and all seemed ok!
I'm still greatly confused how the open center was multiplying the drive ratio somehow?!
An open centre rotates half what a LSD or other locker does. I would have done this test the other way round - turn the drum two full revolutions and count the pinion rotations. Depending on which of the ratios you mention above, the pinion should rotate about 3 3/4, a whisker over 4 or about 4 1/3. With a locker you just do one rotation of the drum.
 
OP
O

octane_matty

Well-known member
Joined
Jul 21, 2014
Messages
314
Location
Melbourne, Australia
An open centre rotates half what a LSD or other locker does. I would have done this test the other way round - turn the drum two full revolutions and count the pinion rotations. Depending on which of the ratios you mention above, the pinion should rotate about 3 3/4, a whisker over 4 or about 4 1/3. With a locker you just do one rotation of the drum.

yeah so i was keeping one drum still and rotating the pinion, no lockers engaged (it's electronic activated)
Where things get tricky was the original diff was 3.7 turns as expected! but the new one always seemed to produce half that.
I'm not sure how but possible the bent axle tubes caused one side to have more friction on the old diff :S i dunno
Spider gears on the inside were 9 and 13 teeth, crown wheel 37, pinion 10

Speaking of diffs and since you're a mustang man do you hear about many newer mustangs running friction modifier or not in their 8.8's?
I noticed the E36 ford 8.8 diff seems to be spinning only one side. Not sure if it's due to the clutches being worn, i haven't added friction modifier yet or i bought an open diff and didn't realise :LOL:
 

Geoff289

Well-known member
Joined
Nov 10, 2013
Messages
1,235
Location
Melbourne, Australia
yeah so i was keeping one drum still and rotating the pinion, no lockers engaged (it's electronic activated)
Where things get tricky was the original diff was 3.7 turns as expected! but the new one always seemed to produce half that.
I'm not sure how but possible the bent axle tubes caused one side to have more friction on the old diff :S i dunno
Spider gears on the inside were 9 and 13 teeth, crown wheel 37, pinion 10

Speaking of diffs and since you're a mustang man do you hear about many newer mustangs running friction modifier or not in their 8.8's?
I noticed the E36 ford 8.8 diff seems to be spinning only one side. Not sure if it's due to the clutches being worn, i haven't added friction modifier yet or i bought an open diff and didn't realise :LOL:
You don't want to mistake me for a new fangled Mustang man, they don't interest me and I don't know much about them. Most of the guys in the club who have them aren't really car guys in terms of working on them and modifying them, just take them to the dealer for service. I can think of a couple of exceptions so I'll try to remember to ask at the next meeting or event. Craig Dean, who runs this outfit will probably have an educated view on this.

https://www.mustangmotorsport.com.au/
 

hardtop5000

Well-known member
Joined
Apr 26, 2021
Messages
99
Location
Ngunnawal country
An incredible level of consistent, well structured diagrams i think anyone can appreciate.

My Grandfather worked for 44 years as an Engineer for a mining company and was involved in the design of the Gladstone QAL (Queensland Alumina Refinery) and Boyne Smelter. Today said mining company after many name changes is now known as Rio Tinto.
Amazing stuff, matty. It‘s rare that expert/advanced operators are able to see tools and tasks with a beginner’s eye and provide all the background and guidance they need, in plain language and drawings. I bet everyone who worked with your grandfather came away more skilled and safer.
 
OP
O

octane_matty

Well-known member
Joined
Jul 21, 2014
Messages
314
Location
Melbourne, Australia
Yeah wow it's been 4 months! :LOL:
Absolute rollercoaster of a year and plenty more to come
Our little girl started daycare a few months ago and ever since we've been on/off sick for the past 3 months. Gastro, Hand foot and mouth, stomach bug this past weekend. I'm sure covid or RSV is next week!

Apologies if the pictures are rather obscure and random but it's all a work in progress :D

A while ago i sold the old rocksliders from the Amarok, ordered a set of offroad animal ones.
Unfortunately they don't make mounts for the Amarok so i'll be fabbing some up.
The main reason for changing is to have more of a usable 'step'
!AtIQgqdZDEGfh4V1qYoh29Ovro6Iag?embed=1&width=1024.jpg

You may remember late last year my brother in laws CRF250x gave up on the ride home
It's since been sitting in my garage and paying someone to fix an old bike doesn't make much sense at the moment.
I drained the oil a few months and only a few drops came out so time to dig in.

Things seemed ok in the top end to start with
AtIQgqdZDEGfh4VygswmfsHN5Vv5vQ?embed=1&height=1024.jpg

Suspicious dent in the clutch cover case, doesn't appear to leak though
AtIQgqdZDEGfh4V2VsFZmPthifqOfQ?embed=1&height=1024.jpg

After pulling the head apart it's clear things ran a little hot and the exhaust valves are a bit pitted.
One of the titanium intake valves has a slight bend and the intake valve springs were out of spec (Too short)
The intake valve guides are also worn.
Hard to say what caused the intake valve to bend...doesn't appear to be signs of it hitting the piston.
Either way valve issues are very common with these 00s hondas.
A new set of kibblewhite stainless intake valves + guides have been ordered.
I tried cleaning up the exhaust valves but i just don't trust them so a new set of exhaust valves ordered too.
Despite having no oil, the bottom end feels ok apart from the piston rings being wasted from the heat.
I'll have the valve seats machined soon and hopefully slap it back together.

E36 getting a little bit of love
new interior sill trims
AtIQgqdZDEGfh4V5XxxKPLD-bgaOSA?embed=1&height=1024.jpg

New inner fender liners, i had to trim the top part that doesn't suit my fender setup
AtIQgqdZDEGfh4V7tMKGubDuViOi1A?embed=1&height=1024.jpg

Clearance is tiiiiight, might need some heat gun work
AtIQgqdZDEGfh4V89rLjAPg2NJq0kg?embed=1&height=1024.jpg

5 months ago i ordered the last piece of the Amarok upgrades
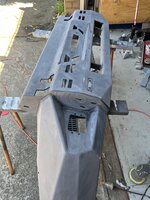
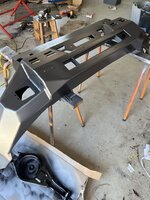
Rival aluminium bullbar, weighs probably 20kg
AtIQgqdZDEGfh4V9GiYwv0lqWzi7EA?embed=1&height=1024.jpg

Bit of sanding, few rattle cans later
AtIQgqdZDEGfh4V_gTe1XRGXvq-12Q?embed=1&height=1024.jpg

Other projects on the go:
Been trying to cleanup the garden lately, my shredder/chipper is giving me some grief so maybe some mods on that soon :LOL:
E36 Dash: I've been fighting issues with no RPM reading, no temp readings. Tried different sensors and worked out the cluster isn't functioning well. Swapped a used cluster in and no different :cry:
E36 rear end: I suspect something is rubbing when cornering, potentially driveshaft boots on the E46 rear upper control arms. As you can see in the last photo i've got a set of stock E36 ones to try out.

5 weekends to Christmas :oops:
It's going to be a busy christmas break :ROFLMAO: don't worry i've got a few more projects to start

Cheers
 
OP
O

octane_matty

Well-known member
Joined
Jul 21, 2014
Messages
314
Location
Melbourne, Australia
Well the foreshadowing was correct and Covid came the week after my last post :ROFLMAO:
I've dodged it so far so maybe it hit me harder, took 2 weeks to recover and still don't have my taste/smell back completely :(

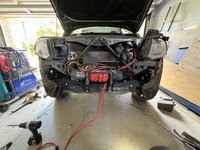
Yesterday took some time off work to start on the Amarok bullbar install

Before
!AtIQgqdZDEGfh4hS92g8YQha0-pTNQ?embed=1&width=1024.jpg

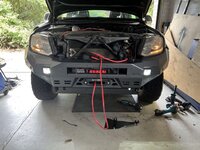
Brackets installed
For anyone players at home make sure you grind the sides of the crash bar flush with the frame rail.
!AtIQgqdZDEGfh4hTi-03NlL-4v1nzQ?embed=1&width=1024.jpg

That's as far as i got after 7hrs and 20mins of work.
Figured out i don't have a big enough step drill to mount the parking sensors yet
Panel gaps are ehhhh but need some clearance between body and frame.
Still need to rewind the winch, fix the battery neg cable, underbody armour, plenty of extra nuts and bolts etc

AtIQgqdZDEGfh4hUNhq-3tqoNKJvBg?embed=1&height=1024.jpg


I have a few projects comming up soon that require using nailguns on ladders so i've made the decision to upgrade the nailgun fleet to cordless.

I've sold a few things over the past year for the big tool budget, originally a vertical wood bandsaw was on the list but nailgun projects come first.

The short list ended up being Paslode or Milwaukee framing guns.
Paslode seems nice and the lightest option but if i shoot too many nails it'll need service work and the cost of gas cartridges add up. If i don't use it enough i risk wasting more money buying batteries and gas cartridges expiring.
Milwaukee seemed to be the winner and has equal if not greater power
 
OP
O

octane_matty

Well-known member
Joined
Jul 21, 2014
Messages
314
Location
Melbourne, Australia
Latest marketplace purchase $100 broken milwaukee framing gun
Shoot nails about 30mm into wood on a good shot.
AtIQgqdZDEGfh4hNW_BXyRwDv1n9zA?embed=1&height=1024.jpg

Enter $17 1/8 bsp to shrader valve


AtIQgqdZDEGfh4hOv2wreu1K_MG1Bw?embed=1&height=1024.jpg

Opened her up, depressurised, gave the o-rings a clean
Insert the adapter into the tank valve with some teflon tape. Strange the tank says pressure is meant to be 102psi but that's no where near enough. I ended up charging to about 190psi with a bike shock pump.
Milwaukee say roughly 30-60k nails before these need servicing and they charge them with Nitrogen. Air is 80% nitrogen and i can refill for free :cool:
AtIQgqdZDEGfh4hQ4VK1rGRMcRCn6w?embed=1&height=1024.jpg

Now perfect sinking 90mm's
AtIQgqdZDEGfh4hRpE4RCDaty92Eaw?embed=1&height=1024.jpg
I also tried some very hard Australian hardwood; sinks about 70mm worth of a 90mm nail
I could pump it up more but generally i'm nailing pine to hardwood these days and that's about expected performance for any cordless nailgun.

for $117 total i can't complain :D
 
OP
O

octane_matty

Well-known member
Joined
Jul 21, 2014
Messages
314
Location
Melbourne, Australia
Well Merry Christmas and a Happy new year all! :cool:

It was a busy break all round, i had maybe 2 days relaxing out of 3 weeks and the rest trying to tick items off my todo list :ROFLMAO:

CRF250's head came back from the machine shop with a fresh set of valves
Found the cam lobes were a little damaged re-assembling and ended up throwing in a stage 1 hot cam.
Bike was re-assembled, runs suprisingly and now needs some final touches.

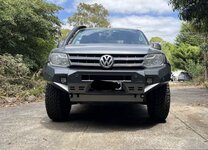
Amarok bullbar install continued
!AtIQgqdZDEGfh4t_FIKRcHnJ2zR9ew?embed=1&width=1024.jpg

Install completed...haven't installed the bash bar yet but will get to that
EGfh4wQEzS23b93paEseg?embed=1&width=729&height=527.jpg

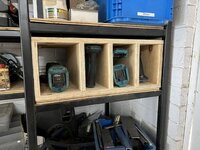
While cleaning up the garage i couldn't handle throwing tools in a pile anymore so knocked up this cubby to hold a few makita skins
!AtIQgqdZDEGfh4wHGRCtYk9ob5CCYg?embed=1&width=1024.jpg


Study Makeover time!

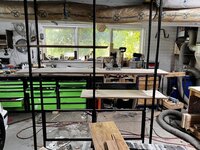
10 years ago i started building this 3m desk very very early in this thread
The time has come to upgrade my study/work from home setup so it's being cut up :cry:!AtIQgqdZDEGfh4wGp3tPuYFifYR3fw?embed=1&width=1024.jpg
It was an achievement at the time given how long and heavy it is with limited tools :LOL: but now i know better to make 2 smaller desks :LOL:

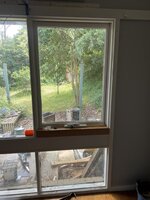
We got split system AC's a few years ago and this boat anchor needs to go.
AtIQgqdZDEGfh4wIPMQ9CpoW3Ip5Eg?embed=1&height=1024.jpg

We will probably get a new window at some stage, for the moment i acquired a free window from a friend and packed the bottom a little.
AtIQgqdZDEGfh4wJpTS2YrsdV7w9IQ?embed=1&height=1024.jpg

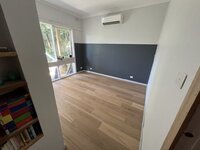
Re-painted, plaster filled, new flooring, new skirting
!AtIQgqdZDEGfh4wOtCan8HPZ6hGwIA?embed=1&width=1024.jpg

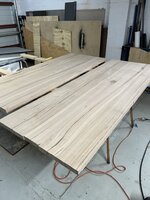
Purchased 2 messmate timber panels locally and added another length to make them ~700 deep
AtIQgqdZDEGfh4wMxzaqQv04_hlmow?embed=1&height=1024.jpg

epoxy, sanding and chamfered the front edge
AtIQgqdZDEGfh4wNNs-DhC9uQM0hSA?embed=1&height=1024.jpg

!AtIQgqdZDEGfh4wP8UhSi01F3l9FQA?embed=1&width=1024.jpg
Ran out of time in the end so had to set everything up temporarily.
Plenty more work to do: floating shelf, lighting, bulk cable management.

Finally ticked cladding off the list for the bifold.
Really keen to sort the last little things and have this building permit ticked off.
!AtIQgqdZDEGfh4wRES7DQtCg30ZlNg?embed=1&width=1024.jpg

And that's about it over the break. Plenty more smaller projects were done but too boring to post :ROFLMAO:
 
OP
O

octane_matty

Well-known member
Joined
Jul 21, 2014
Messages
314
Location
Melbourne, Australia
Wow it's been a busy 2 months of small but significant fixes

E36 Progress update! :cool:

From a few small test drives i noticed a rubbing sound when cornering. Fairly certain it wasn't tyres rubbing but something else.
Seems my absolutely overkill driveshafts are rubbing on the control arms
AtIQgqdZDEGfh5Avq_QMiUAi7oI_pQ?embed=1&height=1024.jpg
I could grind away some of the material but for 500g weight penalty either side i'll go back to stock steel arms
AtIQgqdZDEGfh5AtKHcw6M9roE41Ew?embed=1&height=1024.jpg

The stock ones still need clearancing
AtIQgqdZDEGfh5AurHvBEtJpd8sKkw?embed=1&height=1024.jpg

Quick Weld & paint later
AtIQgqdZDEGfh5ArcnIGEczEUgGS8g?embed=1&height=1024.jpg
Bottom adjuster of the coilover adjuster was still rather close, i cut 10mm off the bolt in the end
!AtIQgqdZDEGfh5AopLdQ6Z9vqKbX5Q?embed=1&width=1024.jpg

AtIQgqdZDEGfh5AsIdfMvsRNJzsKXg?embed=1&height=1024.jpg

Now onto fixing Instrument cluster and speed sensor issues:
I previously had 2 e36 speed sensors, i recently discovered theres two types of speed sensors active/passive. It appears the E36 one is wrong for the E38 PCM. I replaced the lower sensor with a transmission sensor from a 4L60e from a VX commodore (easiest most common car to find it on)
AtIQgqdZDEGfh5Ap5KaHDdA6rECPrg?embed=1&height=1024.jpg

Since then i've made a heap of changes in HP Tuners to get the speed sensor working, to help others primarily swapping Holden LS's into cars here's the summary:
Under transmission settings:
-Make sure speed sensor fitted is enabled
Under speedometer tab:
- disable wheel speed sensor - this disables the ECU from reading from ABS sensors
- set speed output type to vehrepTOS
- make sure the wheel circumference calibration and reluctor count are accurate

After this i opened logging and confirmed rolling around i could see at least 1km/h from the vehicle speed sensor.
Having the LS VSS working enables the reverse lockout switch to work and supposably helps the tuning somewhow.

Next problem was tachometer not working:
Simple solution to this one in HPTuners:
Under Engine -> General, Set the type to Crank and adjust the resolution to compensate for 6cyl or 4cyl speedo clusters
Here is a good thread to calculate:

I don't think it's perfect but close enough

Next problem the speedometer doesn't work:

I've switched between all 3 spare sensors i have before i discovered the E36 speed sensor is very particular about where the sensor is positioned in relation to the reluctor wheel.
For anyone playing at home the E36 sensor reads continuity across the pins with nothing between the sensor. When a steel object is between the sensor prongs the resistance should significantly increase to the point of breaking connection. After adjusting the bracket countless times i successfully could see consistent changes in the resistance while spinning wheels
AtIQgqdZDEGfh5AqWvM5W9_plj0TIA?embed=1&height=1024.jpg

Next small problems to address:
Interior still needs work
One of the O2 sensors isn't reading correctly.
Brake pad sensors still not turning the dash light off
Other than checking some wheel clearance i'm storming towards an engineers visit hopefully.

Recent tool sales: Sold off my Dewalt Cold cut saw
Recent tool purchases: none...incredible i know

Cheers for reading!
 
OP
O

octane_matty

Well-known member
Joined
Jul 21, 2014
Messages
314
Location
Melbourne, Australia
3 weeks but we're getting there with the 36!

New bracket to hold the bussmann relay/fuse box
AtIQgqdZDEGfh5FaSqGwf6KDYTfvCQ?embed=1&height=1024.jpg

New cover for the bias valve
AtIQgqdZDEGfh5FZzhaxUKZhLtmSog?embed=1&height=1024.jpg


Replacement o2 sensor for bank 2, fixed sensor issue! i swear the first batch of sensors must have been duds
AtIQgqdZDEGfh5FchJ__uDE09U1P0w?embed=1&height=1024.jpg

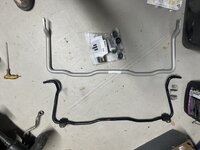
Rear whiteline swaybar installed!
slightly better bend for driveshaft clearance but still hit the exhaust v-bands
I ended up moving the v-band, i'll spare you the details on the 2 day ordeal. Not sure if i'll ever build another exhaust :LOL:
!AtIQgqdZDEGfh5MRdOlAHbKLGQM0HA?embed=1&width=1024.jpg

Messy as always working late
!AtIQgqdZDEGfh5MQfR-n3LHaBL6ztg?embed=1&width=1024.jpg

Unfortunately came across a pretty much brand new silicone radiator hose leaking.
Given it's ran...5 times? and still supposably under 1 yr warranty, i asked for a refund/replacement from the seller.
They're giving me a hard time so i've purchased a spare if they keep playing hard ball.
s!AtIQgqdZDEGfh5MGNRF3sLY2IJuYSw?embed=1&width=660.jpg

New battery ground switch (Victron)
Installed on an aluminium bracket behind the carpet.
I need to cut the bottom piece of carpet off here. In e36s if the battery hold down clamp comes loose the battery terminal grounds through the carpet to the chassis and starts a fire :(
AtIQgqdZDEGfh5MKIfCgGr_2xOvpwA?embed=1&height=1024.jpg

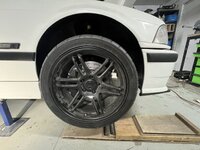
I've noticed the front wheel rubbing slightly on the guard liners under braking. M3 Offset caster bushes are an easy fix + upgrade :cool:
AtIQgqdZDEGfh5MLGEJ9lxZoBlAQ1w?embed=1&height=1024.jpg

Hard to tell the difference but it's about 10mm pushed forward in the wheel well. 0.5* caster
s!AtIQgqdZDEGfh5MMICK48sq10auV4Q?embed=1&width=660.jpg
After
s!AtIQgqdZDEGfh5MHuN1UFsXtBoBFtg?embed=1&width=660.jpg

Initially thought i'd wait until engineering is complete to add E85, but now thinking i'll gamble it.
Little ASA 3d printing later
AtIQgqdZDEGfh5MPosE3_X-7M4dV4A?embed=1&height=1024.jpg


Few hoses and it'll be good to go.
AtIQgqdZDEGfh5MNDD3sLyYJpJPqPw?embed=1&height=1024.jpg
I'll take bets on if the mount will melt or not. ASA should be good for 90-110c

As long as my new Exhaust mods to clear the swaybar hasn't created any leaks i'll be contacting the Engineer this week for advice on the next steps.
Over the next week todo list:
- Replace upper radiator hose
- Install door trims
- Make fuel lines for flex sensor
- Wash


Cheers for reading
 
OP
O

octane_matty

Well-known member
Joined
Jul 21, 2014
Messages
314
Location
Melbourne, Australia
This year is flying by!!
Small update but only because i forgot to take pictures of everything else going on :ROFLMAO:

Project car update:
So the E36 is finally booked in for a second inspection with the Engineer 1 month from today and a final inspection hopefully 2 weeks following that.
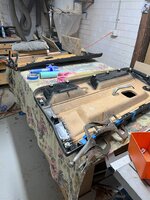
I've been working away trying to glue a good set of E36 door cards together and tidying up what i can.
QxBIICfI8sBAAAAAdRON6zrY7WsW9t-C9oDALY?height=1024.jpg

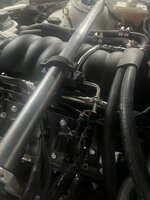
Fresh top radiator hose, changed the angle for better intake clearance.
QxBIICfIMsBAAAAAQ-LIzttPy-MBGRLxobeQtY?height=1024.jpg

House update!
So for the kitchen bifold/wall removal i've had the final inspection done and received the certificate of final inspection from the surveyor (y)(y)

So for the past year or so i've been thinking about getting an E-Bike. Originally i hated E-Bikes but now i'm very curious and terribly unfit so this seems like a good avenue to get me back on the bike :ROFLMAO:

Mrs Octane wasn't a fan of more projects when i presented the idea but made a deal that the building permit had to be completed and Project car registered. Building permit is done and she said booking the engineer inspection was close enough 😁
(She now wishes she added the bathroom being completed onto the deal but i've started that now anyway 😆)

So it turns out E-Bikes are very expensive, in Australia a new Ebike can be anywhere from 6.5k on runout specials to 24k!!
As you may know from this thread i don't like paying retail so we're going offbrand/custom.

So i purchased a carbon fibre Dengfu E82 frame with a Bafang M560 motor and 1008wh battery through aliexpress.

The goal is pretty much build a relatively light/good value Enduro? bike.
Aiming for sub 23kg roughly 8k AUD (5k USD)
SjySRrsqJ1Xt1chMAUvbr9g2VO3UdRxgOZJGq4o?width=1024.jpg
This might seem like alot of money but this frame is a Chinese copy similair to a Canyon Strive:ON which costs around 8k USD, weighs 24.3kg and has a 750wh battery.

There's alot of hesitation around chinese carbon frames and barely any reviews of their long term performance so this is partly for the fun of building it and seeing if i can break it 😆

For the bike nerds out there here is my rough spec list:
Forks - Manitou Mezzer Pro 29"
Shock - Fox Float Performance, upgraded to Elite with an LSC knob.
Wheels - DT 350 hubs with Carbon rims, tubeless tyres
Bars - Funn black ace Carbon 780mm
Dropper - Bike Yoke Revive
Brakes - Formula Cura 4 pot 203/180mm
Drivetrain - Shimano 1x12

A real mix of low/mid/high end parts that might confuse some but it's chosen based on a mix of durability, price, weight and servicability.

Aiming for 170mm Travel on both ends, the frame can do 150-190mm depending on shock/yokes.
The frame came unpainted a missing a few parts so a good time to whip out some spray cans while i wait for the remaining parts.

First coat came up great, this is a BMW colour of course Riviera Blue P5C
WmL9Q4a-Zz8L8dBgAQKvNXaE1auhtguc9X_t7RM?width=1024.jpg

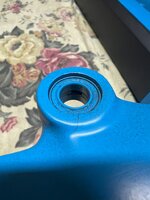
So you may notice i painted over some bearings here. The rear triangle bearings felt like rocks so i already purchased replacements.

Upon some close inspection after the first coat 😱
Looks like we have a crack
QxBIICfJcsBAAAAATpK0PzefolLPVuWYAlnxwU?height=1024.jpg
I've already contacted the reseller so i have a new rear triangle on it's way from the factory.
Not off to a good start but i'm still confident this will work out 😅
 

hewey

Well-known member
Joined
Sep 5, 2014
Messages
1,681
Location
Blue Mountains, Australia
Beemer project milestones sound great, really getting to the pointy end now. Good luck with the e-bike. $5K would get you one hell of a lightweight and good spec dually!
 

Geoff289

Well-known member
Joined
Nov 10, 2013
Messages
1,235
Location
Melbourne, Australia
Of course you're building your own E bike! How come you got all the skills?
I've had an E bike for a few years, on my second one now. I just went to the bike shop and bought this one.

https://pedalbikes.com.au/products/pedal-coyote-electric-hardtail-mountain-bike-gloss-charcoal

(didn't pay that much for it, though)

I've always had a bike, but I found that I just wasn't riding it much. The E bike makes all the difference, and I use it a lot. Currently working on the election for the AEC and commuting about 20 k's round trip, nearly all the way on bike paths, and not stressed by parking dramas like all my fellow casual election employees are.

I got a second battery for it, so I always have a fully charged one available. I take it with me in a backpack if the circumstances make it a prudent precaution against range anxiety.
 
OP
O

octane_matty

Well-known member
Joined
Jul 21, 2014
Messages
314
Location
Melbourne, Australia
Of course you're building your own E bike! How come you got all the skills?

Haha do we call this skills or expensive hobbies? :ROFLMAO:
Bikes are ikea flatpacks with special tools, don't worry i'm not going as far as building my own battery 😁
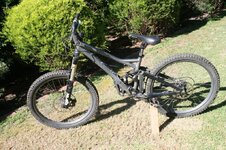
I probably haven't covered bikes on this thread since my latest trail bike build a few years ago of the 27.5" Lappierre Zesty
Since early 00s i figured out my father wouldn't take me to ride dirtbikes every weekend so i rode mountainbikes almost daily in my teens to mid 20s.
I was relatively lucky i grew up near Jells Park which has connecting bike paths to the eastern surburbs.

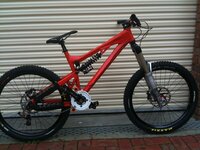
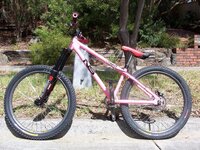
This was my first custom built bike circa 2004
0K4qQZYdEUP1AcjaAedxFo5EBvjwvK4w92pjPiA?width=1024.jpg

Year or two after building this bike i met a bloke by the name of Trev that introduced me into downhill racing.

I raced a few times in the Vic DH series
RVRVe1AR2-KRdAsjaFTbaGYnLCIfQ?width=600&height=450.jpg

Next bike purchase was a Giant Reign circa 2009
r8NMSYIH97hl7A-rAawEJcSRgX5S8_DDf9ox3O4?width=1024.jpgFlogged the hell out of that bike
wyfyQ60yNCtc6ZHVAQssPvBhCzsvVzQJICh1014?width=1024.jpg

Then an Intense Socom build circa 2011
F_TafATvpf4OkG8szP_m8C6lX8SI?width=1024&height=768.jpg

AclgSrwJsDWiddNfAbmXzdlJBwa4ndSwLsjz-ws?width=1024.jpg

Things started to get serious around 2012-2013 - Santa Cruz V10
C-VvSYaAsCi7b44dAUWrY8_c01ftTLNuYinU8Lo?width=1024.jpg

Queenstown trip late 2012
C7wN7Ad-GQWkm2QnqJkdbei-ra3A?width=1271&height=718.png

2013 Whistler
I was actually planning to return to Whistler in 2020 but covid hit just before we were going to book flights.
zq-Q55qCR5cgVp_AfIgVhh6RgqFlvKvPAecF0I?height=1024.jpg
Broke my arm in two places 1 week into the 4 week trip 😅
 
To avoid these ads, REGISTER NOW!
Top Bottom