To avoid these ads, REGISTER NOW!

MaxJax came early

VictorBravo

Well-known member
Joined
Jul 13, 2014
Messages
321
Location
Asotin County, Washington
So I finally ordered a MaxJax last Thursday night through Costco. Got the order confirmation Friday morning: "allow four to six weeks for delivery."

Which was fine with me. Things have been hectic and I could use a little time to get organized for it. I figured I'd have time to call the freight company this week and figure out the logistics.

Except yesterday I got the email saying it was coming today by Conway. I called them and told them I wasn't ready for offloading, it was a residential address on a gravel driveway, etc., and wanted to make sure I didn't put them at a delay. I was just surprised how quick they were.

The Lady said, "I'll have a lift gate deliver it. Driver will call 20 minutes before hand."

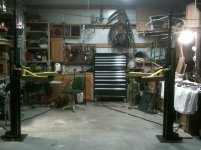
Which is exactly what happened today. No lift gate charges. It was dropped gently on my concrete floor by Jason, who said this was a piece of cake compared to the oversized Costco generators that he's been delivering to cabins in the Blue Mountains.

Now I have rearranged my projects. I'll be tracking down some hammer bits tomorrow.

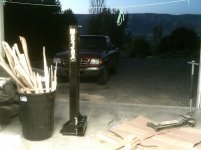
I even got some nice angle iron for my cutting torch cart project out of the deal.
 

Attachments

  • DSCF0004.jpg
    DSCF0004.jpg
    143.4 KB · Views: 134
  • DSCF0008.jpg
    DSCF0008.jpg
    143 KB · Views: 111
  • DSCF0010.jpg
    DSCF0010.jpg
    142.2 KB · Views: 128
  • DSCF0007.jpg
    DSCF0007.jpg
    144.4 KB · Views: 98
Last edited:
To avoid these ads, REGISTER NOW!

AndyCBR

Well-known member
Joined
Jun 22, 2014
Messages
396
Location
Baton Rouge, LA
I helped my buddy install his and a new bit will help so you can drill the hole in gauge.

My buddy also set the anchors flush with the concrete and kept track of the washers so it is easy to set up the next time.

He also got some nylon set screws that screw in the anchors when the lift is not in use in his carport so the holes don't fill up with garbage.

It's a really nice system for the money.
 
OP
V

VictorBravo

Well-known member
Joined
Jul 13, 2014
Messages
321
Location
Asotin County, Washington
I helped my buddy install his and a new bit will help so you can drill the hole in gauge.

My buddy also set the anchors flush with the concrete and kept track of the washers so it is easy to set up the next time.

He also got some nylon set screws that screw in the anchors when the lift is not in use in his carport so the holes don't fill up with garbage.

It's a really nice system for the money.

That sounds like good advice. I was thinking of bolts in the holes to protect them, but nylon sounds better.

I'm pretty happy right now. We'll see how it goes. At least I am fairly confident my floor meets specs based on some small test holes I've done under cabinets.
 

AndyCBR

Well-known member
Joined
Jun 22, 2014
Messages
396
Location
Baton Rouge, LA
The way we laid it out was to pop a line where he wanted the plane of the jacks to sit. Then we set the jacks in place and squared them up to the chalk line with a framing square.

We then used a small 1/4" bit to drill a center hole at each of the mounting holes.

Once the pilot holes were in we then moved the jacks out of the way and drilled the full size hole. This helped prevent the larger bit from walking if you hit some stubborn aggregate while drilling. It also gives you room to "steer" the bit a little if it tries to walk, something you can't do with the jack plate in place.

It's a pretty good size hole and I had a larger Hilti rotary hammer from work. You may have to rent/borrow a larger rotary hammer depending on what you've got.

:beer:
 
To avoid these ads, REGISTER NOW!

Todd.Brock

Well-known member
Joined
Jul 15, 2008
Messages
4,250
Location
Cincinnati
:scared:The nylon set screws are from McMaster Carr. Maybe MSC. I think it was around 10 bucks for a bag of 25. They are Allen head and work great. I was surprised how much crud accumulated around them. Congrats on lift!
 
OP
V

VictorBravo

Well-known member
Joined
Jul 13, 2014
Messages
321
Location
Asotin County, Washington
Well, I started around 11 this morning and got the MaxJax up and running by 7:30 PM.

No real issues: everything seemed straightforward. All the threads I’ve read on GJ helped a lot in keeping me from making mistakes.

The Wedgits went in without issue and snugged up fine. Using a rotary hammer is really the way to go. The only thing I can add to the knowledge base is to not follow the instructions for drilling the 5/8” pilot hole 2” deep. Just drill it a half inch deep. The 7/8” bit dances around too much in a 5/8 hole.

The other thing was I found that a plastic rafter square makes an excellent drill guide. Just align the depth rod with it and keep things straight.

I haven’t put a car on it yet, but the lines are bled and everything seems to work.
 

Attachments

  • sdsdrilling.jpg
    sdsdrilling.jpg
    133.8 KB · Views: 65
  • Maxjaxup.jpg
    Maxjaxup.jpg
    142.6 KB · Views: 61

AllenYo

Member
Joined
Sep 8, 2015
Messages
11
How far apart are your posts and for which cars will the jack be used? I am installing one soon and pouring a floor in a new garage...
 
To avoid these ads, REGISTER NOW!
Top Bottom