Hi there,
Let me tell you a bit about my blasting cabinet.
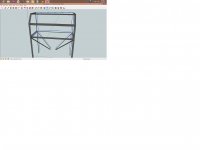
I brought a cheap cabinet new from eBay, at first everything was fine, i don’t use it every day, just for small projects now and again, so my first problem was when i wanted to change the glass i found that the frame holding it in was done with nuts and bolts. This meant that i had to lean in through the side door to get to them, no big deal, but irritating, i have since changed them for rivnuts. The second thing was that it blows dust and grit from just about every joint. Seam sealer has fixed this. The light inside was not bright enough so i have changed this to a full width LED strip and put it in a clear plastic pipe, and fixed it to the top of the cabinet. The lamp it came with was a 12 volt tube light that was not earthed, i guess when you are blasting there is a build up of static electricity, because every now and then i would get a jolt off one of the bolts holding the glass in. Not a nice thing for a nose to have to deal with i can tell you, so now i have made sure that the cabinet is earthed back to the plug, and have not eleratcuted a booger since!
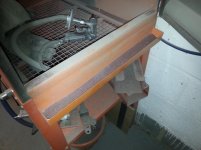
Being that I’m in the UK the next big problem was wet air coming from my compressor, OK so i do live in the driest part of the UK but by most standards its still dam damp! The wet airs made the sand clump together and block the gun. So i fitted a good water/air separator next to the cabinet.
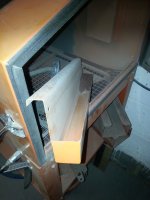
The next problem I’m working through is the dust control. Like you have said i wanted to couple up the shop vac to the sandblaster to keep the dust down, the problem i have is that the vac is too good. This means that when i switch it on the gloves are pulled into the machine and when i put my arms in its very hard to move them, when anybody is using the cabinet, they are known as the sandblasting zombie!!
I did think of putting a filter but am worried that it would just overheat the vac, so maybe i will add a rheostat so that i can turn the vac down.
The final thing is whatever size you think you need .......double it. I have seen some really nice cabinet on here GJ made from old oil storage tanks, and the like.
I hope that this will help in the building of your sandblaster, and when you have finished please post some pics.
Good luck