To avoid these ads, REGISTER NOW!

Michigan garage project

toomanyrocks

Well-known member
Joined
Jan 20, 2019
Messages
190
Location
Ohio
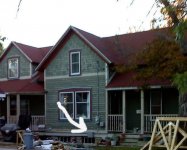
I have been lurking about this website for years and finally have decided to share my experiences. This thread will document the construction of a garage for my daughter and son-in-law who made the decision to buy a home in northern Michigan two blocks from Lake Michigan....WITH NO GARAGE!

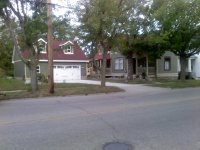
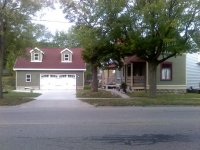
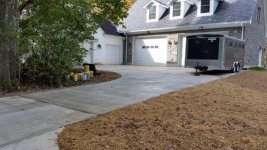
To say the least, it was an easy wedding gift to come up with. below is winter in Michigan, for those of you in warmer climates. And a pic of the old Victorian...with NO Garage! At least they had a double lot, so on the left of the pic is the drive we had poured to the new garage.

 

Attachments

  • winter.jpg
    winter.jpg
    44.1 KB · Views: 149
  • pre.jpeg
    pre.jpeg
    57.3 KB · Views: 150
To avoid these ads, REGISTER NOW!
OP
T

toomanyrocks

Well-known member
Joined
Jan 20, 2019
Messages
190
Location
Ohio
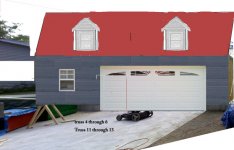
So we started with a really bad photoshop mockup and some pre-made blueprints from Menard's. Building permit folks don't like these, but my daughter and son-in-law are engineers, so he was able to modify the plans to satisfy the locals. Luckily a small town where everyone knows everyone and most things are done pretty casually. The garage was to have electric from the house, no plumbing and no living space, so permitting wasn't too hard.

Ill try to add some hints for those of you looking at this site with the idea for doing this sort of thing too, maybe you can benefit from our experiences.
 

Attachments

  • drawing.jpeg
    drawing.jpeg
    95.8 KB · Views: 103
OP
T

toomanyrocks

Well-known member
Joined
Jan 20, 2019
Messages
190
Location
Ohio
Don't forget that if you are building a garage, plan to have access to lots of POWER. You don't want to find out that you have to rewire your entire house or add a second line to feed the garage. This was a detached garage, so we had to run power from the house. First issue was that the service to the house was only 90 amps. Great for 1950 but this house had been recently remodeled and updated, but even with no air conditioning (northern Michigan) there wasn't enough power to add a garage and shop.

First Project, replace the main to the house with 200 amp service. Sorry, I don't have any pics of that, but it was pretty straight-forward after getting permits, to have the power company cut the drop line. We removed all the cabling down to the meter, the meter and the cabling into the house. Relaced the multitude of scabbed on breaker and fuse boxes with a proper 200 amp box and re-cabled with 200 amp wiring to the new meter box (which the power co supplied, not my experience when doing this to my house...but that is a different story.) and up to a new weather-head. Do all this in one day and night, and the next day have the inspector come, OK it, and the power guys are there to hook it back up. Sounds good til it start raining and you have no power and the generator you planned to use won't start....(hint: always test the generator ahead of time)...wasted a lot of time running around finding another generator.

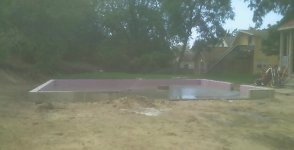
With that done time to start the actual project. My son-in-law had some great cement contractor contacts, so getting a foundation in was the easiest part of the project. Had to remove a couple smallish trees was all.
 

Attachments

  • 00001.jpeg
    00001.jpeg
    59.9 KB · Views: 93
OP
T

toomanyrocks

Well-known member
Joined
Jan 20, 2019
Messages
190
Location
Ohio
We were near the lake as mentioned, so at least he trenching for the power line was easy, all sand...hard part was keeping the trench from collapsing on itself before the inspector could come to ok the depth. I put all the underground in 2 inch conduit so I wouldn't have to worry about it in the future, but lesson to learn is to buy a heck of a lot more wire than you measured, once all the curves and up and down, I ended up about 3 feet short and had to splice the line...you can't splice in conduit, so had to add a box at the side of the house to house the splice, it could have been worse.
 

Attachments

  • box.jpg
    box.jpg
    50.8 KB · Views: 86
OP
T

toomanyrocks

Well-known member
Joined
Jan 20, 2019
Messages
190
Location
Ohio
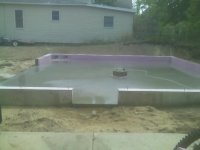
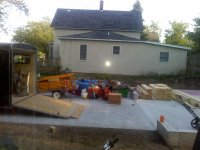
The cement crew finished the driveway and poured the floor of the garage. Notice we put 2 inches of rigid foam inside the foundation...this is Michigan, remember. I didn't want the insulation on the outside, as it would be too prone to damage from lawnmowers and the elements.
Also, I don't know what we did at that time, but currently I have them add fiber to the cement and specify 4500 or 5000 psi cement for the driveway. I also use rebar, probably unnecessary, but I am old school and in the north, where you get hard freezing, anything you can do to prevent cracking...
 

Attachments

  • foundation.jpeg
    foundation.jpeg
    75.3 KB · Views: 69
OP
T

toomanyrocks

Well-known member
Joined
Jan 20, 2019
Messages
190
Location
Ohio
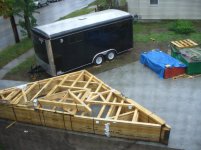
Finally, materials and work. I have a nice enclosed auto trailer worked perfectly as a portable workshop in the site, table saw and miter saw in the trailer and good dry storage for materials. Oddly the trailer came with windows, so it actually looks like a horse trailer, but those windows gave lots of light to be able to work in the trailer.
 

Attachments

  • 00003.jpg
    00003.jpg
    137.9 KB · Views: 90
OP
T

toomanyrocks

Well-known member
Joined
Jan 20, 2019
Messages
190
Location
Ohio
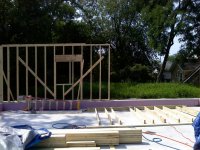
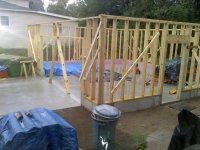
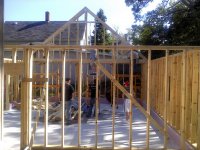
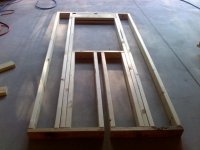
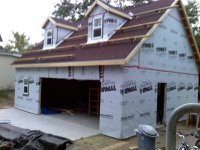
a few framing pics. 2x6 construction, so the walls could be maximum insulation. You probably noticed the little measure once, cut twice boo boo. Didn't quite measure out the window placement properly.
 

Attachments

  • 00008.jpg
    00008.jpg
    146.6 KB · Views: 62
  • 00006.jpg
    00006.jpg
    153.3 KB · Views: 68
  • 00005.jpg
    00005.jpg
    148.4 KB · Views: 67
  • 00004.jpg
    00004.jpg
    149 KB · Views: 71
OP
T

toomanyrocks

Well-known member
Joined
Jan 20, 2019
Messages
190
Location
Ohio
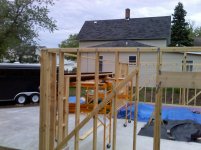
some more framing. This is an extremely windy area near Lake Michigan, so we designed the building for the wind. Lots of shear force on the walls and lots of lift on the huge roof, so all the studs were tied with hurricane clips, top and bottom. Sill plates were bolted every 18 inches with oversize plates. The entire building will be sheathed in 7/16 structural strand board.
 

Attachments

  • 00009.jpg
    00009.jpg
    145.9 KB · Views: 59
  • 00010.jpg
    00010.jpg
    139.9 KB · Views: 60
  • 00011.jpg
    00011.jpg
    137.2 KB · Views: 59
Last edited:
OP
T

toomanyrocks

Well-known member
Joined
Jan 20, 2019
Messages
190
Location
Ohio
Again, Engineers....I hate sagging headers over garage doors...Plus we planned on using the attic room for storage, meaning lots of weight up there. Since the trusses were to run front to back, that 16 foot door header would be holding up most of the front of the building. 400 pounds of steel, no crane...
 

Attachments

  • 0014.jpg
    0014.jpg
    146.2 KB · Views: 78
  • 00017.jpg
    00017.jpg
    150 KB · Views: 77
OP
T

toomanyrocks

Well-known member
Joined
Jan 20, 2019
Messages
190
Location
Ohio
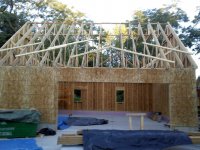
Finally, Trusses delivered. Oops, the plans and mock-up had 2 dormers on the front, the trusses came designed with one bigger dormer in the middle. That would be really odd looking, but the number of trusses worked out so that we could still use all the trusses and build the dormers later.

Remember, when you are dealing with engineered trusses, you cannot make any alterations without engineering approval. You can't just cut them or add or remove anything.

Well, we didn't have enough trusses to be able to build the true dormers we originally wanted, since that would entail girdering up multiple trusses on either side of the dormer spaces, so we decided to go with false dormers...more on that later.
 

Attachments

  • 00018c.jpg
    00018c.jpg
    140.2 KB · Views: 51
  • 18b.jpg
    18b.jpg
    146.7 KB · Views: 51
OP
T

toomanyrocks

Well-known member
Joined
Jan 20, 2019
Messages
190
Location
Ohio
I never put up such large trusses before, but luckily one of the drafted friends had. carry the truss into the space below put one end up, then the opposite end, with the top of the truss hanging upside down and then flip it up with a couple of 2x4s as push rods.

Works great, just make sure that the gable end that you put up first is really well braced, it is rather frightening when you flip those big ones up and they smack against the ones already there, shaking that whole structure. I nailed a pacer to the top of each truss and we got ready to flip it so it would be properly spaced at the top.
 

Attachments

  • 00019.jpg
    00019.jpg
    148 KB · Views: 68
  • 00020.jpg
    00020.jpg
    145.7 KB · Views: 64
  • 00021.jpg
    00021.jpg
    153.9 KB · Views: 77
OP
T

toomanyrocks

Well-known member
Joined
Jan 20, 2019
Messages
190
Location
Ohio
After a few are up, you can put down some sheathing panels for flooring and you have a place to put a ladder, a lot easier to nail together the tops and bracing, than climbing around like a monkey.

Hint, at some point you are going to get enough trusses up that you won't have enough room to flip any more, so be sure to plan ahead and at that point, you have to stack all the rest up top and slide them into place while vertical. It was a little hairy, but as long as everything is braced, it actually went well.

It took all of 4 hours to get all the trusses up and temporarily braced. Didn't drop a one.
 

Attachments

  • 00023.jpg
    00023.jpg
    142.8 KB · Views: 106
OP
T

toomanyrocks

Well-known member
Joined
Jan 20, 2019
Messages
190
Location
Ohio
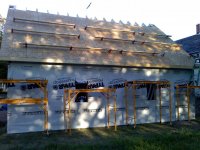
On to the sheathing...We sheathed the walls first, mainly because of the wind. I didn't want to sheath the roof then have that kind of lift on the building as the wind blew through.

Also, fyi, be sure that you put ALL the bracing and counter-bracing in the trusses exactly as on the truss manufacturer's diagrams. It is a lot easier to do this when there is no sheathing, since some of that calls for long 2x4's that will have to be threaded into place.

These trusses were attic trusses with a full 8 foot high attic room, so the roof pitch was almost 11/12, really steep.
 

Attachments

  • 00022.jpg
    00022.jpg
    153.1 KB · Views: 56
  • 00024.jpg
    00024.jpg
    145.9 KB · Views: 53
OP
T

toomanyrocks

Well-known member
Joined
Jan 20, 2019
Messages
190
Location
Ohio
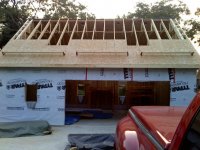
A little house wrap....Make sure you get wrap labeled for the weather and time that it will be exposed, it never fails you get delays and that stuff has to protect your building for 6 months more than anticipated.

Notice on the gable ends I made the eve overhang as a separate box that I bolted to the structure, just another little peeve of mine when I see the roof dip at the eave because someone toe-nailed those little pieces on. The alternative is to use a dropped-gable truss, where the end truss is 4 or 6 inches shorter than the rest and you run pieces across the top, nailed onto the 2nd truss in. Either way gives a lot more strength to that overhang.
 

Attachments

  • 00026.jpg
    00026.jpg
    150.4 KB · Views: 59
  • 00027.jpg
    00027.jpg
    147.5 KB · Views: 67
OP
T

toomanyrocks

Well-known member
Joined
Jan 20, 2019
Messages
190
Location
Ohio
a little roofing..
 

Attachments

  • 00028.jpg
    00028.jpg
    145.2 KB · Views: 52
  • 00029.jpg
    00029.jpg
    141.1 KB · Views: 52
  • 00031.jpg
    00031.jpg
    115.9 KB · Views: 58
OP
T

toomanyrocks

Well-known member
Joined
Jan 20, 2019
Messages
190
Location
Ohio
never can have too many roof jacks.

About those dormers. We wanted light in the attic room, but didn't want to cut any trusses, so ended up building false dormers that were fitted around the truss and sat on the floor, so the weight would be transferred to the floor and not the roof. Remember your roof is engineered for the weight of roofing materials, wind and snow, not extra stuff nailed to the roof.
 

Attachments

  • 00032.jpg
    00032.jpg
    141.5 KB · Views: 61
  • 00033.jpg
    00033.jpg
    100 KB · Views: 57
  • 00034.jpg
    00034.jpg
    118.5 KB · Views: 63
OP
T

toomanyrocks

Well-known member
Joined
Jan 20, 2019
Messages
190
Location
Ohio
dormer framing
 

Attachments

  • 00041.jpg
    00041.jpg
    131.4 KB · Views: 62
  • 00040.jpg
    00040.jpg
    146.5 KB · Views: 57
  • 00036.jpg
    00036.jpg
    151.1 KB · Views: 58
  • 00035.jpg
    00035.jpg
    134.6 KB · Views: 61
OP
T

toomanyrocks

Well-known member
Joined
Jan 20, 2019
Messages
190
Location
Ohio
The roof is all done, Garage door installed, ready to start on the exterior. Garage doors are pretty simple and generally come with all the parts and instructions, just bolt up the tracks, stack up the panels one at a time, putting on the hardware as you go, just be sure you measure everything properly as you only have a little adjustment in the tracks once it is bolted to the frame of the door.

Anyway, these came with torsion bar springs across the top, with a slick winding mechanism you hook to a drill to tighten, quite safe compared to the old manual method of winding those springs.
 

Attachments

  • 00044.jpg
    00044.jpg
    140.6 KB · Views: 42
To avoid these ads, REGISTER NOW!
OP
T

toomanyrocks

Well-known member
Joined
Jan 20, 2019
Messages
190
Location
Ohio
For the exterior, we used cedar 6in lap on the bottom and cedar shingles on the top. I always prime all 4 sides before installation, this really makes it easier later and prevents warping due to uneven moisture in the wood. All knots were filled and all joints in the siding were backed with roofing paper to prevent water penetration. The shingles on the gable ends were all applied with overlaps like you would do on a roof.

Undersides of the eaves were closed with ventilated aluminum, so lots of ventilation for the roof.

I forgot to mention about the roof that Water and Ice membranes were used on all the eave edges and wrapped up all the walls of the dormers to prevent water under the flashing.
 

Attachments

  • 00055.jpg
    00055.jpg
    148.3 KB · Views: 62
  • 00050.jpg
    00050.jpg
    112 KB · Views: 52
Last edited:
OP
T

toomanyrocks

Well-known member
Joined
Jan 20, 2019
Messages
190
Location
Ohio
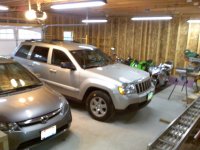
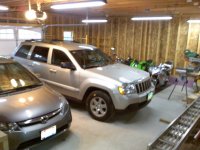
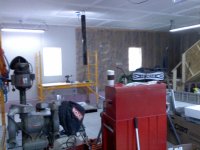
Well, the outside is done, now time to start on the interior. here's a view with some things in the garage. I don't have a wide angle view, but the garage is 28x32, so plenty deep for the cars plus workspace and lots of storage room on the left for motorcycles and shop equipment.
 

Attachments

  • 00073.jpg
    00073.jpg
    140.9 KB · Views: 77
  • 00066.jpg
    00066.jpg
    137.1 KB · Views: 74
OP
T

toomanyrocks

Well-known member
Joined
Jan 20, 2019
Messages
190
Location
Ohio
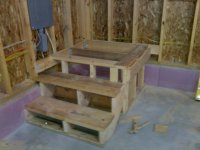
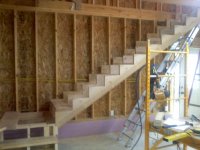
Now to address the stairs, I wanted as much room as possible to haul large stuff up and down, so we made the stairwell extra wide. Since the access door was on the same side of the building in order to have a decent size landing at the top to turn big stuff, there had to be a little landing at the bottom to turn. I hate overly steep stairs, so this was the option.

Built the landing and then the stairs.
 

Attachments

  • 00060.jpg
    00060.jpg
    114.7 KB · Views: 51
  • 00064.jpg
    00064.jpg
    128.8 KB · Views: 52
OP
T

toomanyrocks

Well-known member
Joined
Jan 20, 2019
Messages
190
Location
Ohio
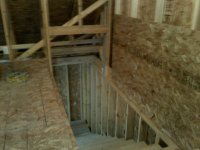
Now to address the issue that the stairs spanned 2 trusses. Recall that earlier I told you not to cut trusses, well since we doubled up truss #3 as a girder, #2 could be partially removed over the stairs and bracing could be framed in to form the opening of the stairwell. Its hard to tell what I did in the picture, but the cut ends of the truss were hung from supports on either side. This is a view from below with most of the bracing in place before the truss cord was cut and removed.
 

Attachments

  • 00062.jpg
    00062.jpg
    120.9 KB · Views: 50
OP
T

toomanyrocks

Well-known member
Joined
Jan 20, 2019
Messages
190
Location
Ohio
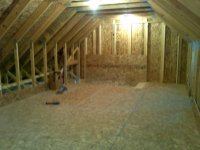
A couple shots of the finished stairwell and the attic room space. Code states there has to be a wall or rail around the stairwell, that comes later, but I put in a half wall at the opening of the stairs so large items can be raised over the top of it.
 

Attachments

  • 00071.jpg
    00071.jpg
    122.2 KB · Views: 55
  • 00073.jpg
    00073.jpg
    140.9 KB · Views: 57
  • 00068.jpg
    00068.jpg
    135.3 KB · Views: 55
OP
T

toomanyrocks

Well-known member
Joined
Jan 20, 2019
Messages
190
Location
Ohio
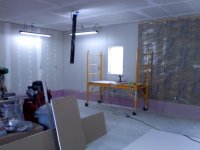
Electric was pretty straightforward....outlets everywhere...Every 4 feet along the walls, and a string of outlets at workbench height every couple feet. Outlets were wired so that each wall was on a separate circuit and every other outlet was on a different circuit, so you can get full current to two different tools at the same time.

All outlets were 20 amp. Also code says you have to have outlets near each door outside. Outside outlets now have to have in use covers, but not at that time. All outlets reachable from the floor have to be ground fault as well. 220 volt outlets were run to the workbench and a line was run for a welder at 50 amps as well. We opted for switched outlets on the ceiling for hanging lights.

We used 6 in thick fiberglass for the walls and 12 in in the ceiling. ( you may have noticed plastic wrap over the faced wall insulation...I don't think you can do this, moisture can get trapped and breed mold between the layers, but in the wall, it isn't as much a problem, as it would be if you did this in a ceiling. Since the whole thing was not planned as a heated building, we didn't have to worry about this from an inspection point of view.)
 

Attachments

  • 0420031221.jpg
    0420031221.jpg
    122.4 KB · Views: 57
  • 0420031220.jpg
    0420031220.jpg
    98.6 KB · Views: 62
  • 0419030824.jpg
    0419030824.jpg
    95.7 KB · Views: 56
OP
T

toomanyrocks

Well-known member
Joined
Jan 20, 2019
Messages
190
Location
Ohio
A word about drywall. This is a garage. Lots of flammables, so we wrapped the whole thing in 5/8 inch fire rated drywall. The attic is unfinished, but we even went up to the roof in the stairwell due to the house being only 10 feet away. Even the underside of the stairs was insulated and closed in fire rated drywall. If this was attached to the house, you would have to be sure to use a self closing, fire rated door between the house and garage.
 

Attachments

  • 0422031812a.jpg
    0422031812a.jpg
    130 KB · Views: 43
  • 0421031624.jpg
    0421031624.jpg
    115.4 KB · Views: 52
OP
T

toomanyrocks

Well-known member
Joined
Jan 20, 2019
Messages
190
Location
Ohio
A little sanding, a little paint.
 

Attachments

  • 00017a.jpg
    00017a.jpg
    82.2 KB · Views: 61
  • 17.jpg
    17.jpg
    80 KB · Views: 56
  • 0424031846.jpg
    0424031846.jpg
    50.7 KB · Views: 54
OP
T

toomanyrocks

Well-known member
Joined
Jan 20, 2019
Messages
190
Location
Ohio
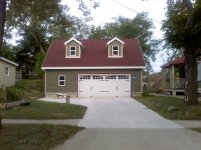
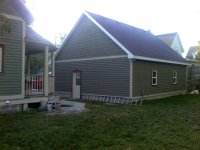
Final paint and trim.
 

Attachments

  • 0913030809.jpg
    0913030809.jpg
    138 KB · Views: 73
  • 809aa.jpg
    809aa.jpg
    142.9 KB · Views: 68
  • 0913030810aa.jpg
    0913030810aa.jpg
    136.1 KB · Views: 78
  • 0914030831aa.jpg
    0914030831aa.jpg
    122.3 KB · Views: 71
OP
T

toomanyrocks

Well-known member
Joined
Jan 20, 2019
Messages
190
Location
Ohio
With all that insulation, the building really stayed warm. It is really tight, with the insulated windows and doors. It only took a small kerosene or electric heater to worm it up to a reasonable temp in the winter. I could work in shirtsleeves in January.

Now for the bad news, never got to finish out the workshop area, as my son-in-law was transferred to another job in a different state. This pretty much as soon as the paint was dry on the dormers. At least we still had the lift for the weekend and could paint the house too.
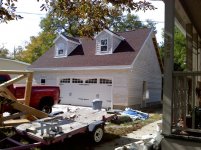
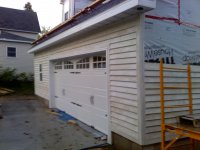
Well, the house sold really fast in a down market, (probably because of the garage.)
 
OP
T

toomanyrocks

Well-known member
Joined
Jan 20, 2019
Messages
190
Location
Ohio
Actually, this was really just a practice project...I really wanted to do a few things to my own home, needed to hone some of the skills and get the ideas on paper before tackling those projects. I was planning on posting the current project when I get the chance.Prob in a separate thread, will post a link when I start it.
 
OP
T

toomanyrocks

Well-known member
Joined
Jan 20, 2019
Messages
190
Location
Ohio
next project:


kitchenb.jpg
 

Attachments

  • kitchenb.jpg
    kitchenb.jpg
    67.4 KB · Views: 25
Last edited:
OP
T

toomanyrocks

Well-known member
Joined
Jan 20, 2019
Messages
190
Location
Ohio
next project:

Actually a 2 part project: New Kitchen and New shop. I had to do the kitchen first as a separate project, since I would have to have full access to the back yard for the heavy equipment for that phase of the construction, which would have been impossible with the shop building in place.

Ill add the link to the new thread when I start it.

kitchenb.jpg


previewnew.jpeg
 

Attachments

  • kitchenb.jpg
    kitchenb.jpg
    67.4 KB · Views: 16
  • previewnew.jpg
    previewnew.jpg
    64.9 KB · Views: 19
Last edited:
To avoid these ads, REGISTER NOW!
Top Bottom