To avoid these ads, REGISTER NOW!

Mig welding extra-thin sheet steel - quenching okay?

myredracer

Well-known member
Joined
Nov 1, 2015
Messages
557
Location
Langley, BC
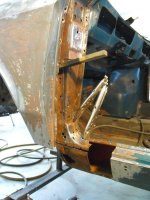
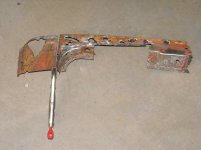
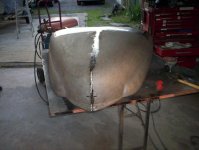
Am working on a '66 Fiat Abarth steel bodied car with lots of rust to deal with. I'm finding that the body has a lot of thinner than expected sheet metal in many places, 24 gauge (or metric equivalent).

I've been using a wet rag to immediately cool the metal to keep distortion to a minimum. It sure doesn't take much heat or very long for 24 gauge to get messed up real quick. Is there any big reason not to cool with a wet rag? I know it's not recommended and can affect the temper of the metal but I haven't found any problems sanding down the welds or other issues so far.

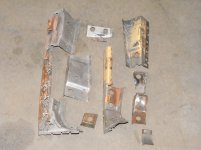
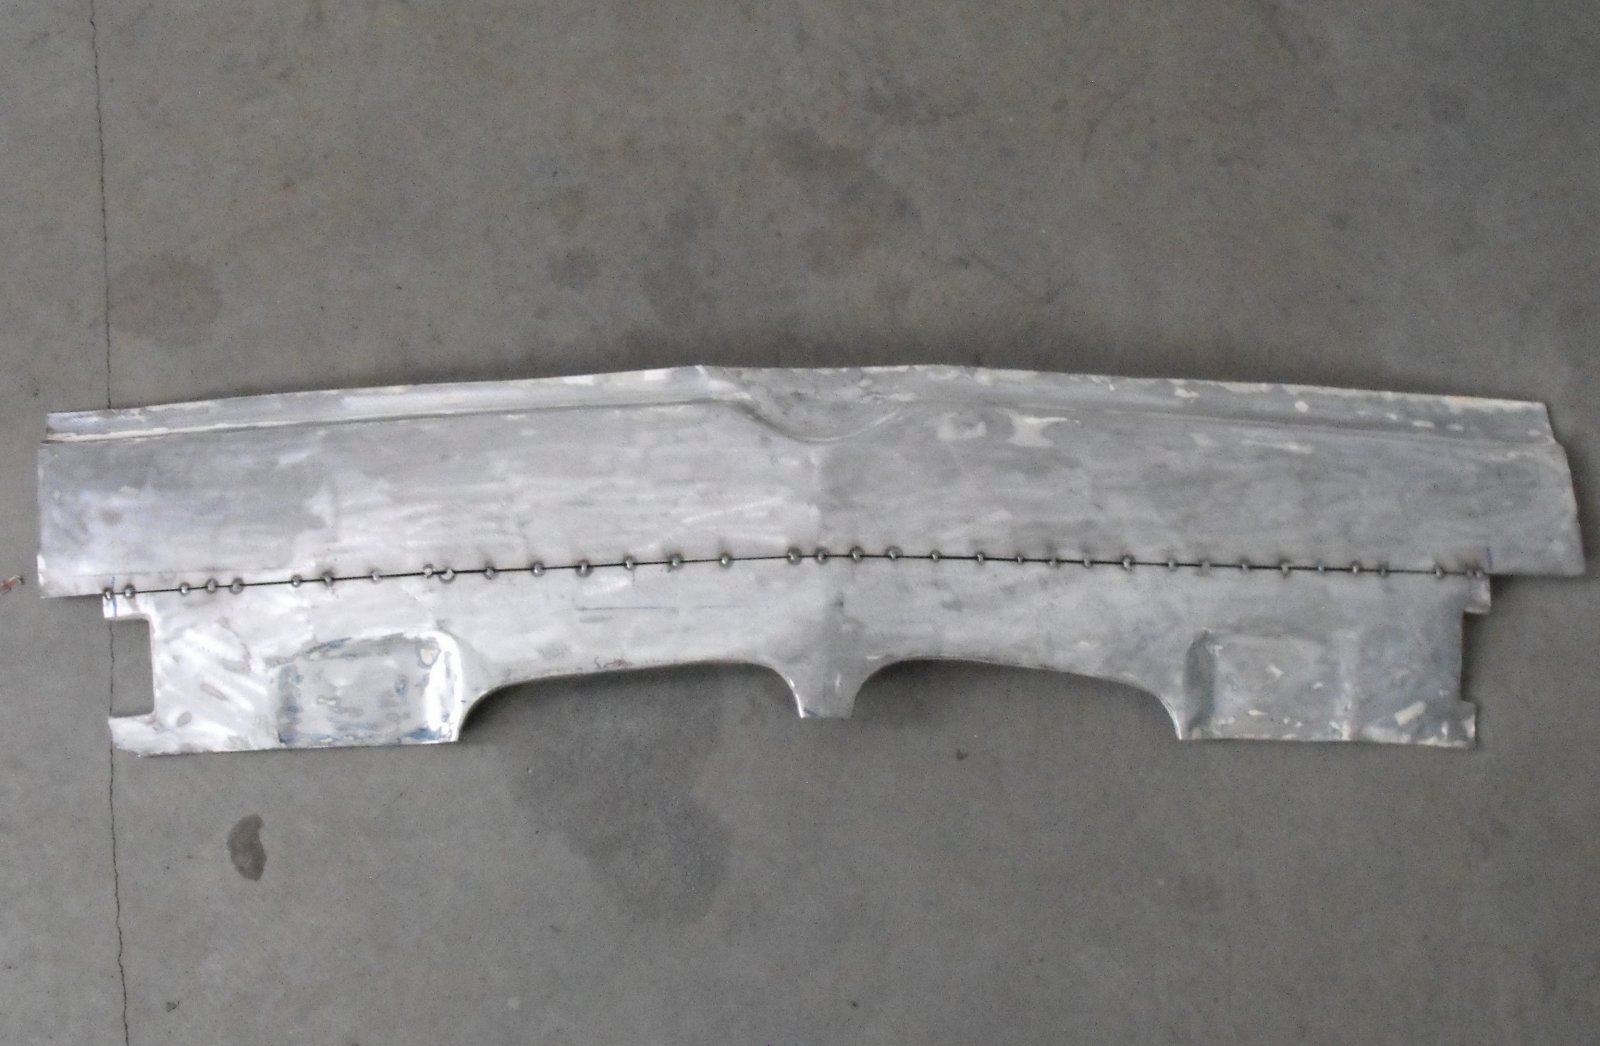
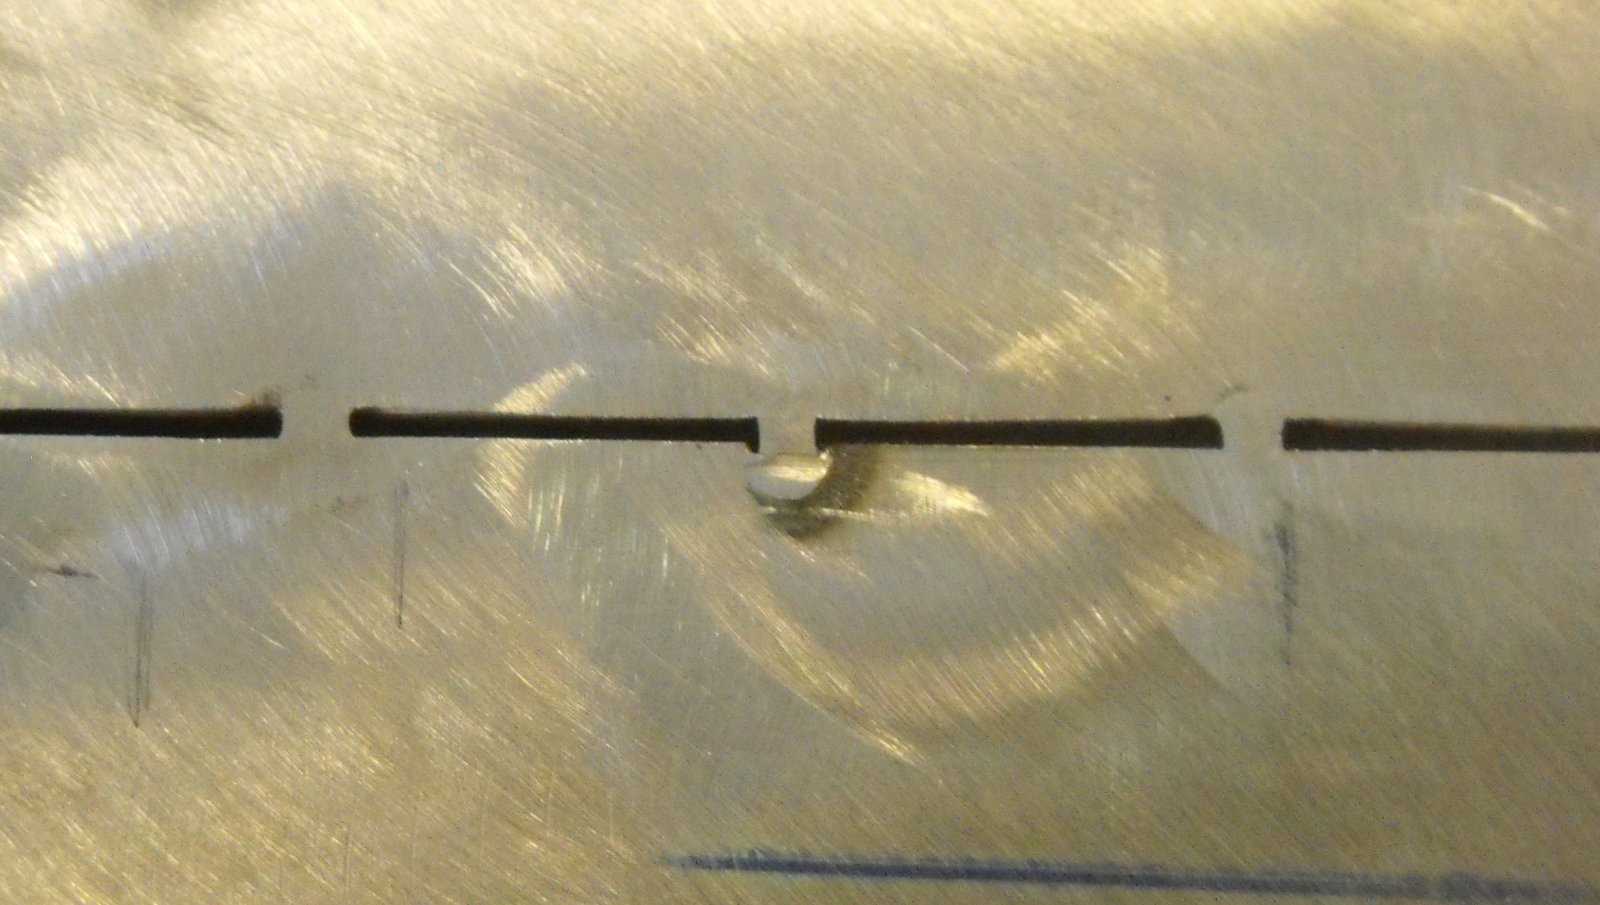
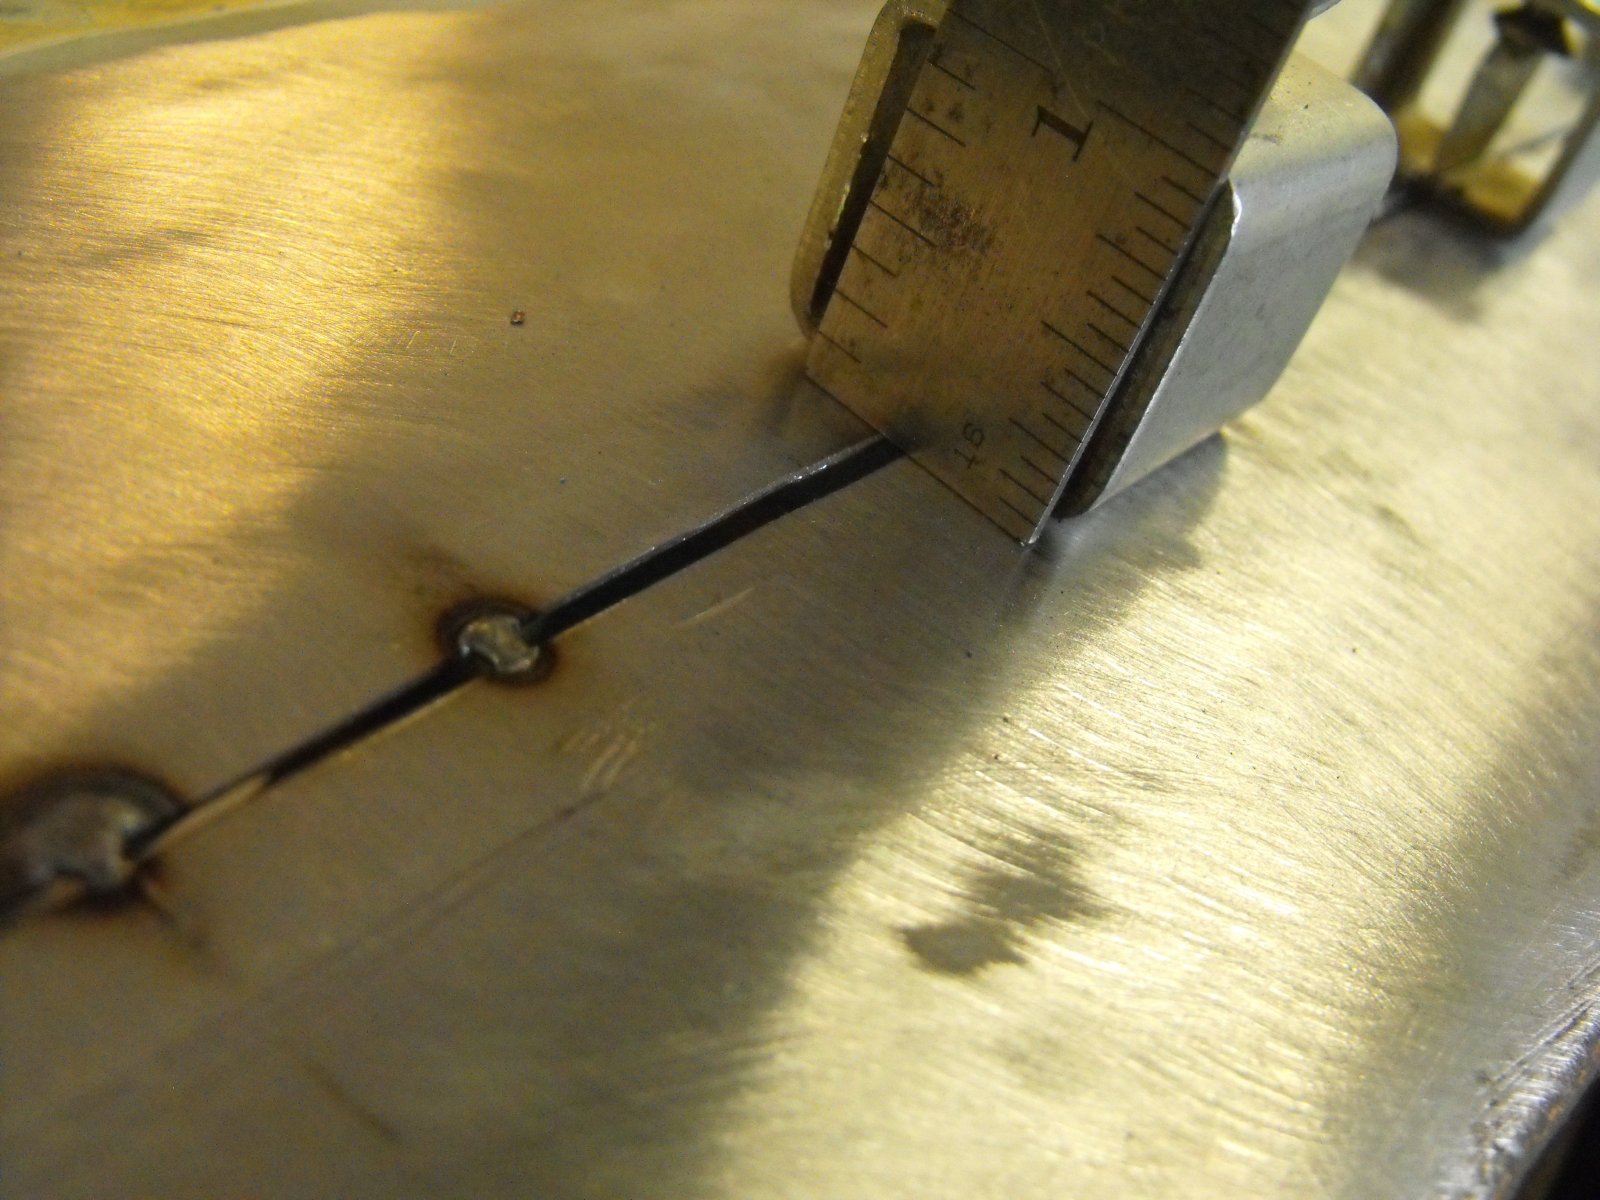
Below is an example of a long-ish seam that I just welded up on some front nose panel metal salvaged from a donor for use as a patch piece. I have the initial round of tack welds done and so far so good. Am planishing each weld dot and checking for alignment as I go. The process sure is dang slow...

index.php


index.php


index.php
 
Last edited:
To avoid these ads, REGISTER NOW!
OP
M

myredracer

Well-known member
Joined
Nov 1, 2015
Messages
557
Location
Langley, BC
Nice. How will you complete the joint?
Will go back and do another weld dot halfway between all the initial ones and repeat the planishing, sanding and checking for flatness, and then repeat as many times as needed to complete the seam. Weld dots will be overlapping. Not having to planish the welds with the panels on the car does help. I used a hand dolly and low crown hammer after sanding down a couple of welds and found the panel distorted a small amount.

I also have to be careful on heat generated from sanding which can also easily mess up the thin metal.
 

Strouty

Well-known member
Joined
Mar 21, 2010
Messages
38,205
Location
Southern Maine
When you quickly cool the metal you can distort it too, you are essentially trying to shrink it with the quick cooling.
 
OP
M

myredracer

Well-known member
Joined
Nov 1, 2015
Messages
557
Location
Langley, BC
When you quickly cool the metal you can distort it too, you are essentially trying to shrink it with the quick cooling.

Good point. Is there some sort of happy halfway approach? I've been more worried about the metal perhaps becoming brittle and leading to cracking later.

I'd give Tig welding a go but don't want the expense or steep learning curve. I asked about Tig-ing the thin stuff at a welding shop I use for some things (like aluminum for ex.). Surprisingly, although the guy is a genius welder, he said even he wouldn't want to weld really thin sheet. But he was quick to say he knows a guy that does incredible work on sheet metal with a Tig.

I welded some 16 gauge yesterday and that was waaay easier in comparison - like welding 3/16" plate. What a treat!
 
Last edited:

rsanter

Well-known member
Joined
Dec 22, 2007
Messages
18,487
Location
visalia ca
Buy copper.
Get some copper sheeting at least twice as thick as the metal you are welding.
Back the area you are welding with the copper sheeting.
This will remove excess heat and help prevent blowtrough
 

Kaizen

Well-known member
Joined
Jan 9, 2015
Messages
6,936
Location
New England
I’d make a template of sorts that fits the shape in front and back. As thick as you can and with as much contact as you can. Leave a gap to weld. Put weight in it and leave it to cool. Other metal should help absorb heat. Turn down weld amp as much as possible. Use .023 wire if possible. Gap might be too wide. Get beer to keep you busy waiting. Use a little two inch sanding disc after all welds are done. No need to grind each one as the next one will be half sitting on top of previous one.


Sent from my iPhone using Tapatalk
 

chinboys

Well-known member
Joined
Jun 20, 2011
Messages
434
I second the use of a non-ferrous heat sink to back the sheets of metal you will tack dot.

Look for old copper bus bars that are ~1/8 inch thick or thinner.
 

MoonRise

Well-known member
Joined
Nov 5, 2010
Messages
4,025
Location
NJ
Most auto sheet steel is just plain low carbon (aka "mild") steel.

Not enough carbon in it to respond to a quench and become 'hard'.

It WILL still distort from heating and cooling, and may crack/tear if the cooling shrinkage exceeds the tensile stress limits of the steel itself.

No matter what, welding of 'thin' sheet metal is a rather time consuming process of make a small weld dot, let that cool, make another small weld dot, let that cool, repeat about a thousand times until the entire weld seam is welded. Add in some planishing and 'readjustment' as you go along.

Go to the thread here on GJ by MP&C about welding auto panels. Read through it, it is a wealth of tips and knowledge.

The process is NOT the same as welding 'thicker' stuff together. And remember that no matter what, welding WILL introduce thermally-induced distortion. I have 'sunk' a divot into the face of 1/4" plate when making a 'small' weld on the back face. Know of another welder (knowledgeable guy too) who ran into some pretty big thermal distortion when welding some pretty big plate (1/2" or 3/4" type thickness stuff) as some gussets until he just 'compensated' for the thermal distortion by setting up out-of-square before welding and let the distortion pull the assembly back into square as it cooled.

I think it is in the MP&C thread where he mentions using a zip disk to 'nibble' at the weld bead dot instead of 'face sanding' the weld dot.

And I think that you have too much gap between your panel pieces. Which means you have to bridge that gap when you weld and thus add even more molten steel while you are welding.

And if you aren't using 0.023/0.025 solid wire, change and use that small diameter wire.

Copper backing or other chill bars/plates can help somewhat.

But no matter what, you have to get into the mindset of SlowDown. :beer:
 

Bellaireroad

Well-known member
Joined
Mar 22, 2013
Messages
636
Location
Fort Worth
They make a putty that helps with heat too. Can’t remember the name off the top of my head.


La Co cool gel, I recently had to weld on an old parts cabinet with original paint that I didn’t want to waste

Still used all precaution and went slow, but the paint didn’t burn


Sent from my iPhone using Tapatalk Pro
 
To avoid these ads, REGISTER NOW!

n20junkie

Well-known member
Joined
Aug 22, 2010
Messages
538
Location
Grand Island, NY
I wouldn’t have had any gap. It takes way more heat with a gap and allows each tack to pull and close the air space leading to a washboard.

I personally prefer to use TIG silicon bronze for body work.
 

kerrynzl

Well-known member
Joined
Nov 8, 2013
Messages
5,054
Location
Tauranga, New Zealand
Hammer welding, O/A torch & no filler rod, is one way ... but MAN 24g is thin! It would work if it was 19g metal and you had access to both sides.

^^^^ this is the best method [If people truly understand what happens]

It is the weld filler cooling that causes distortion
Molten hot filler shrinks when it cools and pulls the parent material.

Weld it in stitches ,and hammer and dolly the excess filler flat as it cools.


All metal expands [every direction] when it is hot, then shrinks when it is cold.
Welding hot filler into cold parent material, then the filler cools and shrinks.
Hammering the filler expands it out into the parent material.

It is not a "dark science" and relatively easy to do.
 
Last edited:

PCO6

Well-known member
Joined
Dec 25, 2008
Messages
4,573
Location
Newmarket, Ontario
^^^^ Good points.

With a bit of experience, it's amazing how quickly you can go with hammer welding. The actual hammering and dollying is much easier when rod is not used. Basically you're shaping 2 soft sheets of metal. Introducing a 3rd and much harder material, the rod, makes the job harder.
 

Jazz1

Well-known member
Joined
Jan 3, 2016
Messages
4,184
Location
Thunder Bay On.
I used a rag to cool welds when replacing two pieces at cowl about 12"x6" where the metal was brittle. This was ten years ago and the hood is still perfect. Your methods look the same as mine.:beer:
I was fearless as I had a spare hood in case this first time attempt failed.
 

Attachments

  • 100_3103_zps34f25313.JPG
    100_3103_zps34f25313.JPG
    49.9 KB · Views: 75

Dwerden

Well-known member
Joined
Dec 28, 2018
Messages
130
Location
Ontario
Theres no getting around a bit of warping, try to close up your gap if you can in the future. I always used air, spot weld blow for a few seconds, spot weld blow. Then give a quick wipe down with water once it starts to heat soak.

The last truck I did I used 3m panel bond everywhere I could instead of welding, results in way less finishing in the end due to zero warping
 

PCO6

Well-known member
Joined
Dec 25, 2008
Messages
4,573
Location
Newmarket, Ontario
Theres no getting around a bit of warping, try to close up your gap if you can in the future. I always used air, spot weld blow for a few seconds, spot weld blow. Then give a quick wipe down with water once it starts to heat soak.

The last truck I did I used 3m panel bond everywhere I could instead of welding, results in way less finishing in the end due to zero warping

For some reason I feel like I'm "cheating" when I use that stuff but it really is a good way to go on a lot of things. :thumbup: I get the same way when I spot weld. lol I'm currently doing a resto-mod on an old fibreglass camper. After years of never doing fibreglass repairs on metal cars (because that wouldn't be right) I'm having a ball trying to become competent at it.
 

joe_padavano

Well-known member
Joined
Feb 26, 2011
Messages
1,788
Location
Northern VA
The distortion is not from quenching nor from the filler. The distortion comes from the fact that the metal is red hot as you weld it. As it cools, it shrinks, causing the pucker. This happens no matter what the heat source and no matter if you use filler or not. The solution is to hammer on dolly at each weld point after it cools to expand the metal and release the pucker. Those sheet metal clamps that leave a gap are the worst possible tool to use. The metal needs to be completely flush, **** welded with no gaps. I've done this with both MIG and TIG. I prefer the TIG and if the gaps are tight enough you can weld this with no filler. That makes it much easier to hammer out the pucker. If I have to MIG because the joints aren't perfect, I run the MIG hot and do very, very short tacks.
 

MP&C

Well-known member
Joined
Oct 21, 2009
Messages
4,396
Location
Leonardtown, MD
Any welding is going to result in shrinkage, and no amount of damp rag application or compressed air will change that. You will still have shrinkage. The weld and HAZ will still need to be planished to restore the original surface area. Area as in amount.

Welding sheet metal with MIG, especially as thin as you are using, means we need to use the single dot weld method in order to set the heat a bit higher for full penetration welds and yet any longer on the weld pass and the heat is too much and would blow holes. Unfortunately the start and stop process introduces the most amount of shrink as you get a circumferential shrink as the panel is superheated in one spot, and cools in one spot. MIG is also going to have the most amount of cleanup in both planishing welds and grinding weld proud. The comment to weld the inside instead of the outside for less clean up work, written on page 1, suggests that the weld proud is left there. Is it left there for strength? If we have a full penetration weld we can dress the panel flat again without any detriment; we are attempting (should be?) to duplicate the original panel to the best of our abilities. Leaving a weld proud on one side for strength, front or back, would only be needed if the weld had insufficient penetration. Full weld penetration should be the first objective in adjusting your heat settings BEFORE YOU START, and should be done on scrap material the same thickness. Leaving a weld proud simply so you don’t have to grind leaves a mound of weld that is 3 times or greater the thickness of the patent metal. Just like using a flange lap (welded or adhesive) instead of a **** weld, this excessive material buildup left on the panel risks a ghost line in the paint :


Our best option here is to use full penetration welds to restore the panel integrity, and then dress the panel to its original thickness.

Any further improvement desired would be to limit the deformity seen in the starts and stops by trimming an absolutely tight joint, tacking to hold the panels together, and then perform a no-filler, non-stop fusion weld, using TIG or O/A torch. By gradually heating the panel as we weld down the seam, and the gradual cooling that takes place behind the weld process, the amount of shrinking that occurs from using the single dots and start and stopping is limited, giving a much more consistent shrink and HAZ. Yes, we will still need to planish. But as the shrinking is more consistent, so then will be the planishing efforts. As the TIG and O/A yield a softer weld, the weld dressing will be easier. As a no filler fusion weld seldom leaves a weld proud AFTER planishing, there is virtually no grinding, and the panels are still the same thickness for virtually zero chance of ghost lines.

Can this job be done with MIG? Sure, but the work is quite a bit more. However, any shortcuts typically result in other issues that may show in the final product. Maybe not today, but give it a couple years. Today’s efforts are cheap before the paint goes on, rework never is.
 
OP
M

myredracer

Well-known member
Joined
Nov 1, 2015
Messages
557
Location
Langley, BC
Thanks for all the comments and suggestions. Great info. MP&C, thank you.

I'm finding that one thing that helps is having the tip at 90 degrees to the surface and close to the surface. That way I can do really short "micro bursts" and have a nice looking weld dot, good penetration and smaller HAZ and thus less distortion.

In some cases I can't see how you would hold pieces securely together without using **** clamps other than magnets. Sometimes I can use large jaw Vise grips.

I just rebuilt badly rusted out A-pillars on the same car, again on thin metal. This is probably one of the most challenging things I've had to do. Replacement panels are not available and I had to salvage what I could from two donor bodies (which I am fortunate to have). It took 13 individual pieces including some flat stock to rebuild it. Drivers side was worst as rust had gotten into the rocker panel as well and I had to "undo" a whole bunch of spot welds to make enough of the A-pillar and rocker accessible. While the outside of the A-pillar didn't look that bad, the reverse side was a complete ugly mess and most of it was no good. Getting the A-pillar piece out was a challenge in itself.

I clamped the larger pieces of the A-pillar together to ensure it was all aligned accurately. I tack welded the 13 pieces together and did a test fit to make sure it was all good. Then I slooowly did more weld dots until all the seams were closed up. I had a wet rag close by and cooled off each weld pdq. I made all the weld dots as absolutely as small as I could. Where it was possible and needed, I planished the welds. There were many areas where planishing just wasn't possible. When I got the occasional weld dot less than perfect, I stopped, ground it down, checked for distortion and then re-did the weld.

I got the A-pillar and rocker panel repair piece back in yesterday as shown in the last pic. Pretty pleased with the result.
 

Attachments

  • DSCF0533.jpg
    DSCF0533.jpg
    98.6 KB · Views: 40
  • DSCF0548.jpg
    DSCF0548.jpg
    146.4 KB · Views: 41
  • DSCF0551.jpg
    DSCF0551.jpg
    146.5 KB · Views: 40
  • DSCF0554.jpg
    DSCF0554.jpg
    148.1 KB · Views: 37
  • DSCF0565.jpg
    DSCF0565.jpg
    73 KB · Views: 42
  • DSCF0574.jpg
    DSCF0574.jpg
    67.9 KB · Views: 43
  • DSCF0593.jpg
    DSCF0593.jpg
    149.3 KB · Views: 43

jjeffries

Well-known member
Joined
Sep 7, 2013
Messages
91
Nice work. Rust repair on a 60's/70's Fiat? Likely doesn't get any tougher than that. John/CT
 
To avoid these ads, REGISTER NOW!
Top Bottom