To avoid these ads, REGISTER NOW!

Mikey's place

chevelle64

Well-known member
Joined
Jul 23, 2005
Messages
267
Location
Michigan
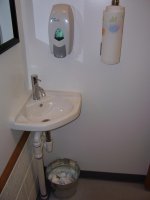
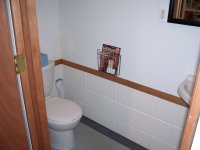
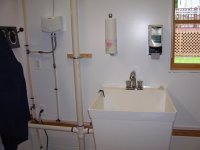
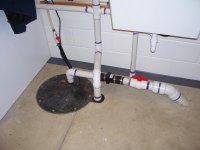
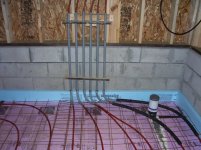
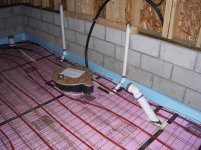
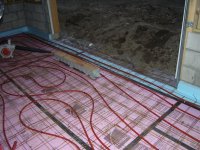
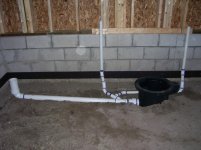
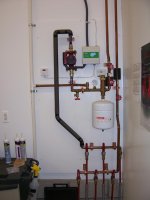
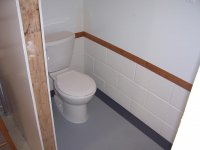
Mikey's place *PLUMBING AND BATHROOM UPDATE*

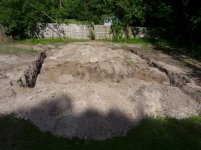
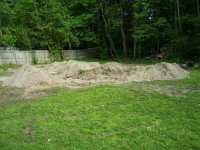
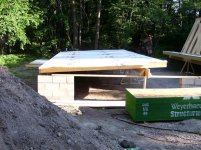
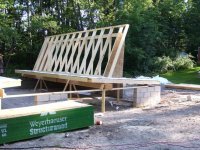
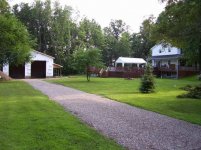
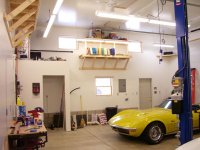
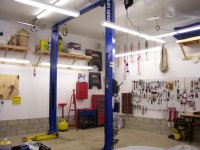
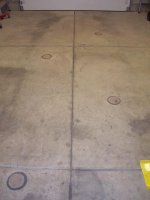
OK, time to show off my new garage. I've been planning it for as long as I can remember and been a member here for about 4 years. It was built in the summer of 2008 and I'm finally getting around to sharing it. The size is 26' deep, 32' wide and 14' high. I originally went with 3 courses of cinder block for the first 2 feet, then 2X6X12' studs. Unfortunately, that area of the yard is a bit low. After looking over the area with the cinder block in place, I thought it would be a little too low so I added another row of block. This, of course was after I filled in all of the block with mortar and set the anchor bolts for the sill plates. So I just had to get more bolts and fill in more block. Here are some pictures of the new driveway, footing, cinder block and wall prep. I don't want to bore everyone with all of the pictures, so I'll post a few and the link to my Photobucket, so you can bore yourselves :thumbup:.
 

Attachments

  • A.jpg
    A.jpg
    152.8 KB · Views: 96
  • G.jpg
    G.jpg
    145.8 KB · Views: 98
  • F.jpg
    F.jpg
    100.5 KB · Views: 82
  • E.jpg
    E.jpg
    148.1 KB · Views: 88
  • D.jpg
    D.jpg
    146.2 KB · Views: 87
  • C.jpg
    C.jpg
    143.9 KB · Views: 75
  • B.jpg
    B.jpg
    149.8 KB · Views: 78
Last edited:
To avoid these ads, REGISTER NOW!

USMCBay

Well-known member
Joined
Dec 16, 2009
Messages
352
Location
Heritage Park - Friendswood, TX
Looks great so far... It is really different seeing a wall go up before the foundation (I know you have a footer). Here in Texas on the Gulf Coast our ground moves too much to build a footer seperate from the foundation...

Congrats~!
 
OP
C

chevelle64

Well-known member
Joined
Jul 23, 2005
Messages
267
Location
Michigan
Walls built and raised. The final picture with shingles is 3 days of building. I hired my cousin to do the building. Him and his crew had it built with shingles in 3 days! That's about 3 years AND 3 days sooner than I would have had it done by myself :bowdown:.
 

Attachments

  • N.jpg
    N.jpg
    146 KB · Views: 206
  • M.jpg
    M.jpg
    143.4 KB · Views: 129
  • L.jpg
    L.jpg
    137.1 KB · Views: 119
  • K.jpg
    K.jpg
    151.5 KB · Views: 108
  • J.jpg
    J.jpg
    131.6 KB · Views: 117
  • I.jpg
    I.jpg
    146.7 KB · Views: 110
  • H.jpg
    H.jpg
    151.4 KB · Views: 121
OP
C

chevelle64

Well-known member
Joined
Jul 23, 2005
Messages
267
Location
Michigan
I'm installing a bathroom with a toilet and sink and a utility tub outside the bathroom. There is a sump with a grinder pump that will pump everything to my septic. There is a floor drain just inside of each garage door. The slab is 5-6" thick with radiant heat. Thank you Radiantec.com. I planned on my tubing layout to be very neat and symmetrical like a lot of others have, but it just didn't turn out that way :headscrat
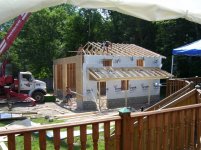
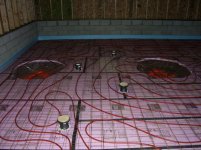
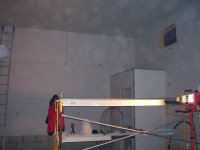
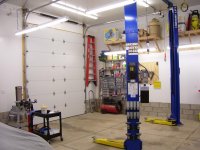
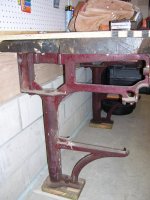
. It turns out that the results are incredible regardless. The base below each hoist column is about 4' in diameter and 12" thick, with much rebar.
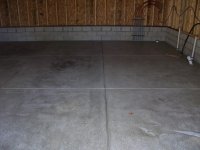
 

Attachments

  • U.jpg
    U.jpg
    125.6 KB · Views: 119
  • T.jpg
    T.jpg
    115.1 KB · Views: 133
  • S.jpg
    S.jpg
    128.8 KB · Views: 148
  • R.jpg
    R.jpg
    124.8 KB · Views: 124
  • Q.jpg
    Q.jpg
    131.4 KB · Views: 118
  • P.jpg
    P.jpg
    148.6 KB · Views: 124
  • O.jpg
    O.jpg
    98.2 KB · Views: 138
OP
C

chevelle64

Well-known member
Joined
Jul 23, 2005
Messages
267
Location
Michigan
I went with 2" of spray foam insulation followed by 3 1/2" of fiberglass in the 2X6 walls, and R-50 blown into the attic. I couldn't wait to use the hoist. In a perfect world, the hoist would have gone up AFTER the drywall. The siding is done, looking good. A friend at work gave me the idea of the two upper windows and the "porch" overhang, to match the house. I think it looks great.
 

Attachments

  • BB.jpg
    BB.jpg
    148.6 KB · Views: 175
  • AA.jpg
    AA.jpg
    147.5 KB · Views: 147
  • Z.jpg
    Z.jpg
    147 KB · Views: 125
  • Y.jpg
    Y.jpg
    71.7 KB · Views: 190
  • X.jpg
    X.jpg
    79.4 KB · Views: 126
  • W.jpg
    W.jpg
    91.6 KB · Views: 119
  • V.jpg
    V.jpg
    113.4 KB · Views: 124
OP
C

chevelle64

Well-known member
Joined
Jul 23, 2005
Messages
267
Location
Michigan
Since the footprint isn't overly large, I took advantage of the tall walls for lots of storage. I built a lot of shelving, with more to come. A loft wouldn't have worked well with the layout of the hoist, garage doors and bathroom. These pics are getting moved in and organized.
 

Attachments

  • II.jpg
    II.jpg
    102.5 KB · Views: 271
  • HH.jpg
    HH.jpg
    110.3 KB · Views: 257
  • GG.jpg
    GG.jpg
    105.2 KB · Views: 214
  • FF.jpg
    FF.jpg
    115.2 KB · Views: 221
  • EE.jpg
    EE.jpg
    106.9 KB · Views: 246
  • DD.jpg
    DD.jpg
    73.2 KB · Views: 240
  • CC.jpg
    CC.jpg
    69.4 KB · Views: 226
OP
C

chevelle64

Well-known member
Joined
Jul 23, 2005
Messages
267
Location
Michigan
OK, here is how it stands today. Currently working on the bathroom. I'm planning on painting the inside cinder block white, like the bathroom block. I know, I know, it would have been easier to paint the walls BEFORE everything was moved in :bounce:.
 

Attachments

  • PP.jpg
    PP.jpg
    63.8 KB · Views: 213
  • OO.jpg
    OO.jpg
    88.7 KB · Views: 219
  • NN.jpg
    NN.jpg
    110.6 KB · Views: 220
  • MM.jpg
    MM.jpg
    133.1 KB · Views: 249
  • LL.jpg
    LL.jpg
    98.3 KB · Views: 202
  • KK.jpg
    KK.jpg
    85.5 KB · Views: 195
  • JJ.jpg
    JJ.jpg
    57.3 KB · Views: 191
OP
C

chevelle64

Well-known member
Joined
Jul 23, 2005
Messages
267
Location
Michigan
Last shots...for now. The floor picture shows the low voltage light canisters that I'll put fixtures in down the road, they are directly below the hoist and already wired. And of course I didn't want to forget my Budd Lynch bobblehead, he oversees everything that goes on. Red Wing's fans should understand. Thank you all for contributing over the years, even without knowing. And thanks for looking. Comments, questions and suggestions are always welcome :beer:.
 

Attachments

  • WW.jpg
    WW.jpg
    43 KB · Views: 192
  • VV.jpg
    VV.jpg
    72.1 KB · Views: 174
  • UU.jpg
    UU.jpg
    142.1 KB · Views: 219
  • TT.jpg
    TT.jpg
    103.7 KB · Views: 177
  • SS.jpg
    SS.jpg
    78.7 KB · Views: 184
  • RR.jpg
    RR.jpg
    128.6 KB · Views: 187
  • QQ.jpg
    QQ.jpg
    64.2 KB · Views: 162

mikeytint

Well-known member
Joined
Dec 10, 2007
Messages
76
Location
East of the rotten Apple
Looks really good. How do you reach some of the shelving areas they seem high up? Some of the regular things that you have up there would be a hassle to get a ladder for each time.
 
OP
C

chevelle64

Well-known member
Joined
Jul 23, 2005
Messages
267
Location
Michigan
Very nice! I like the high windows.

That workbench under the pegboard--what is the base constructed of? The legs?
The workbench legs are cast iron and fairly heavy. The base is two boards, 7 1/2' long. It came from my Grandfather. I don't know exactly how old it is, but it's older than I am. I took some pics to clarify. I screwed a piece of 3/4 plywood to the boards to give it a flat surface, then glued a piece of laminate to the top. And there are a couple of "flats" on the legs that I put a 1X10 and a 1X12 on for shelves.
 

Attachments

  • 100_2532.jpg
    100_2532.jpg
    145 KB · Views: 127
  • 100_2535.jpg
    100_2535.jpg
    142.2 KB · Views: 98
  • 100_2536.jpg
    100_2536.jpg
    136 KB · Views: 86
  • 100_2537.jpg
    100_2537.jpg
    141.3 KB · Views: 75
OP
C

chevelle64

Well-known member
Joined
Jul 23, 2005
Messages
267
Location
Michigan
Looks really good. How do you reach some of the shelving areas they seem high up? Some of the regular things that you have up there would be a hassle to get a ladder for each time.
Yea, I do need to use a ladder to reach the shelves. A lot of the stuff up there is seasonal, so I only need to get to it a couple of times a year. I've got some original Corvette parts that I'm keeping, just to keep. There really aren't a whole lot of regular things up there that I get to very often. Plus it beats the alternative of either not having the stuff at all, or keeping it on the floor and tripping over it. That's probably a very long winded way of saying that it isn't a problem at all and works very well for me
 
To avoid these ads, REGISTER NOW!

Goobzilla

Well-known member
Joined
Dec 19, 2005
Messages
321
Location
Wellington, CO
Well I like your shop and your taste in Vettes:

CIMG0297.jpg
 

expatriated

Well-known member
Joined
Mar 22, 2009
Messages
1,571
Location
SE of Disorder
The workbench legs are cast iron and fairly heavy. The base is two boards, 7 1/2' long. It came from my Grandfather. I don't know exactly how old it is, but it's older than I am. I took some pics to clarify. I screwed a piece of 3/4 plywood to the boards to give it a flat surface, then glued a piece of laminate to the top. And there are a couple of "flats" on the legs that I put a 1X10 and a 1X12 on for shelves.

That's a very interesting piece. Thanks for the additional photos. What was it originally, do you know?
 
OP
C

chevelle64

Well-known member
Joined
Jul 23, 2005
Messages
267
Location
Michigan
That's a very interesting piece. Thanks for the additional photos. What was it originally, do you know?
I wish I knew more history on the workbench. Unfortunately, I didn't have the appreciation for it enough when I was younger to ask my Grandpa :(
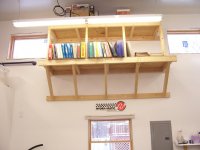
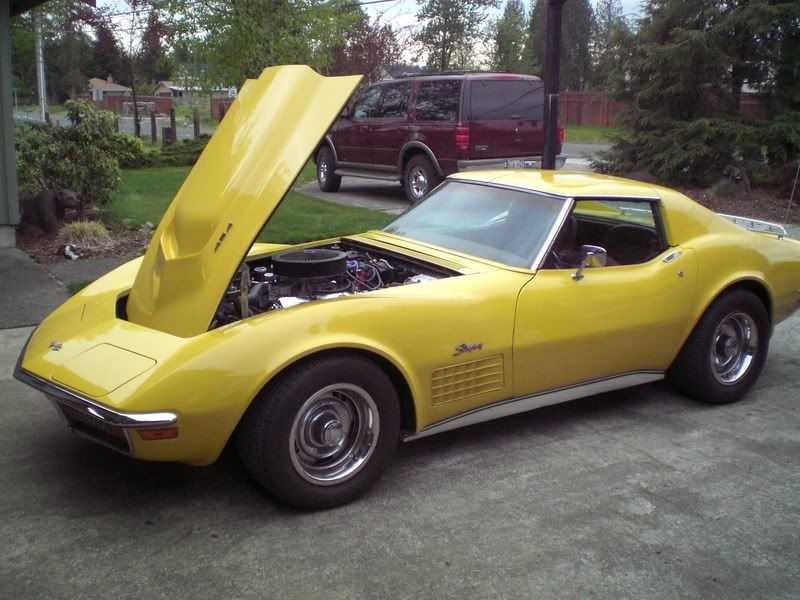
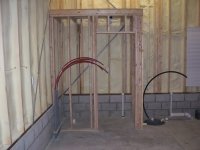
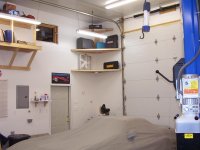
. It IS very cool though, and I appreciate it now.
 

Curt_pnw

Well-known member
Joined
Mar 27, 2009
Messages
223
Location
Edmonds, Wa
I like your garage a lot! Sorry if you already mentioned it, but are you planning on painting the lower blocks in the main part of the garage?
 
OP
C

chevelle64

Well-known member
Joined
Jul 23, 2005
Messages
267
Location
Michigan
I like your garage a lot! Sorry if you already mentioned it, but are you planning on painting the lower blocks in the main part of the garage?
Curt, yes I'll be painting the blocks in the garage. I'm actually doing the wall where the laundry tub will be going right now. The sinks and plumbing are my main focus right now. I'll also be covering the outside block eventually with some sort of decorative block or stone.
 

jerseywild

Well-known member
Joined
Dec 13, 2009
Messages
302
Location
Lynden, WA
I like the floor mounted lights under the lift, nice touch! The floor drain at the door, I take it you just took out the drain cover a put a piece of plywood there for the floor pour. Where do you have it draining to?
 
OP
C

chevelle64

Well-known member
Joined
Jul 23, 2005
Messages
267
Location
Michigan
I like the floor mounted lights under the lift, nice touch! The floor drain at the door, I take it you just took out the drain cover a put a piece of plywood there for the floor pour. Where do you have it draining to?
Yes, I put plywood in place of the drain grates during the pour to keep the plastic troughs from becoming distorted from the weight of the concrete. At first I thought you were asking if I hid the drains during the pour, then uncovered them after my final inspection. I've read where a lot of others have done this. Luckily I didn't have to, the township approved the drains. My county shot them down, but said the township has the final say. I thought that was strange, but I wasn't going to argue. Both of the drains come together at a Y and then run through the rear wall footing and end up in a buried 55 gallon plastic drum. The drum has a bunch of 3/4" holes drilled in it, it's wrapped in landscape fabric to keep dirt out and its buried deep in a hole with gravel surrounding it.
Thanks again to everyone for the kind words :beer:.
 
OP
C

chevelle64

Well-known member
Joined
Jul 23, 2005
Messages
267
Location
Michigan
What are the two funneled things on the wall (looks like something to drain an oil bottle or other container)
http://www.garagejournal.com/forum/attachment.php?attachmentid=47875&d=1261499618
On this web site, it's called the Funnel Buddy: http://www.autobarn.net/xxxw-whifunnelbuddy.html. It's basically just a fancy funnel holder. It comes with an empty quart sized oil jug with a small funnel on top that allows oil from the large funnel to drip into it. It's far from a garage necessity, but it's kind of a cool gadget that I felt I needed at the time. I like it a lot because I was sick of having funnels laying around.
 
OP
C

chevelle64

Well-known member
Joined
Jul 23, 2005
Messages
267
Location
Michigan
What kind of ladder system do you have to get way up to those shelves?

No real system. I can reach every shelf but one with an 8' stepladder. I have an extension ladder for the other shelf and to get into the attic access. Most of the things on the shelves are things that I don't need to get to very often.
 
OP
C

chevelle64

Well-known member
Joined
Jul 23, 2005
Messages
267
Location
Michigan
Mikey's place - *Plumbing & Bathroom Update*

I have all my plumbing done. My bathroom and laundry tub are functional and operational. I just wanted to post some pics and see what everyone thinks. All of the drains run into the sump where I've got a Zoeller grinder pump. Then it all gets pumped to my septic. I was very surprised how quiet it is. I have to turn the radio off to hear it run! The small unit on the wall is an electric water heater. It's more like an electric water warmer because it's so small, but it's perfect for washing hands. I've got rubber wall base moulding on the floor to cover up the exposed 2" insulation at the perimeter of the slab. A friend of mine owns a cleaning supply company, so he got me a couple of soap dispensers. Let me know what you think.
 

Attachments

  • 100_2755.jpg
    100_2755.jpg
    145.4 KB · Views: 16
  • 100_2754.jpg
    100_2754.jpg
    139 KB · Views: 12
  • 100_2753.jpg
    100_2753.jpg
    136.8 KB · Views: 12
  • 100_2752.jpg
    100_2752.jpg
    139.6 KB · Views: 16
OP
C

chevelle64

Well-known member
Joined
Jul 23, 2005
Messages
267
Location
Michigan
A few more.
 

Attachments

  • 100_2756.jpg
    100_2756.jpg
    125.5 KB · Views: 11
  • 100_2757.jpg
    100_2757.jpg
    136.1 KB · Views: 12
  • 100_2758.jpg
    100_2758.jpg
    137.6 KB · Views: 13
  • 100_2759.jpg
    100_2759.jpg
    135.6 KB · Views: 11
To avoid these ads, REGISTER NOW!
Top Bottom