To avoid these ads, REGISTER NOW!

Minimalist maximization – 20x14 two story 'tiny garage'

IncorpoRatedX

Member
Joined
Aug 26, 2014
Messages
11
Good morning everyone. I’m a long time reader, first time writer here. This is my first shop build; I’ve been renting my way through various extremes of garages over the last ten years and just recently completed a cross country move. I started life in the garage pretty young working with my dad on farm equipment or his diesel trucks in our pole barn. When I got older and into cars I quickly learned the pole barn wouldn’t cut it for real automotive work, anything left out in a dusty pole barn gets dirty, especially engines.

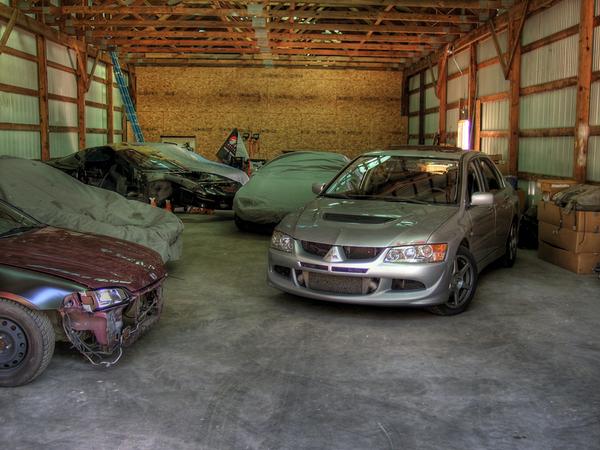
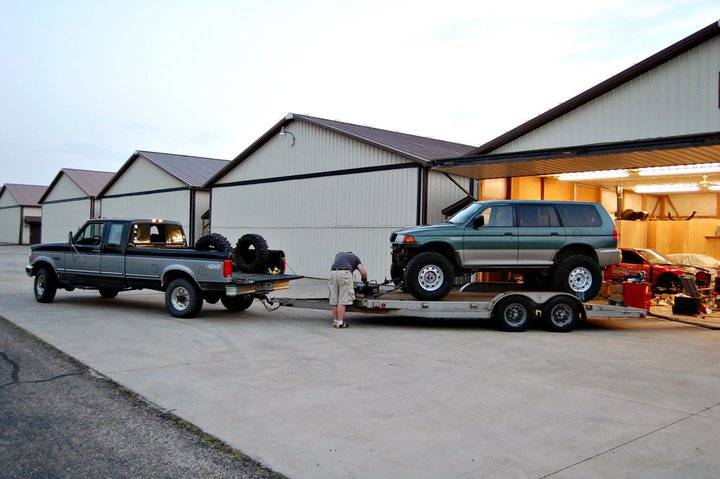
So I rented a small storage place and started working on them there, over the years some of my friends joined me and the small storage place turned into larger ones, from 600 sq. ft. up to 1500 sq. ft. and eventually a 6000 sq ft old airplane hangar on a private air strip. I had formed a collaborative with some other enthusiasts and we enjoyed the shared work space, shared inventory of tools and general likeminded group. We were diverse enough in our interested and backgrounds that it taught us to appreciate other points of views, other automotive styles and methods, much different from our individual way of doing things.

Once I finally decided to move across the country I had to dial things back quite a bit and ended up renting a house with a 20x40 workshop, I used the work shop to finish up as many projects as possible and found new homes for them, then headed south with whatever I couldn’t get rid of or finish up. The house with a shop turned out to be a vital logistics hub for me over the last few years as I moved projects in, completed them and sent them off to new homes. I’ll touch on some of my old work spaces before I go into the new one. Mainly because I feel there will be a stark contrast.
This is the first place we called home years ago
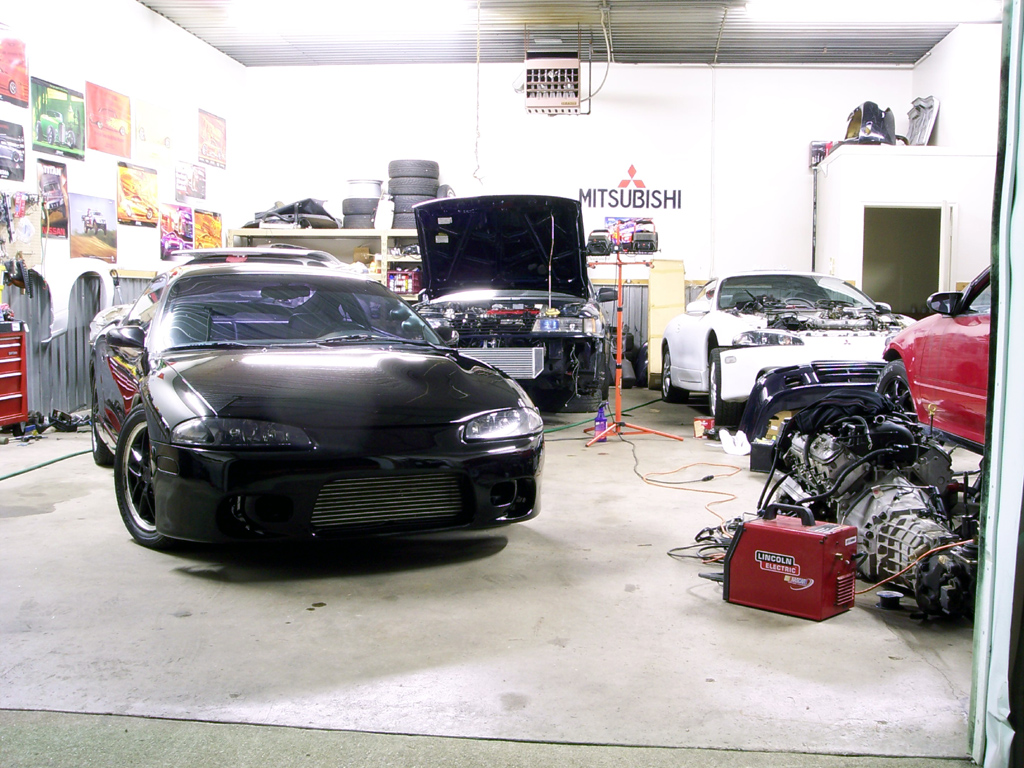


100_4373.jpg


Here’s one of the others
garage_2.jpg


And the airplane hangar
34493_10150208616990508_642218_n.jpg


Finally the shop I rented prior to moving
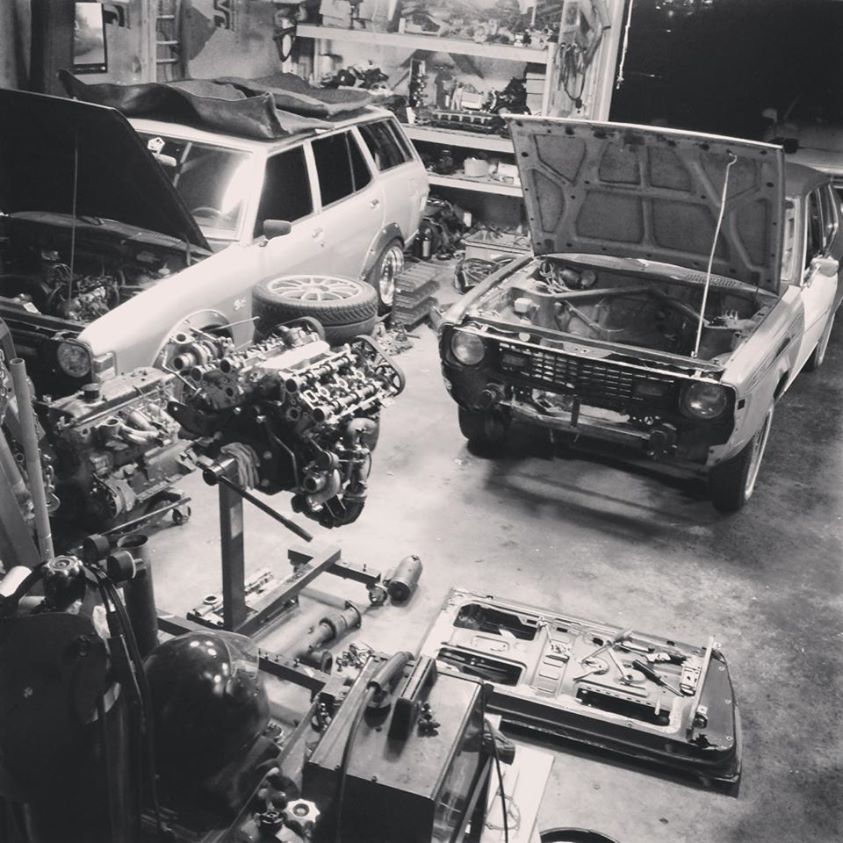
1379817_10153408799230508_1875847840_n.jpg
 
Last edited:
To avoid these ads, REGISTER NOW!
OP
I

IncorpoRatedX

Member
Joined
Aug 26, 2014
Messages
11
Now that I'm finally settled in a long way from home and ready (or so I think) for my first garage build. I had plans to put a 20x40 building on the property, but the way code is set up around me and due to having a guest house, I’m limited on where I can do things. I ended up with a 20x14 slab and the building will be 20x14x15.5” tall walls, 21” at peak, two interior stories. The slab is reinforced with metal mesh and rebar, 12” wide footer around the outside edge, the building is a pre-fab metal structure that bolts to the slab, metal siding. From the outside it will look pretty plain and boring for a long time. The inside will require a lot of tricky “tiny house” style uses of space, the first floor being where cars can be pulled in, will have work benches that fold from the wall, cabinets and work benches combined for good storage. The walls will be insulated with sheet foam and then covered with old reclaimed lumber I have on hand, the lumber will be sanded and oiled for that old wooden wall hot rod shop kind of feel. The floor will get acid stained a strong rust color.
I’ve got a number of major projects this garage will lend it’s space to. So I’ll need a lot of working and storage space, I was really worried about not having storage space with such a small foot print, but due to the sidewall height, this gives me a good 5 feet on the second floor starting at the wall and ten feet in the center. This is assuming I use 6” wide boards to build the floor, using 4x4 supports, once the floor is in, one of the 2nd floor walls will get lined with shelves. I might set up a gray water bathroom (no solid waste) and I plan to have a couple windows.

For right now it's a concrete slab, the building material will arrive in 2 weeks.

Here are some of the projects waiting for a garage to get finished up. Most of these are planned to get engine and drive train upgrades.

10852692_1043876085626836_24434799_n.jpg

10735276_808914792483994_1858478680_n.jpg

11032823_943632705670169_781505471_n.jpg

10724235_843121469086835_2049356324_n.jpg

10432076_396378250530474_419619339_n.jpg


There's also a ratrod project and a turbo diesel 4x4 that I didn't post.
As you can see, I have a lot of work logged for the shop. Time to get building...
 
OP
I

IncorpoRatedX

Member
Joined
Aug 26, 2014
Messages
11
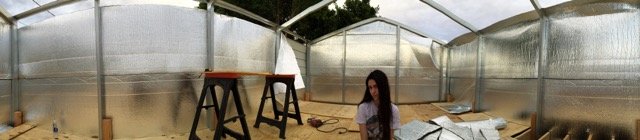
Minor updates, material arrived, construction has started, I guess I lucked out with the weather, normally it's well over 100* here. lately it's been 90-105*, slight humidity and cloudy, still not ideal building temps, but way better than 115 and blaring sun every day.

Everything fits on one trailer load
attachment.php


uprights going together
attachment.php


siding and insulation going on
attachment.php


Almost done with the side panels, hope to start the roof on saturday.
attachment.php
 

Attachments

  • 1.JPG
    1.JPG
    144 KB · Views: 1,246
  • 2.jpg
    2.jpg
    61.8 KB · Views: 1,245
  • 3.jpg
    3.jpg
    55.2 KB · Views: 1,247
  • 4.jpg
    4.jpg
    140.2 KB · Views: 1,245

adamjabaay

Active member
Joined
Mar 22, 2015
Messages
39
cool mitsu stuff.... never had one. always wanted to play with one. loved my buddies 600 HP gallant VR4
 
To avoid these ads, REGISTER NOW!
OP
I

IncorpoRatedX

Member
Joined
Aug 26, 2014
Messages
11
any issues with it being that close to the property line?

Shouldnt be, they plan to close the alley and give it to the residents.

cool mitsu stuff.... never had one. always wanted to play with one. loved my buddies 600 HP gallant VR4

Thanks, I actually just got rid of my single owner VR4 to help fund the shop. Mine wasnt 600hp, more of a refined luxury sedan. I will miss it.

10666243_858582387504921_1928269254_n.jpg


Whats the story with the bike? What frame and motor? I love that look!

It's something i threw together from the scraps of a few dead bikes, the frame is part Trac and part Tomos, there's puch, batavus and other parts on it. The engine on it is pretty much stock, i used to have a built engine on it, bike would do 60+ mph but it was quite scary. You can see some of the patched together parts if you look close in this pic. People seem to love this bike even though it's current phase is only the rough draft. :thumbup:

1740236_363388743869532_1813820424_n.jpg
 
OP
I

IncorpoRatedX

Member
Joined
Aug 26, 2014
Messages
11
Minor updates, second floor is progressing.

I used ten 4"x4"x10' studs and two 2"x6"x20 secured to the main uprights, then 20 2"x6"x14' spaced a foot apart for the supports, 5 are tied to the main upright beams directly, 15 are mounted to the pair of 2x6's that run the length of the building using hurricane brackets. I've also got 90* hurricane brackets under the pair of 2x6's tied to the 4x4's and the metal main supports of the building. I am not sure if i will put a support near the middle of the room, but the upstairs feels pretty solid. I haven't built a floor before, so I don't really know if I'm under-building it or over-building it. Currently using 1/4 underlayment to cover the floor, once i get the roof on i'll finish the floor.

Once the second floor is in, the roof will go on. Easier and cheaper to work from a ladder from the second floor than it would be to rent a lift.

first floor is 9 feet tall, second floor is 8, despite the garage not being done yet, i've already completed two projects in it.

I've got a single 100w induction flood light mounted on the back wall currently. It lights the entire shop at night, I'm still working on the permanent lighting plan. I have over 4,000 watts of induction lighting set aside because my original plan was a 20x40 and i wanted it lit up like the sun, so that's nice, i'll have extra.

attachment.php


second floor needs some insulation repair once the floor is done.
attachment.php
 

Attachments

  • IMG_3809.JPG
    IMG_3809.JPG
    38.7 KB · Views: 859
  • IMG_3815.JPG
    IMG_3815.JPG
    36.1 KB · Views: 885
OP
I

IncorpoRatedX

Member
Joined
Aug 26, 2014
Messages
11
Second floor is done, put half of the roof on and had to take it back off to put the trim under it, oops. we're in the middle of the summer here in arizona so my work times are from 5/6am-7:30 and from 6pm-8pm, tough to get things done but im chipping away at it, hoping to knock the rest of it out this weekend and start on ducting the AC.
 
OP
I

IncorpoRatedX

Member
Joined
Aug 26, 2014
Messages
11
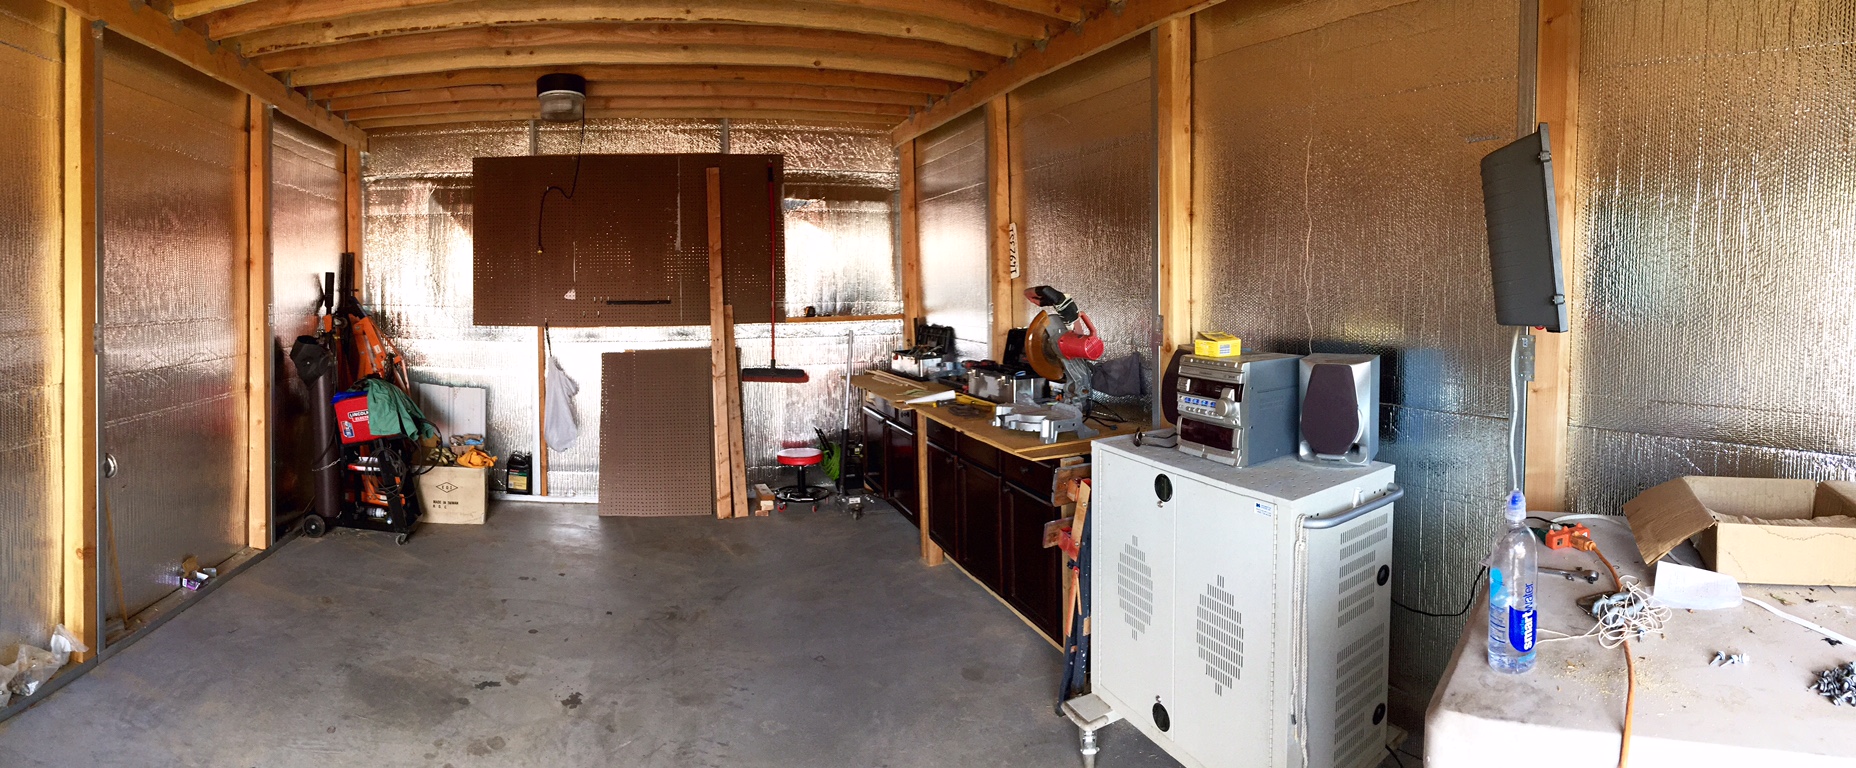
Things are starting to feel like a place of my own. I've got a number of tasks
to complete, a long list really. But the budget is depleted and most of what
im working on going forward will have to be incremental finishing things or i'll
build stuff from free things.

Speaking of free things, I've started installing the pegboard i got for free,
installed some cabinets I scored this morning for free with temporary tops
until i can find some good lumber for the workbench part of it, got a rolling
car with a power cord built in for free last week, it's currently holding the
radio I also got for free. Things are coming together, slowly but surely.


Left to do on the exterior:
-3 pieces of corner trim
-2 pieces of eave trim on the north wall
-garage door trim
-finish putting in about 200 screws in the sheet metal

first floor
-stain floor
-duct AC
-finish interior walls
-electrical
-lighting
-Move in and organize all tools and equipment
-put up front 10x12 shingled awning in front of door (reclaimed from an old shed)


second floor
-flooring (has 1/4" plywood currently)
-AC ducting
-interior walls
-windows
-gable vents

photo from today:

cabinet_install.jpg
 
Last edited:
OP
I

IncorpoRatedX

Member
Joined
Aug 26, 2014
Messages
11
The Garage has been hard at work as a shop for me as I work to do a frame-up build on a 4x4, turbo diesel, mighty max. Recently I received an assortment of free items, this helped me leap forward a little in getting things done. The end result was; two chain hoists, a winch and a Ward 5455 Vice, not sure if that means it's a Montgomery Ward vice, or something else, google wasn't able to find much and I'm still researching the winch.

Most of the list above will help me move a shingled roof from a shed that I want to re-purpose as an awning in front of my shop. Using 100 feet of 2"x3" steel box tubing we made an A-frame, the photo was before cross members were added and the chain hoists were put up. Hopefully your imagination works. :) I will also use this to lift the mighty max body so we can roll the new frame under it. Lots of work to be done.
 

Attachments

  • image2.JPG
    image2.JPG
    59.6 KB · Views: 33
  • IMG_0484.JPG
    IMG_0484.JPG
    37.5 KB · Views: 28
  • IMG_0475.JPG
    IMG_0475.JPG
    68.3 KB · Views: 30
  • image1.JPG
    image1.JPG
    71.9 KB · Views: 29
OP
I

IncorpoRatedX

Member
Joined
Aug 26, 2014
Messages
11
A monumental leap forward in my eyes today. Electricity. :rocker:

The shop had been powered by two extension cords, so the lighting was minimal and most everything was ran through a surge protector and shut off every night. I've worked in worse conditions so I made due but my uncle dropped by with an old Wadsworth fused switch box he found at a yard sale, some wire, and some handy boxes. I had some empty room in my house panel right outside of the garage and we had talked about tapping into it, I'm on limited funds so I scavenged off two 20 amp breakers and ran 12 gauge wire through conduit over to the garage, dropped it down and ran it to the switch panel with 15amp fuses, one dedicated wire ran to the air compressor and welder, the other ran to a box near the work bench. To achieve all of this I bought two panels of mdf with radiant heat barrier on the backsides, a couple sticks of conduit and some breakers. It was a cheap investment and a jump forward.

This will allow me to install the lighting I've been sitting on for some time. I've got 8 200 watt external magnetic induction lamps and ballasts. I actually have more than that but I like to keep spares. I'll be putting them in the garage on two switches spaced evenly. This is total overkill but I will likely only ever use 1 set at the most and between the two sets and my hours of use the lights will be good for over 20 years.

I can later continue the run of conduit and get it over to the main power panel for my future needs. Near sundown I hooked up an outdoor 120 watt induction flood light, tomorrow I'll run the wiring through the wall and I think I'll reduce it to either a 40 watt induction or a 20 watt LED, it doesnt need to be really bright, then put a photocell in the fixture. It also works as a porch light.

I've mounted the vice on my temporary workbench and recently was given an old craftsman tool box with some good patina. I've been looking for one but not wanting to spend money and my friend was going to throw this away. I cleaned it up a bit but I need to find or make an upper tray, I'd like to make one if I can find the thing I want to use for the project.
 

Attachments

  • IMG_0926.jpg
    IMG_0926.jpg
    49.4 KB · Views: 29
  • IMG_0927.JPG
    IMG_0927.JPG
    132.4 KB · Views: 31
  • IMG_0936.jpg
    IMG_0936.jpg
    55 KB · Views: 30
  • IMG_0928.JPG
    IMG_0928.JPG
    126.7 KB · Views: 33
  • IMG_0934.JPG
    IMG_0934.JPG
    132 KB · Views: 31
  • IMG_0935.JPG
    IMG_0935.JPG
    138.9 KB · Views: 28
To avoid these ads, REGISTER NOW!
Top Bottom