
You are using an out of date browser. It may not display this or other websites correctly.
You should upgrade or use an alternative browser.
You should upgrade or use an alternative browser.
MN Auto Shop build in a 42x90 pole barn
- Thread starter Mr_C
- Start date
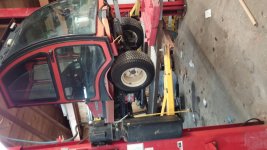
Just because people seem to enjoy the car pics, I currently have an interesting car on the hoist. It's my friends car, and was bought by his parents from the dealer in the fall of 66 (technically, the dealership owner drove it for part of a year, so they didn't buy it "new"). It is all original and is in fantastic condition, the interior still even has a "sheen" to it like it was brand new. We were replacing the brake lines (one had rusted through, so we replaced all of them with prebent lines).
This is the guy I bought my 1950 Desoto (again, all original, purchased new by his grandparents) from... it's going to take me a lot longer to talk him out of the LTD though.
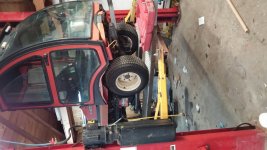
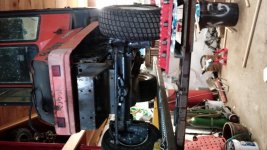
1966 LTD
Factory 428, auto
Black vinyl top
black cloth interior
66,400 original miles.

This is the guy I bought my 1950 Desoto (again, all original, purchased new by his grandparents) from... it's going to take me a lot longer to talk him out of the LTD though.
1966 LTD
Factory 428, auto
Black vinyl top
black cloth interior
66,400 original miles.
gordyy
Well-known member
my ramps are some scrap (daughters significant other is foreman at a laser cutting shop)
they are formed channel pieces a galvanized channel with holes pressed into and bent up (that part can be challenging as the pressed up holes grab the rubber tires really good but also have been known to grab skin and gouge deep holes) about 2' long 2" high and about a foot wide. layed them between some 2" X 2 X 1/4 angle and tacked it all together. then welded a piece of scrap on the bottom to engage the cross bracing so they can't slide off when being driven up on.
to disassemble I just lay a couple cheep moving carts down set the hoist down on them unscrew the bolts lift the arms back up lay the arms on the ramps and roll out of the way.
The angle welded on the bottom allows me to slide the forks from the tractor into the ramp and put them in hangers on some pallet racking out along the side of the garage.
here is a link for the thread where I kinda described putting it all together
http://www.garagejournal.com/forum/showthread.php?t=196470
Last edited:
It's been a long time since I have updated anything, but I haven't made much progress on the shop because it has been usable enough that I have been working on car projects instead. ")
The owner of the scaffolding I have has requested them back soon, so that was my motivator to get on the wiring side of the project. Up until this point I have been running off of 100+ feet of extension cords (one 110 and one 220) to power everything from the adjacent shed. That has been less than convenient.
I decided I needed to tackle the wiring project before I lost the scaffolding. I purchased a Siemens 200a panel and started running conduit. I wanted everything in conduit so I can tweak with the wiring over the years easily. I started by putting in outlets on one wall, every 5 feet alternating 110 and 220. that way I have a power source till I get the rest of it wired. I then ran a conduit line to my hoist (which was previously wired by a huge extension cord). Lastly I put up 16 2 x 4' T8 light fixtures. Once I had the planning part out of the way, the actual installation went better than I thought. I worked on this Friday evening, and for about 4 hours each on Saturday and Sunday. I did almost all of it by myself.
I am very happy with the quantity of light I am getting, the white walls certainly don't hurt the light situation either. before I was just using the 4 incandescent bulbs in the center and that was pitiful.
Next steps are to run the rest of the conduit for the rest of the outlets around the other walls of the building, and then I need to dig a trench so I can run the feed line to the pole (currently I am just using a 100' 220v extension cord plugged into a 50a plug in the adjacent building).
One step at a time I guess..
gordyy
Well-known member
I think your shop is looking good be nice to get the wiring done anyway more convienent to just plug it in than fool with the extension cords
It was especially difficult using extension cords when I had to use two long cords to reach my work area, and I couldn't start my air compressor with the lights on or it would brown out and pop the breaker.
I can't wait till I get the 200a service run so I can run the furnace, welder, air compressor, lights and hoist all at the same time.
I can't wait till I get the 200a service run so I can run the furnace, welder, air compressor, lights and hoist all at the same time.
Mr C
Can i ask what you chose for a heat source for your in floor heat, propane or elec?
I have a 30 x 50 barn we're just getting ready to pour the floor in. Very similar project to yours.
Off peak rates in our area are about 1/2 of regular rate. i have a 200 amp panel but an elec boiler would take up 100 amps.
It's either elec or propane out here. We're just S of the twin cities.
ABJNET,
I guess I haven't been here for a while... gonna have to change that. I am going to be using waste oil as my heat source. I debated a lot of options, really wanted to use solar as a primary heat source but it was very expensive to install and I would still need a secondary heat source. I also considered wood but it is just too much effort to keep it warm every day (I am often out of town and I don't want to shop to freeze).
Propane and electric were the easiest to do, but the most expensive in the long run. I am trying to keep the operating costs of my shop down as low as possible.
I have a lot to update...
I will start with the wiring. I managed to complete all my wiring. It was a bit of a hassle because there are a lot of i's to dot and t's to cross to get everything to code. I am not an electrician, so sometimes it took a while to figure out what "right" was. I do have a friend who's dad is an electrician (and he has spent many a summer helping him) and had another electrician out to look at it.
Everything I did, I did in conduit, with the exception of a bit of wiring along the rafters in the cold part of the building for the lights. I installed tons of outlets, plenty of lights, and have a lot of room to expand. The most difficult part was getting the power run from the pole and getting the permit/inspection done properly.
The power required 350' of 4/0 4/0 2/0 aluminum triplex to be buried 2' deep. I have a buddy with a trencher, but timing didn't work out so I rented one. We have pretty heavy clay here and the trencher moved plenty slow. I had all the live powerlines marked (by a friend who works for the cable company). As I dug the trench I found 3 buried lines that weren't marked and a ground rod! None of the lines were live, so I assume it is from old wiring that is no longer used. The ground rod was frustrating because it was in the middle of the yard so I have no idea why it was there... and the trencher did NOT like it. As it turns out, 350' of heavy wire isn't all that much fun to work with either. I was able to bury it to the pole myself, and once the inspection was complete, the local power company hooked it up to the pole for me (I never needed an electrician for the whole process.
Another issue was getting the 4/0 triplex at a reasonable price. For some reason, menards increased their price from 2.50/ft to 3.50/ft in the month I was working on this. I looked around and found that home depot was way cheaper at only 1.89/ft but they don't stock much and didn't have enough for me. Eventually I was able to get menards to price match home depot, but it was a pain.
The inspection went well. I was pretty careful to make sure I did things the way they were supposed to be, or the way I saw others doing it. I also was careful to make sure everything looked neat, tidy and professional. Our local inspector seems to be friendly towards "DIYers" mostly because they don't want to burn their own property down and don't cut corners like some electricians do trying to make ends meet (his perception). Because of this, he didn't look at my wiring nearly as close as I had expected. I think he also saw how clean things were done and assumed everything would be done that carefully. The result of his inspection was that I needed to have "Tamper Resistant" outlets because it was considered residential (if he didn't consider it residential, then I couldn't wire it myself). That sucked because I have 28 outlets in the shop. Additionally, I had a section of rubber line to my hoist, and he wanted everything in metal conduit, so I had to switch that to flexible metal conduit (I actually liked that better). Lastly, I had a spliced in my main ground which is a no-no, so I had to pull some slack from outside.
All in all, it was a huge undertaking getting the wiring done and done right... but I am really happy with it now and I think it was well worth my effort to do it myself (I don't even want to know how much that would have cost me to pay someone).
Next steps...
For heat, I have purchased a Reznor RA140 waste oil heater. I bought this used from a dealer who refurbished it. I have not yet installed it myself as I needed to get my wiring complete first, but now that I have that done, I am starting on it. Fortunately, the manual with it is excellent so installing it shouldn't be too difficult.
My plan is to build a compressor room in the corner of my shop to keep compressor noise down and store the fuel, and misc ****. I will be putting the heater on top of the compressor room.
I got a 120gal fuel transfer tank out of a farm truck and put a drain plug in it. I will use that for my fuel tank. I have 55 gal drums and 260 gallon totes to store my oil in. So far I have found it pretty easy to get waste oil around here. I have numerous shops that are willing to give it to me and have collected over 500 gallons in the last month with little advertising or effort. At that rate I should be able to keep the shop plenty warm.
I just need to finish my compressor room, put the heater on top, plum the fuel lines, wire it and put in my chimney (ha! I said *Just*).
This is what I my compressor room looks like as of last night. One more evening and I should be able to get the plywood and ceiling on. The room is 6' x 10' with 8' ceilings.
The other thing I am working on is my air supply and tools. I purchased a compressor last week capable of 16.5cfm at 90psi and 15.3cfm at 175 with a n 80 gallon tank. That should power anything I need and more.

I have decided to go with RapidAir MaxLine 3/4" line in a loop around my shop. This will allow for plenty of flow no matter where I am at. I have a sand blaster cabinet and plan on using air sanders, etc so I want to make sure I have sufficient flow. I haven't purchased the Maxline, but have a coupon for Northern tool for $20 off good until the end of the week.
The other cool air toy I managed to pick up was a tire machine. I have an old Coats 10-10 but it only works well with steel rims with rear wheel drive offsets. That was awfully limiting, so I managed to pick up a Coats 7065EX rim clamp tire machine of craigslist. It definitely shows a little use but is fully functional and came out of a local tire shop. I can't wait to start playing with that machine.
gordyy
Well-known member
I see the old bubble balancer in the back of the tire machine had to take a picture of it out to my sons. They think I am the only fool still using one of these LOL.
I keep telling them the only reason the tire shops have the big spinners is to be able to charge $10 a tire to balance them. I believe nascar is even still using the bubble balancers if I am not mistaken. at least they were back about 9 years ago when I was in a pit area.
I keep telling them the only reason the tire shops have the big spinners is to be able to charge $10 a tire to balance them. I believe nascar is even still using the bubble balancers if I am not mistaken. at least they were back about 9 years ago when I was in a pit area.
gordyy
Well-known member
and by the way nice progress and that shop is still looking pretty damn clean for my standards.
Course my shop is as dirty as the old lube pit always used to get
Course my shop is as dirty as the old lube pit always used to get
Thanks Gordyy,
I am a fan of the bubble balancers. Personally, I want to do a static balance anyway because I don't want any weights on the outside lip of the rim (tends to scratch the clearcoat off and ruin the rim). With my dynamic balancer I can either put them on the inside lip or use stick on weights. I have balanced a lot of tires with it and never had a problem. Actually, the only time I really have a problem with tire balance is when I get a bunch of dirt/mud/ice packed on the inside of my rims.
I am a fan of the bubble balancers. Personally, I want to do a static balance anyway because I don't want any weights on the outside lip of the rim (tends to scratch the clearcoat off and ruin the rim). With my dynamic balancer I can either put them on the inside lip or use stick on weights. I have balanced a lot of tires with it and never had a problem. Actually, the only time I really have a problem with tire balance is when I get a bunch of dirt/mud/ice packed on the inside of my rims.
I thought I should give a little update. The shop has made some progress in the last few months. I have the waste oil heater installed and running, plus I got the air compressor installed and have some air line run.
For the air line I went with 3/4" "Rapid Air" from northern tool. Its seemed the easiest, cheapest, and most expandable. I have enough line to run a solid loop around the entire shop, although so far I only have it run across half the shop. I am happy with the ease of installation and it seems to work well. I have a fairly large air compressor, and a few tools that can consume a lot of air (tire machine, sand blaster, etc) so I wanted to make sure I have a lot of capacity in my air lines. I just attached the air line to the bottom of the conduit for the power, which is about 4' off the ground.
The heater was a bit more difficult. I didn't hang it from the ceiling, as most people do, but instead built a stand to support it from the ground. That worked well and placed it exactly where I wanted it (on top of my compressor room). I used my 120 gallon tank and mounted the remote pump on it, and then ran a flexible copper fuel line to the heater. That was pretty straight forward. The chimney was a little more difficult. it is a tin pole barn with a tin ceiling... I needed to figure out where to shoot straight up that wouldn't hit any boards. I then went to the roof and started cutting a hole in my perfect roof. That was difficult emotionally. One of the more difficult parts was staying on the roof. The chimney is close to the corner, but that actually made it more difficult because if you started to slide, you didn't have much time before you fell off. All in all, we were able to get the chimney up and complete in a day with two guys working on it. The really hard part was paying for it. The chimney isn't all that big but because I had to use the stainless insulated stuff, it cost over $800, and that was buying it at the local home store (menards). The heating place where I bought my heater would have sold me similar materials for double.
I had a lot of issues with the heater right away, it wouldn't run smoothly and would kick off and need to be manually reset. Turns out that barrel of oil I was using had a lot of gas in it which was boiling and putting air in the system. Otherwise it has worked fairly well. I have been a bit concerned that I am burning more fuel than I expected. My shop is 42x45x14 and is fairly well insulated. When I first got it running I set it at 65 degrees and it was sub zero outside. I was burning about 10 gallons A DAY! That is over a million BTU/Hours to heat it for a day. Wowsers. Fuel is free, but that required me to fill the tank way too often. I temporarily covered some windows with insulation (which actually makes it brighter in there because I am only in there after dark anyway) and caulked the tin walls to the floor. I also turned the heat down to 50 degrees. That has helped a lot. I now am burning half that fuel when it is cold out, and even less when it is closer to the freezing mark.
A few thoughts about waste oil, for those of you thinking about it. I really like the fact that I can get the fuel for free. I have 4 small shops and a few local farmers that give me their waste oil for free. My shop is for fun, so if I was paying $1000-2000 a season to heat it (remember, I'm in MN) I wouldn't be heating it continuously. And if it wasn't warm, I wouldn't be out there daily. It is a lot more work though. I spent quite a bit of time hauling in barrels of oil. Letting them sit 24 hours to warm up, pumping the water out of them (almost every 55 gallon drum I have gotten has had at least 10 gallons of water in it), pumping the oil into the tank, etc. I have had a few issues with my heater as well, and that may be partially because I bought a used (dealer rebuilt) heater... but I think that is the nature of the beast. I can see a lot of people saying it isn't worth their time.
You need to have the ability to pick up this oil as well. I modified a 2 wheel dolly so that I can move a 55 gallon drum by myself, and can wheel it over and put it on the tommy lift on my truck. Without that, I don't know how I would move 400lb oil barrels around. I have a car trailer that I use to haul totes full, but then the only way to move those is with my skidsteer with pallet forks. Without tools similar to those, I am not sure how I would deal with it. Burning 5 gallons a day, you really don't want to deal with it in quantities smaller than 55 gallons.
gordyy
Well-known member
Burning the waste oil is a nice thing and like you say a bad thing. tempermental is an understatement with them!
I am a disabled hvac guy, have never had a lot of time for oil heat as for the nature of the beast, lots of soot, subject to being dirty at the best burn, and generally the end customers never remember how much it costs to clean them after you let them get too dirty. With proper PM a great thing but in this day and age seems 90% of people just decide to forgo the annual clean and service and wait for the tri-annual emergency late night clean it enough on overtime to light and come back later for a good cleaning.
That being said at our shop we did a fair amount of work on them even hooked up several waste oil boilers for floor heat systems. With those it only took once to realize a secondary heat system needs to be there. The nature of the beast with waste oil is it will get dirty fast it will **** out only at night, and only when its really needed. Like -28 windy snowy blizzard its out! lol
Shop is still looking way too clean even if you guys haven't had more than an inch of snow at a time yet this year. We have had 2 inches about 3 times now amazing how much water comes in on the tractors and blowers after playing in the snow for 8 hours.
Keep on its looking fantastic My dream of a nice big shop may actually happen. One of my son's is looking at a couple acres of land about 4 miles away. no house just an old old falling down barn. He is looking at putting a prefab house on it and then my other son and I will go in with him build a shop big enough for the three of us.
I have had my Reznor waste oil furnace since 98 in a 2800 sq ft shop and have had very few problems again in mn temp set at 65 all the time , I think in the future it,s going to get tougher to get oil with all these company,s buying it up and I will not pay for it . I have installed a natural gas furnace this fall for the future first time I ever had an alternative heat source .