To avoid these ads, REGISTER NOW!

Model 200 Logan Lathe Refurbishment

John in OH

Well-known member
Joined
Jun 2, 2007
Messages
2,444
Location
SE Ohio & Eastern Virginia
Some years ago before I retired, I used to occasionally attend local machine shop going-out-of-business auctions just to get a look at neat machine tools.

One summer, over lunch, I went to a tool and die shop auction about 1/2 mile from work. Auctions are fun as one never knows what might be there, or how much some lunatic might pay for a piece of junk!! Anyway, as is the way of life at auctions, some lots stir little or no interest, and a “no interest” item at this auction was an old Model 200 Logan lathe, 10 in. swing, 24 in. btc. It was ugly as sin … dirty, grungy, some rust … and the spindle bearings were rough, so I figured it was probably a boat anchor. No tooling except the 3-jaw chuck. However, a quick visual inspection found minimal wear on the bed ways and lead screw.

I wasn’t really interested as I already had a lathe, but figured I’d bid “just to bid”… usually a dumb thing to do! Well, I took the lathe home with me for $125!

79-Front from left.jpg 82-Front from right.jpg

It’s been sitting in a storage shed in Ohio for about 10 years and this past fall I decided to drag it with me to Virginia and do a refurbishment as a winter project.

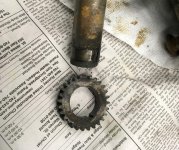
First step was a preliminary teardown and inspection to see if it was even worth the refurbishment effort. Things didn’t look “too bad” … spindle bearings are self-lubricated precision ball bearings and both were stiff and rough … probably the original grease dried up. Broken gear teeth on one back gear and the spindle gear. Fortunately, Logan Actuator still supports parts for these old machines and lots of used parts are available on eBay.

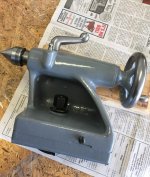
The tailstock appeared to be the easiest component to work on, so that came first.

Before IMG_1918 (Large).jpg After IMG_2217 cropped (Large).jpg
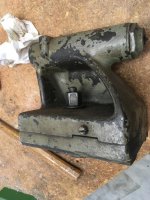
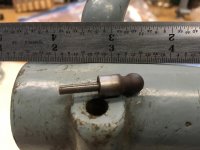
No major problems found; however, I was puzzled over the purpose of a small ball-shaped pin in the tailstock.
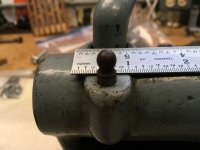
IMG_1995 (Large).jpg IMG_1996 (Large).jpg

After posting this question on the Logan forum, I learned it was a dauber used to apply white lead lube to the old style dead center. Who knew???

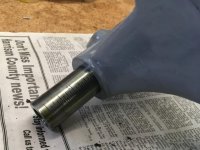
Another oddity was with regard to the tailstock spindle. The linear travel graduations were on the bottom of the spindle!! Out of sight when in service and totally useless! Got on eBay and found a used spindle with the graduations on the top on the spindle.
IMG_2344 (Large) a.jpg

I’ll try to get some more pics posted soon.
 
To avoid these ads, REGISTER NOW!
OP
J

John in OH

Well-known member
Joined
Jun 2, 2007
Messages
2,444
Location
SE Ohio & Eastern Virginia
Phase 2: The second part of this refurb project was removal of the lead screw and carriage apron.

The lead screw was in excellent condition with no signs of wear, although it did require a thorough cleaning of the threads to remove ancient packed grease and dirt.

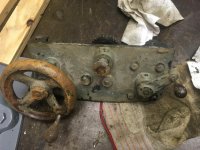
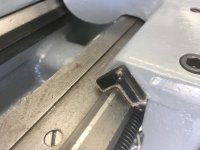
Inspection of the apron found no damage; however, as with the lead screw, the gears were pretty gunked up with old grease and dirt. The half-nuts did show some wear but not too bad. Decided that they were serviceable for the present and since it’s fairly easy to replace the half-nuts, that step and expense can be done later, if necessary.

IMG_2130 (Large).jpg

The apron was completely disassembled, all gears thoroughly cleaned, the casting sandblasted, and the operating handwheel and levers polished. The casting was painted, handwheel and levers clear coated, and all reassembled.

Before IMG_2142 (Large).jpg After IMG_2221 (Large).jpg
 

Merch1

Well-known member
Joined
Aug 28, 2014
Messages
293
Very cool. I have the same machine and plan on cleaning it up for some light turning jobs. How concentric is it? Mine is about 4 thou out.
 

DocsMachine

Well-known member
Joined
Sep 16, 2006
Messages
1,935
Another oddity was with regard to the tailstock spindle. The linear travel graduations were on the bottom of the spindle!! Out of sight when in service and totally useless! Got on eBay and found a used spindle with the graduations on the top on the spindle.

-I believe you'll find they're the same spindle. Your original one was simply installed upside-down.

Take a close look at the photo you posted with the dauber laying out and loose. Right at the 2-1/8" mark on your ruler is a hole that's been painted over- that's supposed to have a ball oiler in it. That is, a small circular unit with a spring loaded ball- you press the tip of an oil gun into it and squirt some oil in there to lube the tailstock barrel.

And directly below that hole, at the bottom of the spindle bore, is a short blind hole- the two were drilled in the same operation.

That blind hole is supposed to have a T-shaped pin, that has a small square block like a pulley "key" at the top, and a round shaft that drops into that drilled hole.

That's the key that keeps the spindle (called a "barrel") from turning. All you need to do is remove your existing barrel, flip it over, and find a- or more likely make- a replacement key. I had to make a new one for mine, as the one it came with was badly worn and let the barrel rotate too much.

Doc.
 
OP
J

John in OH

Well-known member
Joined
Jun 2, 2007
Messages
2,444
Location
SE Ohio & Eastern Virginia
Phase 3: Saddle.

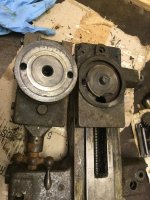
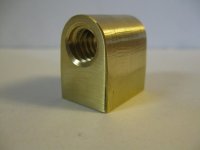
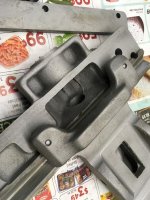
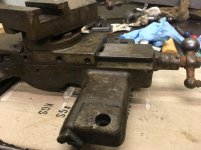
More gunk, dried grease, dirt, rust, and some minor damage! But, again, minimal wear; however, the cast cross-feed nut was actually broken and required replacement. A brass replacement nut came from eBay.

IMG_2161 (Large).jpg IMG_2163 (Large).jpg

s-l1600.jpg

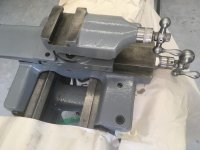
Completely disassembled, thoroughly cleaned, castings sandblasted, sliding surfaces cleaned, and the operating handwheels and graduated collars polished. Numerous mis-matched screws and fasteners were replaced and after reassembly, new way wipers were installed.

IMG_2213 (Large).jpg IMG_2366 (Large).jpg

IMG_2160 (Large).jpg Before IMG_2365 (Large).jpg After
 

NC Rick

Well-known member
Joined
Oct 26, 2017
Messages
302
Location
Asheville
John in Ohio, I really enjoy your refurbishment thread. I appreciate your skill and craftsmanship and the project brings back some really nice memories of an awesome man I had the pleasure of knowing well over 40 years ago. I was just out of college and was able to room and board with him and his wife while his daughter was away at college. He was an engineer at Caterpillar who was a pretty accomplished and serious hobby Machinist. He found us an old but larger Southbend lathe for the shop which he and I spent many evenings and weekends totLly disassembling and repairing. I learned so much from that fine gentleman! He made miniature “hit and miss” engines in his basement shop by getting his own castings built from custom wooden models he built. I spent other evenings learning machining techniques from him as he prepared to sell kits to others. To me, he was a very inspirational person and I have carried much of what I picked up throughout my life. I learned to appreciate good mechanical machines and learned much, being kind of a young “knowitall” punk. I miss him and often think back to that time.
 
To avoid these ads, REGISTER NOW!
OP
J

John in OH

Well-known member
Joined
Jun 2, 2007
Messages
2,444
Location
SE Ohio & Eastern Virginia
John in Ohio, I really enjoy your refurbishment thread. I appreciate your skill and craftsmanship and the project brings back some really nice memories of an awesome man I had the pleasure of knowing well over 40 years ago. I was just out of college and was able to room and board with him and his wife while his daughter was away at college. He was an engineer at Caterpillar who was a pretty accomplished and serious hobby Machinist. He found us an old but larger Southbend lathe for the shop which he and I spent many evenings and weekends totLly disassembling and repairing. I learned so much from that fine gentleman! He made miniature “hit and miss” engines in his basement shop by getting his own castings built from custom wooden models he built. I spent other evenings learning machining techniques from him as he prepared to sell kits to others. To me, he was a very inspirational person and I have carried much of what I picked up throughout my life. I learned to appreciate good mechanical machines and learned much, being kind of a young “knowitall” punk. I miss him and often think back to that time.

Sounds like really pleasant memories of a fine gentleman and skilled hobbyist! I also knew man that I have always considered a mentor of sorts. He was a neighboring farmer that I worked for during the summers in my early teenage years. We worked hard in the hay fields baling, filling silos, or picking corn, but on rainy days we headed for the shop!! Hours spent tearing things apart, putting them back together, welding, cutting, repairing … I truly loved those days and learned so much. Hard to believe that was over 50 years ago!! Good times, good times.
 

larry4406

Well-known member
Joined
Jan 27, 2006
Messages
20,228
Location
Northern Virginia
Following along! Nice work!

What brand of paint are you using and how are you applying it?

Also, details on polishing of the levers and hand wheels please.
 
OP
J

John in OH

Well-known member
Joined
Jun 2, 2007
Messages
2,444
Location
SE Ohio & Eastern Virginia
Following along! Nice work!

What brand of paint are you using and how are you applying it?

Also, details on polishing of the levers and hand wheels please.

After disassembly, all parts, were degreased using either mineral spirits and a rag, or if small enough, were washed in an open-pan parts washer using Tractor Supply PSC-1000.

IMG_2389 (Large).jpg

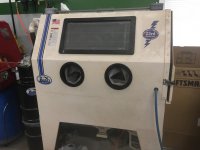
After grease removal, all parts, except for the bed, legs, and chip pan, were either sandblasted or cleaned on a wire wheel. Before sandblasting, I carefully masked all machined surfaces and took care while blasting to protect the machined surfaces from damage. I used glass bead grit in a TIP Tools blast cabinet.

IMG_2388 (Large).jpg

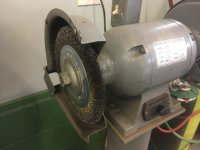
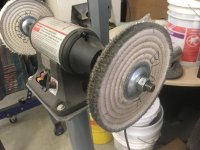
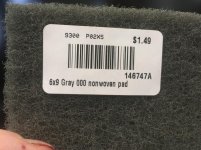
For machined surfaces and fasteners, and depending on the surface, the surfaces were cleaned with a wire wheel, steel wool, Scotch-Brite pads, or some combination.

IMG_2384 (Large).jpg IMG_2383 (Large).jpg

The handwheels, knobs, levers, etc. were first cleaned using the 8” dia. wire wheel followed by buffing, then final polish via the Scotch-Brite pads.

IMG_2385 (Large).jpg

Machined surfaces were again masked and the castings and major parts primed with Rustoleum 2081 Light Gray Automobile Primer spray paint. However, rather than spray the legs and chip pan, I primed them with Rustoleum Professional Rusty Metal Primer, V7569, using a brush.

The gray paint used is Rustoleum Professional Smoky Gray Enamal, V7586, applied with a brush. The brush finish is excellent on the cast surfaces and pretty good on the sheet metal.

After polishing, the handwheels, knobs, levers, etc., were sprayed with Rustoleum Crystal Clear Enamal, 7701. This finish is kind of an experiment as it looks nice now but time will tell how it holds up.

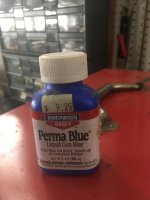
For many of the fasteners and adjusting screws, after cleaning with a wire wheel, I finished them by blueing with Beechwood-Casey Perma-Blue Liquid Gun Blue.

IMG_2382 (Large).jpg IMG_2390 (Large).jpg

The gun blue gives these components some minor rust protection and provides a nice black finish that looks sharp in contrast to the gray.
 
Last edited:
OP
J

John in OH

Well-known member
Joined
Jun 2, 2007
Messages
2,444
Location
SE Ohio & Eastern Virginia
Phase 4: Headstock
Part 1 - Teardown
Going into this project I knew there were some serious headstock problems. The spindle would barely turn and when it did it felt as if it was full of gravel. There were obvious broken teeth on the spindle gear and the back gears wouldn’t engage properly or stay engaged. Not to mention the ever-present gunk, dried up grease, rust, and old swarf.

IMG_2236 (Large).jpg Nastiness! IMG_2266 (Large).jpg More nastiness!

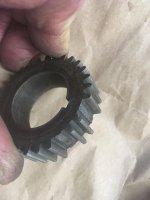
IMG_2377 (Large).jpg Broken spindle gear teeth.

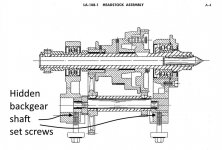
Unfortunately, disassembly was more difficult that anticipated. The backgears are engaged/disengaged via an eccentric shaft carried in a pair of bushings. Try as I might, I could not find out how to remove the bushings! Another visit to the Logan provided the secret! Hidden at the upper end of the headstock hold-down bolt holes are set screws holding the bushings in place! Take out the two hidden set screws and out comes the bushings.

Headstock a (Large).jpg Hidden set screws IMG_2261a (Large).jpg Backgear eccentric shaft

With the backgears out, another problem was found as there were broken teeth on the smaller of the two backgears.

IMG_2263a (Large).jpg Broken teeth on backgear

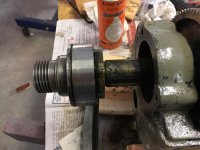
Next, what could be easier than removing a spindle from a pair of pressed in bearings …. Right?? Nope! But after a considerable effort of hammering on wood blocks the spindle and the pressed-on front bearing finally came out.

IMG_2265 (Large).jpg Spindle front bearing
 

Mandres

Well-known member
Joined
Jun 22, 2006
Messages
1,167
Nice! I have a Logan 200 also, but mine isn't as far along as yours. I really wish I had a blaster - stripping the old paint by hand is taking forever on some of these parts.

There's a good resto thread here that I've found helpful: https://www.hobby-machinist.com/threads/redlinemans-logan-200-rescue.17903/

And mrpete/tubalcain on youtube has a lot of good videos on the logan lathe also. Worth a watch if you haven't seen 'em.

-edit- if it all possible, try to reuse the spindle bearings. They're expensive to replace from Logan and seemingly nobody has found a good aftermarket replacement. A lot of guys wash out the old grease with solvent and then repack. I'm planning to do that with mine, while leaving em pressed into the headstock.
 
Last edited:

OccupantRJ

Well-known member
Joined
May 15, 2009
Messages
11,502
Location
Eastern North Carolina
I normally use a carbide insert paint scraper on castings too large to go into the blast cabinet, or on items I do not want the grit to infiltrate. I have both triangular and round scrapers, around $20 each.
 
OP
J

John in OH

Well-known member
Joined
Jun 2, 2007
Messages
2,444
Location
SE Ohio & Eastern Virginia
Nice! I have a Logan 200 also, but mine isn't as far along as yours. I really wish I had a blaster - stripping the old paint by hand is taking forever on some of these parts.

There's a good resto thread here that I've found helpful: https://www.hobby-machinist.com/threads/redlinemans-logan-200-rescue.17903/

And mrpete/tubalcain on youtube has a lot of good videos on the logan lathe also. Worth a watch if you haven't seen 'em.

-edit- if it all possible, try to reuse the spindle bearings. They're expensive to replace from Logan and seemingly nobody has found a good aftermarket replacement. A lot of guys wash out the old grease with solvent and then repack. I'm planning to do that with mine, while leaving em pressed into the headstock.

Thanks for the link to Redlineman's rebuild on the Hobby Machinist site! Sure wish I had known about that before I started mine as he has some very good ideas, tips, and suggestions.

I also wish I had taken more pics of my actual work-in-progress but I didn't decide to make this thread until I was nearly finished with my refurbishment. By then only "general" pics were available. Maybe I'll think further ahead before I do the NEXT one ... not! :shocking:
 
OP
J

John in OH

Well-known member
Joined
Jun 2, 2007
Messages
2,444
Location
SE Ohio & Eastern Virginia
-edit- if it all possible, try to reuse the spindle bearings. They're expensive to replace from Logan and seemingly nobody has found a good aftermarket replacement. A lot of guys wash out the old grease with solvent and then repack. I'm planning to do that with mine, while leaving em pressed into the headstock.

My original bearings were sealed ... no way to wash out. I bit the bullet and bought new bearings from Logan Actuator. The front bearing is not cheap, but should provide for precise spindle action.

Both of the new bearings are also sealed.
 
To avoid these ads, REGISTER NOW!
Top Bottom