jimreed2160
Well-known member
Nice project for fall.

Nice project for fall.
BB: sorry I didn't read the beginning of your thread to hear if that banner with BOLENS on it was your company, a relative's or just a name you like?
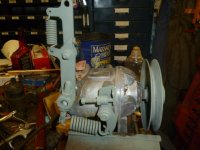
good to see you brought in the motor for your mill into your garage to work on during the winter cause Andy isn't the only member wanting to see you cut a few logs. best of luck with restoring that.
just curious does the engine run now or is it a complete rebuild and maybe a few new parts needed to make it run again?
cheers
I'll wager the electric fuel pump is just the lazy man's way to avoid replacing the fuel pump, and they're generally cheaper, too. I like them because on a seldom used engine you can turn it on and listen to the fuel pump pump up and stop, meaning you have gas to the carburetor and it's ready to start. If the fuel had drained back they won't quit pumping so you know it's an issue.
Looking forward to your remote controls and your remote dashboard. More fun things. How about an old Bolens dash to house the gauges? I assume you'll get a switched oil pressure gauge to kill the engine should you lose oil pressure. Not necessary but it would be cool to know while you're busy sawing logs you don't have to worry about a broken oil line pumping all your oil out on the ground. Then with a high temperature kill switch you're set. But steam blowing out the radiator cap is pretty noticeable.

BB: are you putting a tarp on your new cement pad to keep the rain from pitting it or is there another reason?
best of luck on the engine and it sounds like you know what you are doing so hopefully you won't run into needing a part that is unobtanium. that said I bet HANDY ANDY could make it for you.
have a great day!

Pads are attached with #12 screws 2 inches long. It took my ratchet driver to drive them even with holes drilled.
Even though I love vintage tools, I also appreciate technology. Some things are much easier with it. I think back in the day before impacts we all spent lots of time just screwing around.

These are the bottle racks I built for my ox and argon on their trip to the weld supply. Made of red oak cured to less than 8 % moisture. Pads are attached with #12 screws 2 inches long. It took my ratchet driver to drive them even with holes drilled.

I was going to suggest that design.
Mine look like that but are made of a single 2x6 with no feet. Bottles stay put in the back of a pickup with no other tie down.
A long driveshaft is good for the driveline life. but guards are good too to keep errant lumber off it.
Patience is sure going to pay off for this work.
Worst come to worse you can build a dandy governor from an add-on cruise control, you know.

BB: to get the cotter pins out was it a steady 90 minutes of prying and removing them or did you spend a lot of time thinking about it and have an AHA moment and figure a good way to pull or push them out?
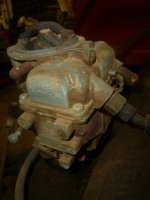
happy to hear you got them out so you could remove the carb cause i'm guessing all old carbs could use a cleaning especially the ones sitting outside.
I bet you'll have this old engine purring like a kitten soon and if you need any new parts I think I heard a guy in Oklahoma likes to make some out of old pop cans if you send him a box of cans.
cheers and good luck!!
1/2 Cup said: "Its good to hear that the governor is still a workable proposition."
I say: You do not live in my state!! just 1/2 kidding!
Looks fantastic!
BB: that's sort of what i figured and good for you for sticking with it and overcoming that cotter pin battle. when you put it back together is there maybe a different plan to maybe make the next removal somewhat easier?
keep up the good work and i'll sit in my chair and just watch in amazement as you do if you have time to post up more pictures and walk us through your adventure.
cheers
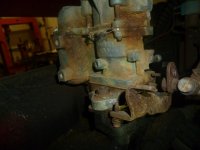
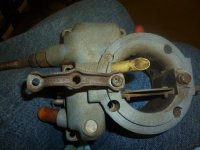
And the other bolt is loose...I think I see the problem with the carburetor. The air cleaner stud bracket is misplaced by 180 degrees.
You do remember the old advertising slogan "Ford has a better idea!". Their engineers took that to heart and had a better idea every model year, sometimes twice in a year, to the point if you don't have a VIN you can't find the part. So then, likely as in your case, one odd year (like the vacuum advance in a 1954 Chevy) is the first to disappear from the replacement parts supply.
Often the adjacent year part will fit, just minor differences like connection size and orientation. The 54 Chevy vacuum advance (the only Ford style part I know of on a Chevrolet) was because they went from front motor mount to side motor mount in 54 and the motor mount interfered with the old vacuum advance style and required an odd shaped bracket. That odd shape being more expensive they did the Ford trick and had yet another better idea for 1955. I was driving a 54 Chevy in the 70's when the part disappeared so I had to alter some earlier ones to fit. It's not so easy on newer cars, like your sawmill.
I truly hoe you weather the storm without injury or damage.