To avoid these ads, REGISTER NOW!

Model A Ford garage

OP
B

bolensboneyard

Well-known member
Joined
Nov 22, 2013
Messages
3,074
Location
South East
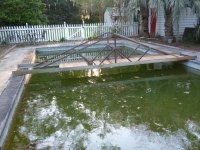
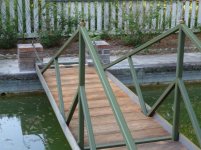
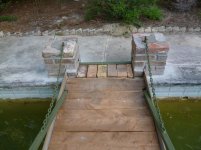
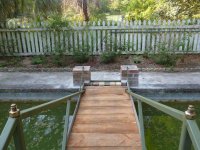
if I can't find real wood beams for my deck i'll probably just use the old 2x10's and spiff them up cause the supports of my old deck are still solid.

I was just going for a better look from below cause i'm planning on building a small woodshop down there. it's not a huge deal using the old supports though and probably will save me some money so I can buy another tool or supplies or material for the woodshop.

are you calling the kitchen done now cause it sure looks great!!

Kitchen was done but then I got a chance to design a copper hood for over the stove and get it built for the swap of one of my Model A carburetors. Works for me. Been cutting some Southern Yellow pine and got to pick up a large oak log next week and some fire wood to replace what we burned this winter.
Why not box the 2x10's in and work them over with a broad ax to make them look hand cut. It would look good in the shop. Lowes also sells six by sixes up to 16 feet long; or at least they did. I don't remember what you originally needed.
 
To avoid these ads, REGISTER NOW!

drivesitfar

Well-known member
Joined
Oct 23, 2013
Messages
36,005
Location
Pacific Northwest
best of luck with the Copper hood that sounds amazing.

I won't be buying lumber at HD or Lowe's anytime soon for the deck, but thanks for the interesting axe aging trick you mentioned. i won't do it on the deck, but maybe some day when i've got time to make a bench or maybe some beams inside my woodshop might have that treatment.

have a great weekend!!
 
OP
B

bolensboneyard

Well-known member
Joined
Nov 22, 2013
Messages
3,074
Location
South East
This is the copper hood I mentioned having drawn up to be made for the Old stove. I was going to make in myself but the guy needed a Model A carb. so we traded my work for his. Oh by the way the Stainless Steel cover over the griddle to be used as a working space while cooking is something I made this week. Mostly been sawing lumber and installing the hood.
 

Attachments

  • P1040375.jpg
    P1040375.jpg
    114.2 KB · Views: 83
  • P1040376.jpg
    P1040376.jpg
    123 KB · Views: 78
OP
B

bolensboneyard

Well-known member
Joined
Nov 22, 2013
Messages
3,074
Location
South East
Thanks Andrew.

Sorry all. I have been busy cutting logs for transport to the mill. Buying old stock steel as prices are climbing daily. Nursing tired overworked muscles (straightening out new old steel i.e. 4 inch x 3/8 angle with a tractor and 12 lb sledge hammer etc.) and trying to figure out where to put this stuff.
Used to be addicted to love. Now just addicted to work.
 
OP
B

bolensboneyard

Well-known member
Joined
Nov 22, 2013
Messages
3,074
Location
South East
This is the only project I have been working on for the last two weeks. The rest was home maintenance. The foundation rails were extremely bent. They are 1/2 inch by four angle iron and I used a 12 lb. sledge and a tractor to get them mostly straight. Then I designed the bridge for looks (not done yet) and strength. Also used design to pull in everything else. When I am done (including the welding) I will show more. Had to run 150 dollars worth of new elect. in order to provide weld access to the bridge. The largest portion (the main frame and two center uprights) was moved by hand from my trailer to the pool/pond. 450 lbs by one old guy and a pry bar; dollies once I got it across the pool. The rest was fit and welded in place. Planning on four small brick pillars (one at each corner) and possibly a small rail on each end to bring it all together.
 

Attachments

  • P1040380.jpg
    P1040380.jpg
    158.9 KB · Views: 99
OP
B

bolensboneyard

Well-known member
Joined
Nov 22, 2013
Messages
3,074
Location
South East
Hey Don. Designing a bridge to be only 18 feet long and not look too small or too big is not a small task. Made of NOS and Scrap the four inch angle is 1/2 inch and was twisted and bent. Wait until you see the end result. I will be building the fourth brick column today and an afternoon in the sun on my knees is killing me. Should be done with paint and all by the end of next week.
 

drivesitfar

Well-known member
Joined
Oct 23, 2013
Messages
36,005
Location
Pacific Northwest
BB: funny you call your old swimming pool a pond, but if you like it better using it that way it's your call. I think I saw some goldfish in it or what do you have swimming in it?

nice looking bridge and I bet the brickwork will really make it look even better. I wonder if taking out the diving board supports and putting flagstone or brick or just removing the cement pool deck might give it an even better POND LOOK?

don't injure your knees cause even though you can buy new knees these days it's nice to know the old ones we were born with still function.

take care!!
 
OP
B

bolensboneyard

Well-known member
Joined
Nov 22, 2013
Messages
3,074
Location
South East
BB: funny you call your old swimming pool a pond, but if you like it better using it that way it's your call. I think I saw some goldfish in it or what do you have swimming in it?

nice looking bridge and I bet the brickwork will really make it look even better. I wonder if taking out the diving board supports and putting flagstone or brick or just removing the cement pool deck might give it an even better POND LOOK?

don't injure your knees cause even though you can buy new knees these days it's nice to know the old ones we were born with still function.

take care!!

Thanks drives. The pool has been a pond for several years now. In fact, we have a second generation of eastern painted turtle now living in. We also have many generations of gold fish, bull frogs as big as your fist, leopard frogs, dragon flies, and water iris. Who knows what else. The brickwork is almost done. One coat of paint yesterday. And the detail will be four brass eyes connecting a chain to every column and bridge support (cosmetic). Brick entrances on both ends and brass finials atop both center posts. I still have to make these. Not so many posts on threads nowadays so no step by step pictures. I see many of us slowing down just to switch gears and weather the coming winds.
Hard to put a face on our place when ours is half covered. I'm afraid we as a people are losing our identity, fearing the loss of our lives. Our face is who we are. Our smile is our gift to the world. Our creations are an outward expression of inward beauty we can share, even with future generations.
How sad we cannot fully express that beauty now in something as simple as a smile. What memory will we leave with our children and grandchildren? Have you ever seen a smile on a corpse. Mine will remember the one I had on my face.
 

drivesitfar

Well-known member
Joined
Oct 23, 2013
Messages
36,005
Location
Pacific Northwest
looking for more pics when you have time to take and post them. sounds like a nice project.

your posts are a lot more philosophical so are you ok? always good to see what you are up to so keep up the great work!!!
 
OP
B

bolensboneyard

Well-known member
Joined
Nov 22, 2013
Messages
3,074
Location
South East
Details will be answered by question for those interested.
 

Attachments

  • P1040401.jpg
    P1040401.jpg
    154.2 KB · Views: 66
  • P1040399.jpg
    P1040399.jpg
    147.9 KB · Views: 64
  • P1040398.jpg
    P1040398.jpg
    150.3 KB · Views: 63
  • P1040396.jpg
    P1040396.jpg
    155 KB · Views: 61
  • P1040395.jpg
    P1040395.jpg
    144.7 KB · Views: 61
  • P1040392.jpg
    P1040392.jpg
    156 KB · Views: 64
  • P1040391.jpg
    P1040391.jpg
    156 KB · Views: 68

y'sguy

Well-known member
Joined
May 1, 2010
Messages
1,310
Location
Tulsa, Oklahoma
This turned out really well. Good work! Do the nuts and bolts function as for tension or what purpose? It seems like tension would be adequate without, but still very cool. I like it!
 
To avoid these ads, REGISTER NOW!
OP
B

bolensboneyard

Well-known member
Joined
Nov 22, 2013
Messages
3,074
Location
South East
This turned out really well. Good work! Do the nuts and bolts function as for tension or what purpose? It seems like tension would be adequate without, but still very cool. I like it!

Thanks guy... The nuts and bolts are cut off of the eye bolts that hold the chains. I got these solid brass bolts when I salvaged a neighbor's brick. columns. I used the brick to build the shed. Not needed to tension structure. I wanted to close the box tube with "finial" of some kind and thought making something realistic, and would bring the eye to the structural/mechanical center, would be nice. I cut the last six inches off of the eye bolts then spun the nuts. Serves a dual purpose. Keeps the rain out and finishes off the structure.
 

drivesitfar

Well-known member
Joined
Oct 23, 2013
Messages
36,005
Location
Pacific Northwest
are you finished with it or are you planning on mortaring in the bricks at each end or putting some wood there and the bricks are temporary? any thing else on the list to finish like staining the wood or ??

it looks like one of your turtles is trying to figure out how to get up on it to sun himself. speaking of those are they able to get out of the pond (old pool)?

looks great from my chair and i'm sure it makes you and your bride smile when you look out at it.

WELL DONE!!
 
OP
B

bolensboneyard

Well-known member
Joined
Nov 22, 2013
Messages
3,074
Location
South East
are you finished with it or are you planning on mortaring in the bricks at each end or putting some wood there and the bricks are temporary? any thing else on the list to finish like staining the wood or ??

it looks like one of your turtles is trying to figure out how to get up on it to sun himself. speaking of those are they able to get out of the pond (old pool)?

looks great from my chair and i'm sure it makes you and your bride smile when you look out at it.

WELL DONE!!
Thanks drives.
Turtles have access in and out. We have had one borne in the pond. It's done. Bricks need to be as is in order to change out wood which is red cedar and requires no stain. They also provide drainage. No traffic will be allowed save by invitation.
 
OP
B

bolensboneyard

Well-known member
Joined
Nov 22, 2013
Messages
3,074
Location
South East
Bobby, the bridge came out great. The Brick Shedhouse and this bridge are adding to the antique look of your property. As does the sawmill.

Thanks Bob. From the porch it looks like a little early 20th century village. Reminds me of my grand parents mill village where I spent a lot of time growing up. Not planned. Just worked out that way.
 

drivesitfar

Well-known member
Joined
Oct 23, 2013
Messages
36,005
Location
Pacific Northwest
I agree the view out to your mill, brick woodworking shop and pool/pond from your patio must be nice and looking the other direction at your new kitchen I bet makes you feel like you've really accomplished something there.

WELL DONE SIR!!
 
OP
B

bolensboneyard

Well-known member
Joined
Nov 22, 2013
Messages
3,074
Location
South East
Thanks drives. Take a look at these 150 year old inclinometers I picked up as a pair. They are real pricey when fixed up or in nice shape. Out of my league. These two were chipped and did not work and or missing parts. I developed a process for welding cast iron that I have not seen done elsewhere over the years (not going to reveal it over the net either. Have to come visit) Take a look at the results. Brazing is nice but you cannot braze this type of quality tool. By the way in case the pictures lie, you can run a finger over the grind and not tell where it begins and ends. They were done on a surface grinder.
 

Attachments

  • P1040406.jpg
    P1040406.jpg
    106.4 KB · Views: 53
  • P1040402.jpg
    P1040402.jpg
    122.6 KB · Views: 54
  • P1040404.jpg
    P1040404.jpg
    121.6 KB · Views: 51
  • P1040403.jpg
    P1040403.jpg
    117.8 KB · Views: 52

drivesitfar

Well-known member
Joined
Oct 23, 2013
Messages
36,005
Location
Pacific Northwest
sounds like we need to make a plan to visit you and learn how to saw logs, weld, some woodworking and how to raise turtles along with taking the mustang for a spin?

feel free to show more of your cool projects when you have time to cause I (we) love your work!!

have a great day!!
 
OP
B

bolensboneyard

Well-known member
Joined
Nov 22, 2013
Messages
3,074
Location
South East
sounds like we need to make a plan to visit you and learn how to saw logs, weld, some woodworking and how to raise turtles along with taking the mustang for a spin?

feel free to show more of your cool projects when you have time to cause I (we) love your work!!

have a great day!!

drives you are welcome to visit any time. We'll feed you good I promise.
 
OP
B

bolensboneyard

Well-known member
Joined
Nov 22, 2013
Messages
3,074
Location
South East
Bobby, these look excellent! So how does an inclinometer differ from a level? Is it that they were called this 150 yrs ago.

Thanks guy. The center of the level rotates and the pointer with it. The dial is graduated in degrees. The level bubble sits inside the rotating part. It will stop at 0 degrees (level) and 90 degrees (plump) or any where you stop it in-between. You then lay the level on a rafter, for instance, turn the center dial until the bubble centers, and read where the pointer is. It will tell you what the angle is. Or you can tell it what angle you want. Pretty slick; and basic. And we had to study geometry in high school anyway. Sheesh!
 
OP
B

bolensboneyard

Well-known member
Joined
Nov 22, 2013
Messages
3,074
Location
South East
New project is fire pit. I came up with this design and have started it. Pit will allow flower pots at 12 different places around its circumference as well as places for roasting hot dogs, marshmallows, or even a spit for a small pig eventually. I plan to make a grill that can be stored elsewhere too. Stay tuned.
 

Attachments

  • P1040410.jpg
    P1040410.jpg
    155.2 KB · Views: 58
To avoid these ads, REGISTER NOW!
Top Bottom