So the lights in the garage didn't pass electrical inspection. The electricians installed standard light sockets for screw in bulbs which got in the way of the high mount door. For inspection they just covered the boxes and took the fixtures out.
No lights in the garage was an obvious problem So I did some digging and it seems like many people have had some success with the Barrina T5 Amazon fixtures. Went ahead and ordered these:
https://www.amazon.ca/dp/B079FC9T9K/ref=pe_3034960_233709270_TE_item
It ended out being $60 CAD for 2 day shipping to my door and came with a 5 yr warranty.
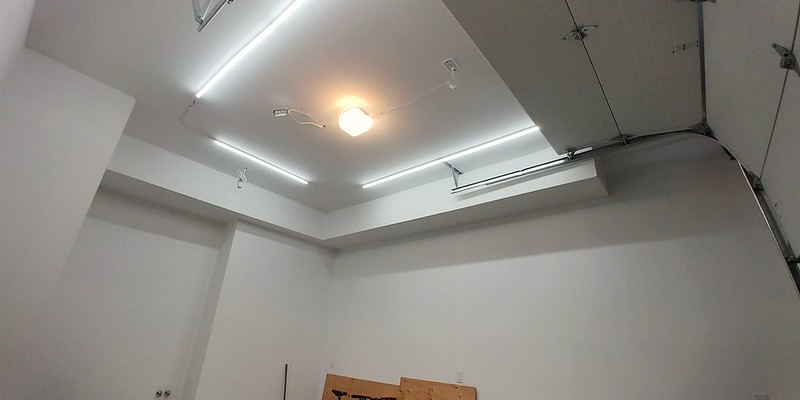
Got them all setup in a large rectangle in the ceiling. The sides plugged directly into each other. For the ends I needed to extend the harness provided.
It felt like -12c on Saturday so it was a Hasty install. I would like to clean up the wiring when it is a bit warmer. The light output is incredible and they fire right up in the cold.
I will also need to get bulbs with the correct colour temperature in the garage door light, but thats a minor detail.
They even cast a nice bright light halfway down the driveway. Overall I am super happy with the product, Just need to tidy everything up once its warm.
-Jordie


")


 what have you done to it ? or have you kept it mostly stock ? I have a 01 S2000 myself so always excited to see another GJ member with the JDM enthusiasm