To avoid these ads, REGISTER NOW!

Modest Mazda Mess - 32x40 in Colorado

snoname

Member
Joined
Dec 19, 2014
Messages
13
Location
Windsor, CO
odVAEX8.jpg

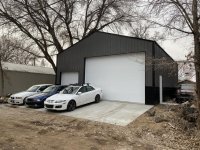
Very long time lurker, first time poster. A bit of background on me, I went to Virginia Tech and was involved in the Car Club before graduating and moving out to Colorado. When looking at property out here, my priority was minimizing my commute and (ideally) getting enough land to eventually build a shop tailored to my needs. Managed to get a place a mile from work and started dreaming about a shop; three years in, was fortunate enough to have the opportunity to start building the dream.

Haven't done a build thread for anything in a while, and kind of missed how forums allow information to be shared and progress documented... So here goes. I'll update this post with direct links to milestones/significant progress, so please don't feel bad commenting, asking questions, or derailing the thread with tangents!
 
Last edited:
To avoid these ads, REGISTER NOW!
OP
S

snoname

Member
Joined
Dec 19, 2014
Messages
13
Location
Windsor, CO
Having no family in Colorado, and knowing nobody who had been through the process of building a shop, I really didn't even know where to start with the planning process. My process took a long time, but yielded the results I wanted, so I've written it down in case anyone researching for their project is interested in some sort of starting point:

1. Figure out the dream, assuming no limits.
2. Determine wants and needs for optimizing the space.
3. Research local ordinances and allowances for building to clarify feasibility of project.
4. Research types of buildings and pros/cons of each for my specific situation.
5. Re-evaluate and clarify wants and needs, decide on specific details.
6. Design within constraints of research from step 3.
7. Research local builders and shop for quotes.
8. Meet with builder onsite and clarify scope of work and expectations.
9. Let the builder do their thing.
10. Enjoy the space.

In an ideal world I'd have loved to do more of the building myself, and that may be the route I go in the future if I build another, but what ended up working out for my situation was letting a local contractor with 25+ years in the industry build the shell for me. Fully turn key didn't make sense to me, because without having the space in front of me, I had trouble deciding how I would best use it.
 
OP
S

snoname

Member
Joined
Dec 19, 2014
Messages
13
Location
Windsor, CO
(Steps 1-3)
I'm the first to admit I have too many projects, especially when it comes to vehicles. This factored heavily into the dream, the wants, and the needs. The second major factor was that I have three pretty good size pups (two that weigh in around 70lbs and one that's around 110lbs), so I wanted to keep as much backyard as possible for them. The last major factor was property size and maximizing added value from improvements.

A bit more background on the property, the lot measures 50' wide by 190' long, and the house is situated on the north end, with alleyway access to the south end. Local ordinances dictated a minimum 5' easement on either side of the property and 10' setback from the front or rear property line, and required a site survey if a proposed structure was within 12" of a required easement/setback.

The magic number I came up with, taking everything into account, was a target of 1400-1500sqft of covered space. Because the property already had a one car garage by the house, I had to evaluate my intended use even more carefully to determine if I'd leave it up or tear it down to get to my target footage. After considering the minimum easements and setback, I decided I wanted to have the new building start 20' back from the property line (to allow parking the full width of the property), which then led me to decide to do a smaller building and leave the little garage up.

At this point, I knew I'd target ~30'x40' for the new building, and started researching my options.
 
Last edited:
OP
S

snoname

Member
Joined
Dec 19, 2014
Messages
13
Location
Windsor, CO
(Steps 4-8)
I tend to suffer from analysis paralysis. After deciding on size, it took me another year of researching and weighing pros/cons to determine the type of building I wanted to do. For the size I wanted to do, cost per square foot came out to nearly the same regardless of pole barn, stick built, or metal building. I ended up picking pole barn style construction because it best met my wants and needs, and in my eyes gave me the most flexibility on design. I also knew I would be able to work with a truss engineer at my company and do fully custom gable and intermediate trusses that exceeded local code requirements.

With a general idea in hand on what I wanted, I started shopping around for contractors and bids.

Screen Shot 2019-10-02 at 22.55.49.jpg

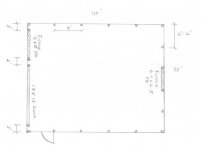
I ended up finding a local company, Clark Enterprises Construction, who was willing to work with my needs, within the right budget, and on a reasonable timeline. I spent a fair amount of time going back and forth with my contractor, Taz, before getting to the design I ultimately wanted to pursue.

Screen Shot 2020-03-22 at 02.36.55.jpg

After talking pricing and specifics with Taz, I decided against just framing openings, and we agreed to do two garage doors (8x8 and 18x12), two walk doors, and two windows. We set a timeline for site prep that I'd be doing, and applied for permits, not knowing exactly how long it'd take to have them in hand and be able to start building
 
OP
S

snoname

Member
Joined
Dec 19, 2014
Messages
13
Location
Windsor, CO
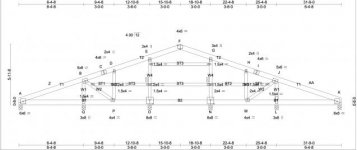
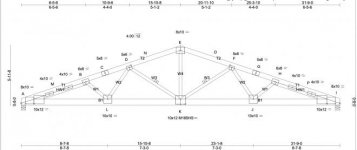
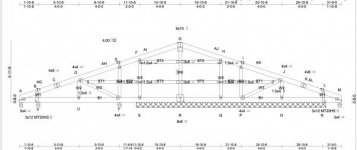
Kind of a neat thing (at least in my eyes), was able to do fully custom trusses for my odd north/south gables that properly distributed load on the custom spaced posts. Unless someone else ends up doing the same odd layout as I chose, these may never be built again.

North gable (facing the house):
Screen Shot 2020-03-22 at 02.50.25.jpg

Intermediate trusses:
Screen Shot 2020-03-22 at 02.50.51.jpg

South gable (facing the alleyway):
Screen Shot 2020-03-22 at 02.51.15.jpg
 

oilfieldtrash4

Well-known member
Joined
Oct 5, 2012
Messages
490
Just curious why you went pole barn vs other buildings? I'm looking into something similar sized. Is that a room or two at the back of the building? What are the costs looking like? Thanks
 

tylerg1

Well-known member
Joined
Mar 28, 2014
Messages
173
I look forward to this thread, also want to see interior pics!
Love the details!


Sent from my iPad using Tapatalk Pro
 
OP
S

snoname

Member
Joined
Dec 19, 2014
Messages
13
Location
Windsor, CO
Just curious why you went pole barn vs other buildings? I'm looking into something similar sized. Is that a room or two at the back of the building? What are the costs looking like? Thanks

Long story short, for my needs and goals with the building, it made the most sense. A bit more background on me, my degree from VT is in Sustainable Biomaterials with a concentration in Residential Wood Structures so stick built and post frame (pole barn) construction are in my wheelhouse. Costs for stuff out in Colorado are definitely on the high side, and contracting out pretty much all the work hasn't made things cheaper.

Contract was for ~$30k on the building with me providing lumber/trusses (contractor provided all labor, site leveling and prep including dirt work, all other materials including windows/doors installed) and ~$6/sqft for concrete (5", 4000psi with fiber mesh reinforcement, finished surfaces, and control joints cut). I'll be posting pics of the building process here in a few min.

I look forward to this thread, also want to see interior pics!
Love the details!

I appreciate it, I'll keep putting up a lot more pics an info in a few min :beer:
 
To avoid these ads, REGISTER NOW!
OP
S

snoname

Member
Joined
Dec 19, 2014
Messages
13
Location
Windsor, CO
(Step 8.5)

Started prepping the site because permits came in quicker than expected. Basically had a week to clear the back of the property, prune my tree, tear out the fence and chicken coop, etc.

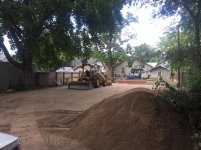
First part of cleaning was reorganizing - I stuffed a car and a motorcycle into the little garage by the house, and then shuffled six cars and a trailer into the driveway (August 21, 2019), leaving another motorcycle on the back patio and very little around back. Logically, I bought another motorcycle three days later on August 24th. A week later on August 31st, took one of my Miata parts cars to a buddy's house and cut it in half (the back half will eventually become a trailer). This first picture is September 4th, when I started the process of pruning the tree and had cleared out most of the space behind the fence

1 - Tree Pruning and cleaning.jpg

On September 17th, after cutting down two car haulers' worth of branches that were either dead or would be in the way, I moved on to the fence and tearing it out.
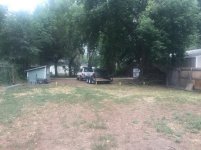
2 - Fence down.jpg

September 19th (Thursday), I found out the plan was to start moving dirt over the weekend, so I loaded up the second car hauler's worth of branches and started looking at the chicken coop and worrying about getting it done.

2.5 - Fence out tree pruned.jpg

Tearing down the chicken coop proved to be a bigger undertaking than expected, and while I got a lot cleared out, I wasn't able to get everything moved as planned.

3 - Chicken Coop demo.jpg

Did, however, get to see some cool stuff like an antique mattress frame that a tree had grown through.
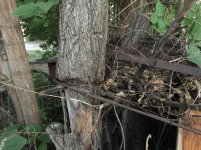
4 - Bedframe around tree.jpg

The next morning, September 20th, heavy equipment arrived and helped move the chicken coop roof, and mentally prepared for actual building progress to start...
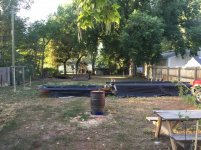
5 - Lumber and equipment delivered.jpg

So, September 20th, before heading in to work, I did the ceremonious breaking ground and the project officially started!

6 - Official breaking ground.jpg
 
OP
S

snoname

Member
Joined
Dec 19, 2014
Messages
13
Location
Windsor, CO
(Step 9)

By the time I got home from work on September 20th, a good bit of dirt had been delivered and moved

7 - Dirt work 1.jpg

On September 24th, the post holes were dug and concrete footers poured.

8 - Dirt work 2.jpg

September 25th I took delivery of another half Miata, which I'll eventually use for a right hand drive conversion :canadian: Not relevant yet but will show up in pictures eventually :lol2: September 28th, however, the contractor was back and posts went into holes... that's probably when the magnitude of the project really hit.
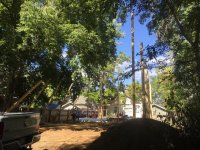
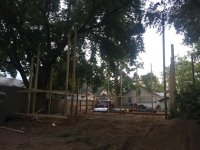
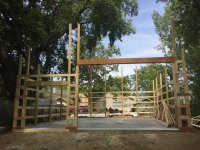
9 - Posts in holes.jpg
10 - Posts 2.jpg

The garage size started to click when they cut the posts on the sides

12 - Posts 4.jpg
14 - Posts trimmed.jpg

The guys called it quits for the weekend and worked on a few other jobsites, which was fine by me given the amount of progress that had been made in a week.
 
Last edited:
OP
S

snoname

Member
Joined
Dec 19, 2014
Messages
13
Location
Windsor, CO
(Step 9, continued)

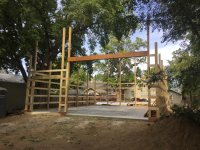
On September 30th, the last posts went up, and mud board went up for concrete work to be able to start.

15 - South wall posts.jpg

16 - Mud Board in place.jpg

October 1st, I came home from work to see that the final flat work had been completed in preparation for the concrete pour, which I was told would start before the weekend...

17 - Flat work done.jpg
 
OP
S

snoname

Member
Joined
Dec 19, 2014
Messages
13
Location
Windsor, CO
(Step 9, continued)

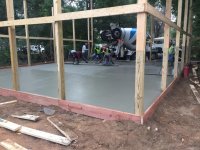
Sure enough, at 7am on October 3rd, the concrete guys were at the house and getting to work!

18 - Concrete pour starting.jpg

19 - Concrete poured.jpg

20 - Concrete skimming.jpg

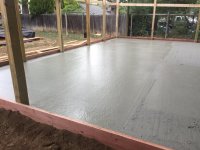
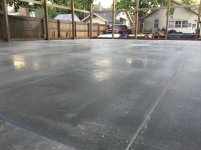
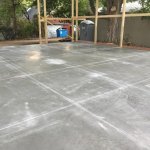
I was incredibly pleased with the work done by the concrete contractors, and wouldn't hesitate to recommend them to anyone local looking for finished concrete work, their name is Red Willow Construction. When I came back at the end of the day I was super pleased to see the finished concrete, relief cuts and all...

21 - Main slab pour done.jpg

22 - Concrete finished.jpg

23 - Relief cuts done.jpg
 
OP
S

snoname

Member
Joined
Dec 19, 2014
Messages
13
Location
Windsor, CO
(Step 9, continued)

Two days later, October 5th, the contractor was back to work on site. Headers were put into place for the garage doors, the girts were finished up all around, and trusses were picked up from my work and delivered to the house.

24 - Door headers and girts done.jpg

25 - Trusses delivered.jpg

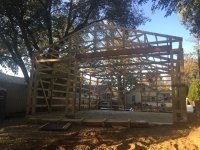
On October 14th, I got pictures of more progress (I was out of town). Was exciting to see the trusses swung and braced, mud board cut, and windows set in place, because it was finally starting to take its final shape :beer:

26 - Trusses swung.jpg

27 - Windows in mud board cut.jpg
 
OP
S

snoname

Member
Joined
Dec 19, 2014
Messages
13
Location
Windsor, CO
(Step 9, continued)

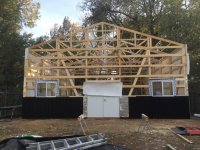
The next day, October 15th, it was time to start sealing up the building and setting in the entry doors. Wainscoat and doors went up first, with radiant barrier going up behind the siding/roof. This all happened fairly quick, and was done within two days of starting.

28 - Wainscoat done some vapor and side.jpg

29 - Back doors in.jpg

30 - West side mostly done.jpg

31 - Roof done, most siding done.jpg

32 - Siding fully done.jpg

33 - Siding fully done rear.jpg
 
OP
S

snoname

Member
Joined
Dec 19, 2014
Messages
13
Location
Windsor, CO
(Step 9, continued)

With the shell only missing garage doors and otherwise wrapped up, we made the call to delay on the doors because of an incoming storm.

The original plan for the rear facing apron was to just do 4' long, the width of the building. At this point, it didn't make sense to cut any corners, and plans had to change accordingly. The grade leading up to the building would have been way too steep for the cars I enjoy, so a ton of math led me to change the plan for the apron, and effectively do a building width driveway. To get to an acceptable breakover point at the garage threshold, we extended the apron from 4' long to 15' long. This got staked out on October 22nd, and poured on October 23rd.

34 - Rear apron extended for breakover.jpg

35 - Rear apron poured.jpg

We covered all the exterior concrete aprons with curing blankets for a few days, and I was beyond thrilled with how they turned out once we pulled the blankets off on October 31st.

36 - Curing blanket on apron.jpg

37 - Curing blanket on apron rear.jpg

38 - Curing blankets off.jpg

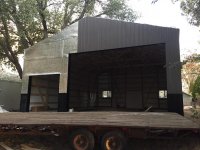
November 1st, the garage doors were installed, and November 2nd, I finally was able to make some space in the driveway :3gears:

39 - Doors installed.jpg

40 - First cars in garage.jpg

In terms of construction and physical progress, I hate to say it, but that's as far as we've made it through today. Next up will be the electric, which has been its own headache from day one... :Violent:
 
To avoid these ads, REGISTER NOW!
Top Bottom