To avoid these ads, REGISTER NOW!

Mopar / Wood Shop Cave

OP
M

moparfreak

Well-known member
Joined
Jan 24, 2005
Messages
853
Location
Milwaukee, WI
Some more updates as I creep closer to a finished product...

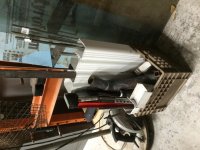
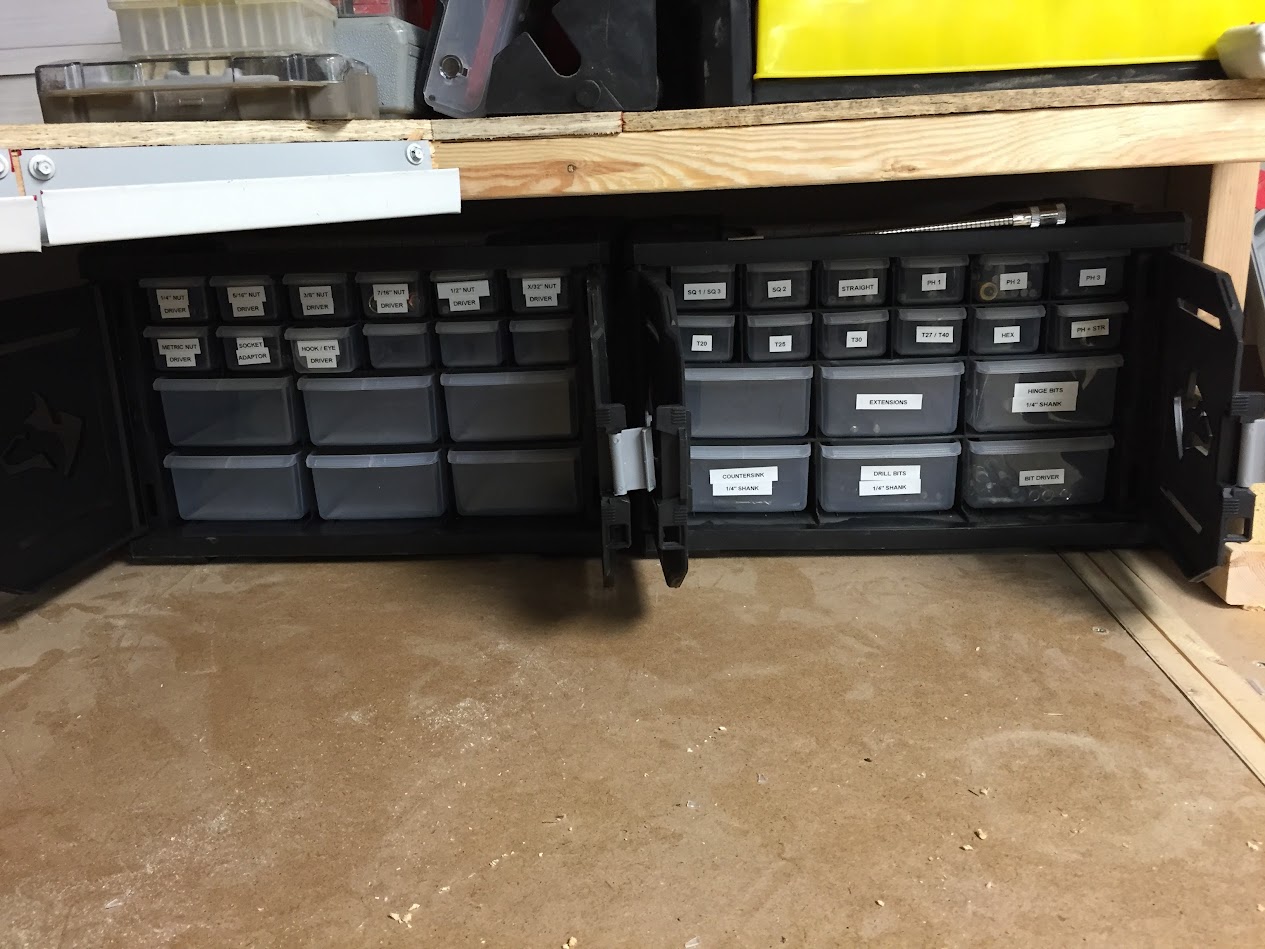
Finished up the last lower shelf. Ended up being a lot of great storage space. I plan to integrate some clever purpose-built storage schemes and solutions down in that lower space. more to come on that....

16375213240_b0245924ab_z_d.jpg


Next, before building the hutch on top, I wanted to get the BenchJaw vise installed, just to make sure there weren't any fitment things I might come across. I'm glad I did, as I changed the plan somewhat...

Using their supplied corner mounting bracket, the vise sits right on the corner edge. I wasn't quite so happy with that, as it crowds the bandsaw that is next to the bench, and if I ever choose to use the extension jaw, it might run into the hutch behind it. That got me thinking to maybe move it in-board about 8".

Here it is on the corner:

15942481393_494c51384d_z_d.jpg


and here is the proposed location which I liked better. I figure w/ 18' of bench length, losing 8" won't hurt:

16376379969_c1aaa285a5_z_d.jpg


Here's the bracket, which I'll rotate:

15942481103_43b6760d1a_z_d.jpg


and need to cut off one of the flanges:

15940100984_20f9bb413b_z_d.jpg


BTW, sidebar. I used the Dual Saw CS650 (6.5" blade size) to cut the flange off. I know it looked gimmicky but after some youtube videos and reviews I decided to take the plunge and get one and boy am I glad that I did. It powers through anything and everything I've tried to cut. Would have taken 4X as long and probably a few grinder wheels to make that cut, and it wouldn't have come out nearly as clean. Definitely a positive review on this unit as an all purpose cutting machine, with better capacity and capability than an angle grinder:

15940100814_82328b54a5_z_d.jpg


Here's the bracket screwed onto the bench after modifications were complete:

16376743517_7a79b1a28a_z_d.jpg


and here's the final product:

16562677715_73fc3de122_z_d.jpg


Overall I'm quite happy. The usability of the vise is really nice w/ the foot pedal and quick jaw movement considering its 16" capacity. An add on extension jaw can increase that to 24" I believe. I think moving it over 8" gives it sufficient clearance from the nearby bandsaw to increase usability and ergonomics. Tonight I hope to start working on the hutch.

16562677595_fdb1b591a1_z_d.jpg
 
To avoid these ads, REGISTER NOW!

dusterbd13

Well-known member
Joined
Mar 19, 2014
Messages
74
Location
Albemarle nc
as a guy that is embarking on a major overhaul of his auto restoration/classic car storage/woodworking shop, thanks for the read.

you had me at mopar, by the way. if you cant figure it out by the screenname.....


and thanks for the ceiling idea. any reasons not to do it that you can think of?

Michael
 
OP
M

moparfreak

Well-known member
Joined
Jan 24, 2005
Messages
853
Location
Milwaukee, WI
Michael,

Regarding the ceiling, due to the awkwardness of the metal sheets, you need to make sure you have a drywall lift and a couple buddies that can dedicate a Sunday or two to helping you get it up. The nice thing is putting the panels up, they are not terribly heavy and won't destroy you physically like it would to put up 100 sheets of drywall. Just awkward due to their length and floppiness. Once you get a couple screws in they don't go anywhere.

Good to see another mopar fan on the page...stay tuned, hope to bring the charger to its final destination once the weather turns warmer. Then maybe this will become the shop/mopar build thread.
 

dusterbd13

Well-known member
Joined
Mar 19, 2014
Messages
74
Location
Albemarle nc
cool. working on the shop around my dead mopar at the moment. need to finish a couple of cars before I can get back on the shop (one of which is my truck that became an accidental frame off) and then the work bay side of the shop before I move the duster over there.

does the courregation cause any difficulties other than mounting lights? weird shadows, etc? any extra noise due to metal vs drywall?
 
OP
M

moparfreak

Well-known member
Joined
Jan 24, 2005
Messages
853
Location
Milwaukee, WI
Noise is not a problem, but I did insulate above it so maybe that helps. I would say the only annoyance would be what you mentioned, the corrugations causing some things to not sit right, and will eventually need some custom attention to clean up properly. With careful planning you can probably get most of your outlets / fixtures / mountings into the flat portions but with existing stuff it will fall out where it will be, so that is the only negative I've experienced so far.
 

188slo50

Well-known member
Joined
Jul 26, 2009
Messages
643
Location
Virginia
I've always was curious about how well them dual blade saws where. How clean does it cut, any sharp edges or does there style need a little cleaning up to make them nice?
 

madoc1

Well-known member
Joined
Dec 11, 2012
Messages
1,242
Location
spicewood, tx
I have heard about those dual blade saws. nice to know they cut metal. where did you source yours from?

jim
 
OP
M

moparfreak

Well-known member
Joined
Jan 24, 2005
Messages
853
Location
Milwaukee, WI
Got mine from Menards. It was easy for me cause I've got a bunch of rebates, but I found the 6.5" model on sale for $70, which is the normal price for the 4.5" model. I think the 6.5" is usually $130 or so. I wanted the extra plunge depth capacity.

I was a bit surprised myself but this basically cuts carbon steel like butter. Kinda pulls itself through w/o much pressure needed, and makes a nicely finished cut, especially if you maintain the cut through one pass. Do a search on Youtube, and the one that convinced me is the guy cutting rather effortlessly through 1/2" plate steel. Check out minute 7 or 8 where he starts cutting:


Angle grinder will win the day for all purpose stuff, handling a wide variety of wheels and cups but for straight cutting its no contest, DS wins on that.
 
OP
M

moparfreak

Well-known member
Joined
Jan 24, 2005
Messages
853
Location
Milwaukee, WI
Some more progress over the past several days...

Built the 12" deep hutch. Kind of designed it as I went along, based on what I had available. The windows kind of break it up a bit so I'm not as pleased with how it looks, but it's improving. Adds a ton of utility and storage:

16625429965_bb059f6fe6_z_d.jpg

Also got sidetracked shredding a tire on the way home from work on Thursday. This was my first chance to use my impact wrench with an AC that can actually back it up. I bought it 13 years ago along with my 4 gal pancake compressor and quickly found out that combo didn't work. It was gratifying to use and spin those lugs off quickly and painlessly...

16625430015_48ddf5feb7_z_d.jpg

Then I got to spend some time on Sunday to get more done on the bench. Built the pull-out lower drawers that was inspired from the Family Handyman article I referenced above. These are AWESOME. Add a lot of great space. I'll eventually add some organization to them, but in general I've got 4 big 40" x 15" drawers now. One for plumbing, one for electrical, one for scrapers and pry bars, and the last one I haven't decided. Came up short on casters so still need to pick a few up.

Built them out of OSB scrap cause that's what I had left over. Just enough for the 4 boxes:

16418139687_4b7cc000f8_z_d.jpg

Took some time also to finally plumb up my shop sink and secure it to the wall, also threw a piece of metal behind it as a sort of splash guard and spruce it up a bit. This is a sink original to the house, to the original laundry room, which I restored the sheetmetal frame and trim and installed new hardware on:

16418140157_2ea7b94daa_z_d.jpg

It's also got a lot of storage below where I can put the cleaning supplies:

16599467046_25dc87cb45_z_d.jpg

16005671043_7aa1a0586d_z_d.jpg

After spending some time cleaning up the area and putting the lower rolling drawers into place, this is really starting to come together and look nice. Such an incredible amount of storage and space utilization too. I'm really happy. More stuff to come on integrating all sorts of storage techniques on the bench, as this is my first custom built shop fixture.

16418139847_7f89d438a7_z_d.jpg

16438254318_798d445968_z_d.jpg

16418139597_5cb3098435_z_d.jpg

Another shop view in one of its more rare "clean" moments:

16599466826_dc6b1baa81_z_d.jpg
 

bj383ss

Well-known member
Joined
Sep 29, 2011
Messages
3,166
Location
TX
The sink looks great. Your workbench area is really coming along.
 
OP
M

moparfreak

Well-known member
Joined
Jan 24, 2005
Messages
853
Location
Milwaukee, WI
Some more slow progress on the shop. I've actually diverted some of my time back into the kitchen. I've got several upper cabinets to do yet, as well as a built-in booth and a concrete kitchen table and desk. Figure it's time to start up on that again w/ the goal of having it completely done by end of the calendar year. I've measured and cut the panels to size for the first cabinet and decided I'm going to stain and finish the pieces before assembly to make to make it easier. Well, that meant I had panels strewn all over the shop, on the floor, sawhorses, rolling carts, etc. Prepping and working on them was really getting to be a pain trying to step around them all. Sanding on one of them got dust onto the finish of the next one. So, I took a few moments to design up a really simple and crude finishing rack for placing panels to dry and not fill up all my floor and bench space.

I had a bunch of leftover 2x4 offcuts, OSB pieces and EMT. Here's what I came up with. Legs:

16148560983_d548ac2cf1_z_d.jpg


Uprights, with holes drilled for EMT. Here they are ganged together while I punched the holes using drill press and cordless drill to finish them off. Not pretty...

16767410972_34612b6906_z_d.jpg


Attached everything together and stiffened somewhat. Cut the EMT to size so I could layer the boards on either side:

16561215077_80622f8fa3_z_d.jpg


Here it is with most of the panels I had laying around on the floor, takes up only a fraction of the space:

16767410632_03fcf40f37_z_d.jpg


Not my best work. But it was quick. Screwed up the holes a bit. If I had installed a table on the drill press and used a proper length bit and taken my time it would have worked a bit better. But it's functional, and I plan to put casters on for better mobility.

The room I created gave me the space I needed to start working on the ShopNotes clamping system referenced in a post earlier. First step was planing down a couple decent 2x4's:

16561217357_c6d39719c7_z_d.jpg


Then routed a chamfer on the front edges of the front rail, and set the TS up for a dado. I adjusted the dado size based on the phenolic I have. The plans call for 3/16" phenolic but I had 1/4" so cut the dado to 5/16":

16767328851_5dfbbfcda2_z_d.jpg


Kinda how they will look once installed to the bench w/ the spacers in between.

16581094180_b30cf806a4_z_d.jpg


Will be out of town most of the week for work, but hope to get back to this later in the week, and through the weekend.
 

bj383ss

Well-known member
Joined
Sep 29, 2011
Messages
3,166
Location
TX
Great idea on the drying racks. Look forward to seeing the clamping system all done.
 
OP
M

moparfreak

Well-known member
Joined
Jan 24, 2005
Messages
853
Location
Milwaukee, WI
Well, didn't get much of anything done during the week since I was out of town, but yesterday was productive. Brought up a lot of my shop stuff from the basement. I'd say about 90% of it is now upstairs so the shop is getting more cluttered but I'm also starting to find all my stuff. So, almost 2 years after moving I'm finally starting to unpack! It's also clearing up major space in the basement which is getting the gears turning now on how we want to finish that space off into a big playroom so more projects on the horizon...

Anyways, not wanting to have too many open projects, decided to push and finish up the ShopNotes Clamping System. Drilled, countersunk and installed the back rail to the bench:

16211433144_b6cf75ecc3_z_d.jpg

My FIL was in today so he pitched in and milled up the spacer blocks. Taking a lesson from the drying rack, all the dog holes and mounting holes were machined on the DP using a fence and stop block. Much better results, obviously...

16647668129_6d39af3be7_z_d.jpg

Made a few more than needed:

16832666472_4a7ffe180a_z_d.jpg

Installing the spacer blocks, just up flush w/ the bottom of the dado groove:

16832666132_1c4cb5c05b_z_d.jpg

16646203398_54ed99959c_z_d.jpg

The front rail is attached using 3-1/2" lags so predrilled and counterbored for those:

16833776605_f98f1041da_z_d.jpg

Clamping the front rail in place, using some blocks to keep things flat:

16646202978_48838e7797_z_d.jpg

Also, cut up a few strips of the 1/4" phenolic that I plan to use for the clamp blocks to make sure that the groove stays aligned and they slide freely during assembly:

16647666419_4f06aa18ee_z_d.jpg

16646414030_434083c8ec_z_d.jpg

And finally, all assembled. Looks fantastic, and it isn't intrusive, only sticks out about 4" further. I plan over the next couple weeks to make a number of different clamp blocks and dog blocks. A few that the magazine article suggests and then a few other ideas I have. I love that magazine and finally I can start building the projects I read about.

16807916266_32a29b5ba9_z_d.jpg


16213829343_d6eac9111c_z_d.jpg
 
OP
M

moparfreak

Well-known member
Joined
Jan 24, 2005
Messages
853
Location
Milwaukee, WI
Well it's been quite a while since I last posted here, but I've been making a lot of progress. This Sunday I finally brought the Charger home to its shop, after more than 2 years parked outside off-site, while we moved houses, unpacked, and then renovated & remodeled.

Jumper cables and a little gas poured down the carb and she fired right up! Quite an exciting moment considering how long it took to get to this point.

Getting the middle bay cleared and ready:

19088496101_edcf13cbc4_z_d.jpg


And here it is brought home and parked:

19088495831_cd8f3dbf06_z_d.jpg


18897505450_4b33d970f9_z_d.jpg


Got a couple feet on either side to move around so not too bad, but it is a little tight. Pretty much rules out my original plan of the Maxjax, but probably will go with something like the Quickjack to still get good easy quick lift capabilities.

Got a lot to go and my list is miles long but also lotsa good stuff to post as the shop is getting more and more usable as I start to build it out. More to come hopefully soon...
 

sublime68charger

Well-known member
Joined
Sep 9, 2014
Messages
5,415
Location
SW Wisconsin
How did it feel to drive the car?

I know after mine sat for 3 years with bad ****** and then brakes I was like a little kid again the first time I got to take the old car down the road.

nice to have the car at home I'm sure.

thanks for the pics
 
OP
M

moparfreak

Well-known member
Joined
Jan 24, 2005
Messages
853
Location
Milwaukee, WI
Yep, feeling like a million bucks despite the usual problems. It actually wasn't too difficult to get it started but it exhibited all of the same issues it had when I parked it. Mainly carb issues. I believe there's a vacuum leak somewhere, and it has a tendency to stall when cold, and also during acceleration. Once it's warmed up, the drivability is OK (not great but OK), it won't stall out at least. Definitely a good bit of work to do. I have to decide at what stage of my project I do this, but this engine will definitely receive sequential port injection in its lifetime.
 

Mickm

Well-known member
Joined
Nov 8, 2006
Messages
156
Location
Louisiana
wonderful build moparfreak!
I am in the same process myself and will start a thread soon.
Like you I am into Mopars and mine will be the "Cuda-Cave". lol.
Keep up and good work and thanks for sharing!

Cheers!
Mickm
 
OP
M

moparfreak

Well-known member
Joined
Jan 24, 2005
Messages
853
Location
Milwaukee, WI
Well, it has been awhile since I updated my mopar shop build, but not because of the lack of progress so I thought it'd be good to catch up the thread.

Did a few interesting side projects for the house, a raised garden bed made of retaining wall blocks to get our veggie garden going, and then I somehow promised a tree house for my sons so that took me a good month of playing around with outside to do, but here we are back into the shop, and I've been cleaning / organizing / making incremental improvements all along the way...

Cleaned and set up the central work station which comprises of the tablesaw, a MDF cart I built years ago based on the Ultimate Tool Stand that is out there on the internet (http://christophermerrill.net/ww/plans/UTS/Tool_Stand_1.html) and a reclaimed table w/ Richlight (super hard!) top. Ultimately I have a lot of plans to add many features that will make it a space for sanding, assembly, glue-up and sheet good cutting. Here it is for now as a seat for my daughter visiting me in the shop:

jlbimU9wRKq17tDqytNKWe_BJisH7_W7rmfFbsezAa5T=w1266-h949-no


Then I finally created some storage for the million driver bits that I could never find, that were piling up. Went for the traditional pull-out bin method, now it's super easy to find what I need and always put it back where it belongs:

bLIXbpPdxtVXXRIeQs80k3h5fXQLG2VBeHauMQ-2KyC8=w1266-h949-no


FL_rNNZFa3jUdgYoT8T4GfAGGR9tLf7sbv_Aui4Q5sPP=w1266-h949-no


and added a plano box for the small bits that don't directly chuck up into the driver:

Gjcn_S1JgmJZq2jD5k1UmTOvhQafm_VvHLjYQfXmkRCn=w1266-h949-no


Xl5o1U47M2tBkqK0kbotff8R5-cW-XbX6W8EZG2LB8eo=w1266-h949-no
 
OP
M

moparfreak

Well-known member
Joined
Jan 24, 2005
Messages
853
Location
Milwaukee, WI
...next gave the bench a good clean...

10w4JMBSGENOTdF6K1vmuItoAb8E2zJGvV5-BRR-hzvg=w1266-h949-no


and I've started focusing in on controlling all of the various sized pieces of wood I accumulate as scraps and for projects. Some of it I built racks up in the attic to hold, stuff that I don't go to as often. But a lot of the smaller stuff I really need to keep down lower and visible, so I know what I have to work with.

It started w/ taking some metal shelving units I had purchased awhile ago from a surgery center going out of business, and created a base for a miter saw station w/ lots of storage for wood scraps of smaller size. This will get more work in the future to add more features and usability (right now it's just a top sitting on it unsecured, no fences):

FAk8cEhWxHatRwqo-E96eV_eSTmZiBdREn_DBXG7CEx3=w1266-h949-no


Then built a couple racks for putting longer wood pieces up high and out of the way.

For solid wood:

ZygeAvj5FAsOBueJy8J9gn6pw5mYeUvLh3lVOcZOvdbD=w1266-h949-no


For sheet pieces:

WKgVWO1SWjAC2N0cftlPbsKVG5T5Rl55UHN1=w1266-h949-no.jpg

Next up is to build a full sheet goods storage cabinet. Here's where I stack my large sheets:

VeDXHFMlTmPa93lLBiX7Fc9uoxJiOZuPm2bYnz3kAr4a=w1266-h949-no


I hope to build something sort of modeled off of this in the very near future, as I think I can make it fit most of the rest of my wood scraps taht are sitting on the floor:

287515-438x.jpg


[Credit for this design goes to the owner of this page: http://lumberjocks.com/projects/62998]
 
To avoid these ads, REGISTER NOW!

BBSkylark

Well-known member
Joined
Nov 9, 2013
Messages
93
Location
Niagara Region, Ontario
Your space is amazing, I aspire to one day make my shop into something similar to yours. Great job with everything!

Can you give me some information on how you mounted your 4' trough lights externally to the ceiling? I have three of those lights and plan on a similar setup on a steel ceiling like yours.
 
OP
M

moparfreak

Well-known member
Joined
Jan 24, 2005
Messages
853
Location
Milwaukee, WI
Those lights were reclaimed from a university building, I believe they went into a grid ceiling originally. In any case, there is not much to installing them. I didn't do the install myself, the electricians that wired up the shop / kitchen remod did it, but really all they did was drive polebarn screws through the frame up into the ceiling joists. In most cases, they rest across those ribs in the steel sheeting, which to me isn't a big deal. I suppose to be a perfectionist, one could make perfect fitting spacers so that the lights are sitting against a fully flat surface, but that's not quite the MO for this shop, and they are plenty secure.
 

shortykorte

Well-known member
Joined
Sep 1, 2014
Messages
8,039
Location
Tallahassee, Fl
Thanks for the link on the ultimate work bench. Another to-do item to add to my list. What kind of table saw and fence do you have? Are you going to have a dedicate miter saw station versus using the ultimate bench?
 
OP
M

moparfreak

Well-known member
Joined
Jan 24, 2005
Messages
853
Location
Milwaukee, WI
Thanks for the link on the ultimate work bench. Another to-do item to add to my list. What kind of table saw and fence do you have? Are you going to have a dedicate miter saw station versus using the ultimate bench?

It's a Craftsman cabinet saw that I got about a decade ago. It's got a single phase 1.5 hp motor which is not powerful enough but certainly serviceable for most things. The fence is biesemeyer but I'm not sure I'm a big fan of it, I'm not really a fan of the locking mechanism for that style fence. I think it's one of those that retailed for 899 or 999 but I know with some deals and coupons I got for the low 700s. I expect to be replacing it w/in the next 5 years with a Sawstop, cause I like my fingers right where they are. But, those things cost so much so I gotta save for it.

As far as miter saw, I'll be building a nice station for it with a top, dust collection, permanent fence, clamps and stops, etc. Those metal wood storage shelves will be used as a base to work from but there will be a lot of structure added.

The Ultimate Tool Cart used to serve as my miter station in my old shop, and I have the fences for it, but I just find that the UTC is more useful as a nice open table for assembly & general work. Those slots that you see in the top of it accept the typical metal Jorgensen style "F" clamps, of which I have dozens, and is really great for securing work. It's just a smart design. It was a b*tch to build though, and I tried to cheat by skipping the torsion box on the bottom and instead sandwiched the MDF. That was a stupid rookie mistake, which I fixed by bolting two pieces of 8' long 4" steel channel on the bottom, and since then it doesn't sag one bit!
 
OP
M

moparfreak

Well-known member
Joined
Jan 24, 2005
Messages
853
Location
Milwaukee, WI
Have started working on the sheet goods holder, as once I get it done it will help me get a lot of clutter put away.

Cleared the space out, took some measurements and built the base. The RH side is where the big full length sheets will sit, so I wanted that base to be slippery for easy sliding, so it's got a melamine floor. I'll also be putting a roller down right in front of it, but that comes last...

bvbxRVZHjN51LIjZA-94RrHfz_NdXtz6gs47pxEu7mMq=w712-h949-no


Then spent some time building one of the dividers. This will serve between the full length and 1/3 length sheet portion. Ripped the shelves and pre-attached. Ran out of time, so I haven't built the top yet, which will allow me to secure it at the right distance from the wall.

BdXSTD7YVAKRrBWBHD9InNXlYIHkSDR2r69-9RddlMgu=w712-h949-no


Next comes the top, and then the second dividing sheet.
 

NedNorton

Well-known member
Joined
Jul 14, 2012
Messages
608
Location
Colorado, USA
Wow! What a transformation. I like the drying rack a lot. I think that it just made the project todo list.
The sheet goods storage is a must. Your's looks like a fixed version of the one I built for the shop. It made me more organized and more productive.

It took this...
ca720b9c-56f8-4eb3-8d76-3d4cb3eda478_zpspt4wp0ag.jpg

And turned it into this...
f1948621-909b-4701-ab22-35a09312d07d_zpsbqy0c9m5.jpg

I painted it to match the walls so it blends in...
a82d3c8b-65ad-4f65-9d9e-52cfaaa5814a_zpsaweqrfgf.jpg

Keep up the good work. The shop looks great! :beer:

Subscribed.

Cheers,
Chris
 
Last edited:
OP
M

moparfreak

Well-known member
Joined
Jan 24, 2005
Messages
853
Location
Milwaukee, WI
The way you camouflaged that cart into your wall scheme is freakin awesome! I would be nervous that it's be a little top heavy but I am fortunate to have a nook for it to go.
 
OP
M

moparfreak

Well-known member
Joined
Jan 24, 2005
Messages
853
Location
Milwaukee, WI
Made some good progress last night on the sheet goods holder. Cut the top piece and put some grooves in it to aid with alignment of those large dividers:

_uMJ_UAtX_sZTTZoFlwiVocSzkSytaqjXolL7=w712-h949-no.jpg

Then capped it off with the end panel which I originally was going to do in standard plywood, but then decided to do with a sheet of 1/4" pegboard that I had around, as it would give me a great deal of additional pegboard storage for lots of little things:

Xkt7iipGWLHWjW6csB2UrjSzNAccMwm66pD-4=w712-h949-no.jpg

It's not as rigid obviously as a plywood panel but with it being secured in several places and once the back is put on, it will be certainly rigid enough for this purpose.

Then the exciting part, starting to fill it up!

GwMGj3t-yuBsgddO-K2OzcKov-Gf29zwjwg24=w712-h949-no.jpg

RuPsvfAelCQWzLRcU556G0OBMVItpFVcB3SfY=w712-h949-no.jpg

Mt4VF1RK-oLFvFF3oPviz9CeLDfJjfPmd26G6=w712-h949-no.jpg

sZI1H4EQ19cg8OnItVkb12HGkUnHp-ZL6-WGv=w712-h949-no.jpg

This weekend I'll work on totally filling it up and really getting all my wood scraps under control, and starting to populate the pegboard. Need to cut and install the backing sheet, but I can't do that till I get in my M18 right angle driver that I ordered (only 6" of clearance there, perfect for this tool). Still have plans to install a roller on the floor to help the 4'x8' sheets slide better, and also going to stack up some PVC tubes in that little 6" space to be able to collect more odds and ends.
 

shortykorte

Well-known member
Joined
Sep 1, 2014
Messages
8,039
Location
Tallahassee, Fl
Looking good. I like how you did the area for the partial sheets. Here's mine. I might have to redo now since my partial sheet area only holds 2ft deep pieces. (Full sheets are put in on left side of shelf.)
 

Attachments

  • image.jpg
    image.jpg
    143.8 KB · Views: 151
OP
M

moparfreak

Well-known member
Joined
Jan 24, 2005
Messages
853
Location
Milwaukee, WI
Looking good. I like how you did the area for the partial sheets. Here's mine. I might have to redo now since my partial sheet area only holds 2ft deep pieces. (Full sheets are put in on left side of shelf.)

Yeah, the 4' deep smaller size slots have come in real handy. Have two half sheet slots and 3 1/3 slots and I end up stacking stuff up in them pretty good. My only problem right now is the rack is about 70% full yet I've still got a lot of boards to bring upstairs from basement storage. I believe I'll still need to put at least one more overhead rack of some sort, or start throwing some of the wood up into the attic.

Once it's full up I'll get some decent pics up. Now that the wood is getting more under control, I'm trying to get the shop clean and organized to be able to start up on more kitchen cabinet work that has been long overdue...
 
OP
M

moparfreak

Well-known member
Joined
Jan 24, 2005
Messages
853
Location
Milwaukee, WI
I had an idea for the small 6" section between the rack and the nearby cabinet. Wanted to use it for skinny long stuff, 2-1/2' - 4' long pieces, so I cut up some cheap plastic downspout. Used two sizes, 2"x3" and 3"x4" and using the 3" dimension on both of them I can fit two sizes in there side by side. Set at an angle, it works nicely for sorting these type of pieces:

Co-AXbLpq-jIly3UdlmBcencalAE0WlAoSmdZqpkVOAP=w480-h640-no


EXjnybvJbJ-CGn37v3NBNSCKxk_p_mzsoCQSZoiK9Cxd=w480-h640-no
 

Lyndon

Well-known member
Joined
Aug 11, 2014
Messages
2,535
Location
Sydney, Australia
I had an idea for the small 6" section between the rack and the nearby cabinet. Wanted to use it for skinny long stuff, 2-1/2' - 4' long pieces, so I cut up some cheap plastic downspout. Used two sizes, 2"x3" and 3"x4" and using the 3" dimension on both of them I can fit two sizes in there side by side. Set at an angle, it works nicely for sorting these type of pieces:

Nice work. :thumbup:

How did you attach the down pipes to each other, and then the wall? :dunno: Glue?

Nice work you've got going on there.

Lyndon
From Far far away in sunny spring time Sydney.
 
OP
M

moparfreak

Well-known member
Joined
Jan 24, 2005
Messages
853
Location
Milwaukee, WI
Nice work. :thumbup:

How did you attach the down pipes to each other, and then the wall? :dunno: Glue?

I installed a couple pieces of wood at the bottom into the sides set at the angle I wanted, then the rest of the downspout cutoffs (2.5' each) simply set in there and friction keeps them in place, they don't move at all. No glue, no fasteners, easily adjustable. Probably wouldn't pass the Norm Abrams shop standard, but y'know?

Spent some more time in the shop yesterday, trying to get it ready for more kitchen cabinets, and wanting to focus on getting a few tools reset and squared away:

I recently purchased the Porter Cable pockethole jig. So far everything I've done is using the smaller hand-held Kreg jig, and it works just fine but for the stuff I've been building for the house, so far, I've been doing a million individual setups. So, in looking at both the fixed Kreg jig (K5) and this P-C, I ended up going with the P-C based on video reviews, and so far it's pretty freakin' awesome. It's very smartly designed, and there's simply no setup to do. It auto-adjusts to the piece you're clamping, and also indicates the proper screw length to use. On my old Kreg hand held jig, I had to add or delete spacer blocks each time depending on if I was doing 1/2" or 3/4" or 1-1/2" and then even thin still always do test cuts. Now, it just works....

Anyways I wanted to set up a little portable station that would support longer workpieces, so with some scraps threw this together...

Started with a piece of ply, turned it into a base with two folding wings, and added 2x material on the ends to serve as the outfeed support (the jig is sized so that a 2x4 can be placed on the other side of the bench as the support piece).

_2b1BmvJFDttA0Pyxw2ohJvuHLUubt2fLr2FYgscy160=w1266-h949-no


Then added the jig, and it folds up nicely for storage under the workbench, but can easily be brought up and clamped down.

AXi1QijL5WzJyC4AcRMDvG1j88YVCPJN102j_58RedOr=w712-h949-no


qdzG3mQ5IWvZEJA87B4XypdEVWc4kpVnB0Vvg-j7V21P=w712-h949-no


Then started focusing on the tablesaw. Since the shop move and setup, I haven't been real happy with how it's setup, it needs some tuning. First issue is actually how I have it set up with the outfeed. It has a fold down metal outfeed table but it's cheap and chintzy, and I generally like to use a larger surface, so I've been using the UTC / Assy table that I built awhile ago and that is a nice setup, but unfortunately during the move, one of the caster blocks got blown off, and since then it's been sitting on a furniture dolly, which has raised it up ~1-1/2" or so, which makes it so it sits above the tablesaw surface on one end and made long cuts rather difficult / unsafe to manage. Time to correct that. With all the MDF and steel, this thing is heavy (500 lb+), I can't even tip it onto it's side by myself, so found a good use for my HF aluminum jack.

Nvi4HhOFQGiyu8qqdPHwFdq21IwXYheJcs-6WwReugTf=w1266-h949-no


56xbajwutTrLF6VSkapcBa9ucQ6C-Wy2W9b2uQ9_jr83=w1266-h949-no


Now material will slide propely, with the UTC being about 1/4" below the tablesaw. Good enough for me. :thumbup:

GKihNlHtXP6ywSTBNehmDlKWGgffQyk93SazHO6Qpq6j=w1266-h949-no
 
OP
M

moparfreak

Well-known member
Joined
Jan 24, 2005
Messages
853
Location
Milwaukee, WI
Some more slow progress on the shop the last week or two. I've been having issues w/ my tablesaw recently, where the insert plate (metal one that came w/ the saw) has a wide opening, has a significant bow in the middle of it, and has been resulting in sometimes having a good deal of tearout on nicer plywood panels that have a thin hardwood veneer on them such as maple or birch. Since I'm going to be doing a couple more cabinets to finish off the kitchen this winter, I wanted to get the saw cleaned up and in tune, which includes making new zero clearance insert plates to resolve the tear-out problems I've seen.

Took some scrap plywood, traced the old plate onto it and used the bandsaw to cut it close to the line, then finish off at the belt sander.

IMG_3533.jpg


IMG_3534.jpg


Fits good, but isn't quite flush, so add some flat-head screws on the bottom to be able to space it up flush w/ the table.

IMG_3536.jpg


IMG_3537.jpg


Now it's matched. I didn't realize that the plywood scrap I grabbed actually had a bow in it in the middle, which makes it difficult to be perfectly flat near the center so I'll probably make another one soon, but it's much better than before.

Last step is to raise the blade up into the insert to make the perfectly formed zero clearance slot.

IMG_3538.jpg
 
Last edited:
OP
M

moparfreak

Well-known member
Joined
Jan 24, 2005
Messages
853
Location
Milwaukee, WI
Finished up a couple little side projects last night as my shop OCD continues to drive towards mad crazy organization of all my stuff.

Been looking for a good way to hold all the various rolls of tape I have laying around. Decided to use EMT (cause I love working with that stuff, super easy to manipulate and re-purpose) to make a vertical rack. I've seen something similar done w/ wood dowel, but I have lots of leftover 1/2" EMT so this one was free.

Took a clean 2x4 scrap, cut to length and set up for drilling the 11/16" holes on the DP.
IMG_3552.jpg

Then cut 5 10" pieces of EMT for the tape racks.
IMG_3553.jpg

Hammer them in, try to keep it straight (the hole kind of self centers them anyways.
IMG_3554.jpg

Mounted on the wall, looks great and holds a lot!
IMG_3556.jpg

Also finished up a rack to hold all of my tubes of caulk and adhesive up high, organized and out of the way of things. Over the years of having projects and all the leftover material, it was filling up an entire shelf of space in my cabinet. Saw a similar type of idea in Family Handyman magazine awhile ago and scaled it a bit larger and added some hangers for all the miscellaneous caulking tools and it turned out pretty nice.
IMG_3558.jpg

IMG_3559.jpg
 
Last edited:
OP
M

moparfreak

Well-known member
Joined
Jan 24, 2005
Messages
853
Location
Milwaukee, WI
Some more minor stuff going on in the shop, finally put up some of free shelving to hold the crates that I use to hold my shop magazines. I have some Popular Woodworking, Family Handyman, WOOD and Woodsmith magazines up there.

IMG_3631.jpg


I've also got most of the ShopNotes catalog, but those are going right on the workbench since they are near and dear to my heart (I was sad when they stopped it last year, still very dismayed by it all...).

Also repurposed a little hanging wire basket I salvaged from somewhere and popped it onto the second level of my workbench, and made a little place for my utility knives, folding knives and scissors to reside.

IMG_3632_1.jpg


More little improvements to come.
 
Last edited:
OP
M

moparfreak

Well-known member
Joined
Jan 24, 2005
Messages
853
Location
Milwaukee, WI
Had a bunch of garden hoses that I started wrapping up for winter storage. Looked at a few different things around here and the internet and couldn't find anything I liked that was cost effective, and then saw some pretty interesting ideas cantilevering out a piece of wood, w/ swiveling hooks. Decided to take that idea and make it even simpler.

Took a scrap piece of EMT conduit. Bent a 45 and drilled in 3 places on the short leg.

IMG_3771.jpg


Then I installed it on one of the solid header lams across the middle of the shop, so it's in there solid. I tie up my hoses using either solid insulated wire, or the velcro strips in two places. Then I just use a carabiner link to hang it up neat and easy. Keeps it accessible but also out of the way, and I don't have to take up a lot of shelf / cabinet space for the 200' - 300' of hose that I have collected over the years.

IMG_3772_1.jpg


IMG_3773_1.jpg


IMG_3774.jpg
 
Last edited:
To avoid these ads, REGISTER NOW!
Top Bottom