To avoid these ads, REGISTER NOW!

Motorcycle Roadracing Garage

OP
E

ekraft84

Well-known member
Joined
Dec 14, 2010
Messages
336
Location
Michigan
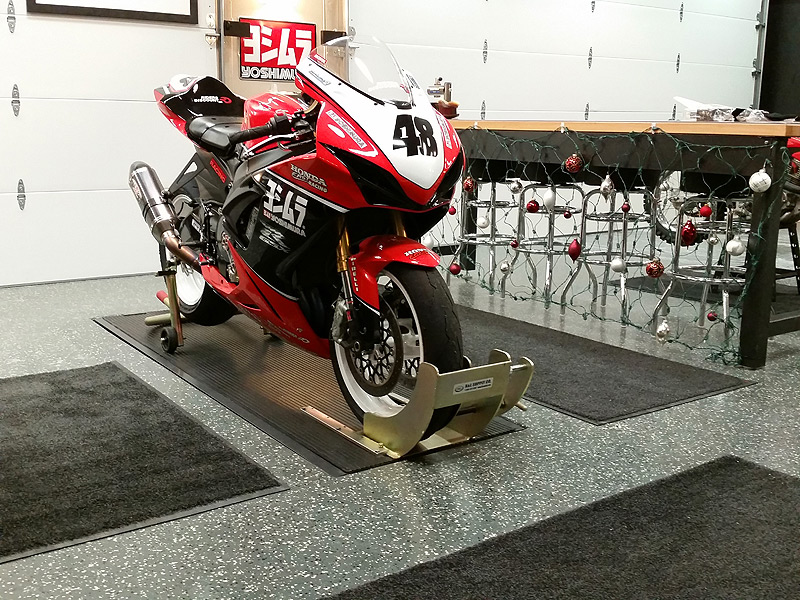
Excellent garage! Can't believe I'd missed it. So many great ideas, and the bikes are awesome too :)

Thank you - much appreciated.

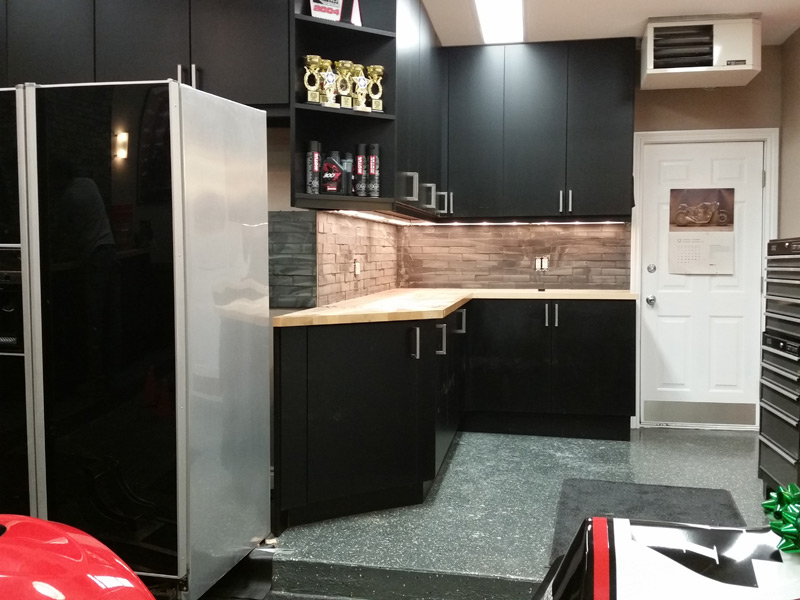
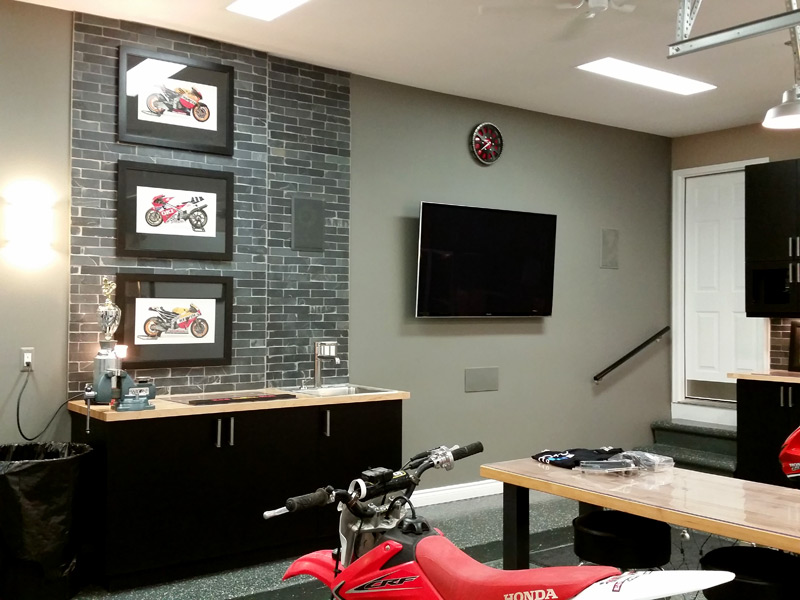
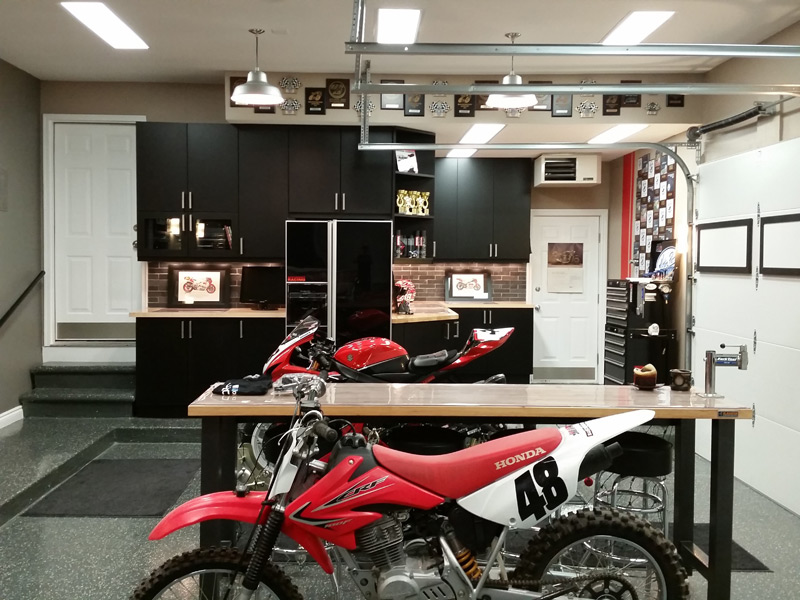
Love how clean all those changes are, my kind of shop.

Indeed. We have similar taste.

Oh man. Now I REALLY want to mount some lights in the ceiling and connect them to the circuit boards for the openers. That looks so clean. I really dislike how I have mine now.

The wiring for the openers looks great! I am in no way OCD, I was just messing with you on the wiring. (I do that to my OCD friends a lot.) Mainly one of my friends,I send him pictures of my messy work bench to make him cringe.

Your place looks killer. I should hope mine turns out as clean and usable as yours. Thanks for sharing.

It was definitely worth it. And really, pretty simple.

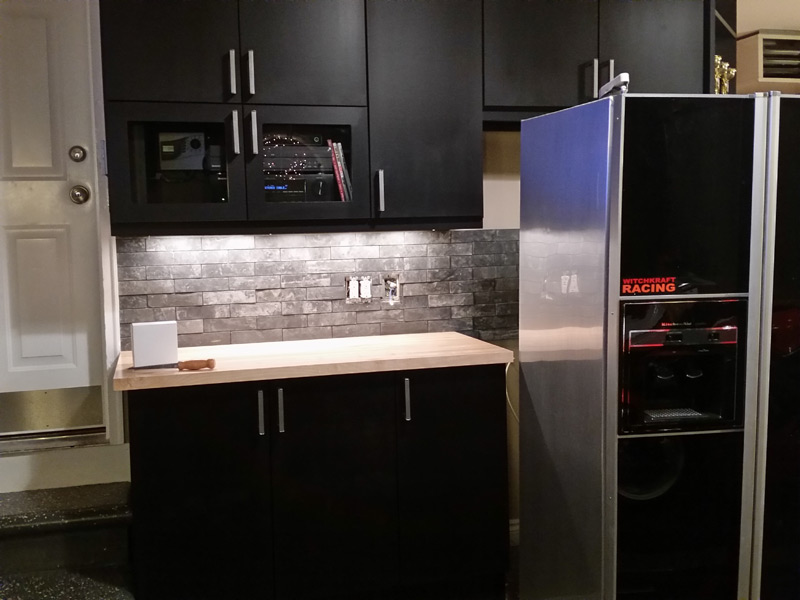
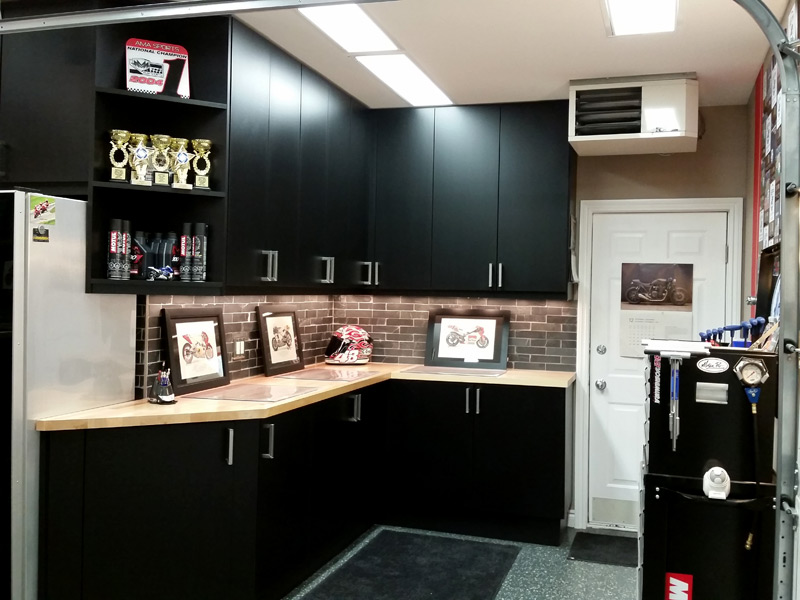
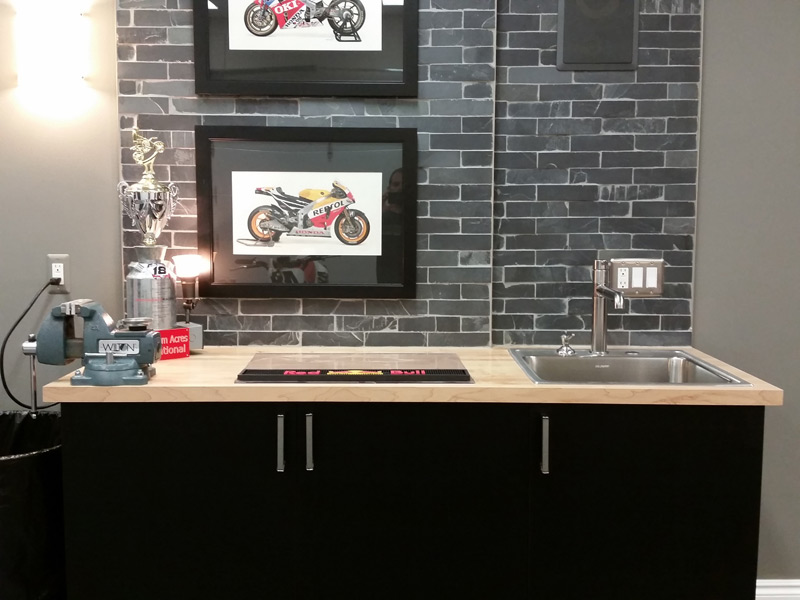
Good work on moving the lift table controls... Doesn't look easy

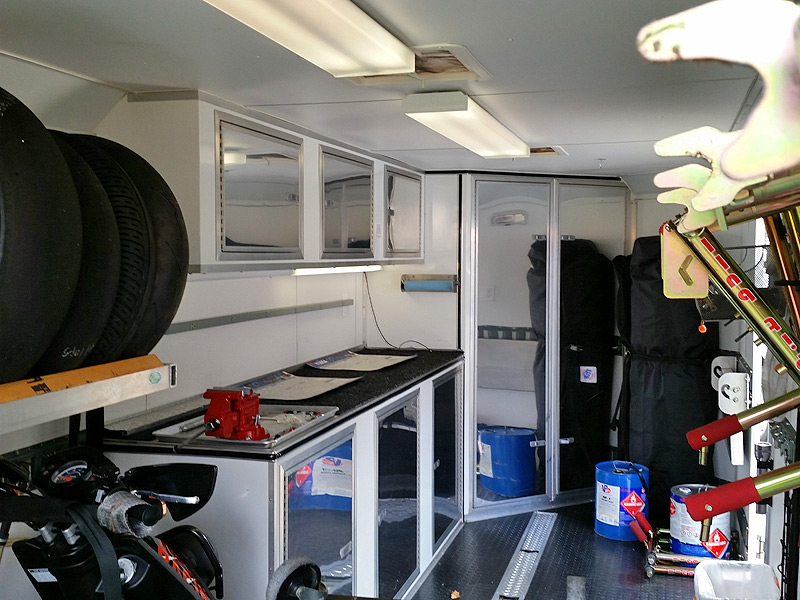
Thanks. Moving it inside the cabinet wasn't bad. Take the box apart, run the wiring through a hole in the back of the cabinet - reassemble. We used a different control box - one that has a key so if the bike is up on the table and some intruder came through, they'd at least have a tough time getting the bike down. Or my youngest will one day need to be creative to take the bike for a spin without me knowing. :D

The most significant part was running the wiring under the concrete and over to the cabinet originally, during the concrete stage.

Pet peeve but it's not OCD... it should be CDO. It's the same as OCD but the letters are rearranged to be alphabetical, like it should be.

:beer:

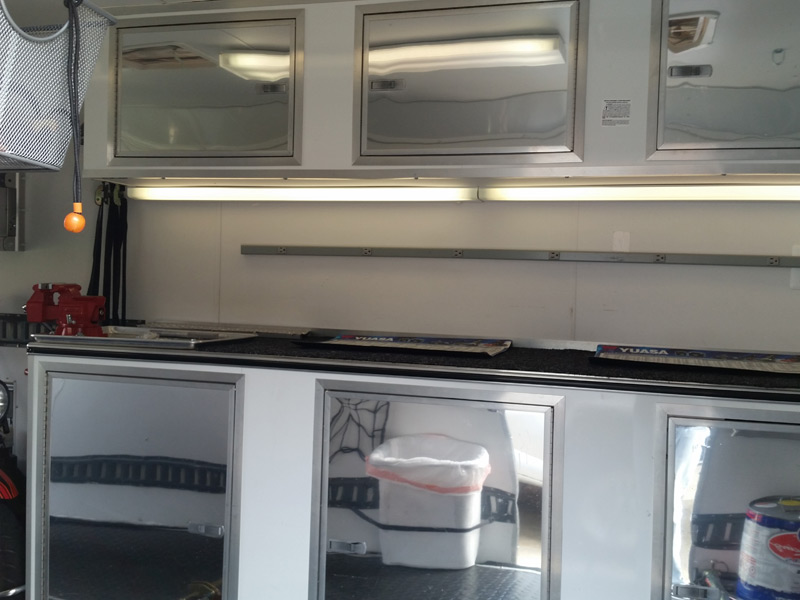
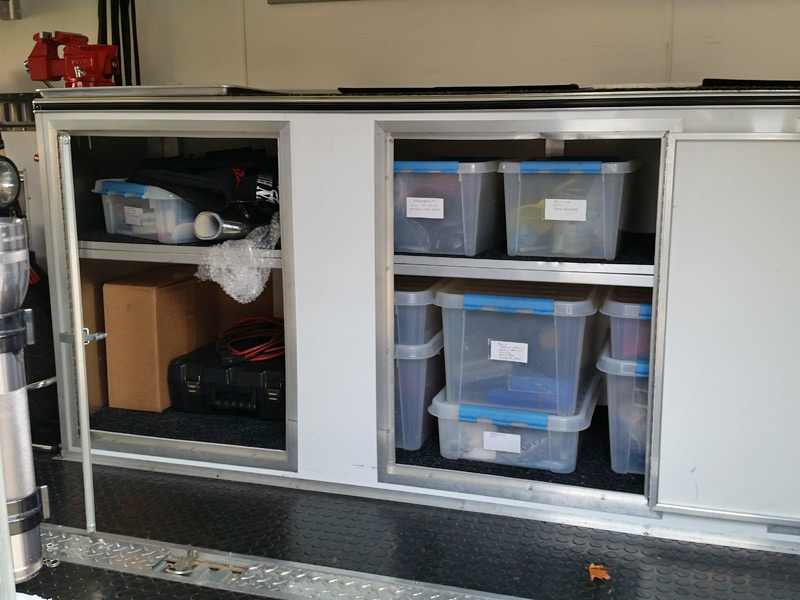
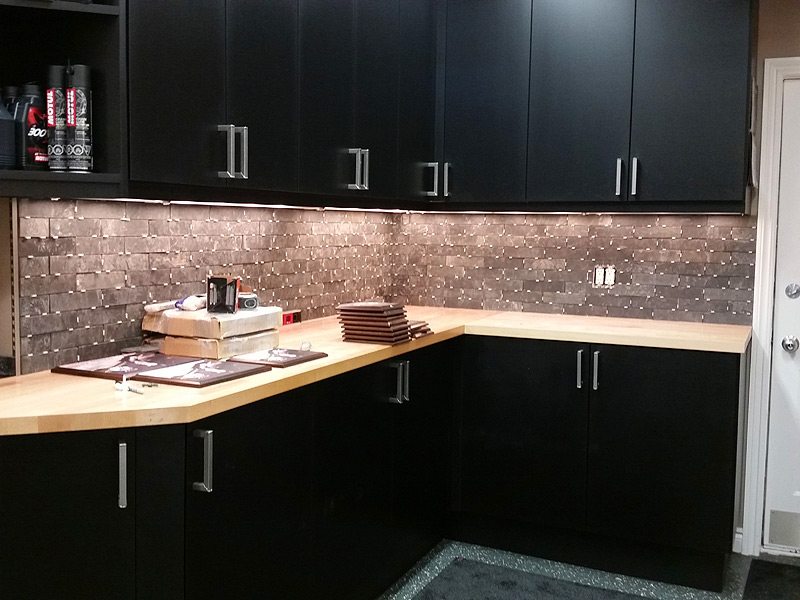
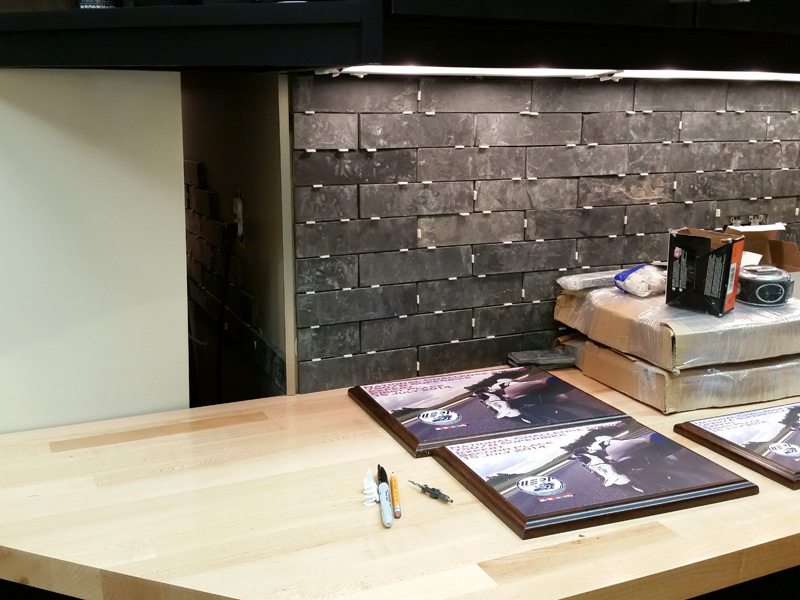
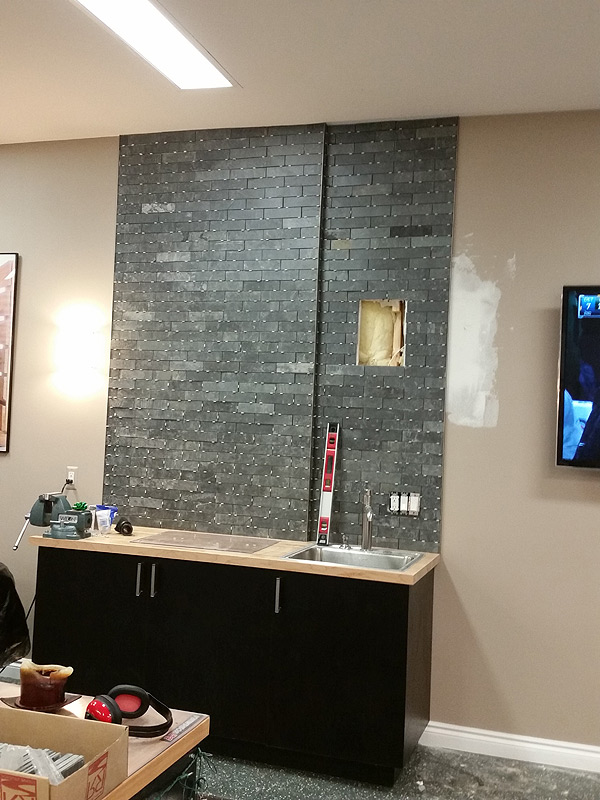
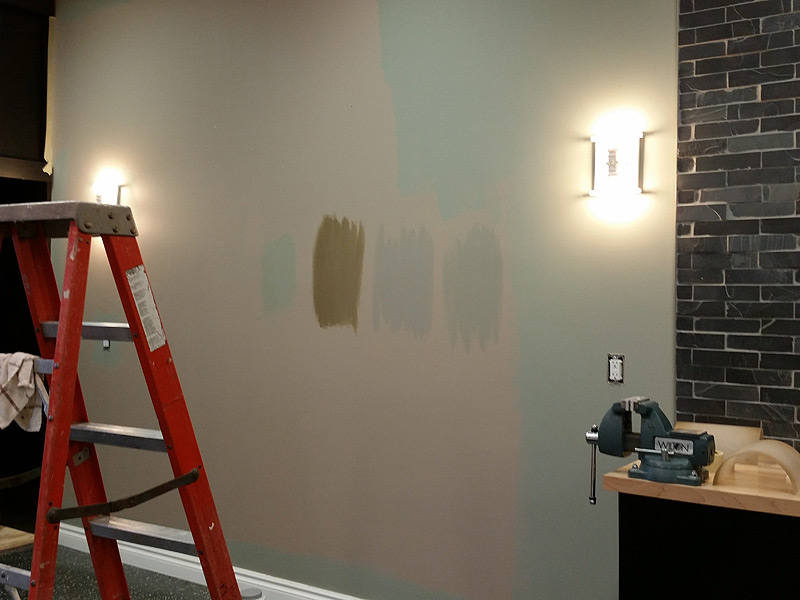
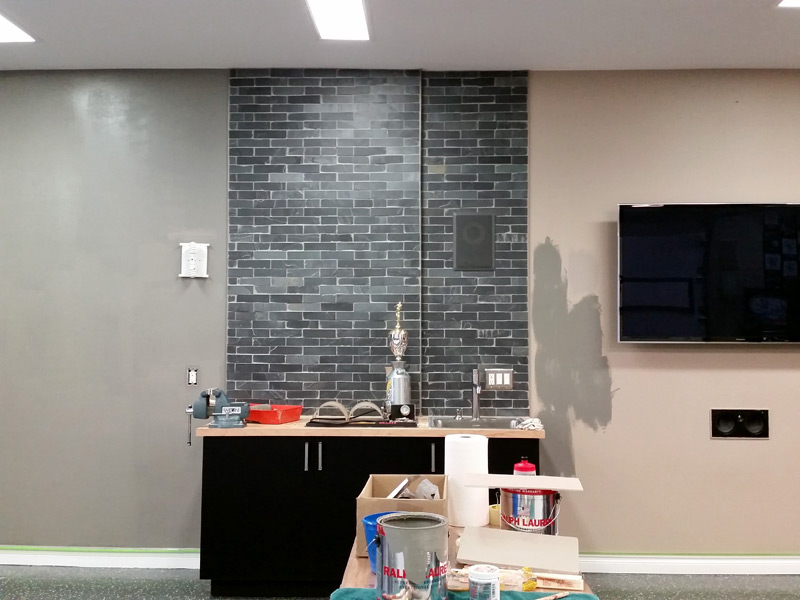
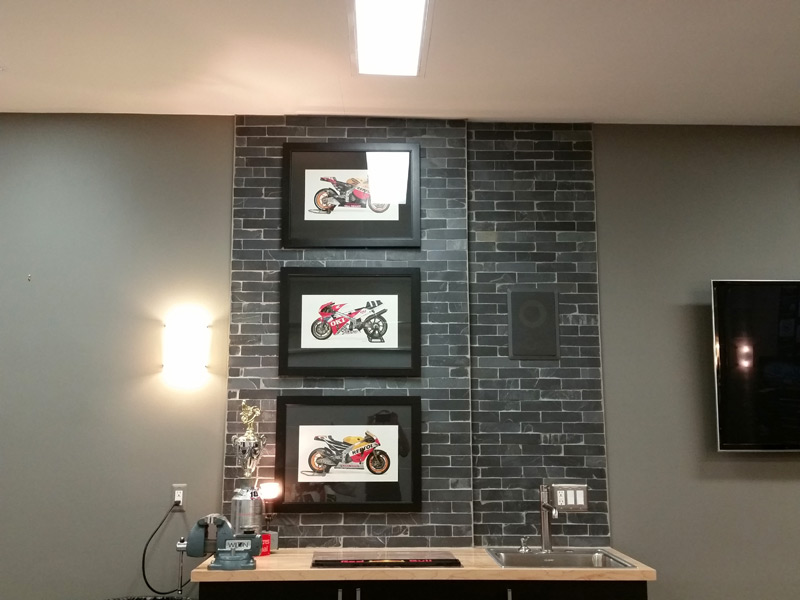
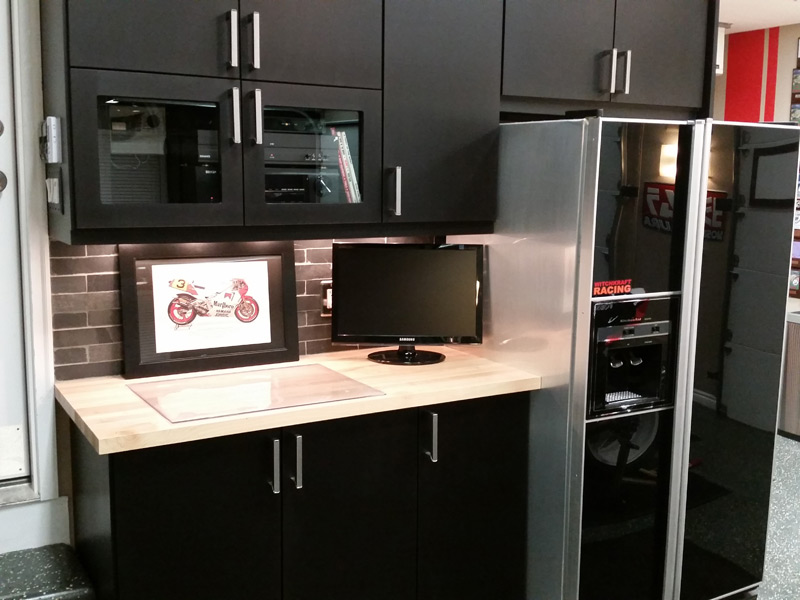
In other news, the far-side cabinets are in progress! Like everything, it's a bigger project than anticipated. But so far, they're looking good. The sliding doors are huge ..
 
To avoid these ads, REGISTER NOW!
OP
E

ekraft84

Well-known member
Joined
Dec 14, 2010
Messages
336
Location
Michigan
Here are a few random photos from the end of this past season, down at Barber Motorsports Park. Figured it had been awhile since posting race photos.

Early morning. Practice, then time to go racing!
15488533657_51ac92ed9c_o.jpg


On pit-road during a red flag. Dad deep in thought:
15053773414_d470a76ddf_o.jpg


Setting up for the long right-hander, T2:
15415831604_c39eda7458_o.jpg


Through Charlotte's Web on a new front tire:
16038100465_74e7259e8b_o.jpg


Looking ahead.
15418454663_f9dc1c476b_o.jpg


Post-race teardown in the tech shed. We passed.
15054369773_16e7c941df_o.jpg


Putting the bike back together.
15488345208_b72c72d5dc_o.jpg


Thanks for reading. And Merry Christmas!

:beer:
 

sbhockey

Well-known member
Joined
Feb 26, 2010
Messages
222
Location
Chattanooga, TN
Hey ekraft, how about a few shots of the race hauler. As well set up as your garage is, I'm sure the trailer is just as nice. Getting my little 6x10 ready for WERA this year. I know pretty much what I want to do, but I'm always up for any new tips to make the little trailer as efficient as possible.
 
OP
E

ekraft84

Well-known member
Joined
Dec 14, 2010
Messages
336
Location
Michigan
Hey ekraft, how about a few shots of the race hauler. As well set up as your garage is, I'm sure the trailer is just as nice. Getting my little 6x10 ready for WERA this year. I know pretty much what I want to do, but I'm always up for any new tips to make the little trailer as efficient as possible.

I'll take some photos and post them, next time I'm over at my dad's and it's not dark (gets dark too early!). The same level of OCD was part of that layout as well. :)

What WERA events do you plan on doing? We may run into each other at some point, I'm sure.
 

sbhockey

Well-known member
Joined
Feb 26, 2010
Messages
222
Location
Chattanooga, TN
I'll take some photos and post them, next time I'm over at my dad's and it's not dark (gets dark too early!). The same level of OCD was part of that layout as well. :)

What WERA events do you plan on doing? We may run into each other at some point, I'm sure.

I'm with you there on getting dark to early, drives me nuts. I'm in Chattanooga, so I'll be running South East. Although I would love to make it to Grattan again. Love that place, so much fun on the little SV.
 

jjminch

Well-known member
Joined
Jan 23, 2014
Messages
56
Location
Bastrop TX
Killer garage. I'm an AV nut and I love the in wall setup. I have an R1 and an SV650. It looks like your Dad upgraded to a GSXR front end on his SV. Does he like it? I thought about it and just did springs and emulators instead.
 
OP
E

ekraft84

Well-known member
Joined
Dec 14, 2010
Messages
336
Location
Michigan
Very impressive build, thanks for sharing. Best of luck on your 2015 season.

Thank you.

Killer garage. I'm an AV nut and I love the in wall setup. I have an R1 and an SV650. It looks like your Dad upgraded to a GSXR front end on his SV. Does he like it? I thought about it and just did springs and emulators instead.

Yes, he did like the front-end upgrade - brakes especially, as he added a Brembo master as well. He sold the bike a year ago and I think a small part of him regrets it. It was a nice bike.

Did somebody say R1?

:D
 
OP
E

ekraft84

Well-known member
Joined
Dec 14, 2010
Messages
336
Location
Michigan
Hey ekraft, how about a few shots of the race hauler. As well set up as your garage is, I'm sure the trailer is just as nice. Getting my little 6x10 ready for WERA this year. I know pretty much what I want to do, but I'm always up for any new tips to make the little trailer as efficient as possible.

sbhockey, I took some photos of the trailer this past weekend. It's nothing like the factory rigs, but it works well for our purposes. For years, we traveled in a 6x10 trailer, stacked to the brim - with a specific order of loading and unloading, for everything to fit. After awhile and as our program grew, it just became too small for our needs.

So a few years ago, my dad spent what seemed like days drawing up plans on grid paper for this trailer. R&R Trailers built it. It's aluminum and 7x19 in size. Some pictures below:

Ramp door in the back for loading and unloading things with wheels:
wkr_north_garage_project_179.jpg


Dad ran three sets of plugs (one shown in this photo) along the side of the trailer for tire warmer hookup. This way, we power the trailer with a generator on the opposite side (away from us) and can run three sets of warmers independently, without extension cords everywhere.
wkr_north_garage_project_180.jpg


Opposite side. Note power hookup towards the front, where the generator typically plugs in. My dad ran power from the house, over to the hook-up in the ground shown here, so the trailer is powered when parked in the driveway. The little lock-door on the side is for fueling race jugs. When at the pump, we open the door and fuel the jugs inside the trailer, without loading and unloading them every time.
wkr_north_garage_project_181.jpg


Inside. Cabinets, tire rack on the left, and racks on the right to hold the Pit Bull bike stands.
wkr_north_garage_project_182.jpg


Up close on cabinets. Plug-strip, under-cabinet lights and vise/mini-work bench. Good for changing shock springs or quick-fabbing parts after an off-track excursion.
wkr_north_garage_project_183.jpg


Dad wanted e-track everywhere to make tying anything down a quick and easy process. The metal bin just houses tire gauges, trailer restraint pins and other miscellaneous items.
wkr_north_garage_project_184.jpg


Pit Bull Trailer Restraint System shown on the floor. We have one for each bike. No more tying down bikes by straps, stressing the suspension - or checking on them during a trip to make sure they're still standing. Just clip the bikes into them and done.
wkr_north_garage_project_185.jpg


The bikes stay on the right side, with the generator sitting off to the left, in between them. The Zuma sits on the far left, under the tire rack and alongside the fuel jugs.
wkr_north_garage_project_186.jpg


We carried this piece over from the old trailer. A good way to store everything from brake cleaner to WD-40. Fabreze too.
wkr_north_garage_project_187.jpg


We use these storage bins throughout the lower and upper cabinets. Basic organization. The far right cabinet has a series of parts drawers (not shown) for nuts, bolts, master links, alum., etc. etc.
wkr_north_garage_project_188.jpg


This is the front cabinet. It's a full-height cabinet and wasn't originally in the plans, but once the trailer arrived, we realized we needed something up in the "V" part of the trailer. The left side has leather suits as shown, along with helmets, boots and gloves off to the far left. The right side cabinet has our spring compressor, along with banners, chairs, tire carts and other odd-shaped items.
wkr_north_garage_project_189.jpg


That's pretty much it. There are certainly bigger options out there, but it's perfect for our needs, while still traveling/towing well without being too big. Hope that helps.
 

catch2otwo

Well-known member
Joined
Dec 29, 2011
Messages
136
Location
San Pablo, CA
Looks great, what are you using to secure the pitbull stands to the wall? Been looking for a clean solution to store my stands
 

afmrick

Well-known member
Joined
Aug 7, 2012
Messages
95
Oooh, I haven't seen those kind of Rubbermaid FastTrack Bike hooks before!
I'm using these (P/N 5E02) for front and rear stands (the compact hooks for single-sided swingarm stands):

The tire support is neat though! Is that an older model? It doesn't have the clamp handle they like now. I can imagine it helping keep them in place a bit - particularly in a trailer.
 
Last edited:

sbhockey

Well-known member
Joined
Feb 26, 2010
Messages
222
Location
Chattanooga, TN
Thanks a ton Ekraft. Wish I could justify moving up to something larger. 7x14 with a tandem is what I'd like. But the 6x10 is going to have to work. I really like the idea of having outlets on the outside of the trailer, as well as the back up lights on the trailer. Will probably be adding both of those to my trailer when I get started finishing it out. I'm sure I'll start a thread when I do.
 
OP
E

ekraft84

Well-known member
Joined
Dec 14, 2010
Messages
336
Location
Michigan
Looks great, what are you using to secure the pitbull stands to the wall? Been looking for a clean solution to store my stands

Rubbermaid FastTrack, as afm mentioned. Although I think they are discontinued. There have been a few people interested in that setup since seeing it, but I think one guy told us he couldn't find it anywhere, after looking.

Oooh, I haven't seen those kind of Rubbermaid FastTrack Bike hooks before!
I'm using these (P/N 5E02) for front and rear stands (the compact hooks for single-sided swingarm stands):

The tire support is neat though! Is that an older model? It doesn't have the clamp handle they like now. I can imagine it helping keep them in place a bit - particularly in a trailer.

That clamp handle looks nice on your image. We haven't had any issues with the stands moving during transport, knock on wood.

Thanks a ton Ekraft. Wish I could justify moving up to something larger. 7x14 with a tandem is what I'd like. But the 6x10 is going to have to work. I really like the idea of having outlets on the outside of the trailer, as well as the back up lights on the trailer. Will probably be adding both of those to my trailer when I get started finishing it out. I'm sure I'll start a thread when I do.

A 6x10 is great for starting out. We just accumulated too much stuff. :)
 

afmrick

Well-known member
Joined
Aug 7, 2012
Messages
95
I will say that the current version of the FastTrack Vertical Bike Hooks do work great - The older ones just might work better with the PitBulls.

I hang 'em with the wheels resting on the FastTrack rail - very solid and easy to take on and off. I usually store the fork lift converter detached and on a standard one of their utility hooks hanging in between the two bike hooks.
 
To avoid these ads, REGISTER NOW!
OP
E

ekraft84

Well-known member
Joined
Dec 14, 2010
Messages
336
Location
Michigan
I will say that the current version of the FastTrack Vertical Bike Hooks do work great - The older ones just might work better with the PitBulls.

I hang 'em with the wheels resting on the FastTrack rail - very solid and easy to take on and off. I usually store the fork lift converter detached and on a standard one of their utility hooks hanging in between the two bike hooks.

Nice. I found that works much better than those Nice Raxx that were around for awhile.

Nice trailer. Very well thought out.

Thank you.
 
OP
E

ekraft84

Well-known member
Joined
Dec 14, 2010
Messages
336
Location
Michigan
A couple random photos from Christmas ..

My dad put together a great gift. A coat hanger. Made from one of his old plaques, along with two Ohlins 30mm cartridge fork caps, I've never been this excited over a coat rack before, but it was needed.
wkr_north_garage_project_192.jpg


Santa brought our 4-year old a couple RC cars for Christmas. I proceeded to put a couple GoPro's on them. For $29, it was tough to go wrong.
wkr_north_garage_project_193.jpg
 

afmrick

Well-known member
Joined
Aug 7, 2012
Messages
95
I found that works much better than those Nice Raxx that were around for awhile.
I never tried those - they looked like borderline more effort than they were worth (two much screwing the handles down). Although, back then I just bungeed the stands on the floor in a corner of the trailer.

Really sharp looking rig! I'm jealous. ;)
 
OP
E

ekraft84

Well-known member
Joined
Dec 14, 2010
Messages
336
Location
Michigan
Finished up a couple other things recently, the backsplash being the biggest thing. I had been lazily looking for something grey for awhile but it seemed simply too absurd to put a backsplash in a garage. However after thinking about it long enough, I found a way to justify the need. Plus, after doing our kitchen I found the exact stone I was looking for, which didn't help matters. Below are some photos of the absurdness:

Grey subway stone tiles w/spacers installed, pre-grout.
wkr_north_garage_project_194.jpg


The metal edge piece is shown here on the corner, to make for a clean transition around the wall and behind the fridge.
wkr_north_garage_project_195.jpg


Flashback photo, with the old off-white sides of the fridge ..
wkr_north_garage_project_50.jpg


I took some "stainless" looking vinyl and cut/applied it to both sides of the fridge. Cleaned it up and made it look not so old.
wkr_north_garage_project_198.jpg


Grout complete on the tile.
wkr_north_garage_project_199.jpg


The plan was always to have a backsplash around the sink, but with that wall being so wide and tall, it didn't look right going up only 12-18". I thought running it all the way up the wall would break it up and look a little more complete. A buddy suggested putting a fireplace in the wall. Now *that* is absurd. I think.
wkr_north_garage_project_196.jpg


Grouted, sealed (natural, nothing to make it any darker) and finished.
wkr_north_garage_project_200.jpg


Another angle.
wkr_north_garage_project_205.jpg


In the midst of this backsplash phase, cabinets have been slow-going, but moving along - as well as some ideas for a change of color ..

Thanks for reading.
 

DrBobOh

Member
Joined
Sep 22, 2011
Messages
19
Wow- just found this build. Absolutely great documenting of this garage and I love how you and your dad are both riding, seriously cool-

It's refreshing seeing smaller garages being used to such an extent!

Any pictures of your whole tow-rig?
 
OP
E

ekraft84

Well-known member
Joined
Dec 14, 2010
Messages
336
Location
Michigan
Wow- just found this build. Absolutely great documenting of this garage and I love how you and your dad are both riding, seriously cool-

It's refreshing seeing smaller garages being used to such an extent!

Any pictures of your whole tow-rig?

Thank you. I don't think we have any photos of the whole rig/setup. I'll dig around and see what I can find.
 
OP
E

ekraft84

Well-known member
Joined
Dec 14, 2010
Messages
336
Location
Michigan
After the backsplash, the color of that wall was to change. My wife offered to help, so that meant things were automatically a go. She has a great hand when it comes to doing trim, where no green or blue tape is required (except for along the bottom trim, mainly for catching paint on my roller-usage). So over the course a couple hours, we hammered out 211 sq. feet of paint. However ..

This was the color we first tried. At the store, it looked grey, not green. Here, it looked like we were painting ourselves into a fish tank.
wkr_north_garage_project_201.jpg


Several samples later, we settled on this.
wkr_north_garage_project_202.jpg


Drying a little darker, it has a grey, putty-like look to it, which blends well with the tile and keeps a touch of warmth, without being too "cold" of a grey.
wkr_north_garage_project_203.jpg


Painted the plates to match and matched the tile to a small sample-size of paint to get the in-wall speaker to match the color of the tile. Also swapped out all the backsplash electrical plates to a stainless/nickel, to match the cabinet pulls.
wkr_north_garage_project_211.jpg


Three new prints from Superbike Planet mounted on the tile. Slightly bigger and better-spaced. The five prints that were originally hanging there now need to go somewhere else. I'm thinking on the face of the full-height cabinets, once complete. The motorcycle prints have sort of become a theme of the garage, scattered throughout.
wkr_north_garage_project_204.jpg


Added another row of plaques to incorporate the coat hanger-gift from my dad..
wkr_north_garage_project_206.jpg


Ready to hang coats.
wkr_north_garage_project_207.jpg


Finished shot of the area to the left of the fridge.
wkr_north_garage_project_208.jpg


The garage is too clean for this time of year.
wkr_north_garage_project_209.jpg


We're sort of in limbo right now with our plans for the upcoming season. This bike (Abbey) has a deposit to a new owner, but we can't move forward with things until the sale is final. It's bittersweet, as this has been a great bike. The second bike (Bridget) is currently at my dad's. He was sad not having a bike in his garage. :)
wkr_north_garage_project_210.jpg


Thanks for reading.
 

rmalkow2

Well-known member
Joined
Jun 26, 2009
Messages
4,087
Location
Brighton, MI
Just an amazing transformation of this garage. I had to go back to the first page to remember where you started. You've made the typical 2-car sized garage a thing of beauty and function for your purposes. Congrats!
 

dubber

Well-known member
Joined
Dec 31, 2012
Messages
5,326
Location
Canada's Capital
Holy ****! The addition of the tile is spot on! Great new texture/colour addition to your space. BTW that trailer looks great.
 
OP
E

ekraft84

Well-known member
Joined
Dec 14, 2010
Messages
336
Location
Michigan
Surgeon suite clean, I love it, and great that you're doing it yourself.

Thank you. I've certainly had a lot of help in getting to this point.

Just an amazing transformation of this garage. I had to go back to the first page to remember where you started. You've made the typical 2-car sized garage a thing of beauty and function for your purposes. Congrats!

Thank you rm! I went back as well, after reading your post. It was certainly different back then.

Holy ****! The addition of the tile is spot on! Great new texture/colour addition to your space. BTW that trailer looks great.

Thanks dubber. Much appreciated. Texture was what I was looking for, with smooth drywall and cabinets taking up much of the space.

I just love this garage so much. It's everything I want and more!

Thank you diggler.
 

51rider

Well-known member
Joined
Dec 21, 2009
Messages
502
Location
London, England.
Good work on the updates to the garage and congratulations on the race season.
Your mention of Barber brings up some good memories for me having ridden it several times. My favourite section is coming into the up and over the tunnel into the double apex right hander before the pit entry followed by the left onto the pit straight:):).
If you like Barber, you would love Cadwell Park and Oulton Park circuits here in the UK. Cadwell has loads of elevation changes and is also home to the launch pad jump known as the mountain! Try a you tube search for this madness. Did I happen to mention that the track is insanely narrow too?:spit:
Oulton is like a mini Nurburgring.

You really must get to the Barber museum! You can lose yourself for hours in there. I was fortunate enough to be able to access the storage area which is like something out of the the Thunderbirds episode where they stack the race cars vertically and horizontally in individual slots. I also had access to some of the workshop areas, it was really cool to see some of the stuff being worked on.

Back to your great garage & specifically the new jackshaft openers-I don't see any cable tension monitors-have you no need for this & if so, how have you been able to link them out for such a clean install? I've seen somewhere that you just need to put in an appropriate rated resistor in the terminals behind the connection panel cover but it has not worked for me & I really want to get rid of the cable tension monitor as the door system I have, does not allow anyway in which to make use of this feature.:headscrat
 
OP
E

ekraft84

Well-known member
Joined
Dec 14, 2010
Messages
336
Location
Michigan
Good work on the updates to the garage and congratulations on the race season.
Your mention of Barber brings up some good memories for me having ridden it several times. My favourite section is coming into the up and over the tunnel into the double apex right hander before the pit entry followed by the left onto the pit straight:):).

That is a fun section. Run up to the edge of the curbing over the tunnel and let the rear end spin up as you crest it, then hammer down into the the long right. Lots of time to be found in that long right, until the front straight. I'm still trying to get faster there. We got down to some respectable lap times, but there's still 1-2 seconds on the table.

If you like Barber, you would love Cadwell Park and Oulton Park circuits here in the UK. Cadwell has loads of elevation changes and is also home to the launch pad jump known as the mountain! Try a you tube search for this madness. Did I happen to mention that the track is insanely narrow too?:spit:
Oulton is like a mini Nurburgring.

I've seen pictures and some races online. Both tracks looks awesome. Would love to race there one day.

You really must get to the Barber museum! You can lose yourself for hours in there. I was fortunate enough to be able to access the storage area which is like something out of the the Thunderbirds episode where they stack the race cars vertically and horizontally in individual slots. I also had access to some of the workshop areas, it was really cool to see some of the stuff being worked on.

I know. We've been there 4-5 times and I still haven't gone. I figured I'd need a good day to hit everything and we just haven't had time.

Back to your great garage & specifically the new jackshaft openers-I don't see any cable tension monitors-have you no need for this & if so, how have you been able to link them out for such a clean install? I've seen somewhere that you just need to put in an appropriate rated resistor in the terminals behind the connection panel cover but it has not worked for me & I really want to get rid of the cable tension monitor as the door system I have, does not allow anyway in which to make use of this feature.:headscrat

The cable tensioners are there actually. They're right next to the opener itself, hidden from a straight-on angle.
 

51rider

Well-known member
Joined
Dec 21, 2009
Messages
502
Location
London, England.
[/QUOTE]
The cable tensioners are there actually. They're right next to the opener itself, hidden from a straight-on angle.[/QUOTE]

Ahh-just couldn't see them so thought you didn't have them.

Yes, you are right you do need to allow probably most of a day to do the place justice & on a race weekend, you just wont have the time. Maybe be you can book an extra day the next time you are down? be a real shame if you don't do it.
 
OP
E

ekraft84

Well-known member
Joined
Dec 14, 2010
Messages
336
Location
Michigan
Very impressive.

Mike.

Thanks Mike. Much appreciated.

Ahh-just couldn't see them so thought you didn't have them.

Yes, you are right you do need to allow probably most of a day to do the place justice & on a race weekend, you just wont have the time. Maybe be you can book an extra day the next time you are down? be a real shame if you don't do it.

Yes, definitely. I'm hoping we get there for some track time this year, before the races. A buddy of mine might actually be getting married there, so that might be good. :D

As for updates, still working on these far-side cabinets .. Hopefully soon.
 

mrzoop

Well-known member
Joined
Aug 24, 2010
Messages
63
Location
Niagara Falls, Canada
Great looking shop! I look forward to the projects to come.
You have inspired me! Now that my build is done, it's time to start a bike project!!
 

markito

Well-known member
Joined
Feb 13, 2009
Messages
136
Wow!!!! My dream garage! Keep us update it please!!!

Love the progress you have made!
 
To avoid these ads, REGISTER NOW!
Top Bottom