OP
Motorman55
Well-known member
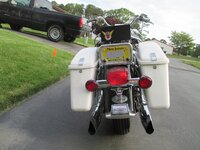
Hooked up the two new Battery Tenders the other day. Can't believe how fast they charged up the batteries on the bikes. Makes me think my old regular type battery charger is not working correctly.
Your suppose to be able to leave these Battery Tenders on 24/7 and they'll self regulate to keep the batteries charged, but I don't like leaving anything in the garage hooked up when I'm not around. I'll probably just monitor the battery voltage levels at rest and hook them up to the Tenders if I see they need it.
Can't wait to Spring and warmer temps.


")