To avoid these ads, REGISTER NOW!

Mounting shoes to snow plow

seagull369

Well-known member
Joined
Jan 16, 2013
Messages
227
Hi everyone. Longtime garagejournal reader and 1st time signer upper here..
Have a question for ya'll if you wouldn't mind...

I have a Meyers snow plow on my mid-sized pickup. It doesn't seem to have provisions so I can add those "shoes" to it, which keep the cutting blade from getting too close to the ground. Because of that when I plow uneven dirt/gravel roads or otherwise hit patches of ice, everything bucks around like a galloping gertie.

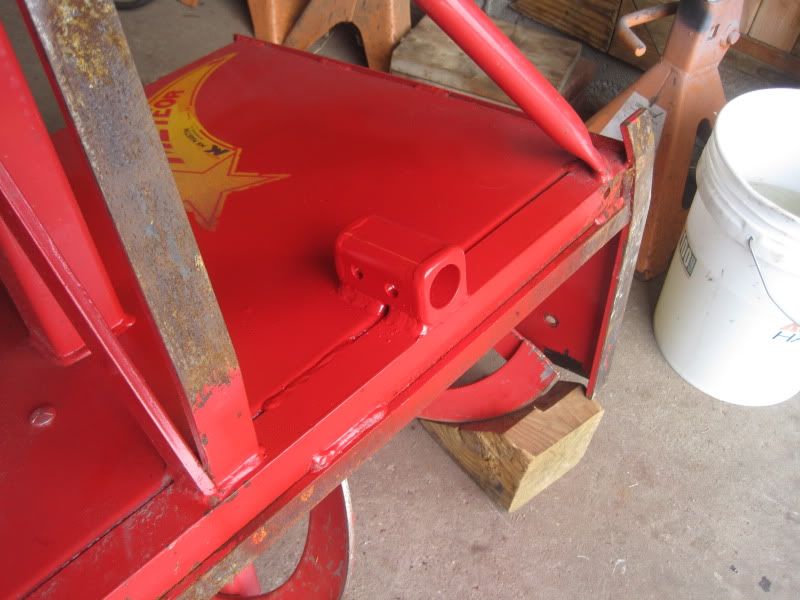
Do you guys think Meyers sells a bracket or sleeve I could weld on to the plow frame which would allow me to add the shoes? If not, I'm sure I could fabricate something, but I'm a little unsure how far down on the plow frame they should go. I already have a pair of the shoes that are like the following (courtesy of pop's basement :thumbup: ).

1303005.jpg


Any thoughts?
 
To avoid these ads, REGISTER NOW!

Buckgnarly

Well-known member
Joined
Oct 8, 2010
Messages
7,654
Location
VT
It should have spots for the shoes, but here's some shoe mounts I made for my two snowblowers. ...


Brackets.jpg


Bracketsmounted.jpg


meteorskidshoes.jpg
 
OP
S

seagull369

Well-known member
Joined
Jan 16, 2013
Messages
227
yea, I looked but nothing like that down there. Bang-up job on that snow blower!
 

Murphy4570

Well-known member
Joined
Feb 27, 2012
Messages
2,821
Location
West Deptford NJ
You must have a very old plow blade if it doesn't have the shoe mounts. Mine was made back in the '60s and has provisions for them.

Just weld on some mounts, it isn't rocket science.
 

Big-Foot

Well-known member
Joined
Jan 30, 2005
Messages
1,951
Location
Midlothian, TX
I have those very shoes on my Meyers plow. I'll see if I can get a picture of the plow and it's brackets for you.. They work very well by the way...
 

Metalcat

Active member
Joined
Jun 19, 2010
Messages
25
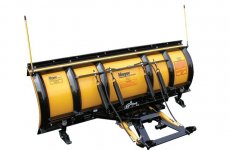
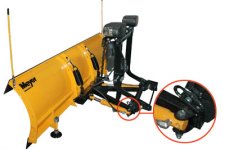
These pics should give you a good idea of what to do.
Click pics for larger version.
meyermain.jpg

DP-single-handle-outlined.jpg
 

scouting

Well-known member
Joined
May 14, 2011
Messages
288
Location
WY, USA
You don't need to get too fancy or technical. You set the final height using a stack of spacers and washers, so just make sure they're both the same height from the blade and setup should be a breeze.
 

trbomax

Well-known member
Joined
Mar 21, 2010
Messages
2,556
Location
starvation lake,mi.
Forget the shoes and put a piece of 2" pipe on the wear blade. You cut slot big enough for the blade to slide in,then weld 3 tabs on it so as to fasten iyt to the moldboard useing 3 of the blade screws. I weld the nuts on the backside so I can do it by myself in about 3 minutes.I'll run outside and take a pic.
 
Last edited:

trbomax

Well-known member
Joined
Mar 21, 2010
Messages
2,556
Location
starvation lake,mi.
Here you are.Simple huh? The pipe will run up over grass or gravel and evenpack the snow down somewhat. After 2 or 3 plows with the pipe on there will be a nice base established and you can take it off,or not. I take it off because I want to limit the ammount of base I have.When the frost goes out in the spring the thin base will melt off in a day or so and allow the frost to come up quicker

IMO the shoes are a giant PITA,they dig in,leave tracks,freeze in the sideways position,and on and on. Ive also been plowing this **** since 1970.
 

Attachments

  • IMG_0381.jpg
    IMG_0381.jpg
    146.6 KB · Views: 226
  • IMG_0382.jpg
    IMG_0382.jpg
    143.3 KB · Views: 174
OP
S

seagull369

Well-known member
Joined
Jan 16, 2013
Messages
227
Thanks for all the great help, guys.

I contacted Meyers and they said my plow is a TMP series, which didn't originally come with the shoes or the hardware to mount them. Not really an old plow as such, since they only discontinued them in 2009 apparently. They told me I could order the brackets from them, but at $30 a piece, I told them to go scratch (in my head anyways ;) ). I was able to find some pics online here of what those particular brackets look like and where they sit and it's seems easy enuff to make myself.

That's an interesting idea putting a pipe over the cutting blade, trbomax. Thanks for taking the time to take those pics. Any tips on cutting the slot properly? I guess I'd just set the plow down on top of the pipe, align it properly then trace from either side of the cutting blade. Angle grinder with cutting wheel from there..
 
Last edited:

trbomax

Well-known member
Joined
Mar 21, 2010
Messages
2,556
Location
starvation lake,mi.
Ive cut them with a torch,or more recently a plasma.The slot isnt rocket science! I plow what is about 1/2 a of lawn in the summer.The pipe doesnt hurt the grass one bit.
 
To avoid these ads, REGISTER NOW!

joshmodelskidoo

Well-known member
Joined
Apr 18, 2012
Messages
872
Location
mid western michigan
mine just has a piece of angle welded so it looks like a triangle against the plow. i dont have any skis but once the ground freezes you shouldn't need them. dad never used them but he plowed pavement for 20+ years with a few gravel drive ways. i thought about trying trbomax's idea before also.
 
Last edited:
OP
S

seagull369

Well-known member
Joined
Jan 16, 2013
Messages
227
Ive cut them with a torch,or more recently a plasma.The slot isnt rocket science! I plow what is about 1/2 a of lawn in the summer.The pipe doesnt hurt the grass one bit.

I don't have a cutting torch or a plasma rig, so guess I'm stuck doing it puerto rican style,,

i dont have any skis but once the ground freezes you shouldn't need them. dad never used them but he plowed pavement for 20+ years with a few gravel drive ways. i thought about trying trbomax's idea before also.

The problem is the ground isn't always frozen.. Plus running into patches or frozen, compacted snow from a road that wasn't plowed previously causes headaches.

I'll pick up that 2" pipe next time I'm out and let you know all how it goes..

Thanks again!
 

csp

Well-known member
Joined
Mar 23, 2010
Messages
5,720
Location
Franktown, CO
Clamp the pipe into a section of angle iron and run a cutoff wheel along the angle iron and you'll get a perfectly straight cut. Cut through a section and move the angle iron along the length of the pipe as you don't need a piece of angle that's the full lenght of the pipe.
 

Big-Foot

Well-known member
Joined
Jan 30, 2005
Messages
1,951
Location
Midlothian, TX
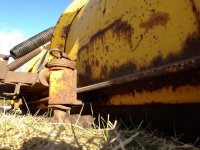
Here's the way the shoes are mounted to my semi-ancient Meyer Plow..
Hope this helps..
 

Attachments

  • image.jpg
    image.jpg
    149.8 KB · Views: 77
OP
S

seagull369

Well-known member
Joined
Jan 16, 2013
Messages
227
Good tip on using the angle iron to cut straight, but I found out the cutting blade is curved on mine so using a full length piece of pipe isn't really an option. I'll try your idea, sberry, and use shorter sections. Thanks for the pics on the shoes, Big-Foot.
 

cbogg

Well-known member
Joined
Feb 4, 2013
Messages
93
The tmp blades weren't too common, light duty at best. The tm series blades had an option to add a "mushroom" style shoe however from what I've seen with the tmp blades the cross brace depending on when the plow was built, and even when you bought the shoe (some were built too long, go meyer) the top of the shoe would hit the brace before you could put the clip in. Best bet would be to find a western shoe, p/n 49071 ( or equivalent, buyers products makes a lot of aftermarket parts in their s.a.m. Line and are cheaper) and welds pipe to that cross tube. I recommend the western shoe because their heavier duty than the meyer, but are a little lighter than a fisher shoe. It also has a longer tube than the fisher, allowing you to mount off the cross tube easier. The meyer tm shies are also $59 each. If I were you I'd throw a post up on craigslist, odds are someone has a set just laying around, lot of people just take them off it it came with it. Hope this helps. If you have any other questions shoot me a pm, did sales and service for a bunch of plow lines for awhile so I have a good idea what's going on, especially meyer.
 
OP
S

seagull369

Well-known member
Joined
Jan 16, 2013
Messages
227
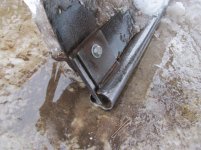
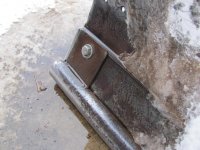
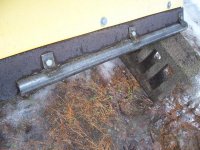
Thanks for the info, cbogg. I ended up going with the pipe idea instead. Finished it about a week ago (pics attached if anyone wants to see). Just waiting for some snow now!

Instead of the 2" pipe, I used heavier-walled tubing which had an ID of 1-3/4". That's what the protruding part of the cutting blade was on mine, so I thought perhaps it was better to go smaller. Probably doesn't matter. I welded up tabs on the front and back side of the tubing using the bolts that secure the cutting blade to hold them in place. Dunno if that was overkill. The wall thickness on the tubing isn't quite up to that of the 2" pipe, but I'm hoping it holds up.
 

Attachments

  • 100_2318.jpg
    100_2318.jpg
    144.7 KB · Views: 57
  • 100_2319.jpg
    100_2319.jpg
    150.2 KB · Views: 60

cbogg

Well-known member
Joined
Feb 4, 2013
Messages
93
You may find that doesn't hold as well as you think. Usually when going with pipe it's welded to the cutting edge. That being said you have to do it right, pre heat and what not as the edge is hardened steel. Hope it works out for you though, it'll work well for soft surfaces.
 
To avoid these ads, REGISTER NOW!
Top Bottom