To avoid these ads, REGISTER NOW!

Mounting threshold on concrete slab

Legion Prime

Well-known member
Joined
Sep 5, 2018
Messages
740
Location
Leelenau County MI
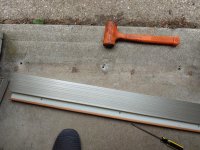
I know I know, drill holes, sink anchor and screw in. I wish it were that easy but there was an old threshold there and of course the holes don't line up, unfortunately some of them almost do. I'll refer you down to the picture below now, the left hole is in the clear, no problems there. The middle hole is a semi-comfortable distance away but still in the chipped out area which will make drilling an interesting proposition. The third hole on the right is only maybe a quarter inch from the original hole. What's my best course of action not wanting to put down a bead of construction adhesive, push it into place and call it a day? Should I just drill, sink the anchors and let the left anchor do most of the work? Relocate the mounting holes as they won't be visible anyway? Patch the concrete, fill the holes and start again another day? I can do any of the three, I just know I don't know what I don't know and I'm worried about holes too close together collapsing in on each other.
 

Attachments

  • 2020-06-01 12.48.33.jpg
    2020-06-01 12.48.33.jpg
    136 KB · Views: 108
To avoid these ads, REGISTER NOW!

MetalBuildingFun

Well-known member
Joined
Apr 23, 2020
Messages
184
Location
TX
If you were the perfectionist like my husband you would fill those original holes and start anew with everything.

LOL, I say that because sometimes he drives me nuts with things that can't be seen. But I can see his point too. He would most definitely patch the concrete and start brand new.
 

DuluthMachineWorks

Well-known member
Joined
Mar 7, 2019
Messages
152
Location
Duluth, GA
Quickcrete and Silka have a two part epoxy concrete patch compound that fits in a normal caulk gun. A tube of that would fill the holes and set up hard like concrete. Don’t bother with the polyurethane concrete patch- it won’t set up deep in the holes for weeks. Then re-drill in the right place. I’d just use tapcon screws for that rather than anchors though.


Sent from my iPhone using Garage Journal
 
OP
L

Legion Prime

Well-known member
Joined
Sep 5, 2018
Messages
740
Location
Leelenau County MI
Well, I will freely admit to some OCDish & **** retentive tendencies so that's kinda the way I was leaning. My big worry is that drilling the 2 holes so close together will break down the concrete between them and then I'll have to stop and fill an even bigger hole. Maybe I'll call my buddy and see if he has some concrete mix I can steal a bit of.
ETA: That epoxy patch compound sounds interesting, it might be better for filling in the holes as well. How is it at leveling? I have a couple other sections that have chips out of I'd be interested in filling while I'm at it, no sense in buying a tube of something and then only using a tenth of it.
 

matt_i

Well-known member
Joined
Mar 14, 2008
Messages
10,758
Location
SE Michigan
I think it would be easier to step over 1 to 1-1/2" and drill new holes in the threshold and then match drill the concrete with the template.

Are you using flathead tapcons?

Beads or bed of polyurethane caulk so water doesn't push under?
 

DuluthMachineWorks

Well-known member
Joined
Mar 7, 2019
Messages
152
Location
Duluth, GA
Yeah, that quickcrete one is what I use a lot at work for patching holes up to about 3/4”. It levels out well and you can smooth it with a putty knife or trowel. I’ve even epoxied a core back in to a cored hole in a concrete tank, and it held water after cure.


Sent from my iPhone using Garage Journal
 
OP
L

Legion Prime

Well-known member
Joined
Sep 5, 2018
Messages
740
Location
Leelenau County MI
Awesome, thanks DMW, I'll have to pick up a tube next time I'm in town.
I thought about that Matt, it's a great idea and I could get the threshold installed today except I don't have any Tapcons. I was debating laying down a bead of silicone underneath it, the problem is that I have to set the threshold down and then slide it into place under the siding and it would just smear. I may still do that regardless and then run beads around it inside and out.
I need to get tapcons anyway so I may as well get both of them them. There are a couple other divots I want to fill in so I'll probably fill all them in in one shot, wait for them to cure and then relocate the two anchor points that are on top of the old ones and finally have a threshold for the garage door. My dad just screwed on a door sweep whenever it was that the old one let loose but I am finally sick of water ingress from rain & snow. Thanks for the help, I'll get some pics once I've got the new threshold in.
 
To avoid these ads, REGISTER NOW!

yeldogt

Well-known member
Joined
Jan 2, 2012
Messages
18,184
So what are you doing ... replacing the old. Was it also a replacement ? Typcially the threshold goes under the door jam?

When you do the replacement they get cut to the frame ... You have to use some type of glue/caulk. One of the rare times

I would drill new holes and use plastic anchors in the old concrete .... use a good poly construction glue -- the kind that will do wood and metal.

Does the front of the new lay flat to the old concrete?

All you want to do is keep it in place until the glue dries. A line of glue under where the screws are and then three or four big dots of glue towards the front .. so they grab both metal and concrete. Smear a bit on the old concrete first so it sticks.

If the front is not tight to the concrete used a 2x4 and wedge it from the head jam to hold it down until it dries. Be careful not to dent the AL -- protect it

Don't run caulk all along the front ... you want any water to run out.
 
Last edited:
OP
L

Legion Prime

Well-known member
Joined
Sep 5, 2018
Messages
740
Location
Leelenau County MI
MetalBuildingFun posting wood products. :rolleyes: LMAO
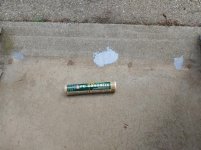
Well I went into a smallish town (as if Traverse city ISN'T small to begin with) and all they had was PC Products 72561 PC-Concrete Two-Part Epoxy at apparently quite the markup. I filled in the holes and a couple divots that have been bugging me as well.
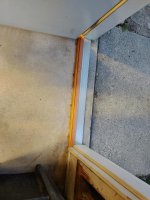
This is a garage with a cinderblock footing on a concrete slab. The old threshold was long gone before I ever laid eyes on the garage. I snagged a MD Building Products Aluminum Adjustable Thermal Break Threshold from the Despot and it fits in without any trimming. There's no framing under or over it, just the slab and the doorframe + vinyl siding on the ends. I snagged a trio of Tapcons and the plan now is to sink a hole as designed on the left side and then relocate the other two holes.
I guess I'll just caulk the sides and inside even though my main issue is water ingress rather than drainage but if you recommend not to caulk the outside then I guess I won't. The package lists a 24hr cure time for the epoxy so I won't be sticking the new threshold in until tomorrow so if I'm doing anything wrong there's still time to set me on the right path!
Thanks for all the advice thus far, I generally have an idea of what I want to do but often don't know how to get from point A to point C without multiple false starts & backtracks.
 

Attachments

  • 2020-06-02 19.32.35.jpg
    2020-06-02 19.32.35.jpg
    132.1 KB · Views: 20

MetalBuildingFun

Well-known member
Joined
Apr 23, 2020
Messages
184
Location
TX
MetalBuildingFun posting wood products. :rolleyes: LMAO
Well I went into a smallish town (as if Traverse city ISN'T small to begin with) and all they had was PC Products 72561 PC-Concrete Two-Part Epoxy at apparently quite the markup. I filled in the holes and a couple divots that have been bugging me as well.
This is a garage with a cinderblock footing on a concrete slab. The old threshold was long gone before I ever laid eyes on the garage. I snagged a MD Building Products Aluminum Adjustable Thermal Break Threshold from the Despot and it fits in without any trimming. There's no framing under or over it, just the slab and the doorframe + vinyl siding on the ends. I snagged a trio of Tapcons and the plan now is to sink a hole as designed on the left side and then relocate the other two holes.
I guess I'll just caulk the sides and inside even though my main issue is water ingress rather than drainage but if you recommend not to caulk the outside then I guess I won't. The package lists a 24hr cure time for the epoxy so I won't be sticking the new threshold in until tomorrow so if I'm doing anything wrong there's still time to set me on the right path!
Thanks for all the advice thus far, I generally have an idea of what I want to do but often don't know how to get from point A to point C without multiple false starts & backtracks.

You guys are freaking brutal! :bowdown:
 
OP
L

Legion Prime

Well-known member
Joined
Sep 5, 2018
Messages
740
Location
Leelenau County MI
Well I've got it in despite pretty much everything you can think of not working out. Basically it's in, no tapcons. 1 of the 5 caps disappeared and 3 of the remaining 4 let loose the first time I closed the door, whatever. I'll silicone everything tomorrow.
 

Attachments

  • 2020-06-03 21.27.02.jpg
    2020-06-03 21.27.02.jpg
    120.1 KB · Views: 25
To avoid these ads, REGISTER NOW!
Top Bottom