
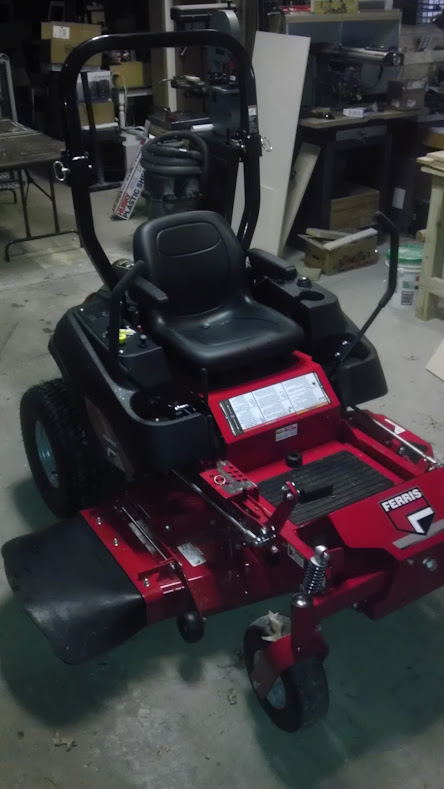
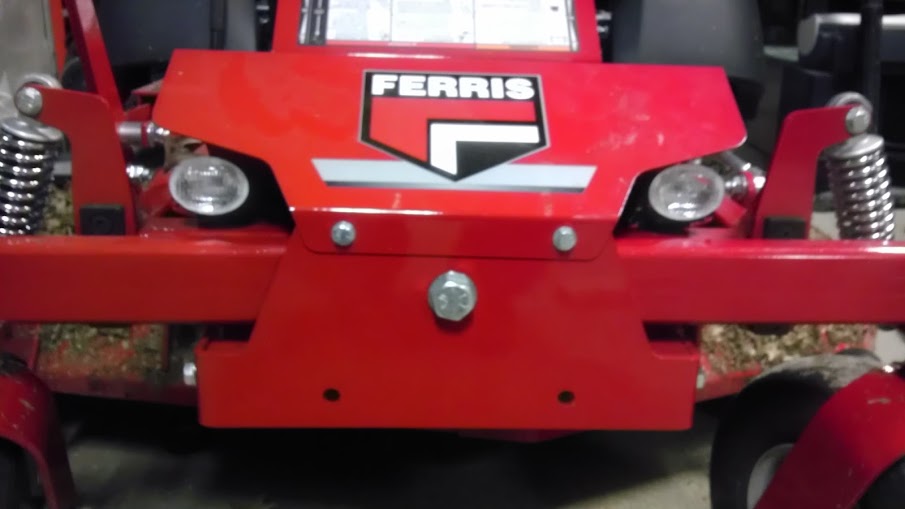
I recently picked up a new zero turn and was too cheap to pay the $75 + installation for lights on it. So I picked up a small set of driving lights from the local auto parts store for $20.
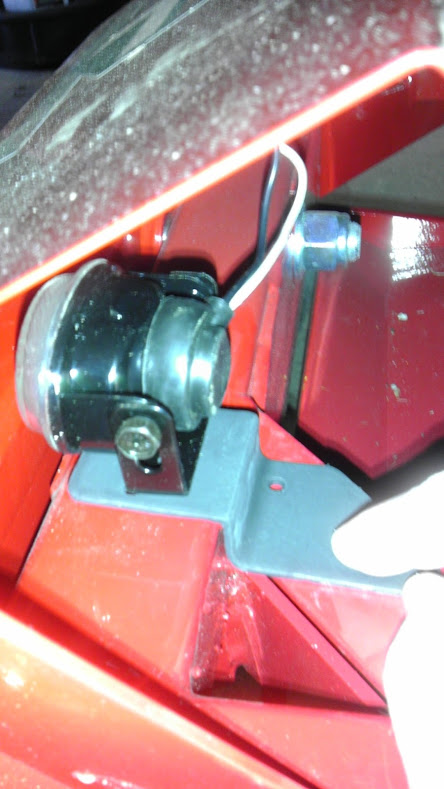
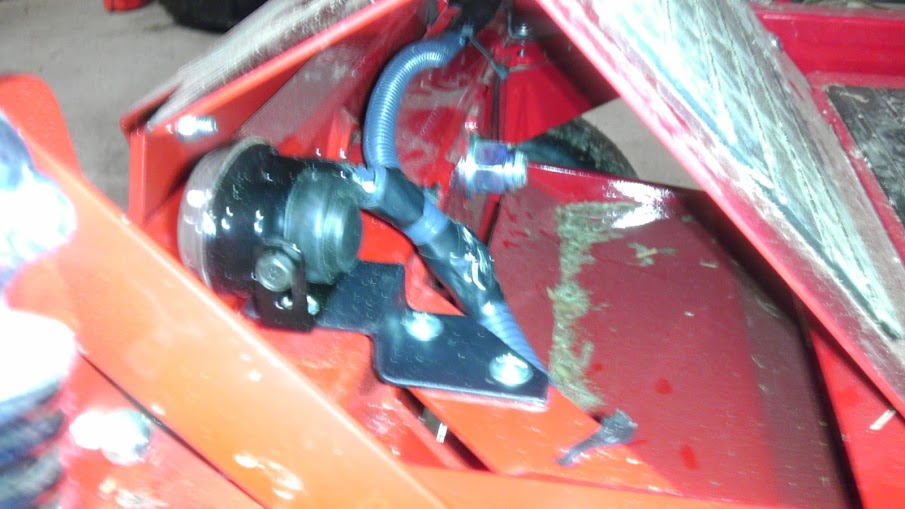
The lights will mount in the small openings in front of the platform behind the front suspension.
I wanted to use some existing holes in the frame gussets.
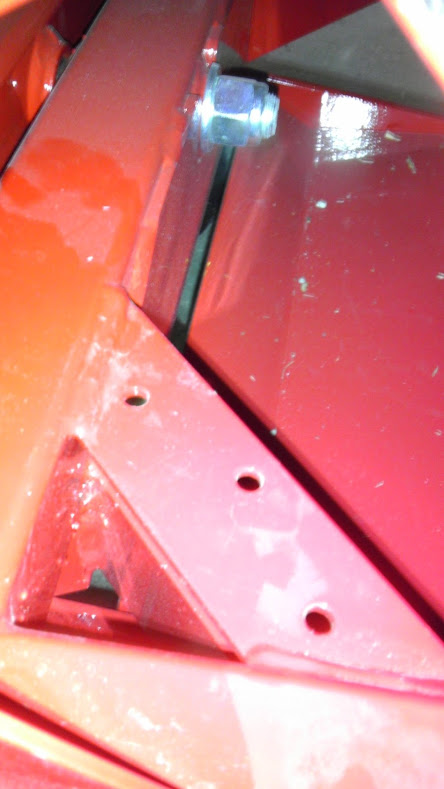
I welded these up from some scrap. Sorry no weld pics, phone died last night and wanted to get them primed, so took pics this morning.

How the light will mount.
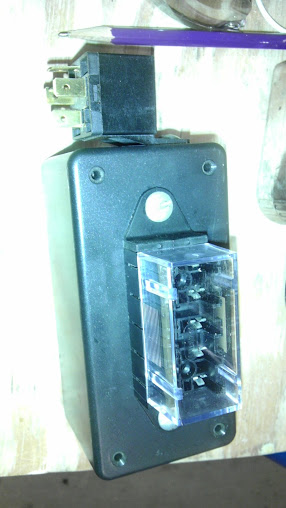
I did buy the factory switch and bezel, just have to pop out the plastic plug in the control panel. The factory light kit diagram shows a place to tie to the key switch for power. I plan to still pull my initial power from there, but will run some relays instead for powering the lights from the batteries directly. This should only draw about 2 amps through the key switch rather than 10 - 15 amps. Also will give me the ability to power additional relays so I could put another light on the rear if need be.
I also have plans for some other electrical accessories, like an electric spreader that a friend gave me, which I’ll make a quick attach mount on the front of the mower for. The relay panel will be mounted under the seat, so should make it easy access for wiring that and a snow plow if I decide to buy or build one.
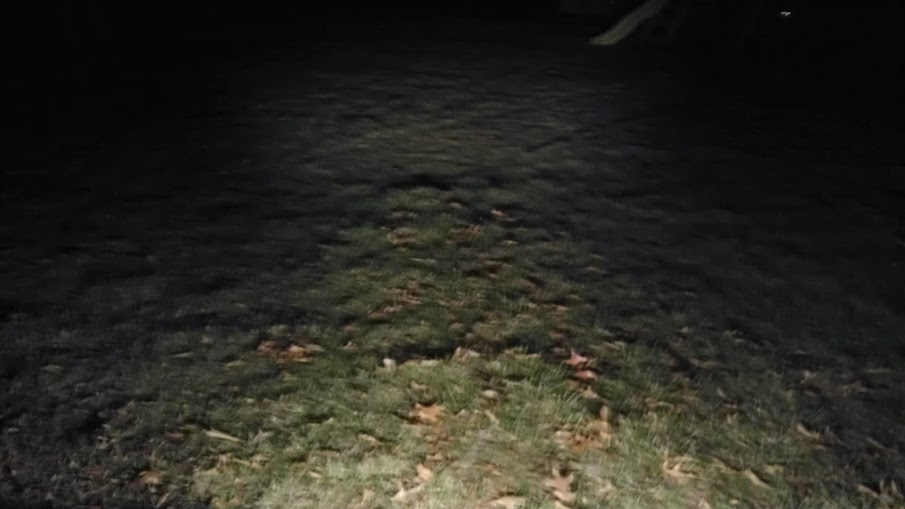
I'm not sure I'll ever mow much in the dark, but at least I'll have them on there.
TIP: For getting hole placement in an area that is too tight to get your measuring tools into to measure. I cut a piece of paper to the size of the bracket base, then placed it on the gusset where the bracket would mount. I then took a pencil and shaded the paper, which left impressions where the holes were. I then took the paper and laid it on my bracket and center punched where the hole centers were. Finally flipped the paper, placed it on the second bracket and used the previous marks to mark that bracket (I verified they were the same first).
The lights will mount in the small openings in front of the platform behind the front suspension.
I wanted to use some existing holes in the frame gussets.
I welded these up from some scrap. Sorry no weld pics, phone died last night and wanted to get them primed, so took pics this morning.
How the light will mount.
I did buy the factory switch and bezel, just have to pop out the plastic plug in the control panel. The factory light kit diagram shows a place to tie to the key switch for power. I plan to still pull my initial power from there, but will run some relays instead for powering the lights from the batteries directly. This should only draw about 2 amps through the key switch rather than 10 - 15 amps. Also will give me the ability to power additional relays so I could put another light on the rear if need be.
I also have plans for some other electrical accessories, like an electric spreader that a friend gave me, which I’ll make a quick attach mount on the front of the mower for. The relay panel will be mounted under the seat, so should make it easy access for wiring that and a snow plow if I decide to buy or build one.
I'm not sure I'll ever mow much in the dark, but at least I'll have them on there.
TIP: For getting hole placement in an area that is too tight to get your measuring tools into to measure. I cut a piece of paper to the size of the bracket base, then placed it on the gusset where the bracket would mount. I then took a pencil and shaded the paper, which left impressions where the holes were. I then took the paper and laid it on my bracket and center punched where the hole centers were. Finally flipped the paper, placed it on the second bracket and used the previous marks to mark that bracket (I verified they were the same first).

")