To avoid these ads, REGISTER NOW!

MP&C Shop Projects

green7racer

Active member
Joined
Aug 5, 2015
Messages
26
Location
Melbourne, Australia
I wonder if dry ice would work on the roof insulation?
I know it works real good on that tar-like floor insulation so loved by manufacturers and so hated by restorers.
Just dump some on a section, wait for the sub-strate to start making cracking sounds, shove it into another location and scoop up the fractured **** underneath.
Works a treat!
 
To avoid these ads, REGISTER NOW!
OP
M

MP&C

Well-known member
Joined
Oct 21, 2009
Messages
4,396
Location
Leonardtown, MD
Never messed with the stuff, but sounds like it works well! Thanks for sharing the method :thumbup:


Our enclosed trailer has the white wagon wheels that always seem to turn rusty in a few years, so I have been trying different wheels to see what might work....


These are some late model Mustang wheels, the hub hole would need to be opened slightly, but the offset was, well off.


Picture%203619.jpg


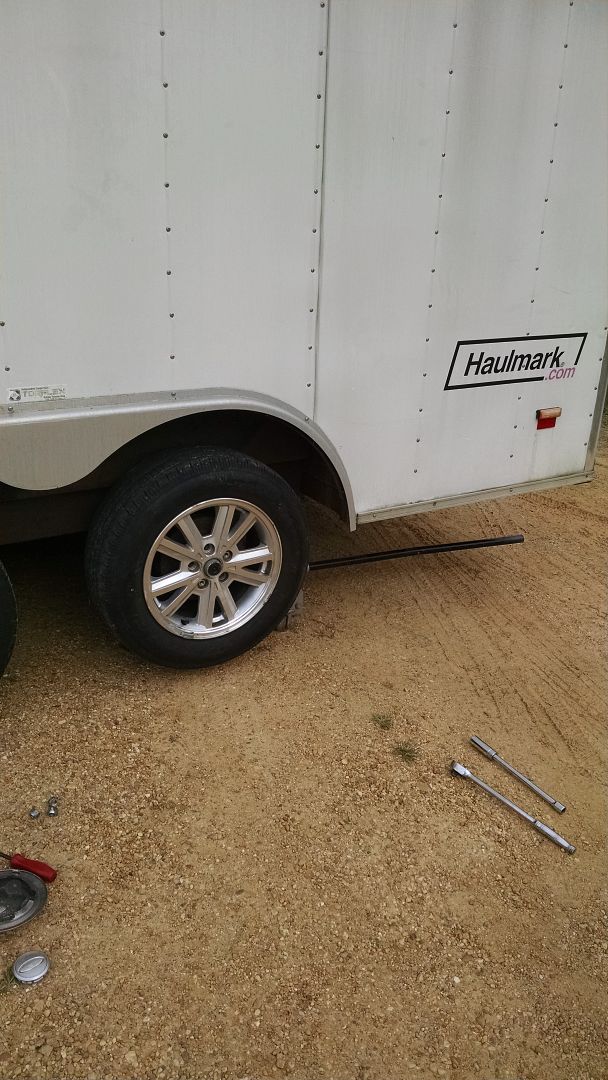
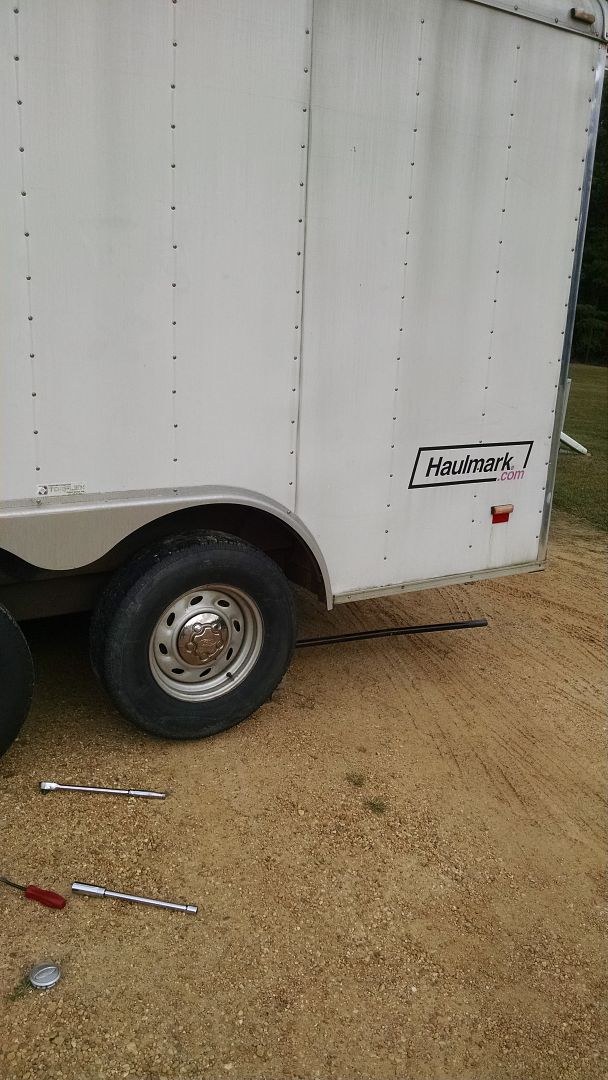
Perhaps on a fancy trailer with more stainless trim, but these just looked too much. Next, some plain Jane Ford Ranger wheels....


Picture%203620.jpg


Much better, correct offset, and no wheel modification needed. Just need to change up the color and add some stainless trim rings. I do have some bright orange, some bright red, and a few other colors in the paint locker.. :lol:


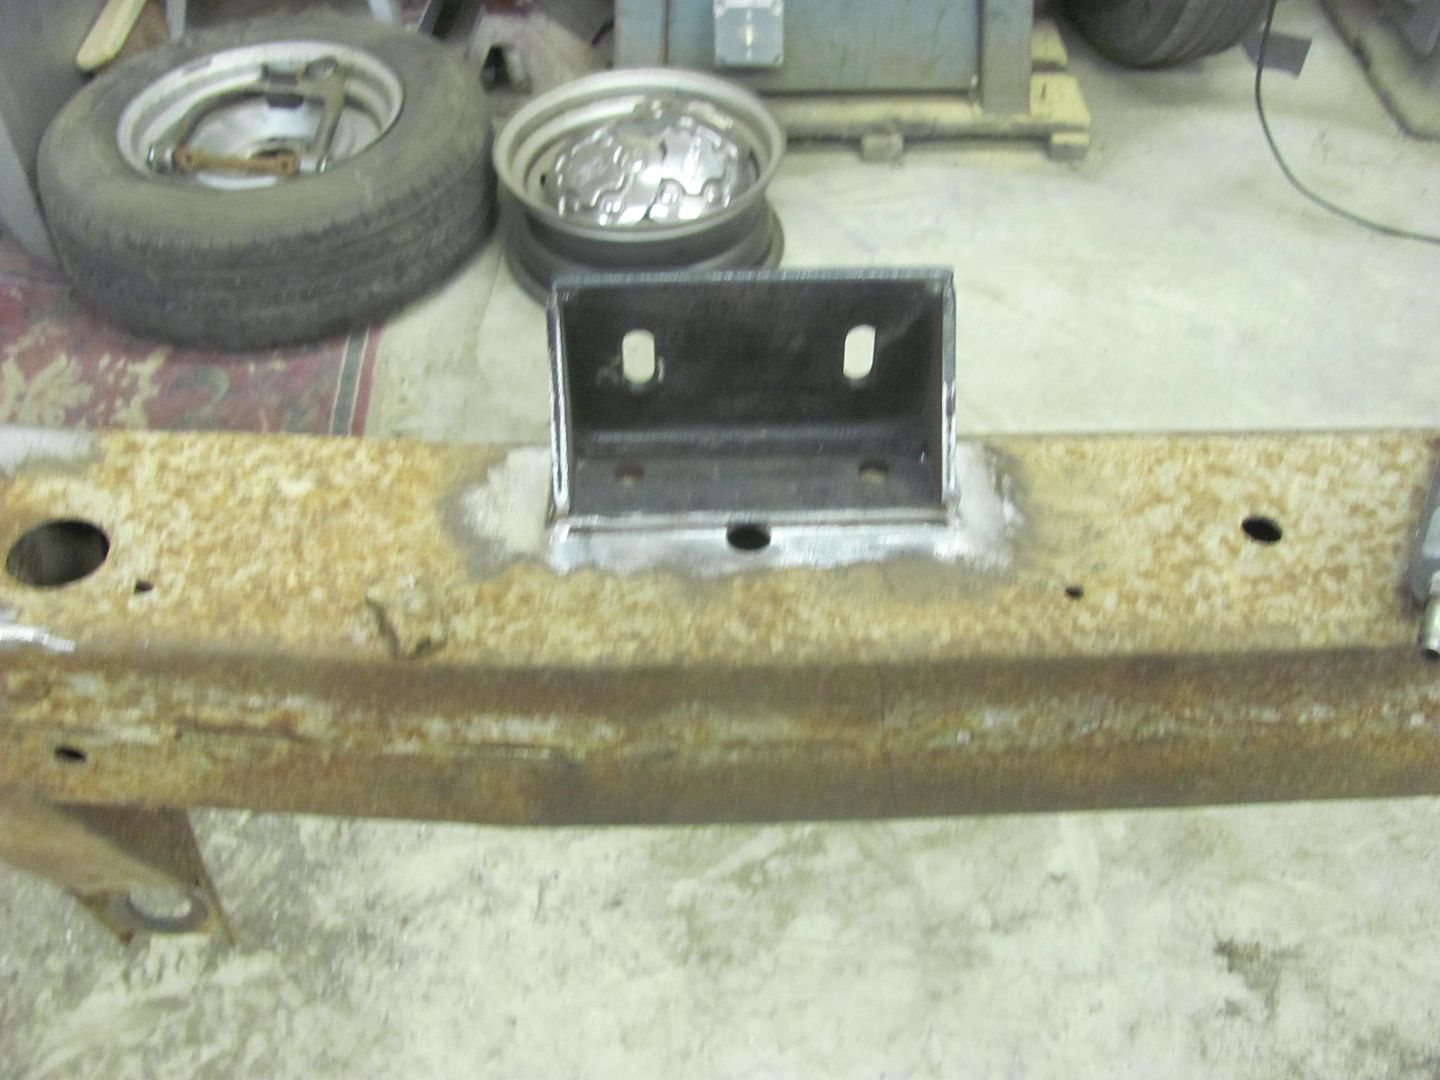
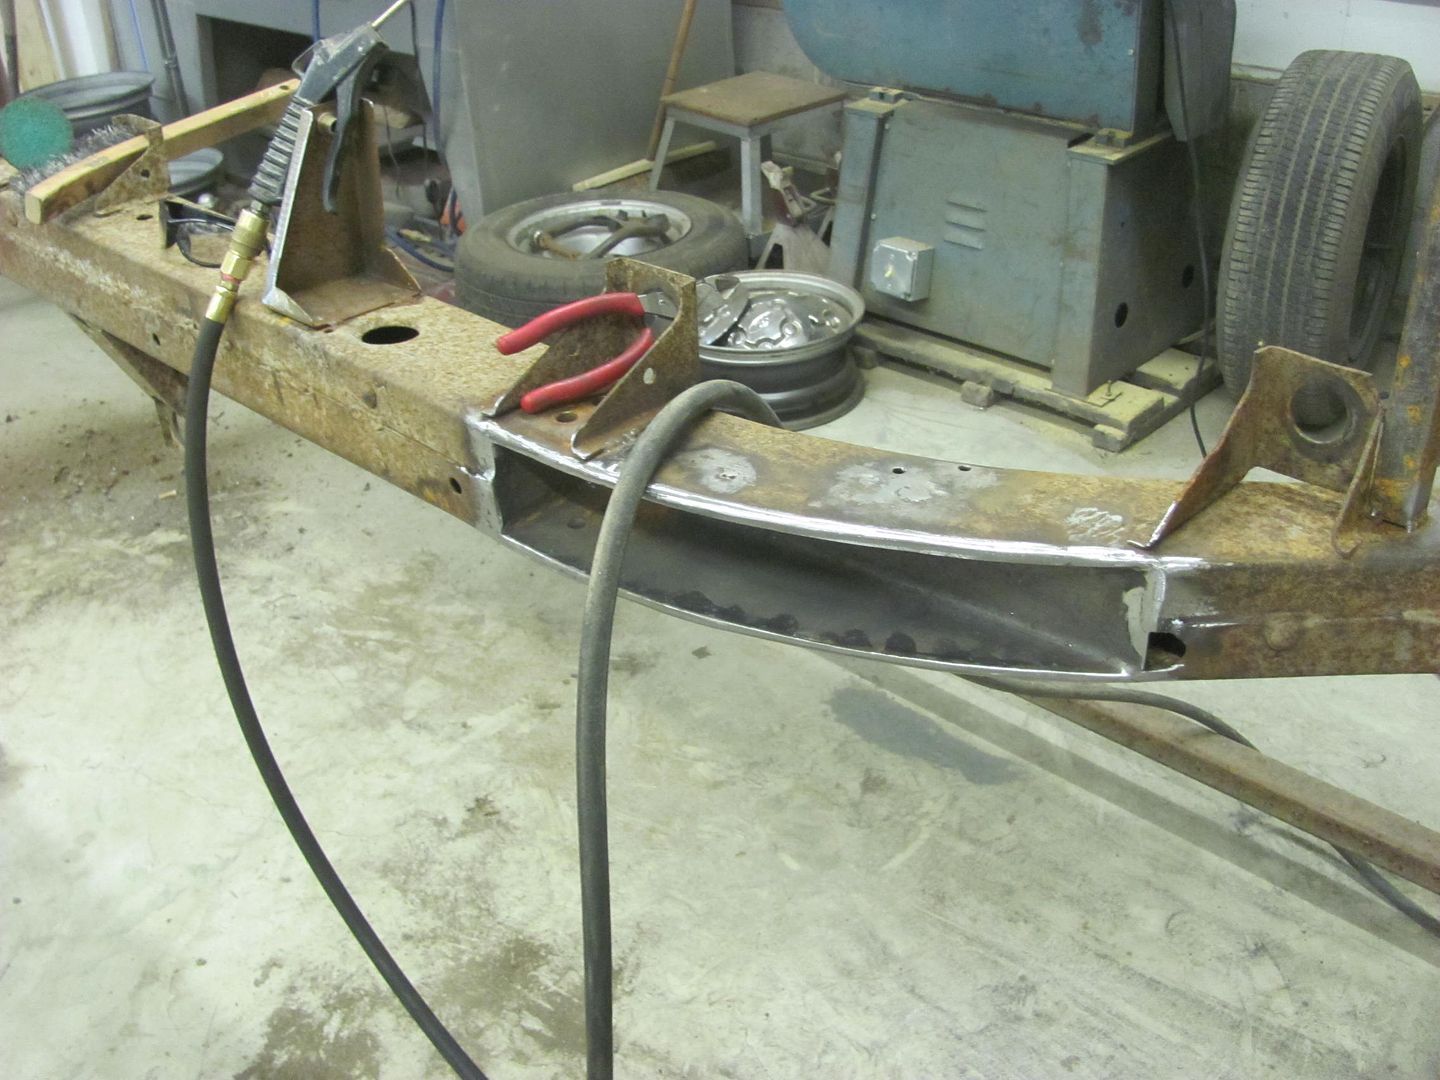
Some before and after media blasting..


Picture%203615.jpg


Picture%203616.jpg


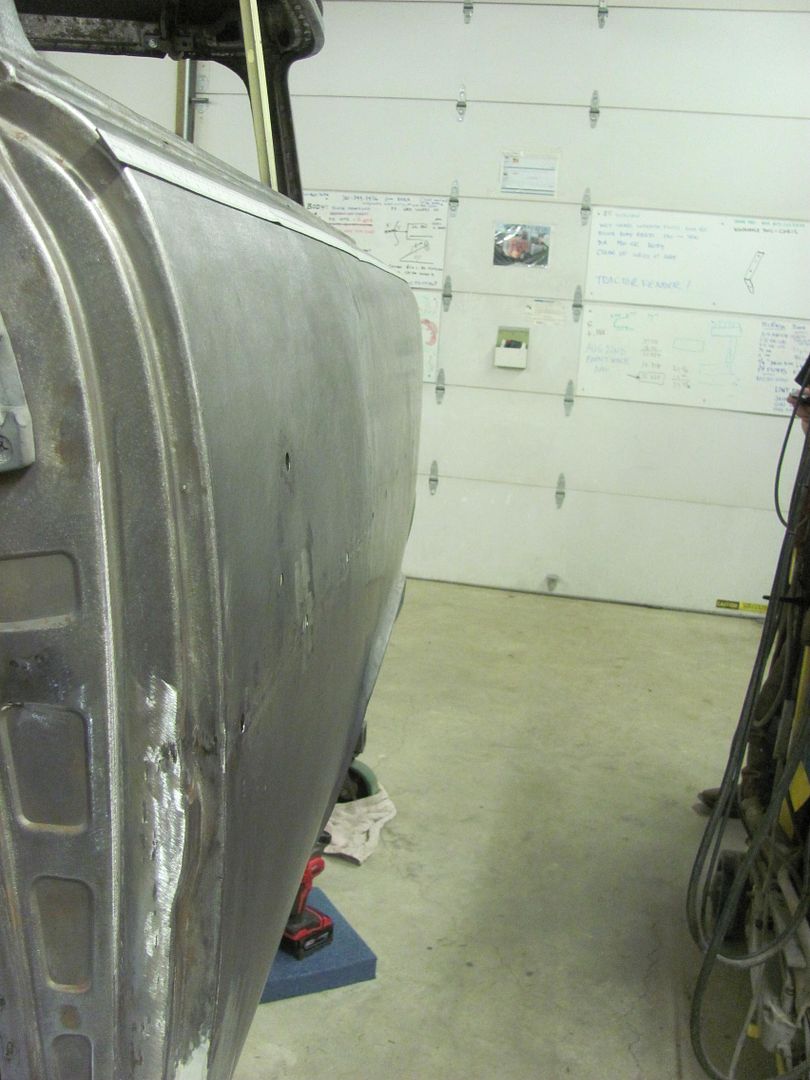
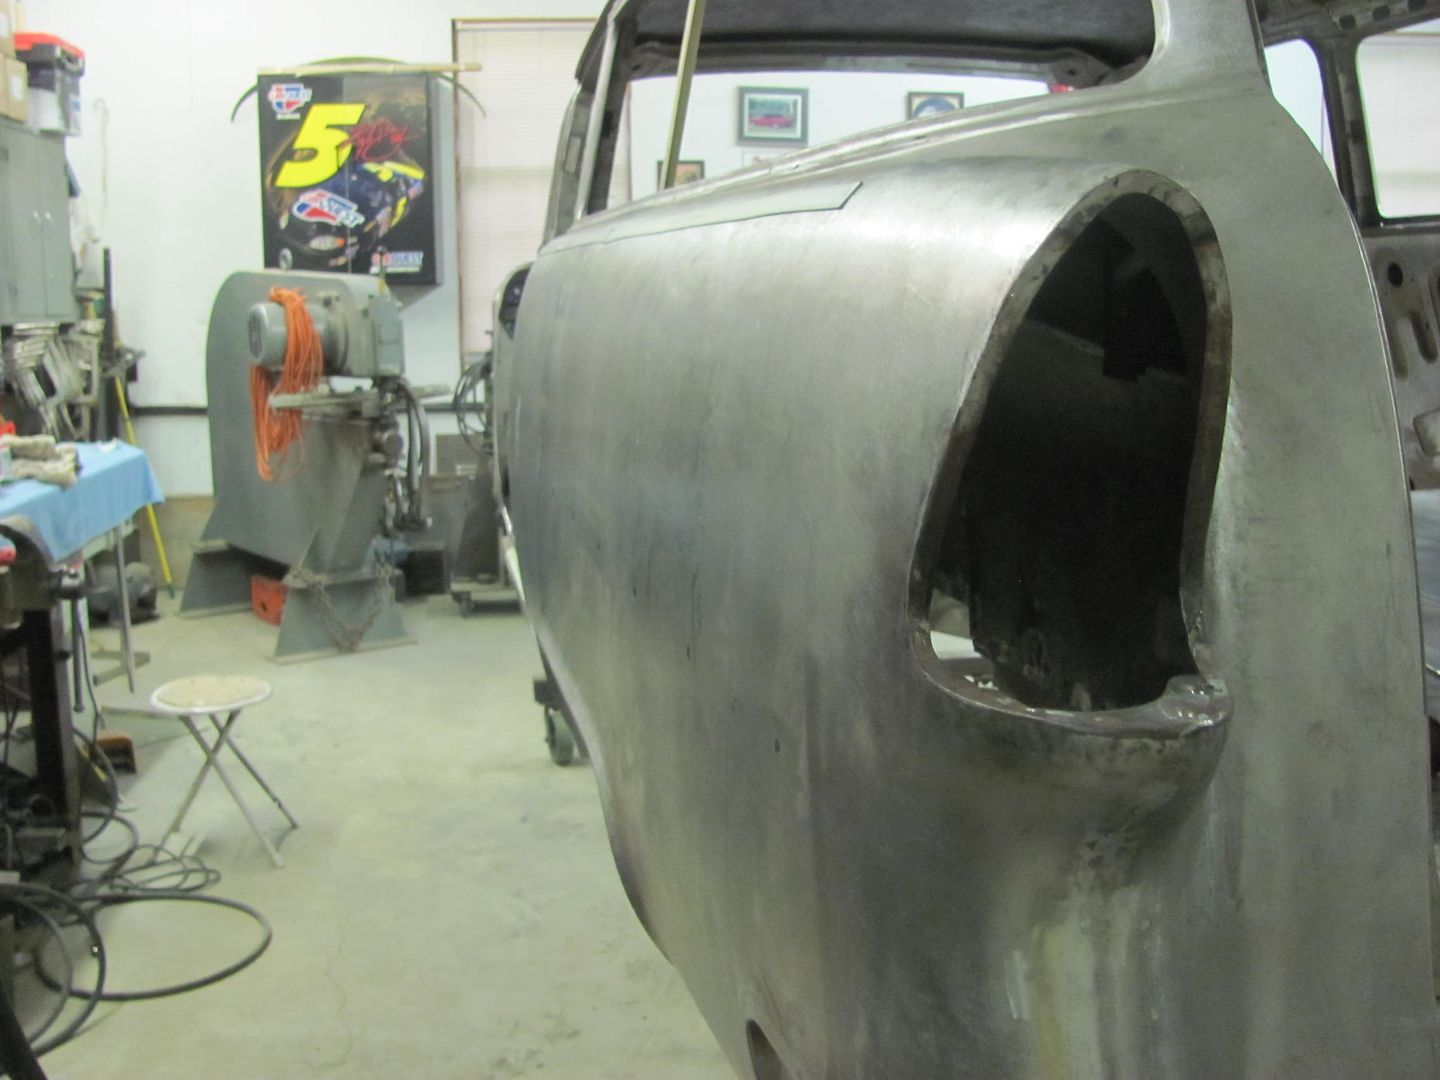
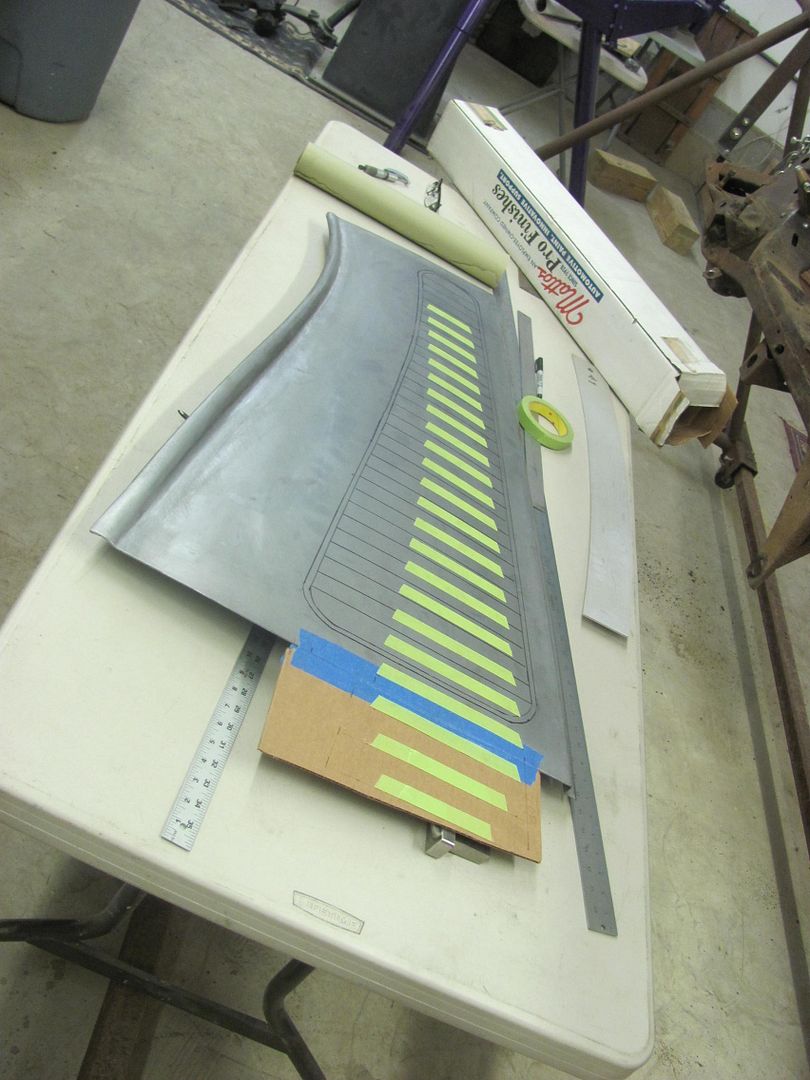
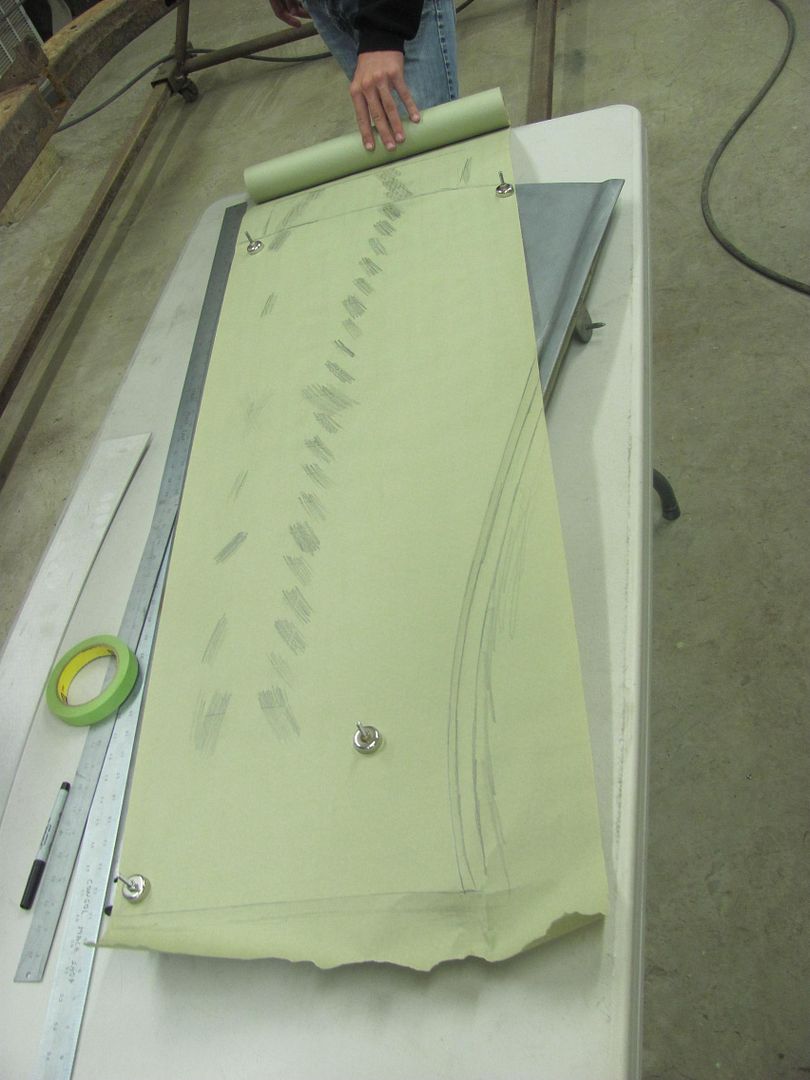
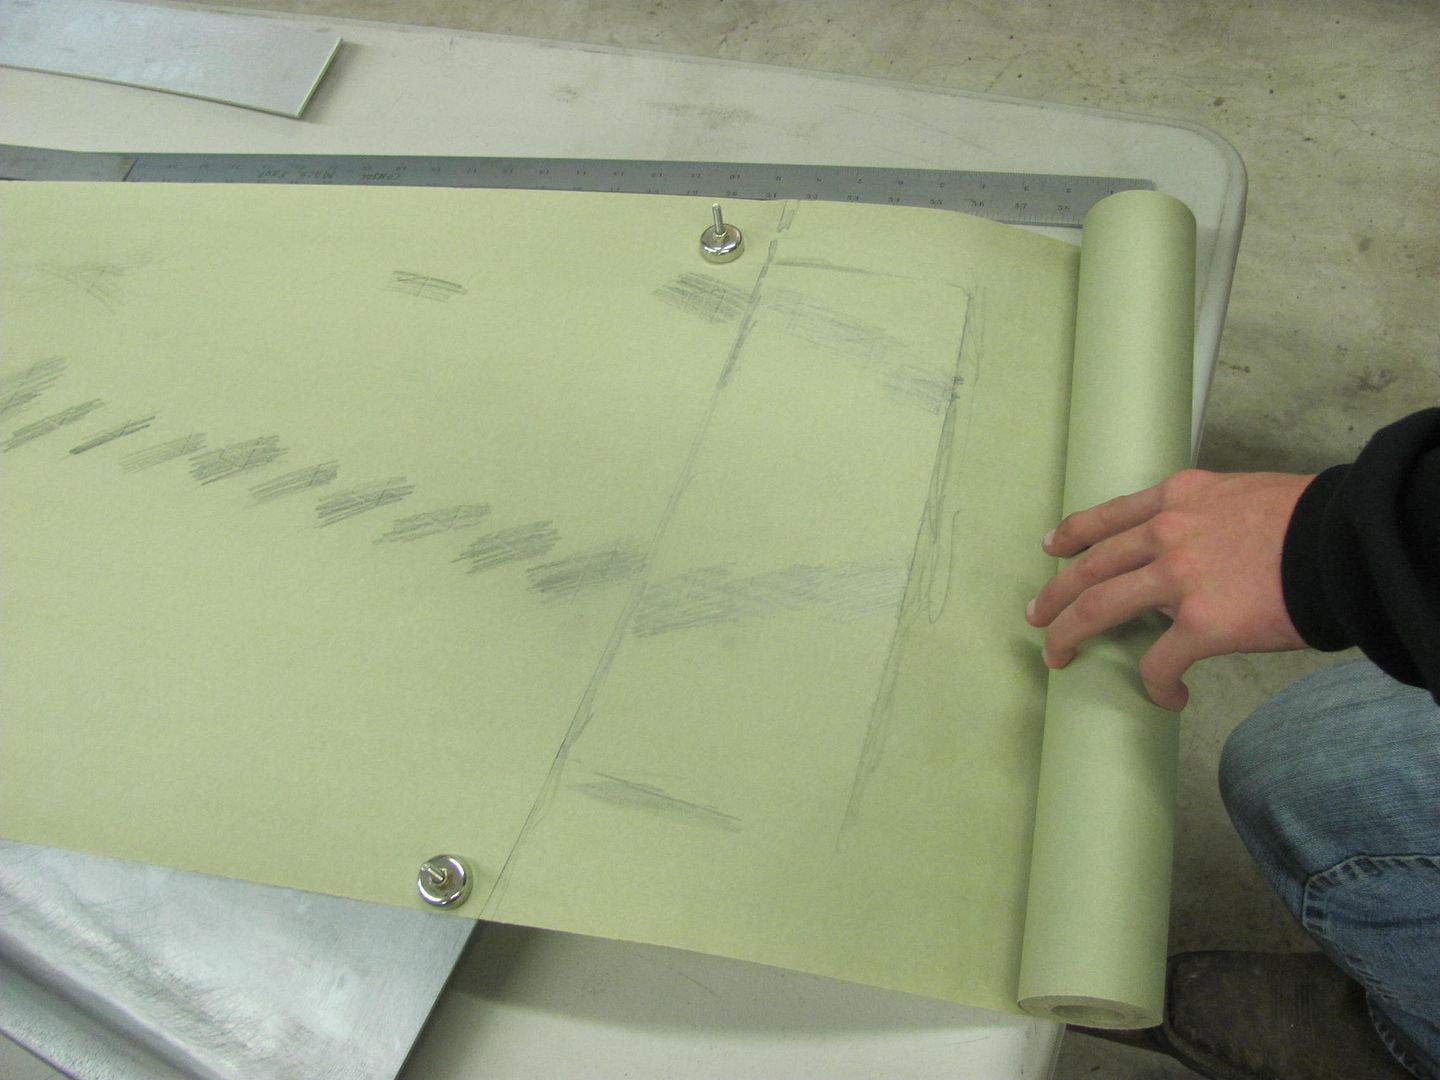
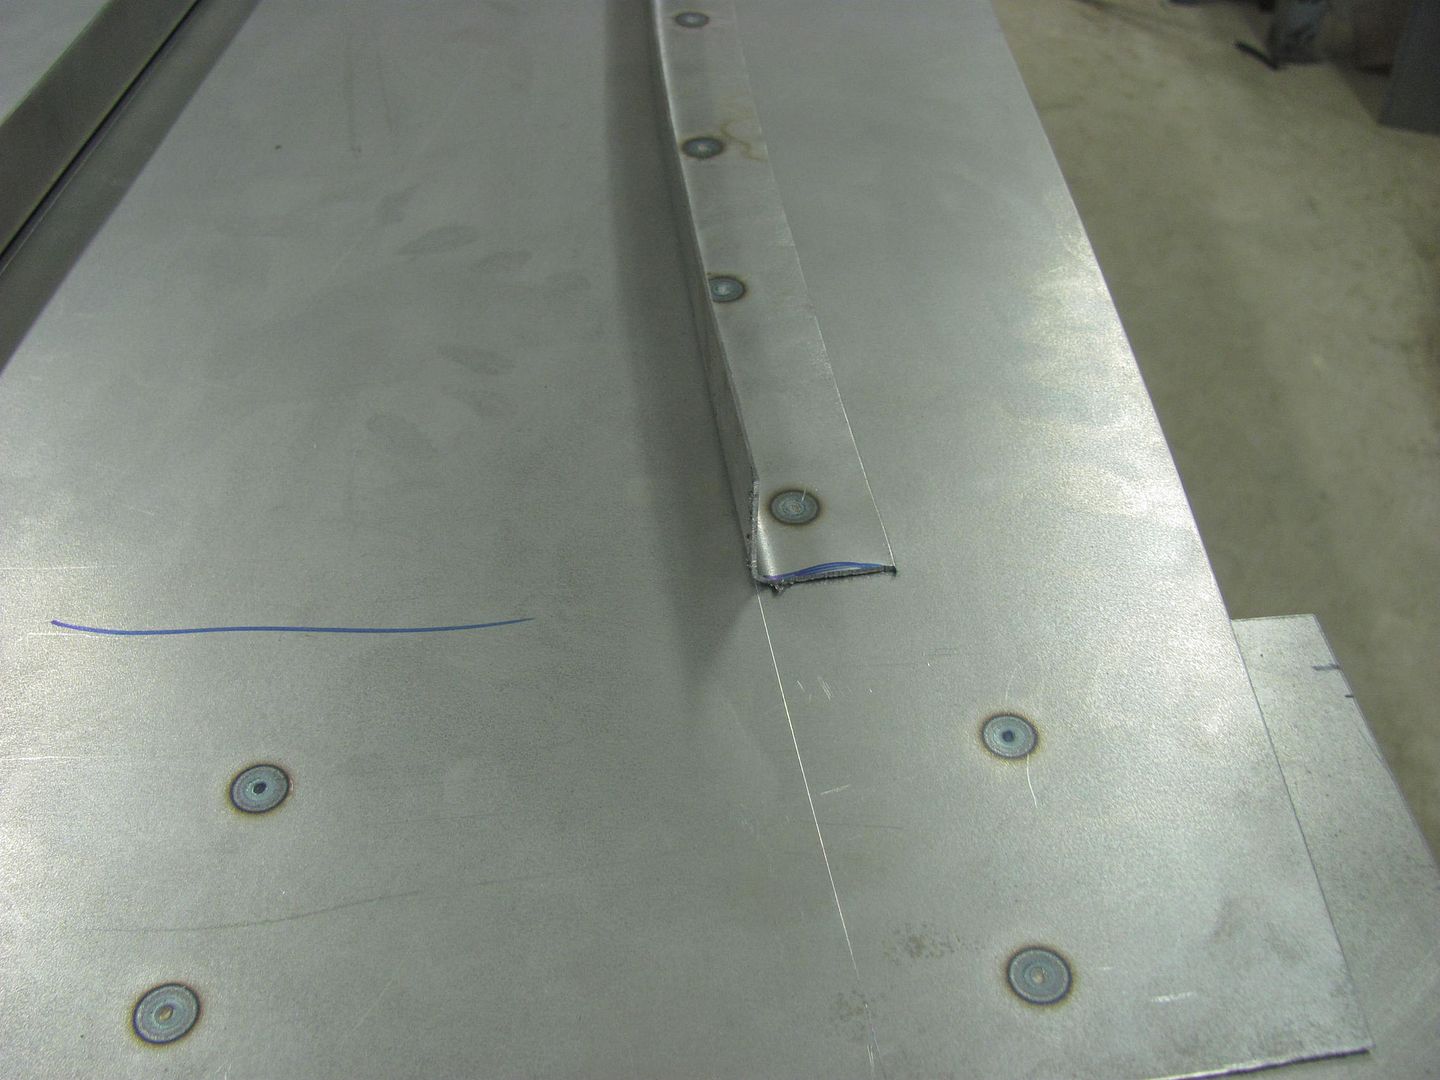
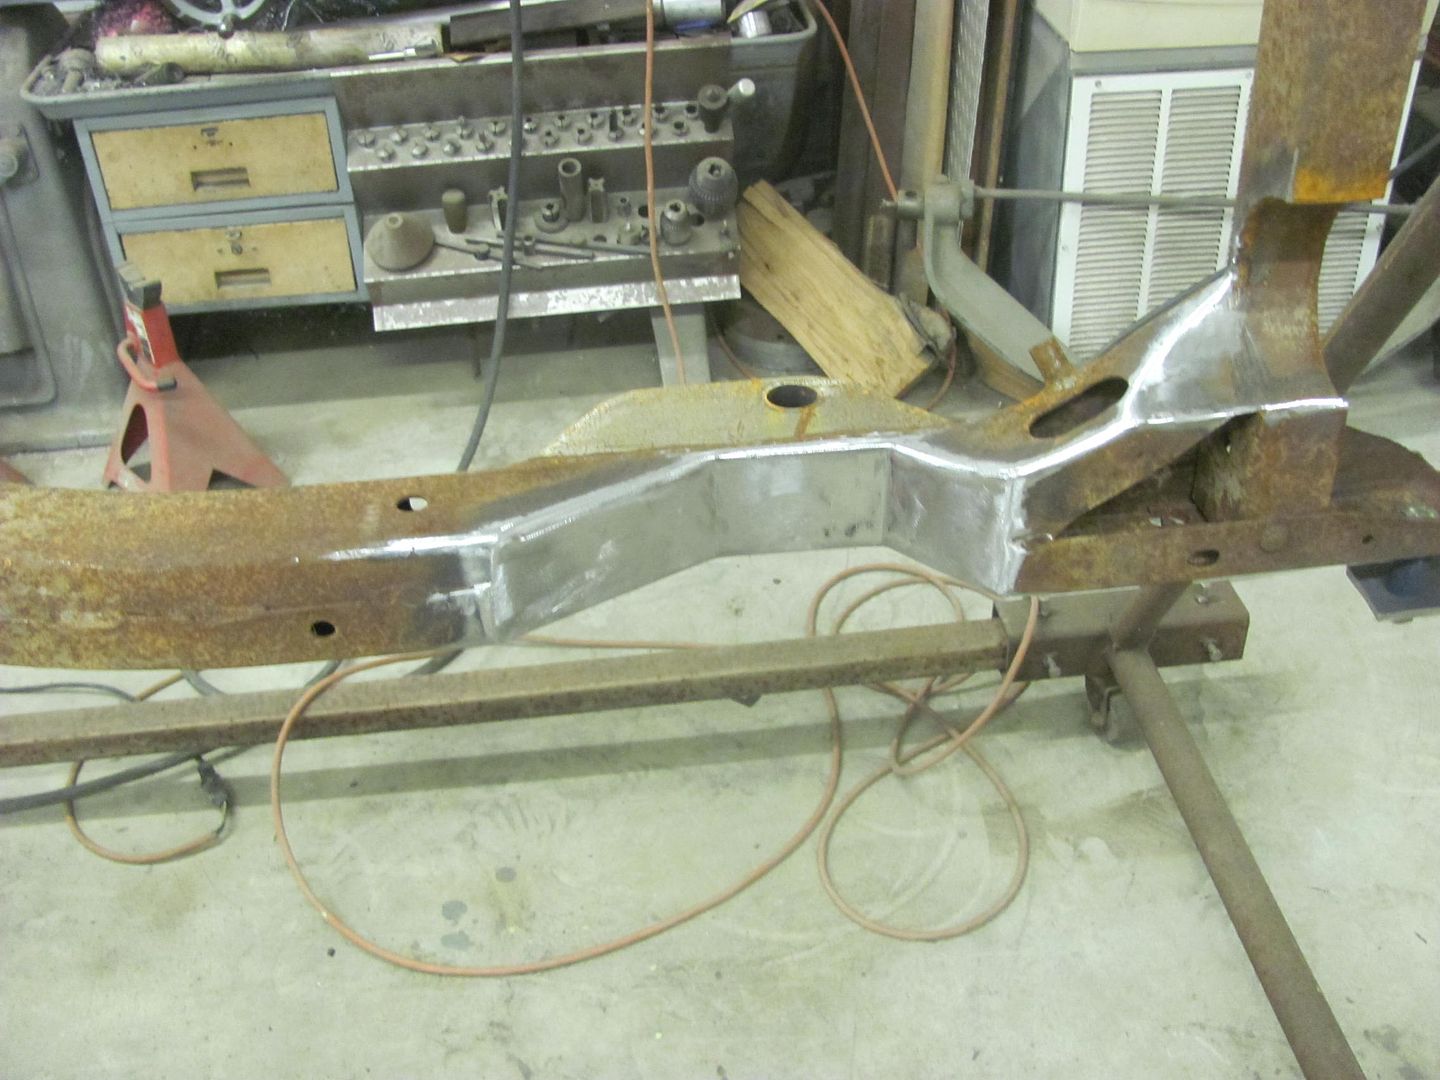
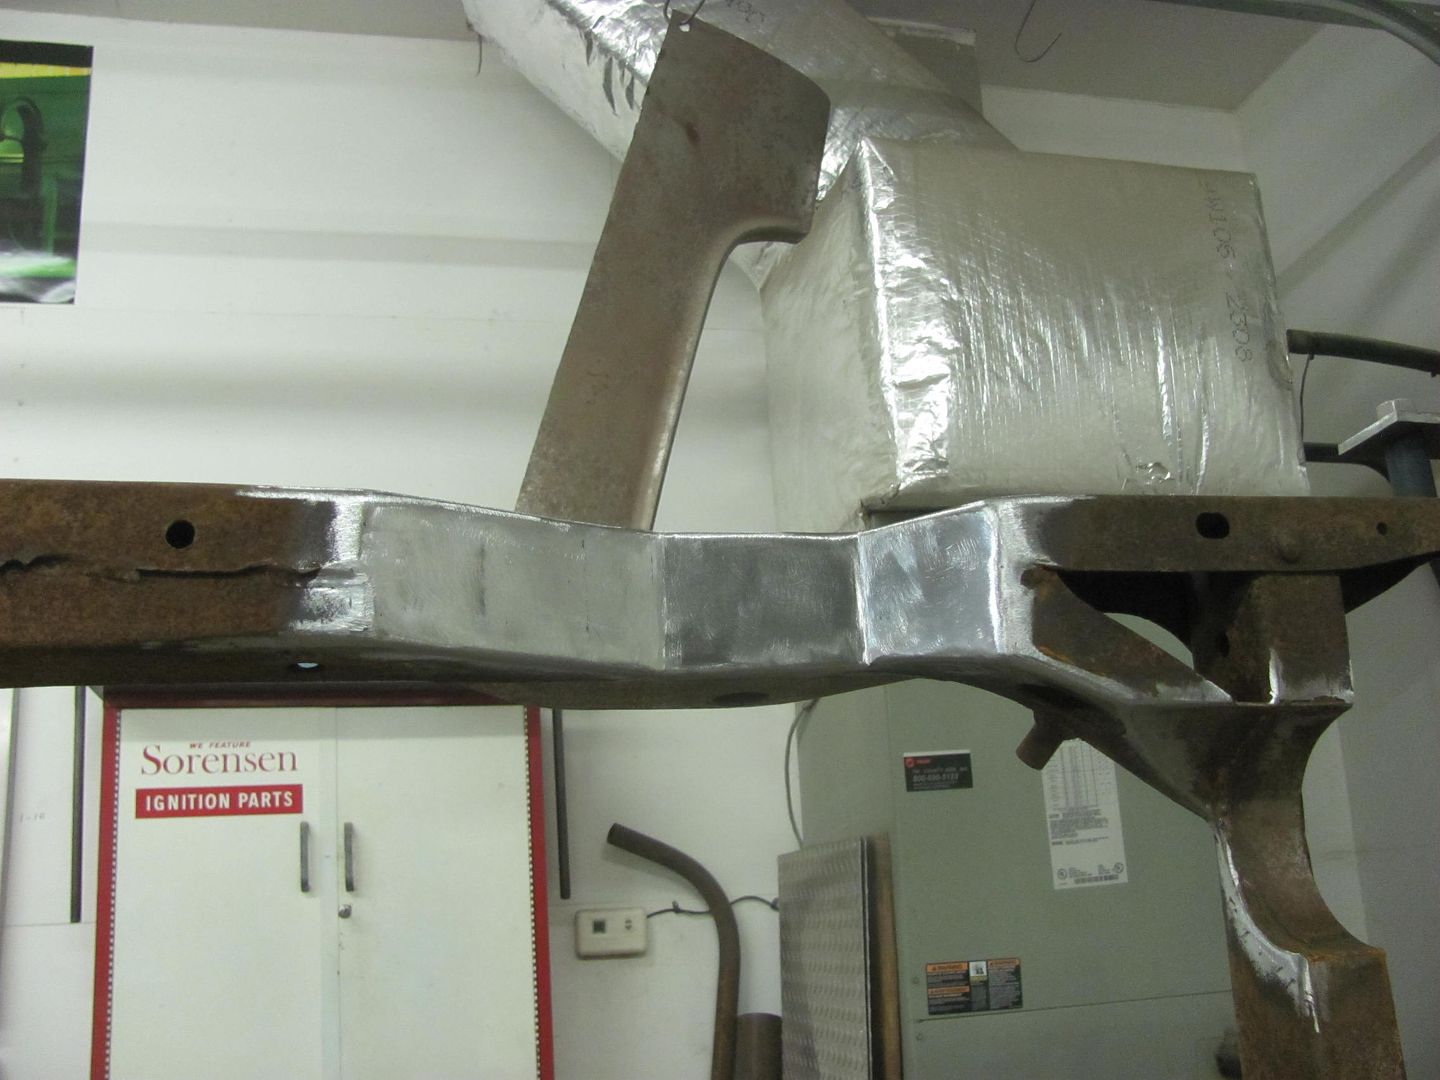
Two down, two to go. Can't get it all done in one night. And more weld grinding and other prep work on the wagon continues. Since the big cleanup in preparation for the class in the shop earlier this month, we haven't been able to find our quarter panel profile template, so Kyle made a couple of them, one for in front of the rear wheel, one behind, and we've been working on the weld seams and doing some metal bumping to minimize our stock in filler products. Drivers side is looking much better than it did last week, still about another day to go and the quarters should be good for epoxy primer..


Picture%203617.jpg


Picture%203618.jpg
 
OP
M

MP&C

Well-known member
Joined
Oct 21, 2009
Messages
4,396
Location
Leonardtown, MD
Tonight we took delivery of a rotisserie for the frame...


Picture%203626.jpg


And Kyle cut some adapter angles out of a piece of 4 x 6 tubing...


Picture%203628.jpg
 

4EyedTurd

Well-known member
Joined
Oct 3, 2009
Messages
595
Location
Texas
A quick question on filling small trim holes, how big does the hole have to be before you cut a filler piece instead of tacking it closed up? Of course using some kind of copper spoon
 
OP
M

MP&C

Well-known member
Joined
Oct 21, 2009
Messages
4,396
Location
Leonardtown, MD
I think for about 3/16 or less I'd use a copper backer and just weld it closed. Larger and I'd cut a filler piece. Personal preference in trying to keep heat controlled..
 
OP
M

MP&C

Well-known member
Joined
Oct 21, 2009
Messages
4,396
Location
Leonardtown, MD
Well, we didn't get pictures of the funny part. Kyle and I loaded the frame in the trailer and headed off to the local car wash to remove the grease from the front cross member. We had quite a few stares and a couple horns honking as he pushed the frame around the car wash parking lot and I was sitting on the frame rail, maneuvering with the Jr. steering wheel. We found the tire presoak and a wire brush does wonders for the engine grease. The car wash attendant did not look too pleased, but never said a word.


Back at the shop, bolting the adapter plates onto the frame...


Picture%203633.jpg


Picture%203639.jpg


You can see in the above picture we used 1-1/2" long spacers to get a better access for media blasting the frame..


Disassembly starts....


Picture%203649.jpg


Picture%203651.jpg


Picture%203652.jpg


Picture%203653.jpg


After a few revolutions and a bit of air pressure, we had quite a pile of 60 year old dirt..


Picture%203654.jpg


Override springs from the era. The handyman wagons were often used as work vehicles, and this option helped with the heavy loads...


Picture%203655.jpg


All stripped....


Picture%203658.jpg


Picture%203661.jpg
 

csp

Well-known member
Joined
Mar 23, 2010
Messages
5,719
Location
Franktown, CO
Oven cleaner (spray lye basically) and the car wash is my formula for removing grease/oil, once as much thicker stuff has been scraped off.
 
OP
M

MP&C

Well-known member
Joined
Oct 21, 2009
Messages
4,396
Location
Leonardtown, MD
Had an early Chevy hood side show up at the shop tonight, the owner wanted a couple different versions of louver samples made up that he could hold against the hood on the car to better visualize. One style he was looking at lends from an early Alfa Romeo that extends the louvers onto the cowl, as shown in the green tape..


Picture%203663.jpg


We took a paper pattern of the details so the hood side could go back with him to use as a pattern for the opposite side that still needs to be made.


Picture%203664.jpg


Picture%203665.jpg


Spot welded on some "end stops" for the louver die.....


Picture%203667.jpg


.....and a squared plate for the back gauge.


Picture%203668.jpg


Picture%203669.jpg


Louvers in the Lennox.....


Picture%203670.jpg


Picture%203671.jpg


Picture%203672.jpg


Picture%203674.jpg


One sample down, one to go..
 
Last edited:
OP
M

MP&C

Well-known member
Joined
Oct 21, 2009
Messages
4,396
Location
Leonardtown, MD
Thanks Larry. We did have a few scraps in getting the machine set up properly, it's been a while since I've done louvers... :willy_nil
 
OP
M

MP&C

Well-known member
Joined
Oct 21, 2009
Messages
4,396
Location
Leonardtown, MD
Wear them in good health fellas..

Kevin, this machine is a reciprocating machine that uses a punch and die, benefit over a single size punch is that you can do varying length louvers, as shown in the pictures above. Downside is that set up and operation time is longer than just a single punch..
 
Last edited:

yaidunno

Well-known member
Joined
Feb 10, 2011
Messages
1,336
Location
WI
Beautiful flow on the louvers. I assume that once you do it on the actual hood sides, the spot welded guides would be removed?

Thanks for sharing!
 
To avoid these ads, REGISTER NOW!
OP
M

MP&C

Well-known member
Joined
Oct 21, 2009
Messages
4,396
Location
Leonardtown, MD
On the "good" hood sides, will check with Cory on how he wants them attached. I can use some 1/8 SS rivets that filling holes will likely be less cleanup work than grinding welds..
 
OP
M

MP&C

Well-known member
Joined
Oct 21, 2009
Messages
4,396
Location
Leonardtown, MD
Well FedEx showed up today with a CL delivery, got a matched pair of 48" linear rails. The two bearing blocks will have a material clamp bolted to each block, and used on one rail. We'll get a chance to try it out on the second louver sample. Where we had been manually holding the workpiece against the back stop, this should work better with a simple glide back and forth once clamped in place..


Picture%203676.jpg


Picture%203677.jpg


Picture%203678.jpg


Picture%203679.jpg


While I was getting that squared away, Kyle was removing some scraps that were left on the frame from the original trans crossmember.


Picture%203683.jpg


Picture%203684.jpg


He also removed the spot welded guides from the louver panel. The good part about samples is we can see what works well and what doesn't. Here we can see that we won't use spot welds next time as it's too much clean up. I think we'll give some stainless rivets a shot on version 2...

Picture%203680.jpg


Picture%203681.jpg


Picture%203682.jpg
 

aggierailroad

Well-known member
Joined
Jan 8, 2012
Messages
581
Location
Houston, TX
Robert, how about double sided tape for the guides. That new stuff is crazy sticky and can be "undone" with acetone or alcohol in a squirt bottle. I've used it to machine thin discs on the lathe with no problems. No grinding or filling or welding!
 
OP
M

MP&C

Well-known member
Joined
Oct 21, 2009
Messages
4,396
Location
Leonardtown, MD
The more I looked at our panel with the spot weld carnage, the more I disliked the result, so with new linear guides installed, we made all new today using stainless pop rivets to hold the guides in place. This will leave a few 1/8" holes to fill, but should be much less issue than cleaning up after the spot welds...


We needed just a bit more throat for this set of "lengthened" hood sides, so one bolt was removed from the material clamp and then rotated the clamp inward 90". This lets the panel pass through rather than bottom out in the clamp.


Picture%203686.jpg


Guides riveted in place....


Picture%203687.jpg


Picture%203688.jpg


Picture%203689.jpg


Here's the new version 1, much cleaner, less distortion, and we can re-use the guides...


Picture%203694.jpg


Picture%203695.jpg


Picture%203696.jpg


The cowl piece was done without guides....


Picture%203700.jpg


And version 2 with the cowl piece.....


Picture%203699.jpg


Dave (the car owner) stopped by this afternoon and picked up the samples, and indicated he was being over-ruled by most parties on louvers in the cowl, so likely that version won't be used...
 

rmalkow2

Well-known member
Joined
Jun 26, 2009
Messages
4,087
Location
Brighton, MI
Robert,
I just finished all 76 pages and like so many before me are just in awe of your skills and willingness to teach and share. I consider this thread a go to resource for all future projects of my own. One thing for sure I now now why I keep collecting vise grips. To make useful special tools from the!
Thanks for all you share here and I will be following along from now on.
Now I gotta go find me a stump!

Bob
 

yaidunno

Well-known member
Joined
Feb 10, 2011
Messages
1,336
Location
WI
I have a feeling the linear rail will come in handy for much more then the lovers!

A few question on the process: Roughly how many strokes per minute is a setup like this running? And are the louvers done in a single pass?

Thanks again for the detailed pictures Robert! This is great stuff.
 
OP
M

MP&C

Well-known member
Joined
Oct 21, 2009
Messages
4,396
Location
Leonardtown, MD
Robert,
I just finished all 76 pages and like so many before me are just in awe of your skills and willingness to teach and share. I consider this thread a go to resource for all future projects of my own. One thing for sure I now now why I keep collecting vise grips. To make useful special tools from the!
Thanks for all you share here and I will be following along from now on.
Now I gotta go find me a stump!

Bob


That's quite a read in all one session! Thanks for the comments, hope my posts will help you out in your future projects. Some HD tanks and fenders on the horizon, perhaps?


I have a feeling the linear rail will come in handy for much more then the lovers!

A few question on the process: Roughly how many strokes per minute is a setup like this running? And are the louvers done in a single pass?

Thanks again for the detailed pictures Robert! This is great stuff.


The machine works on the premise that higher SPM=less gauge thickness, I'll have to look and see where it was set for this. With the louver dies you make an initial pass just to cut the slit, and then I did three subsequent passes. Too much on the first one tends to stretch too much and the lover detail will be wavy..
 
Last edited:
OP
M

MP&C

Well-known member
Joined
Oct 21, 2009
Messages
4,396
Location
Leonardtown, MD
Somehow missed this one....

Robert, how about double sided tape for the guides. That new stuff is crazy sticky and can be "undone" with acetone or alcohol in a squirt bottle. I've used it to machine thin discs on the lathe with no problems. No grinding or filling or welding!


What has been your experience with the tape around oil, and what tape did you use?

We considered some 3M double-sided body molding tape (as I had that in stock), but given all the WD40 used we feared it would have been a temporary hold...... letting go right in the middle, the way my luck runs.. We'll revisit the clamping method with Cody, he's coming to the shop when we punch the "GOOD" hood sides. The final version will likely be a bit longer, so we could even use some vise grips, if they don't pull puckers in the metal from the weight pulling down....
 
Last edited:

rmalkow2

Well-known member
Joined
Jun 26, 2009
Messages
4,087
Location
Brighton, MI
That's quite a read in all one session! Thanks for the comments, hope my posts will help you out in your future projects. Some HD tanks and fenders on the horizon, perhaps?

I should have been clear that it took me multiple reading sessions to finish to this point. And I had to take the side trips to watch the videos as well.
Maybe some HD stuff someday when a bigger shop affords the space. Right now the next big project up is a '29 Ford Roadster hot rod project. So I'm sure I'll use an idea or two from you along the way.
 

xtremek

Well-known member
Joined
Apr 13, 2012
Messages
11,603
Location
St. Johns, Mi
When I work in the school machine shop, we used double sided tape to hold thinner material to pieces of wood which was then clamped to the mill deck. Only problem with that was not messing up the part when it came time to remove it from the wood.
 
OP
M

MP&C

Well-known member
Joined
Oct 21, 2009
Messages
4,396
Location
Leonardtown, MD
Tonight we worked on the frame, used some poster board to make a pattern for a strengthening plate to span the pocket kit on each frame rail..


Picture%203705.jpg


While Kyle filled in some frame holes by plug welding to the pocket kit, I cut out the frame plates...


Picture%203706.jpg


Picture%203708.jpg


Picture%203709.jpg


Picture%203710.jpg


And the shop vacuum is about on it's last leg, it leaves behind about as much as it picks up. For anyone at DYSON or SHARK vacuum that would like to send a test sample, we can sure do a stress analysis on your product.. :lol:
 
OP
M

MP&C

Well-known member
Joined
Oct 21, 2009
Messages
4,396
Location
Leonardtown, MD
Thanks! For the final louvers on the actual hood sides we have another version planned to eliminate drilling holes and save a bit of clean up work..
 
OP
M

MP&C

Well-known member
Joined
Oct 21, 2009
Messages
4,396
Location
Leonardtown, MD
The Lennox is quite a bit cheaper than the Pullmax, but some of the Pullmax machines have a taller throat for more shaping capability in some cases.. Keep your eyes out, I'm sure you'll come across one.. :beer:


More prep and welding on the frame....


Picture%203722.jpg


Picture%203723.jpg


Picture%203724.jpg


Picture%203725.jpg


and we cleared out the remaining vacuum inventory from the yard sale pile.. This one is working a bit better!


Picture%203721.jpg


We've been going through a dry spell here in the shop, it's been quite some time since we've seen any yellow body panels. Soon to change....


Picture%203726.jpg


Picture%203727.jpg
 
Last edited:

xtremek

Well-known member
Joined
Apr 13, 2012
Messages
11,603
Location
St. Johns, Mi
So out with it, what's the story on the bus? Also, I'm kind of perturbed, I thought my idea of putting the front spring perch inside the frames rails was original :( Still it's good to know it can be done safely.
 
OP
M

MP&C

Well-known member
Joined
Oct 21, 2009
Messages
4,396
Location
Leonardtown, MD
A buddy of mine has a fleet of about 20 buses. On a good year, he doesn't need me. Worst case (so far) has been three in one year.. This one will be a cheap fix comparatively, the ones that tear up those aluminum cargo doors rack up $900+ for each door, in primer.


The leaf spring pocket was made of 3/16 steel. I have ideas for an improvement in the design, if you decide to use them let me know..
 
To avoid these ads, REGISTER NOW!
Top Bottom