To avoid these ads, REGISTER NOW!

MP&C Shop Projects

OP
M

MP&C

Well-known member
Joined
Oct 21, 2009
Messages
4,396
Location
Leonardtown, MD
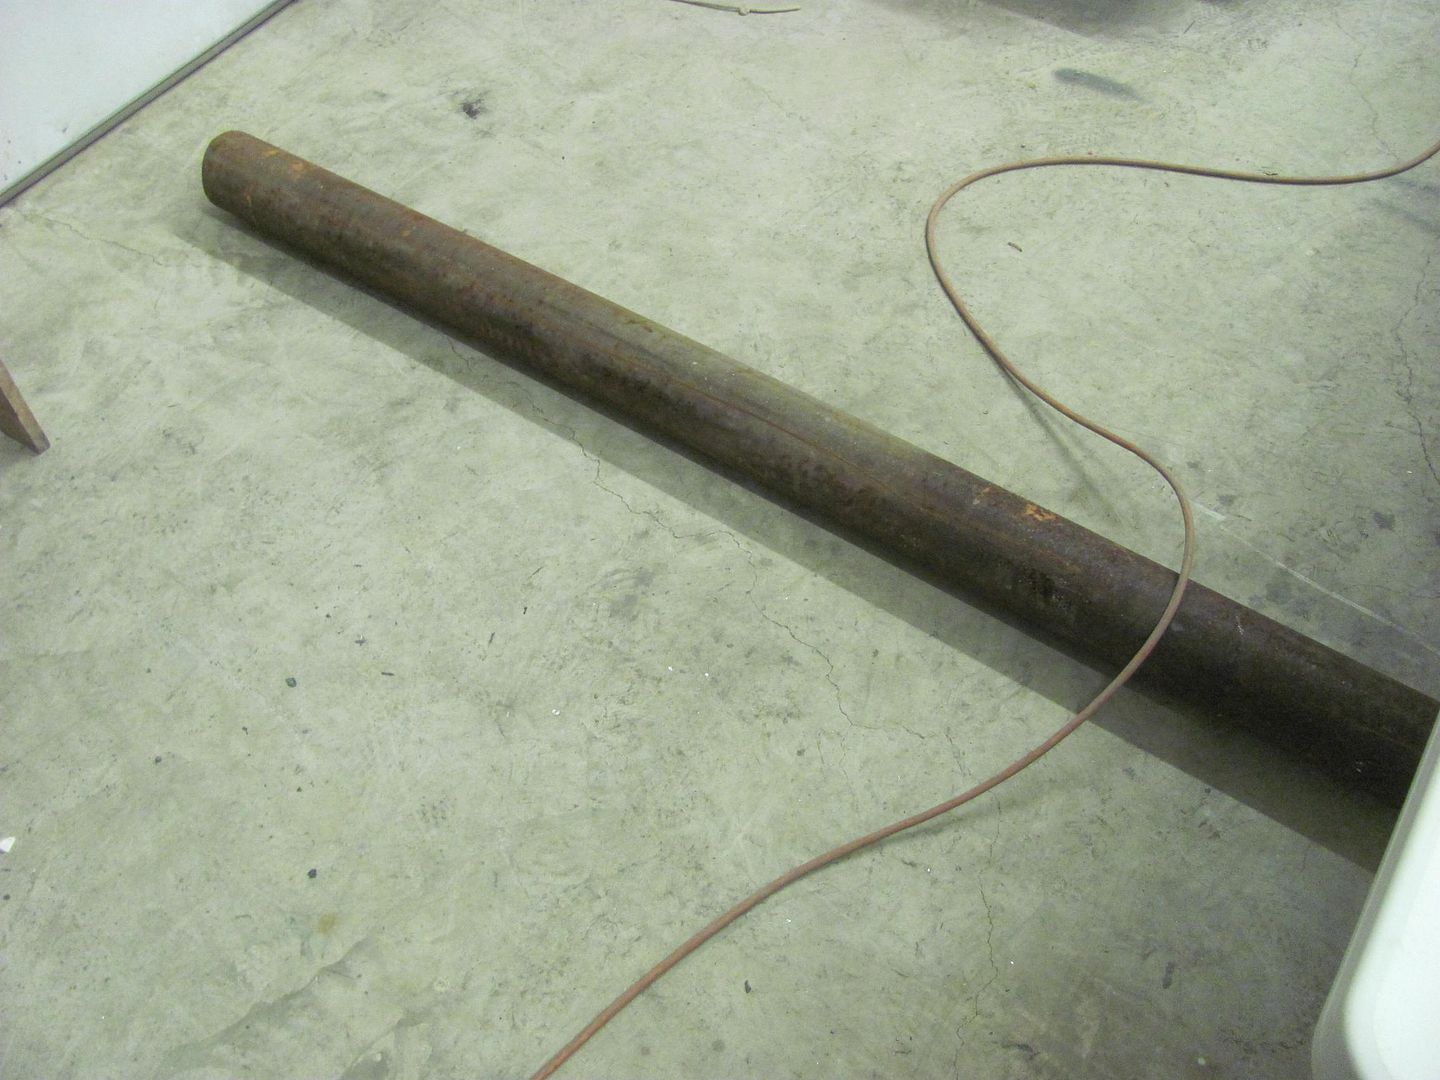
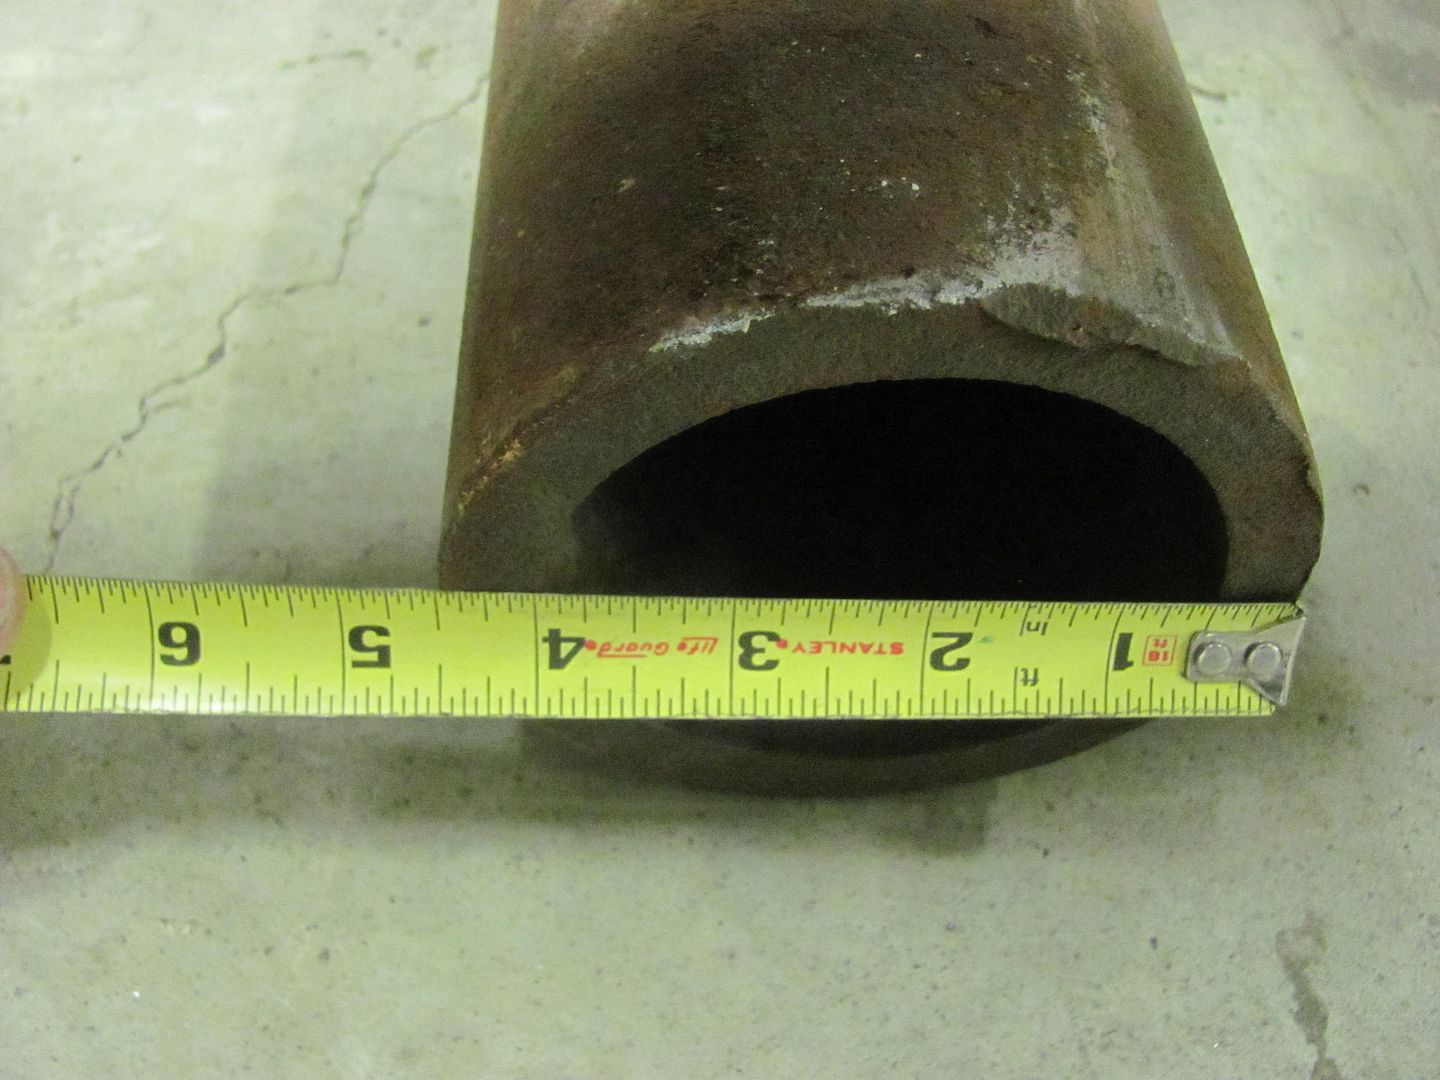
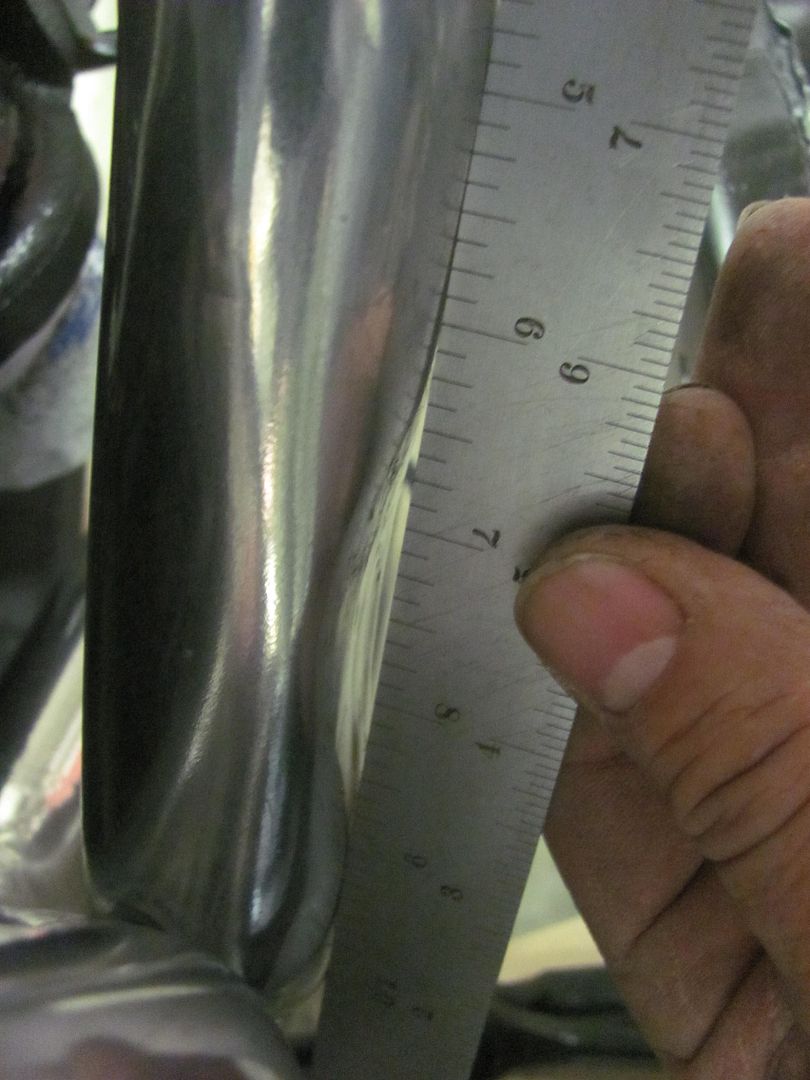
Yesterday we took delivery on an 8' piece of pipe, 4-1/2" OD with 1/2" wall thickness. Will come in handy as the column for the pedestal planishing hammer build..


Picture%204128.jpg


Picture%204129.jpg


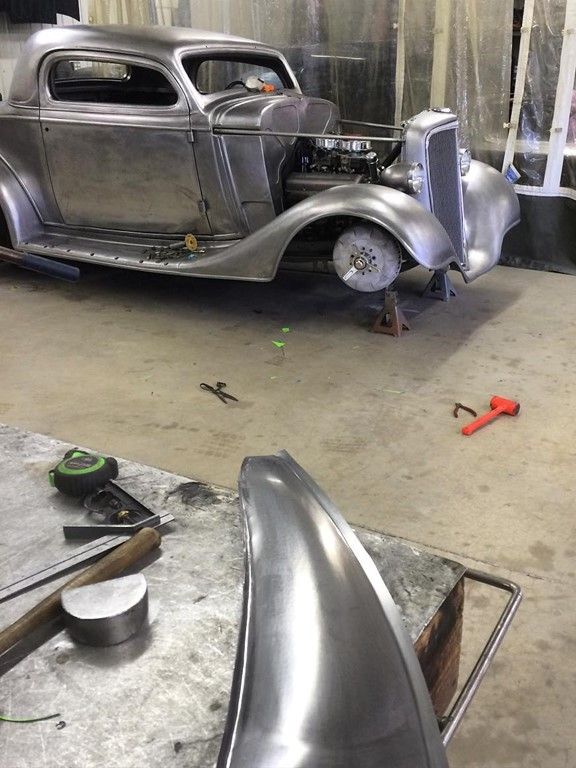
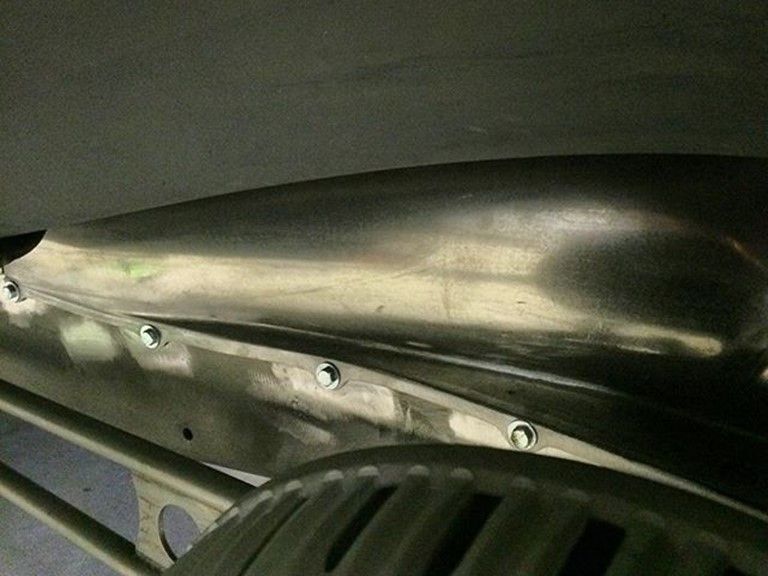
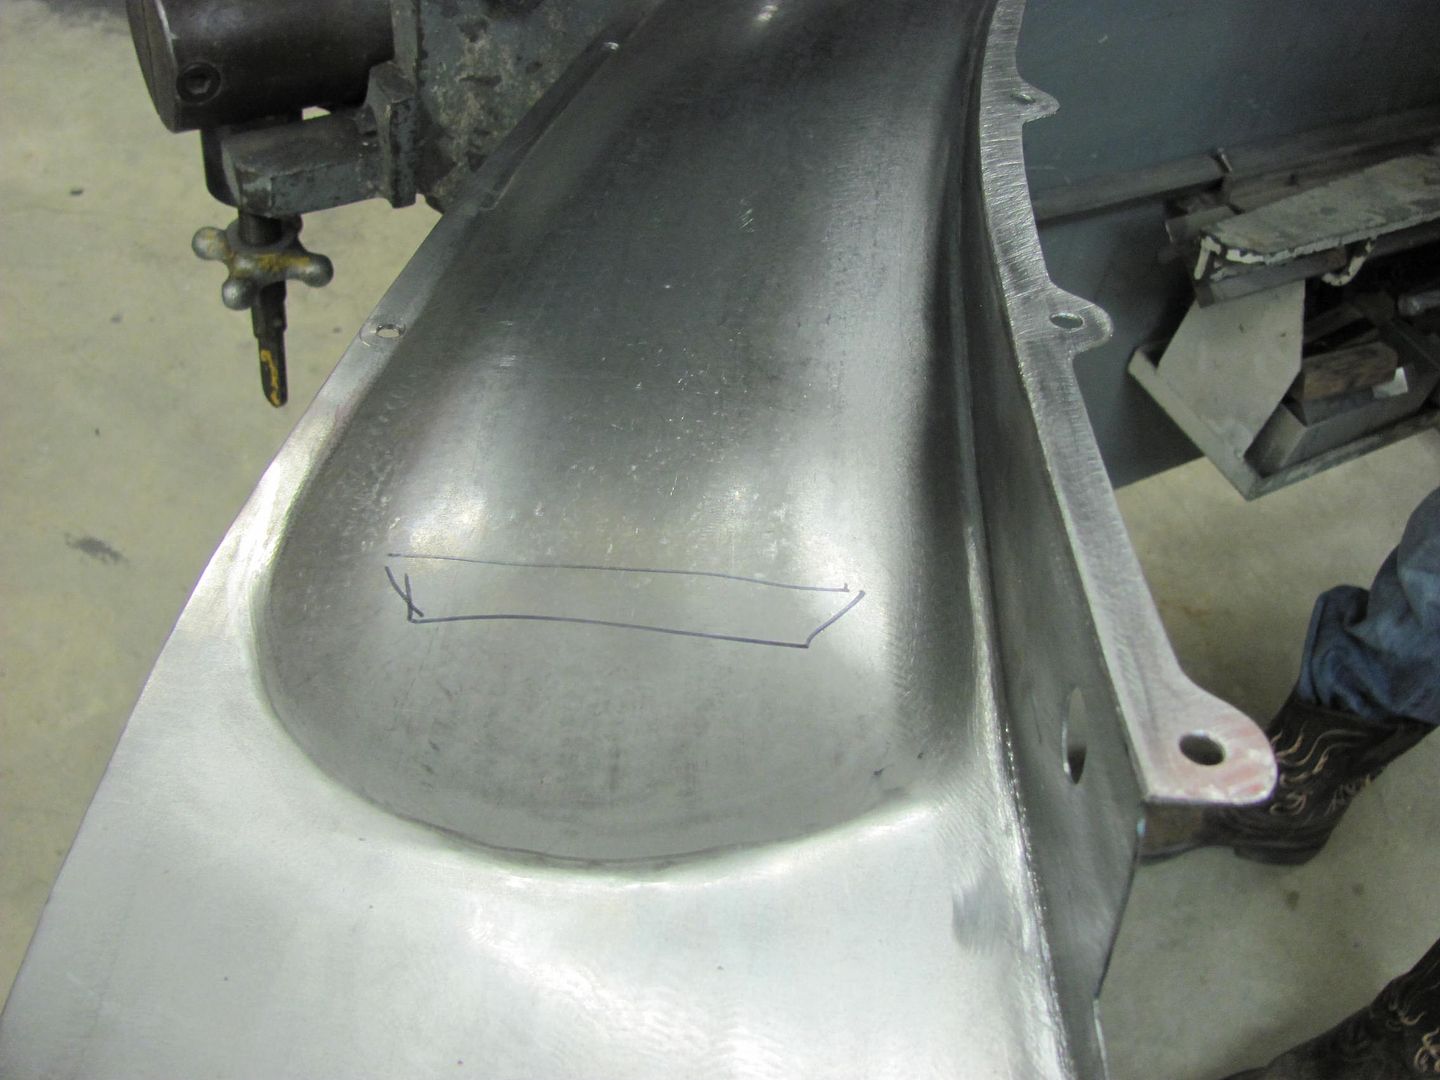
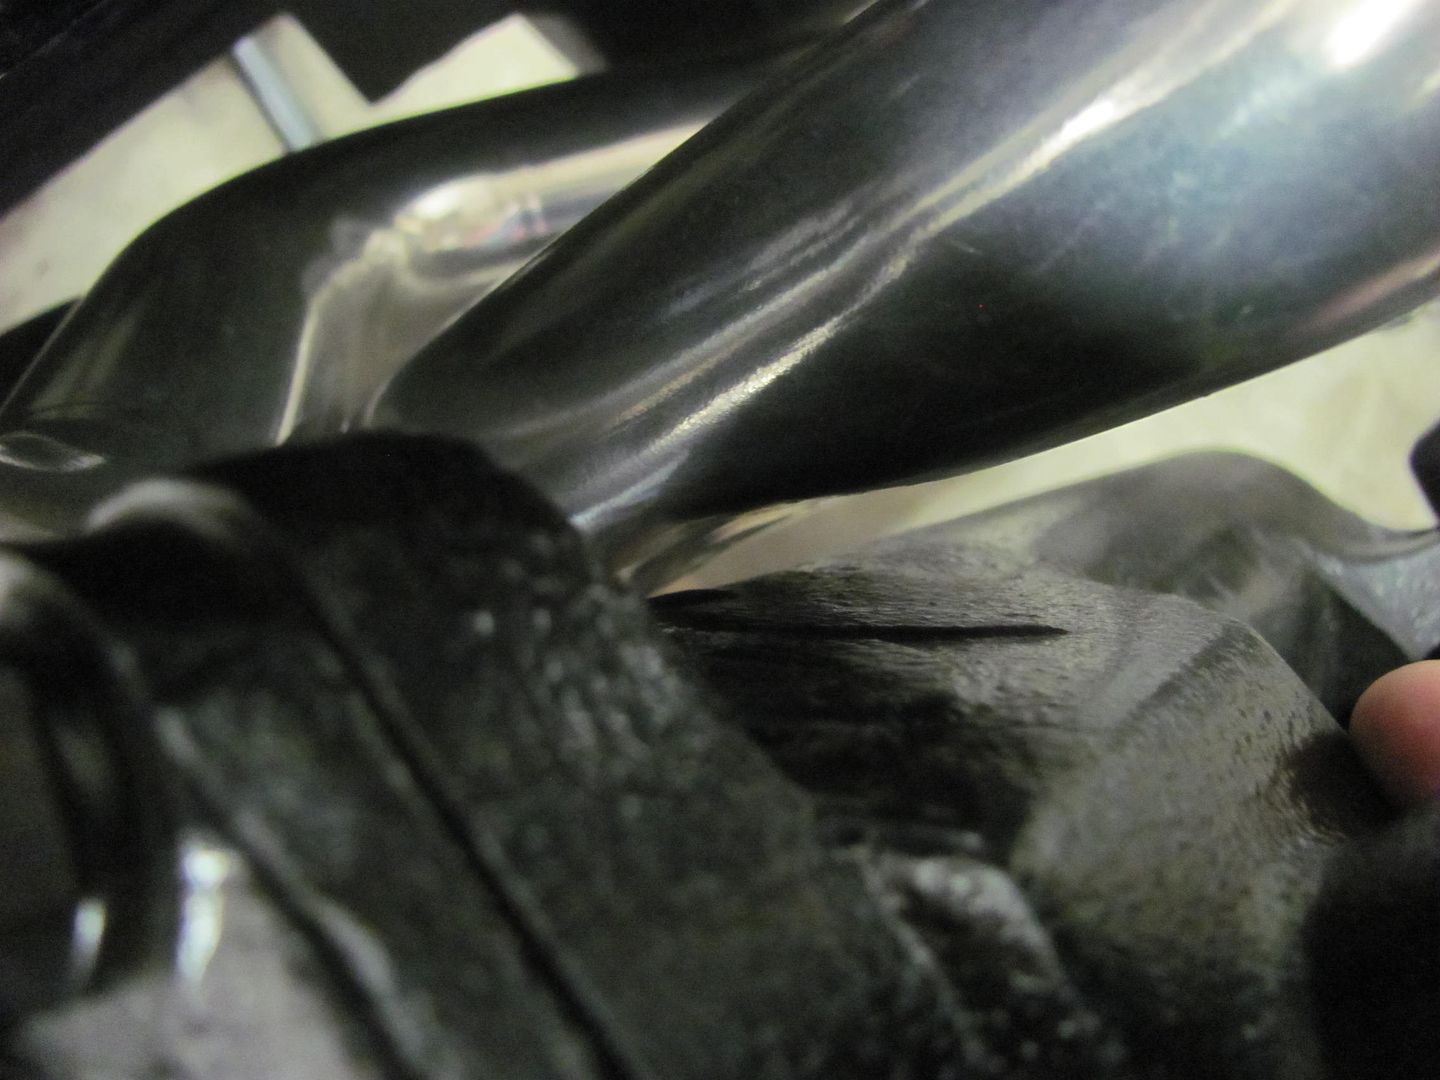
A bit more clearancing for the header tube. Perhaps this fine tuning will also add a few HP...


Picture%204131.jpg


Picture%204132.jpg


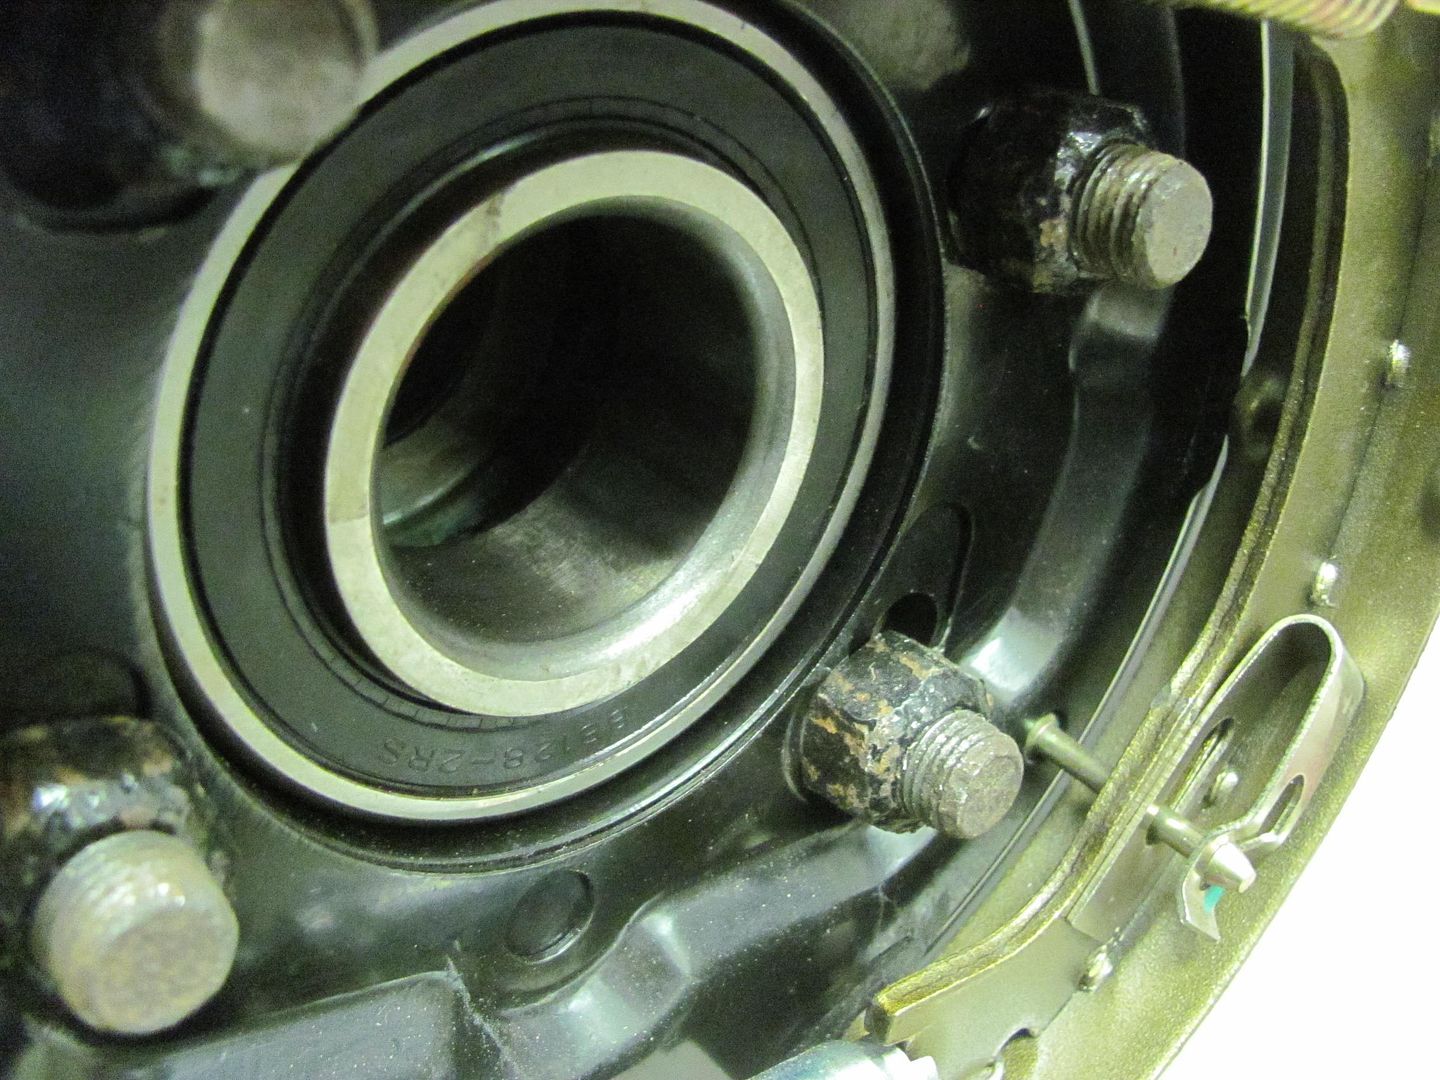
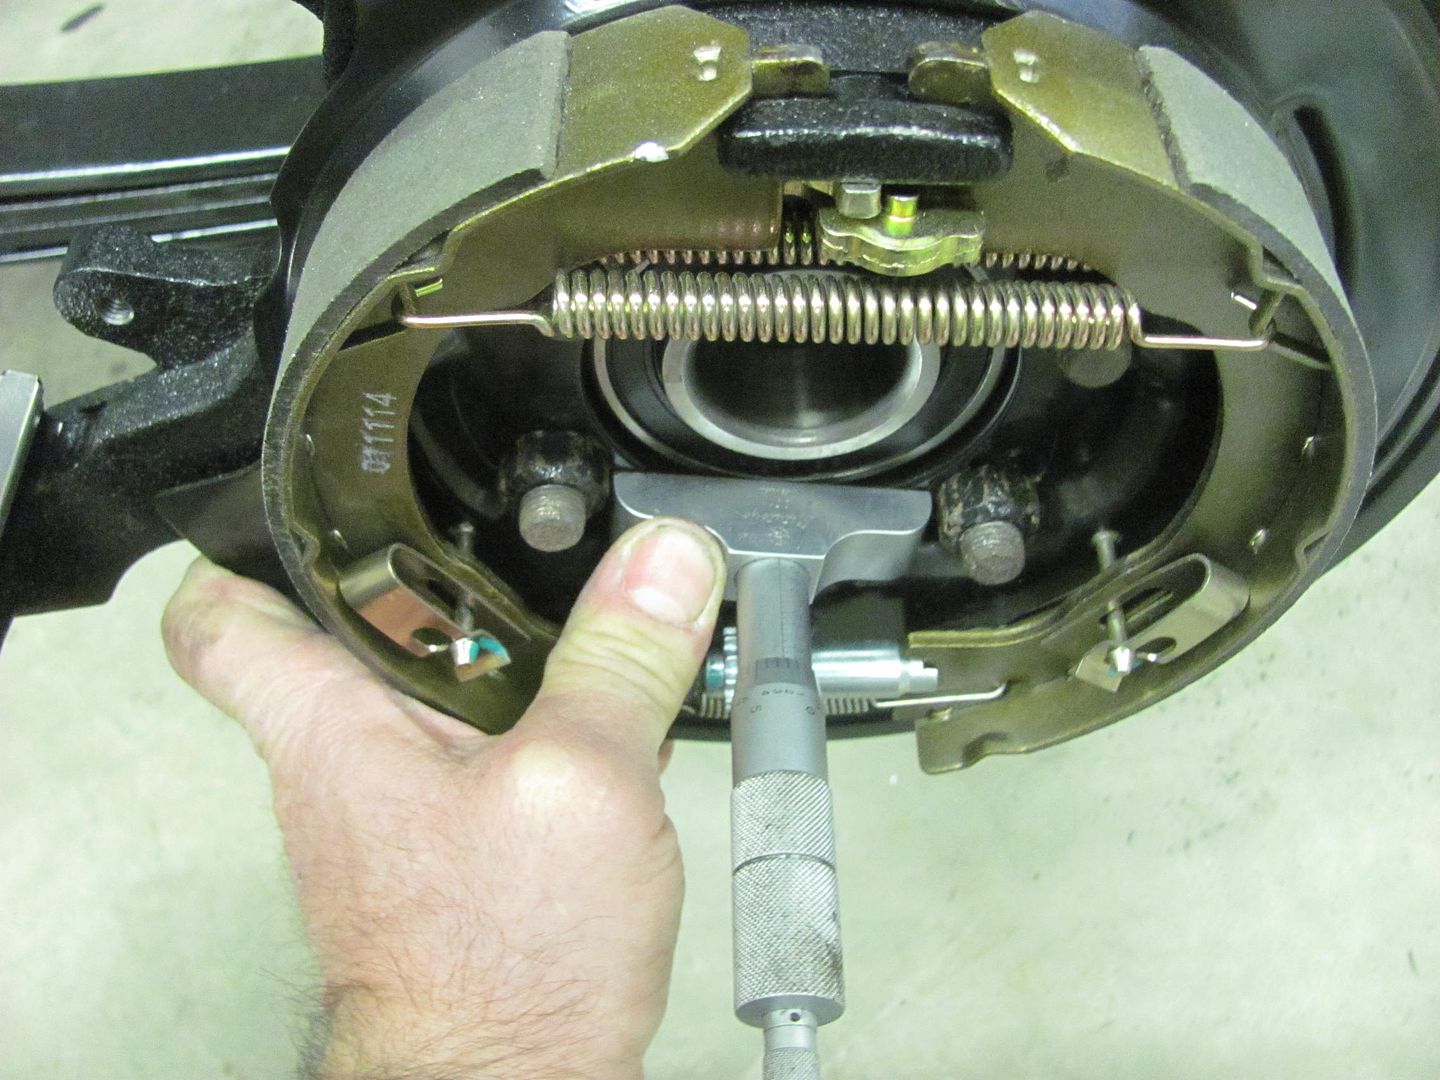
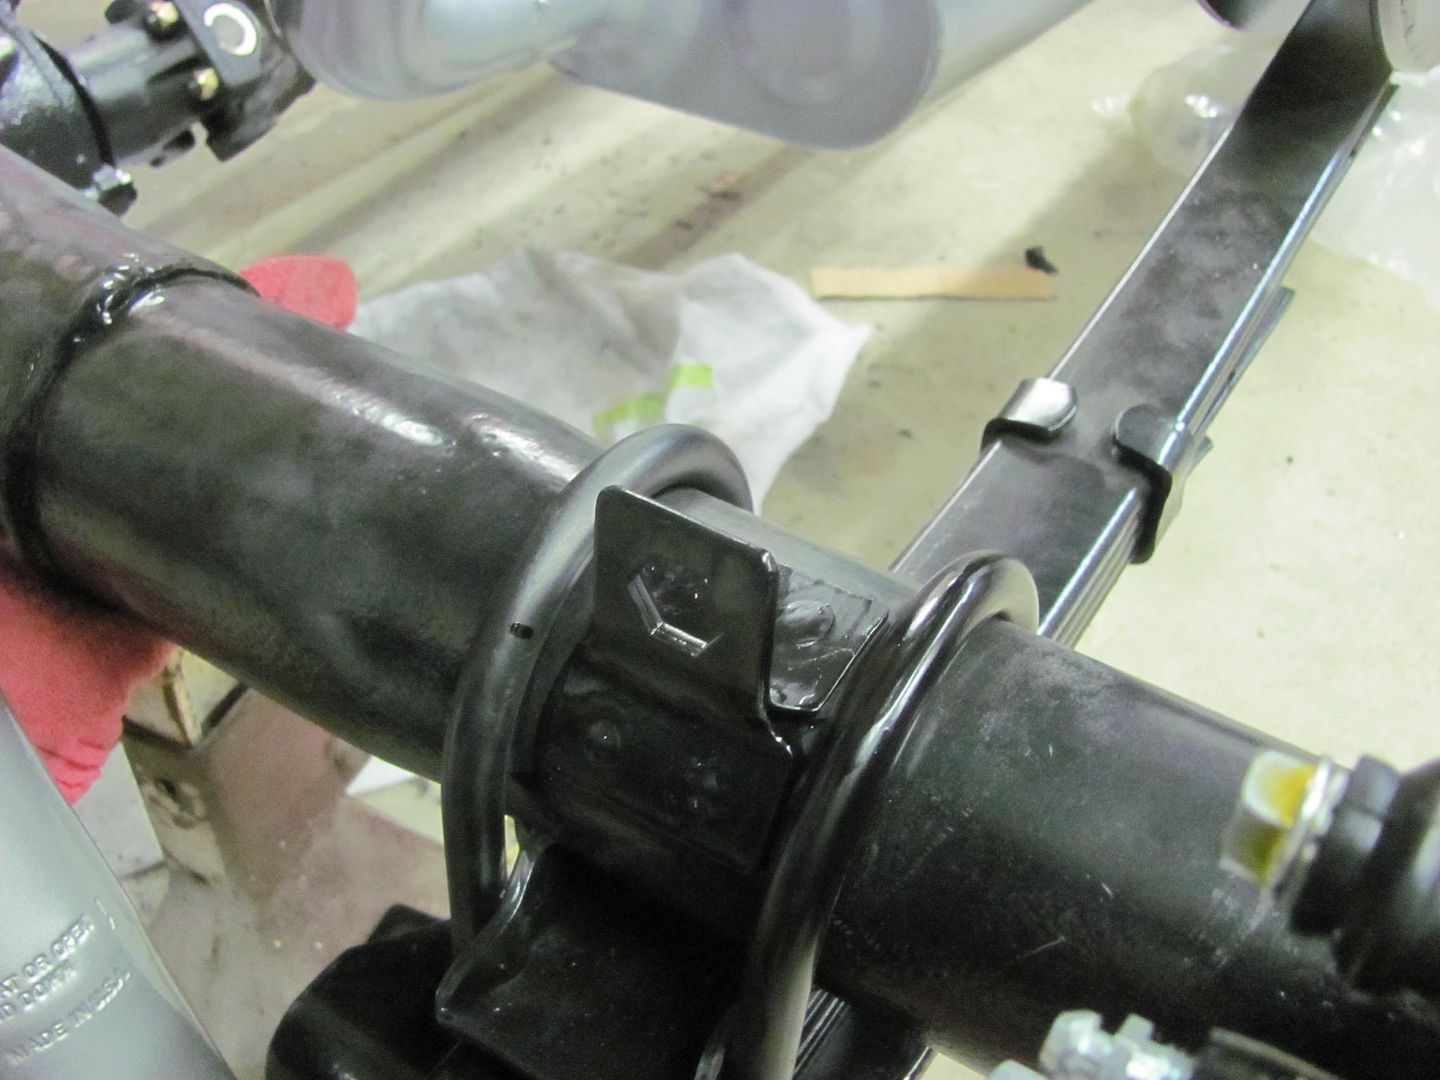
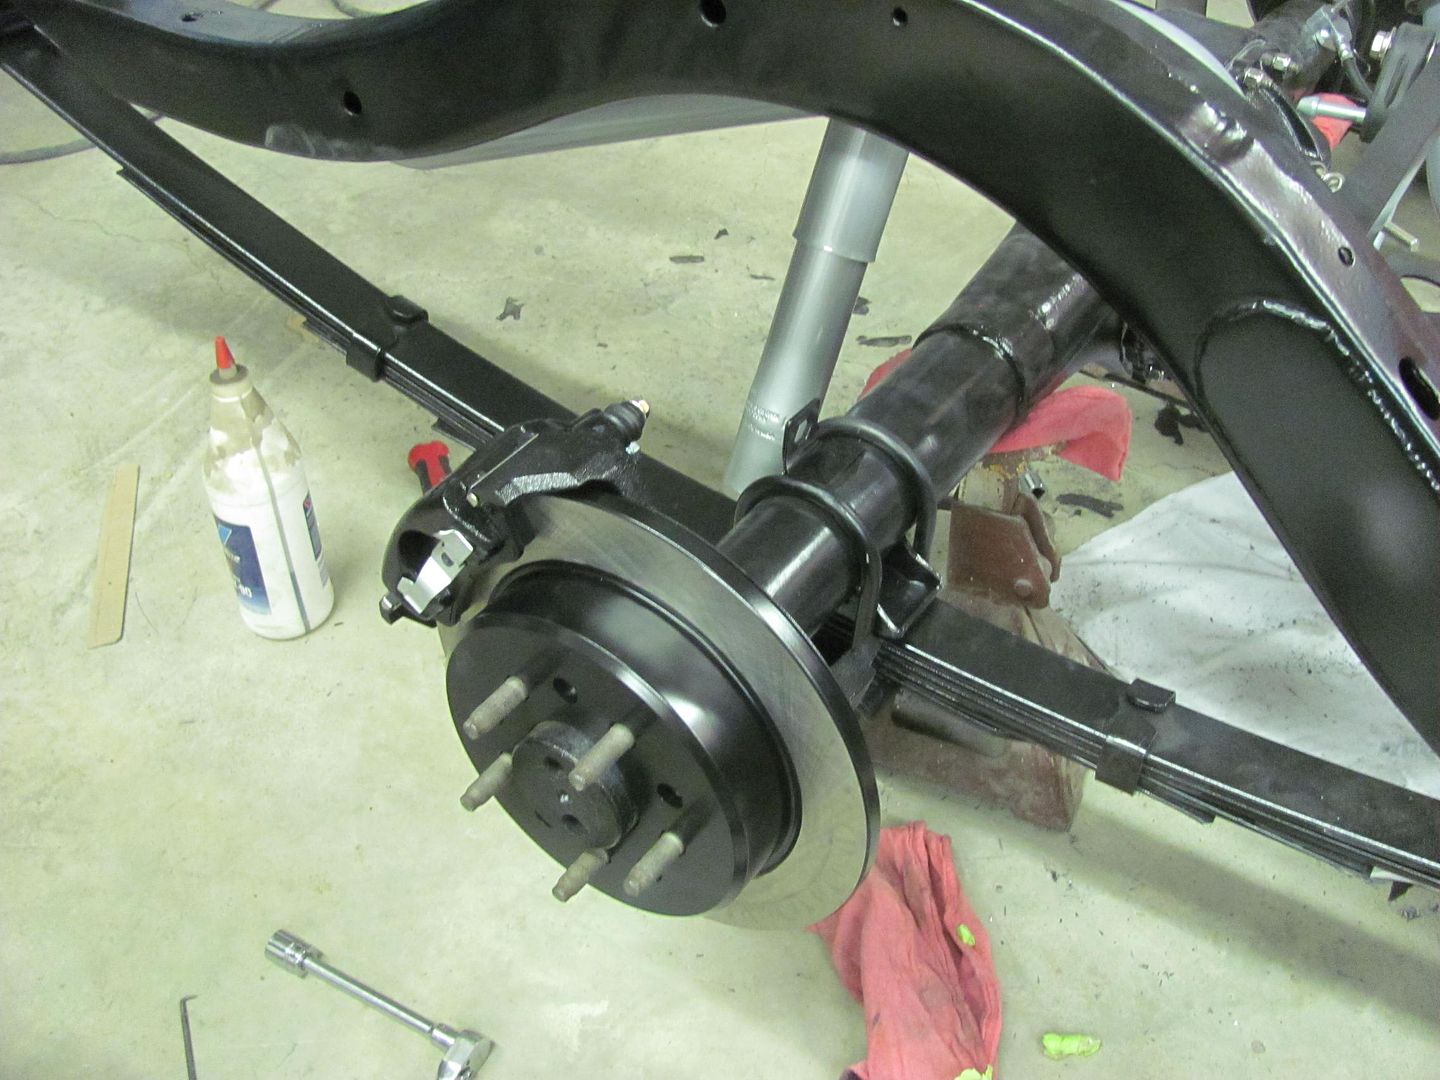
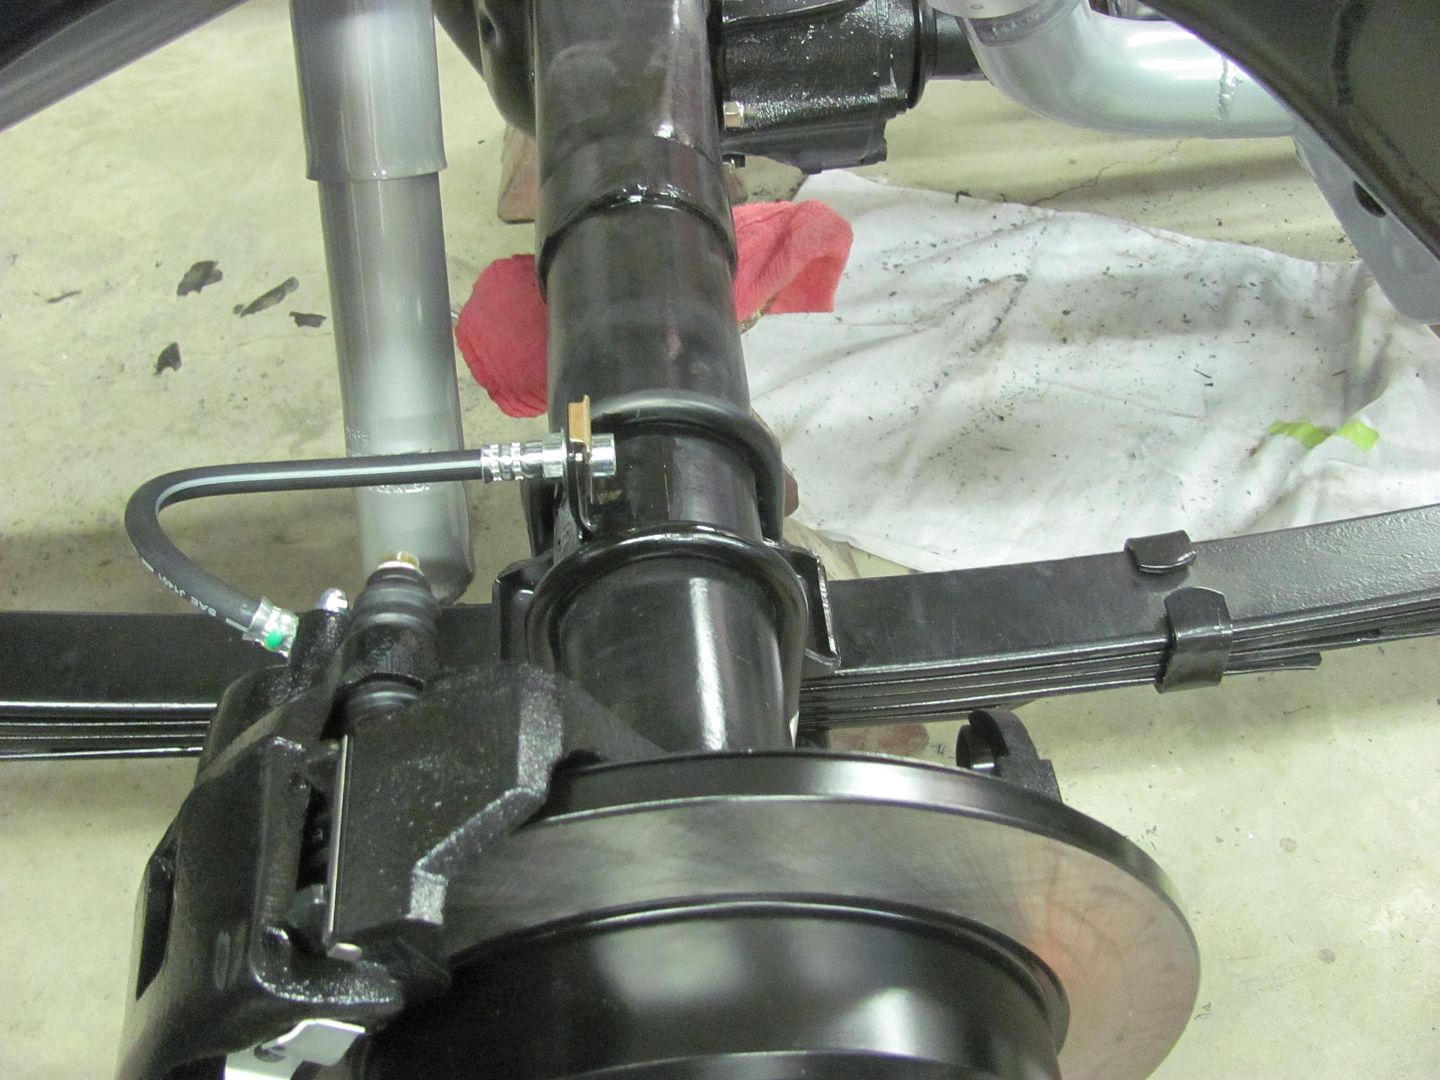
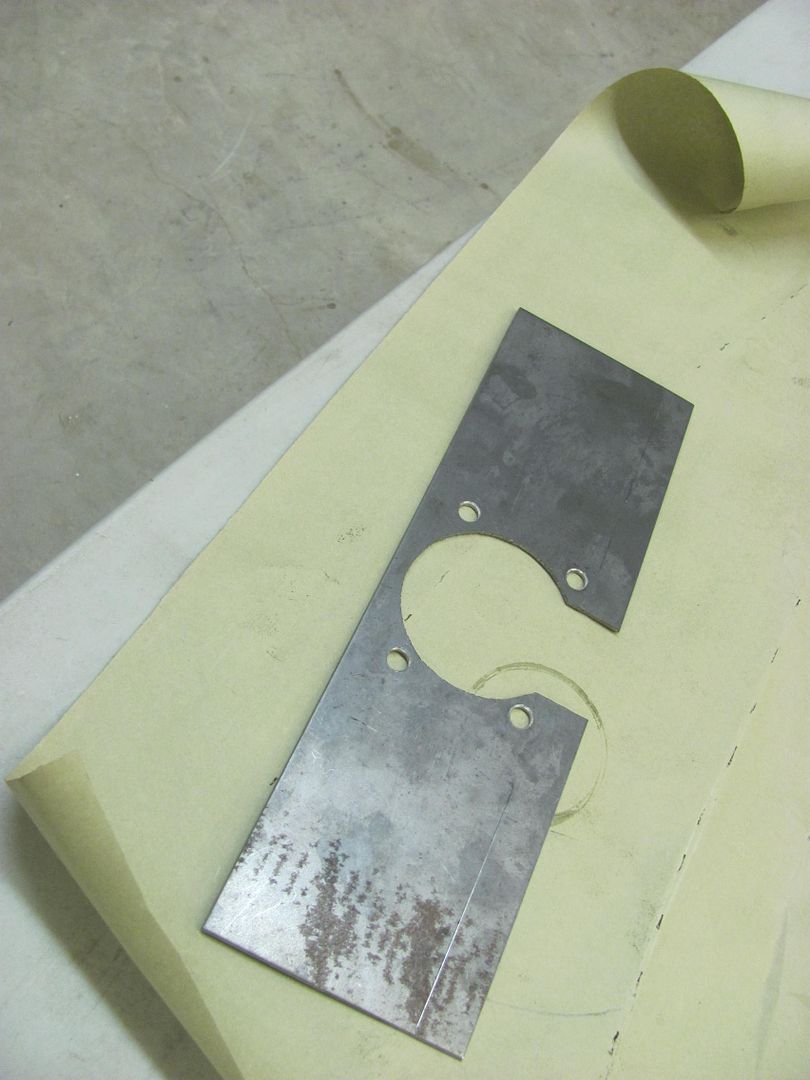
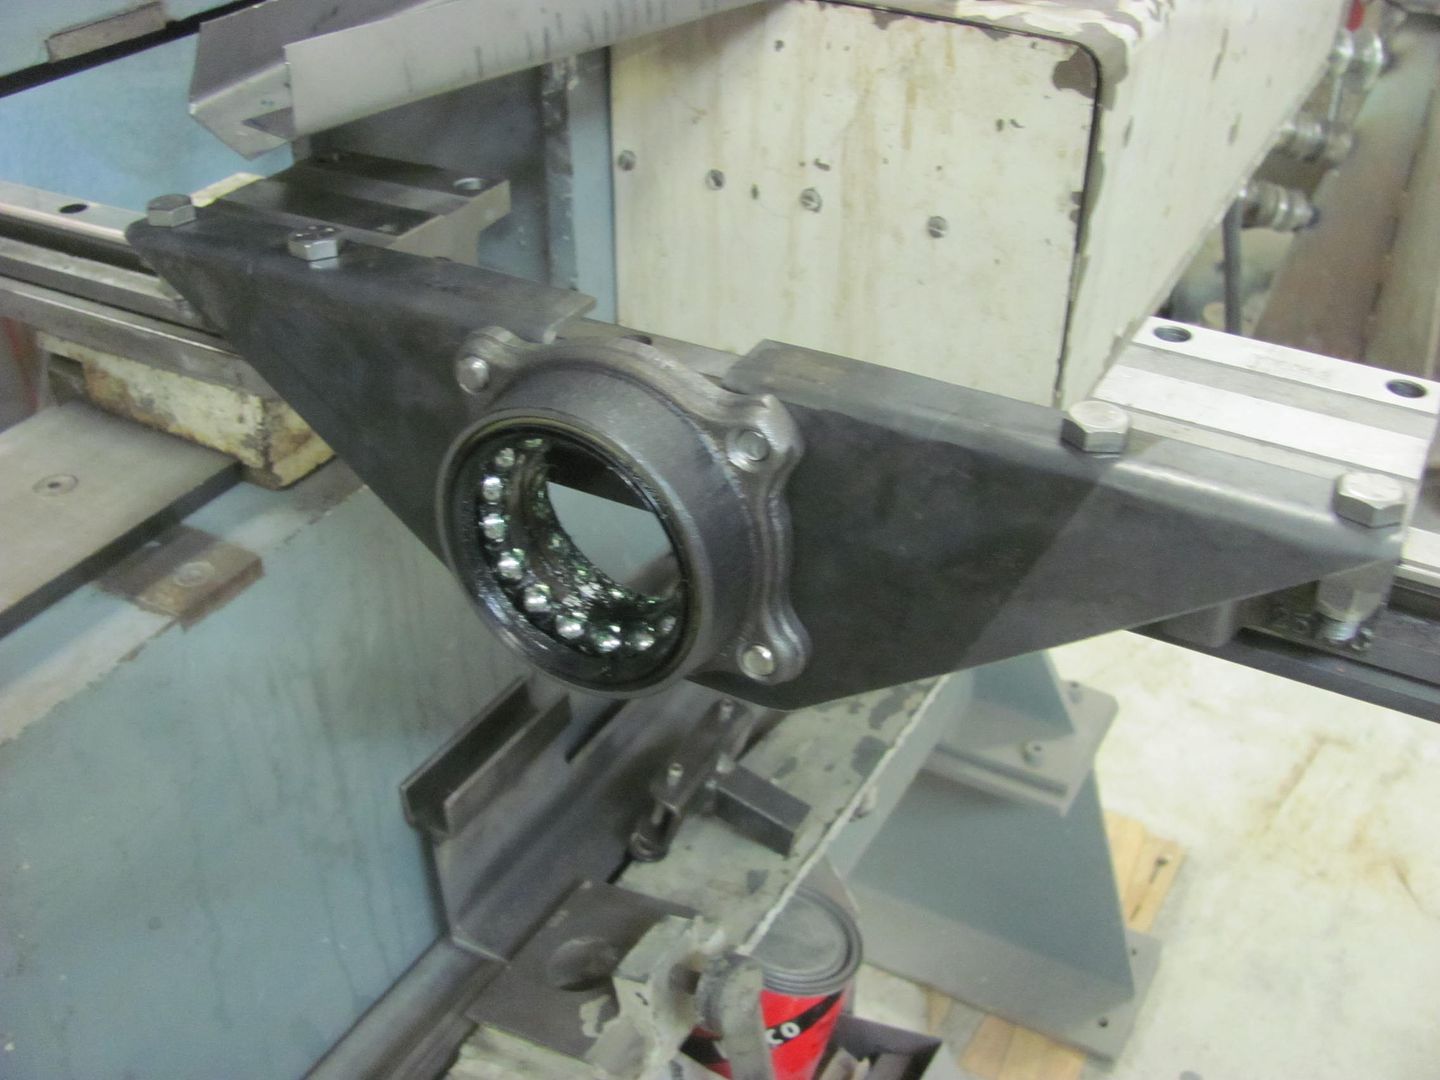
Didn't show too much detail on the Explorer brake install last week, so let's see if we can do better today.. The "kit" was designed for the big bearing rear housing with the Torino ends. As luck would have it, the Lincoln Versailles used a big bearing early style, so we'll need to align and enlarge some holes..


Picture%204134.jpg


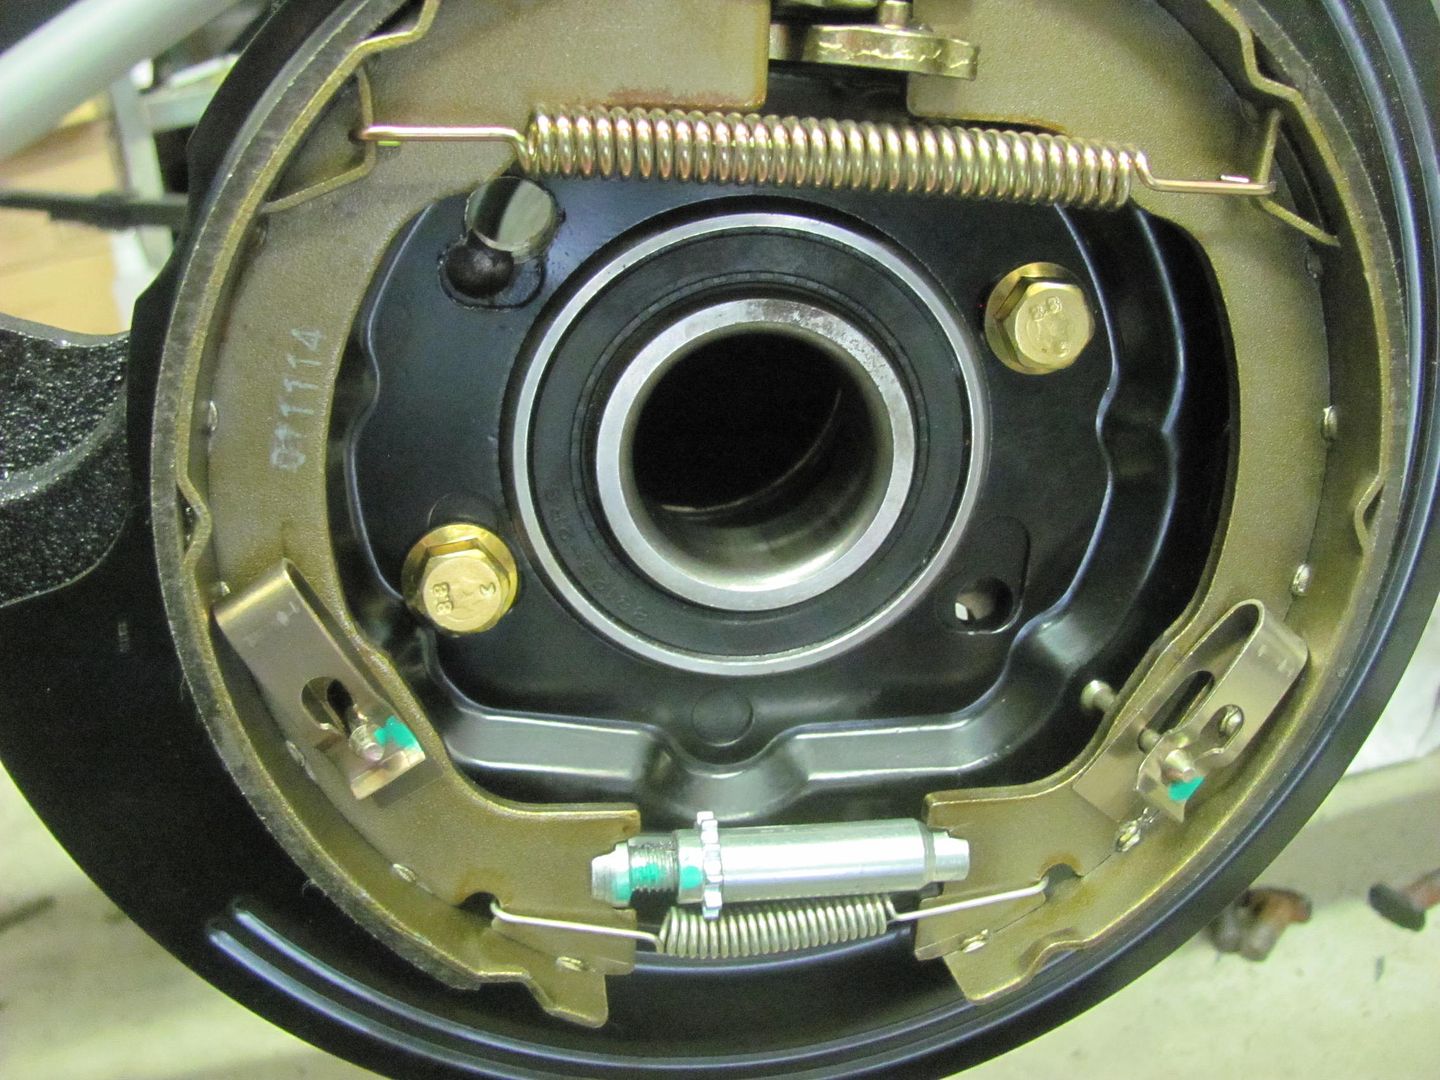
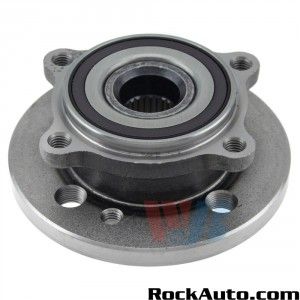
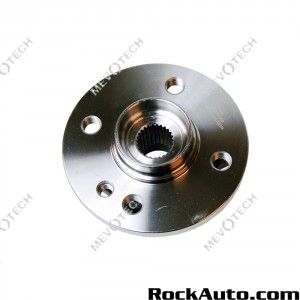
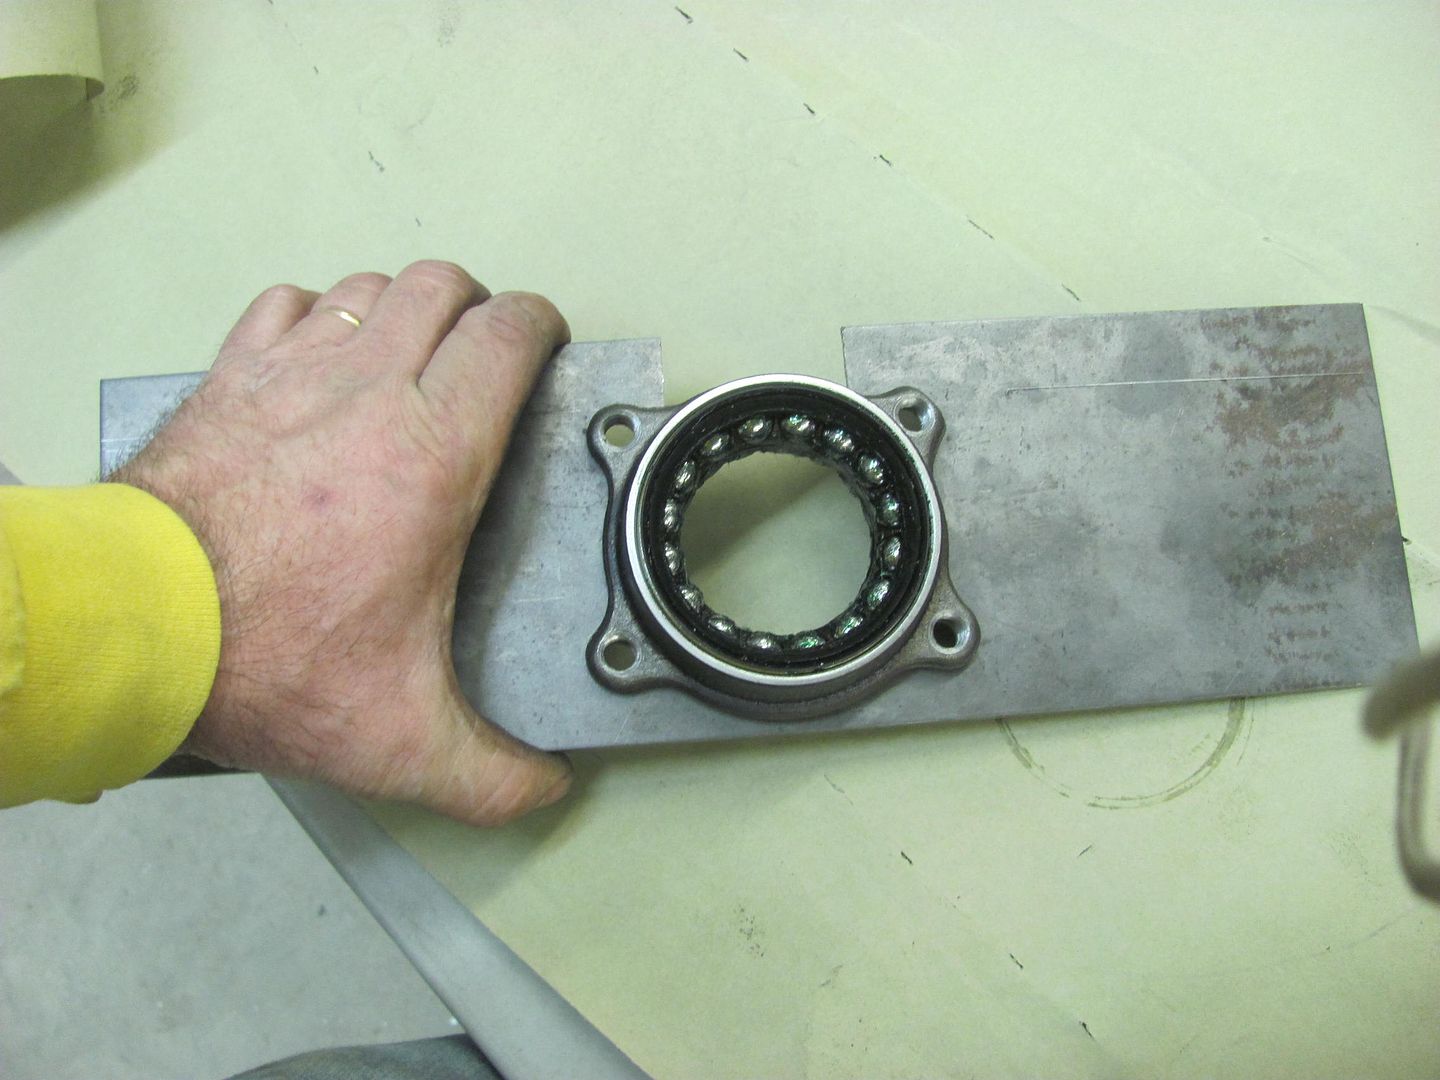
Bolted in place using two opposite holes and the included metric bolts, we used the axle bearing as an alignment tool for the backing plates..


Picture%204135.jpg


Picture%204136.jpg


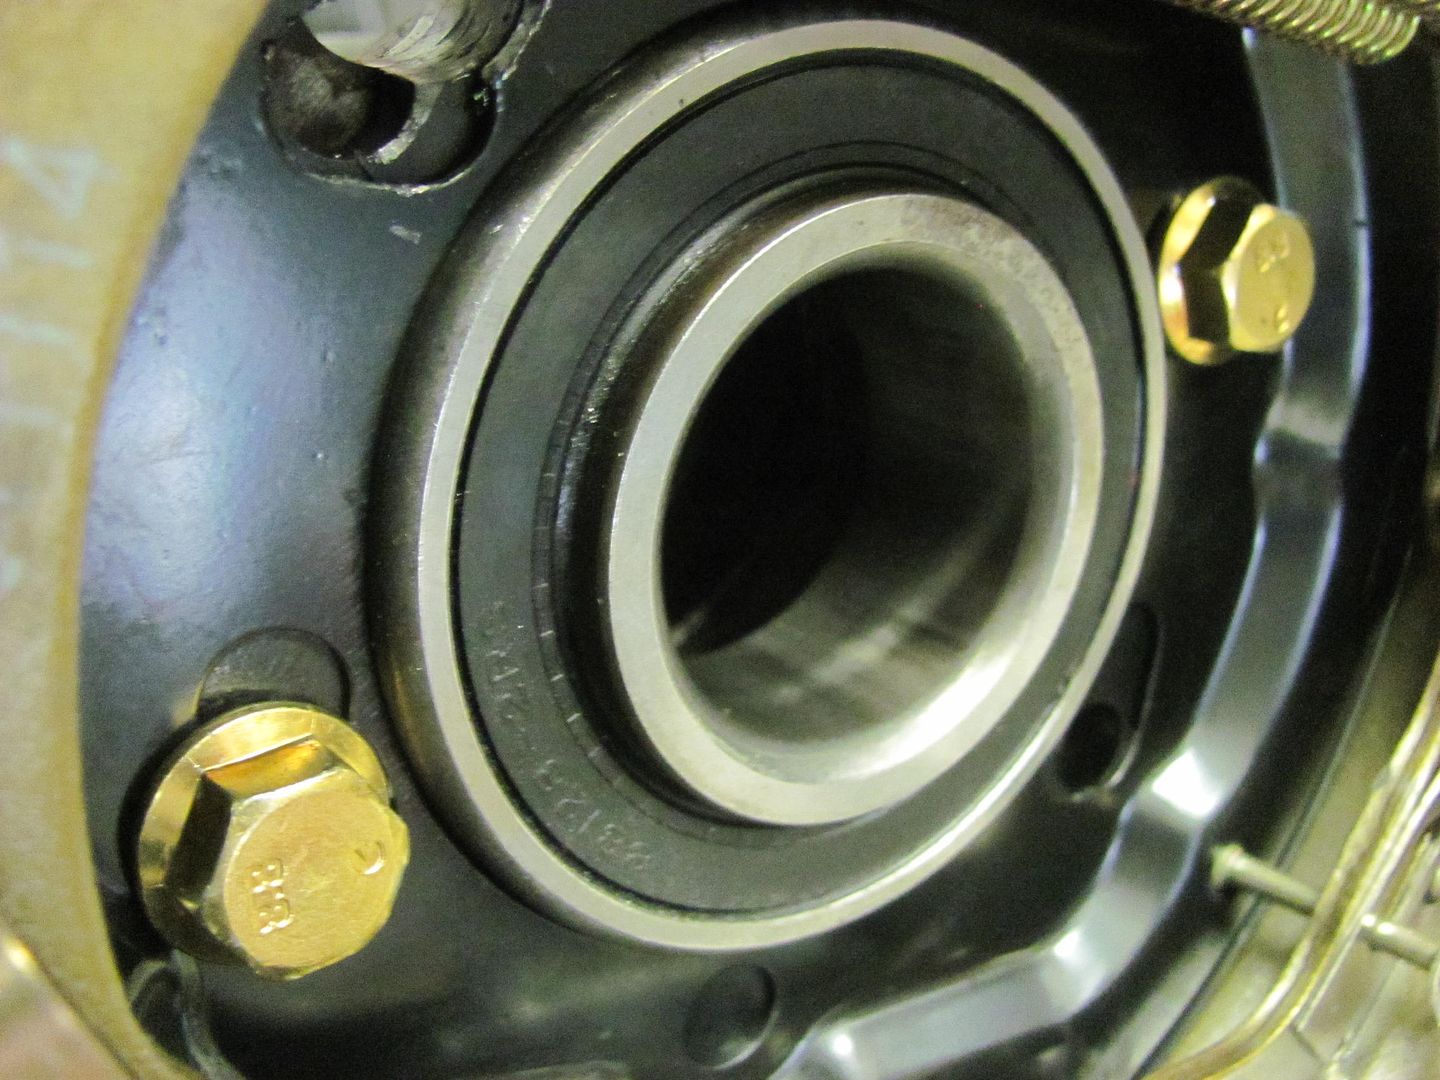
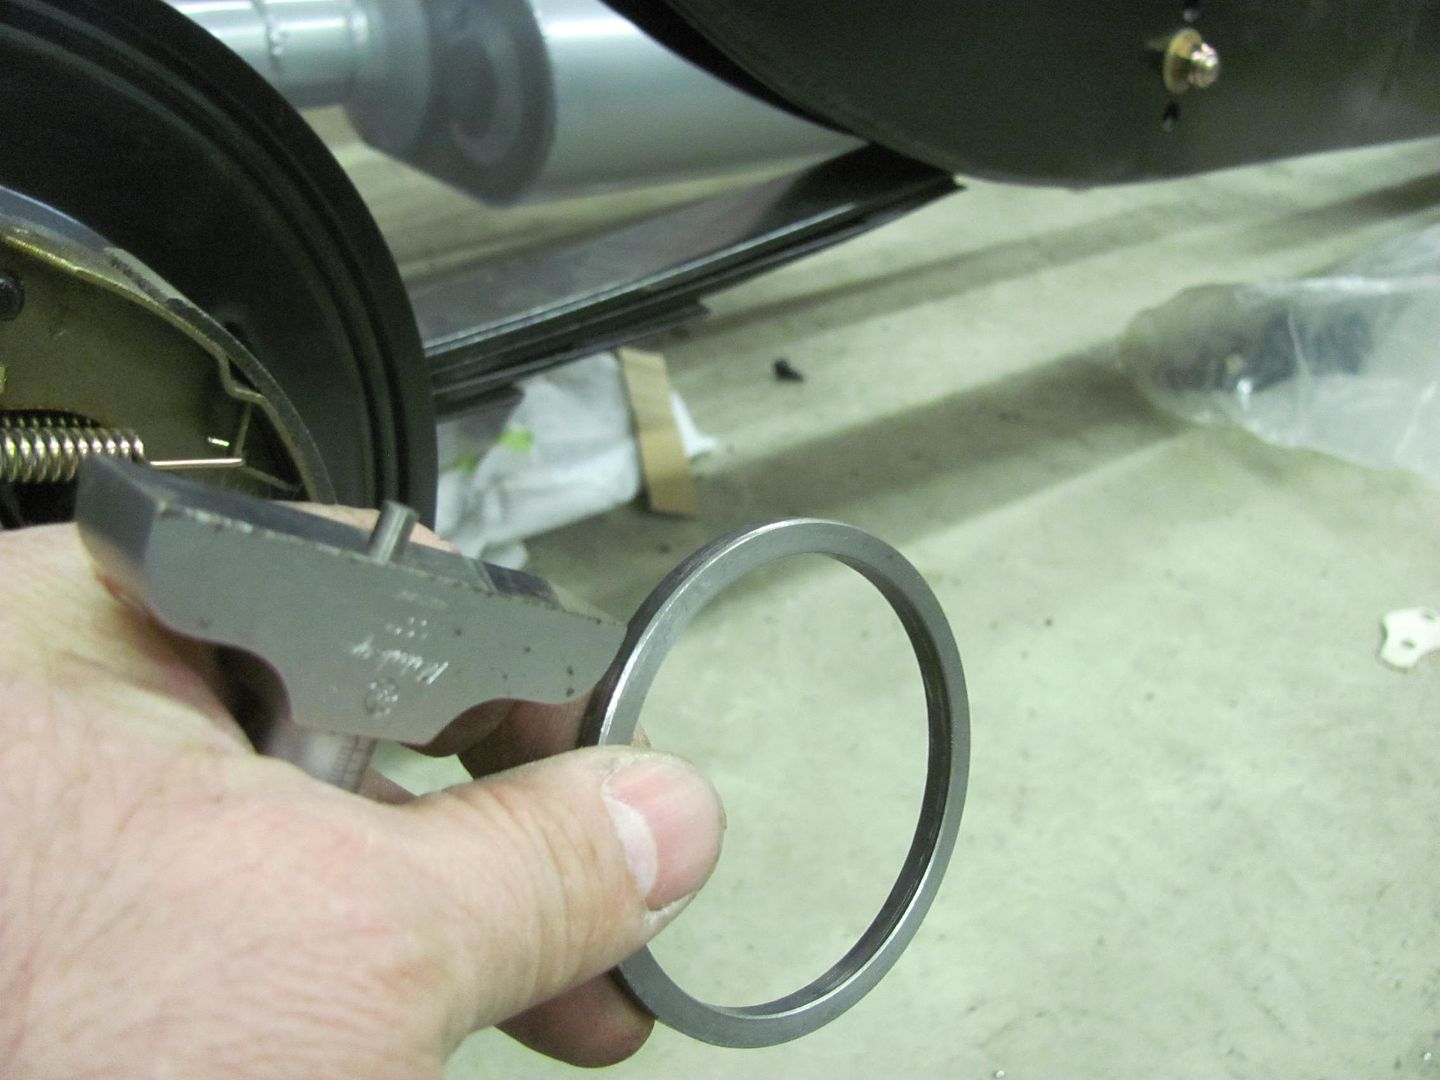
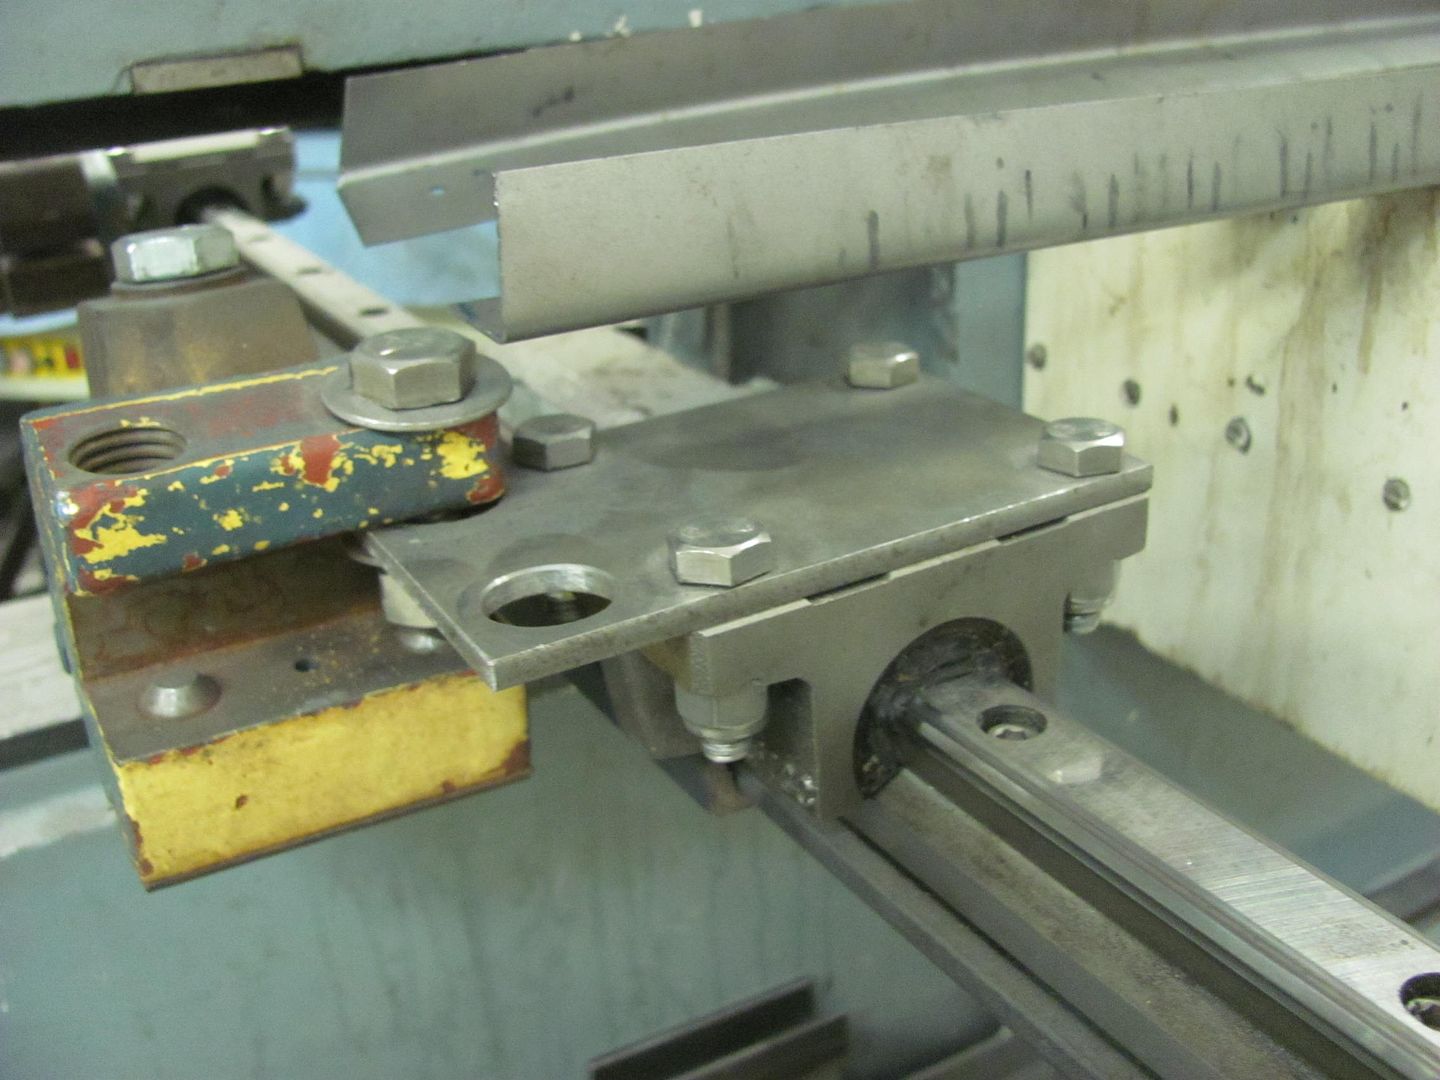
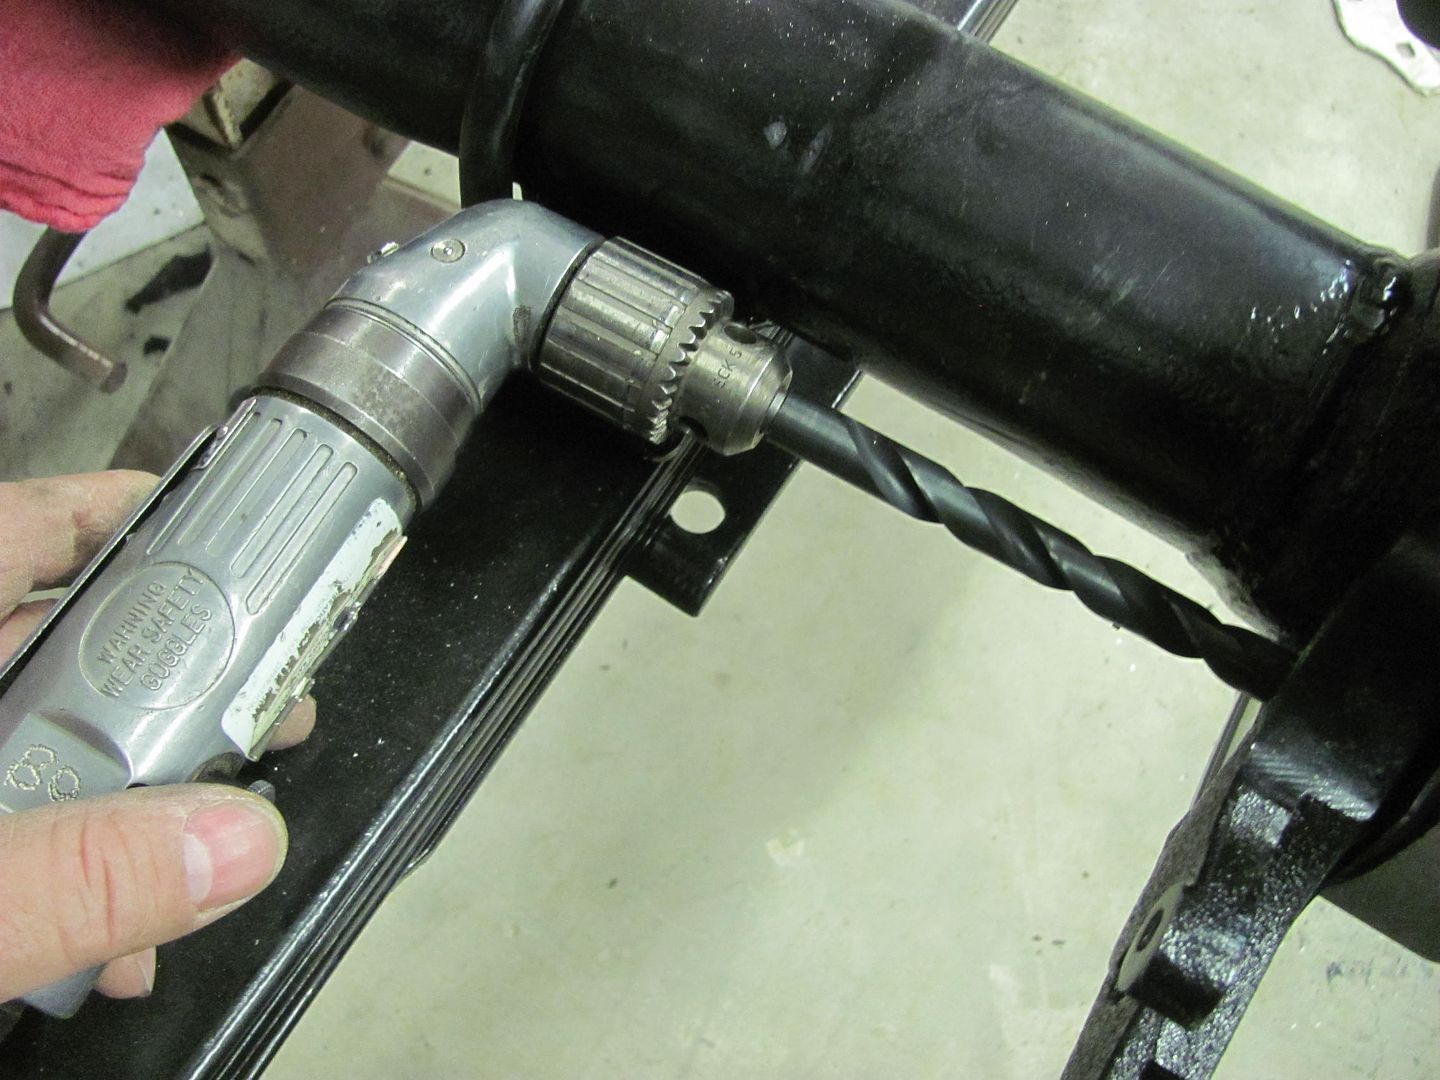
Then used a right angle drill for better access in drilling the holes..


Picture%204137.jpg


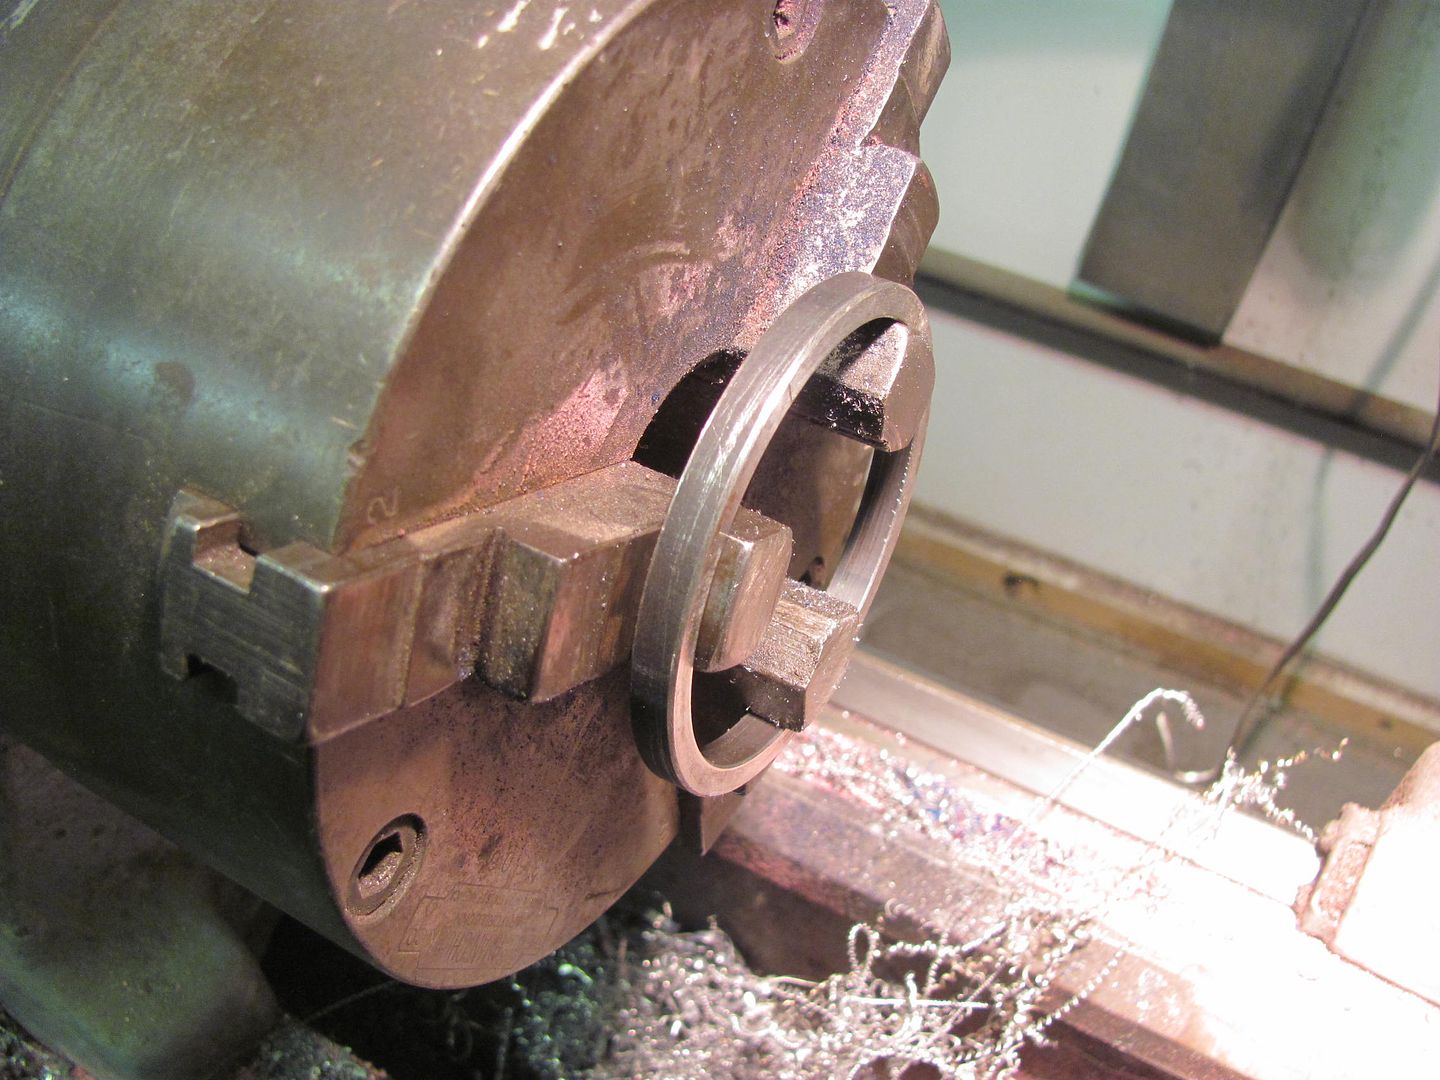
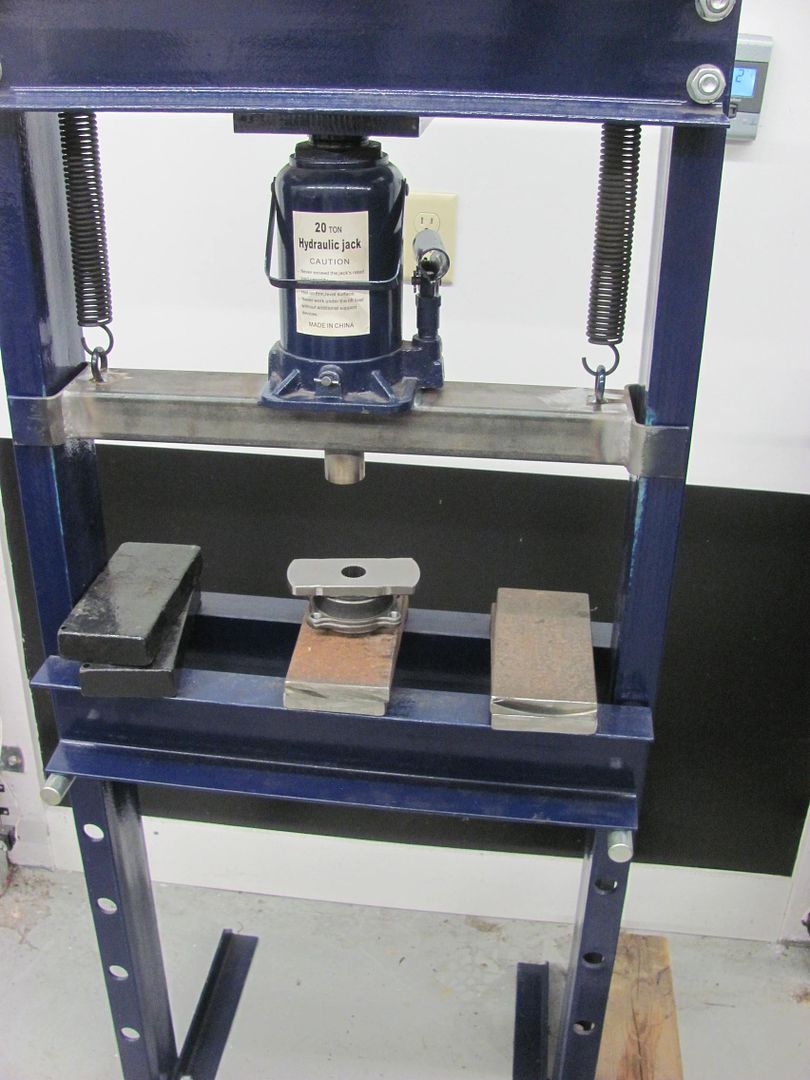
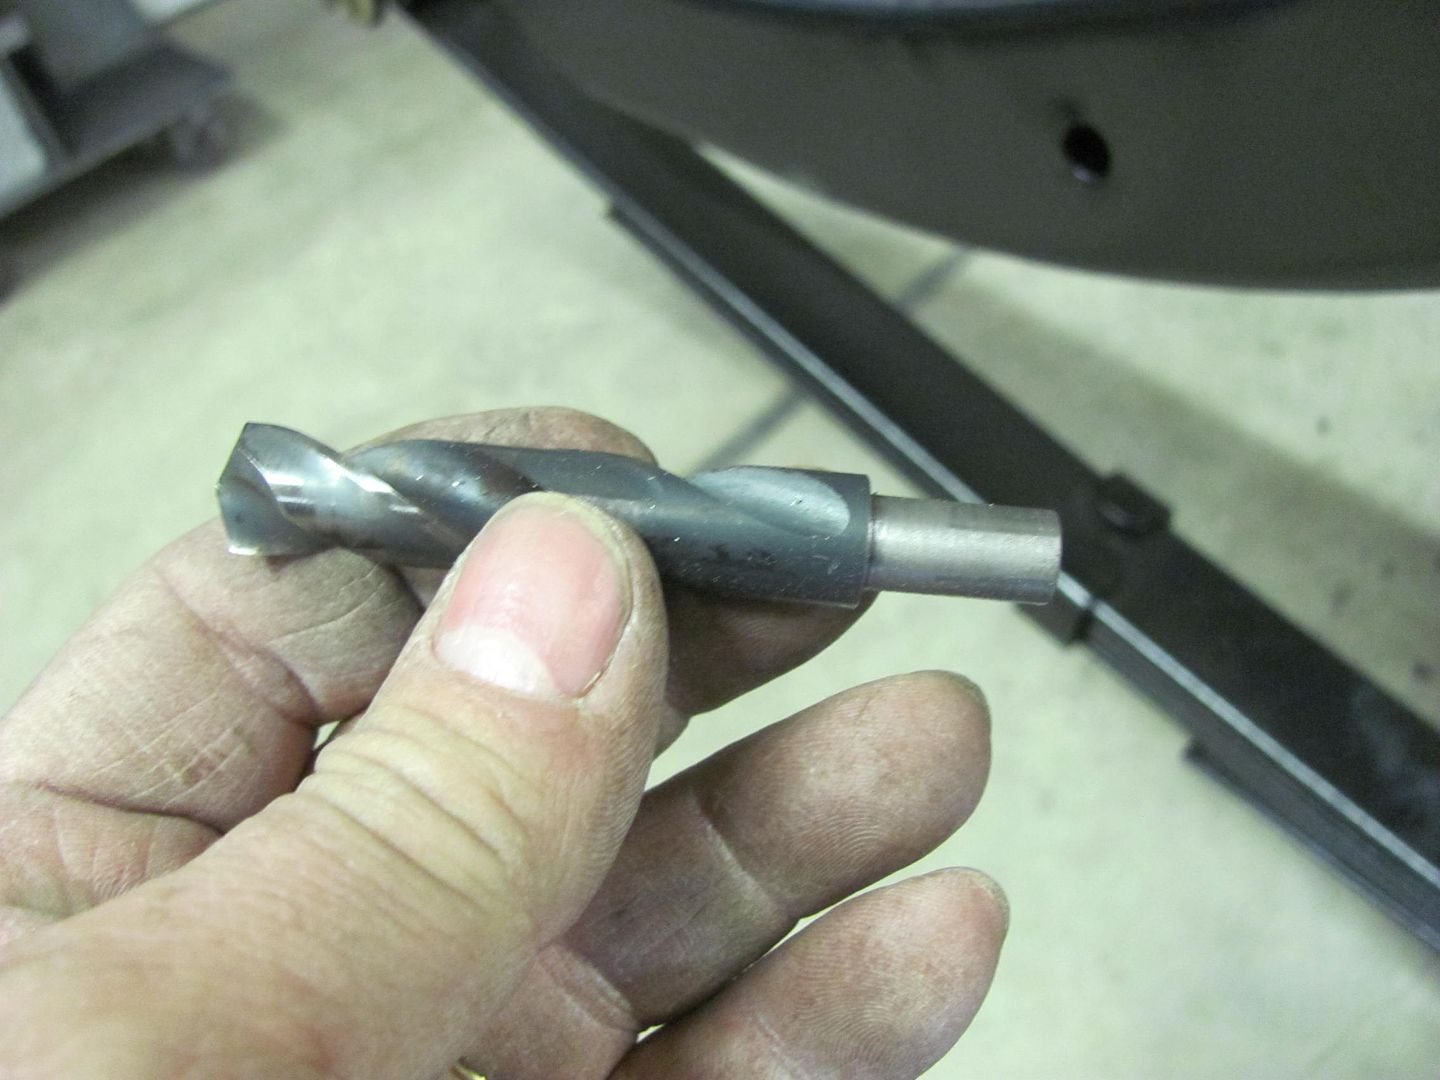
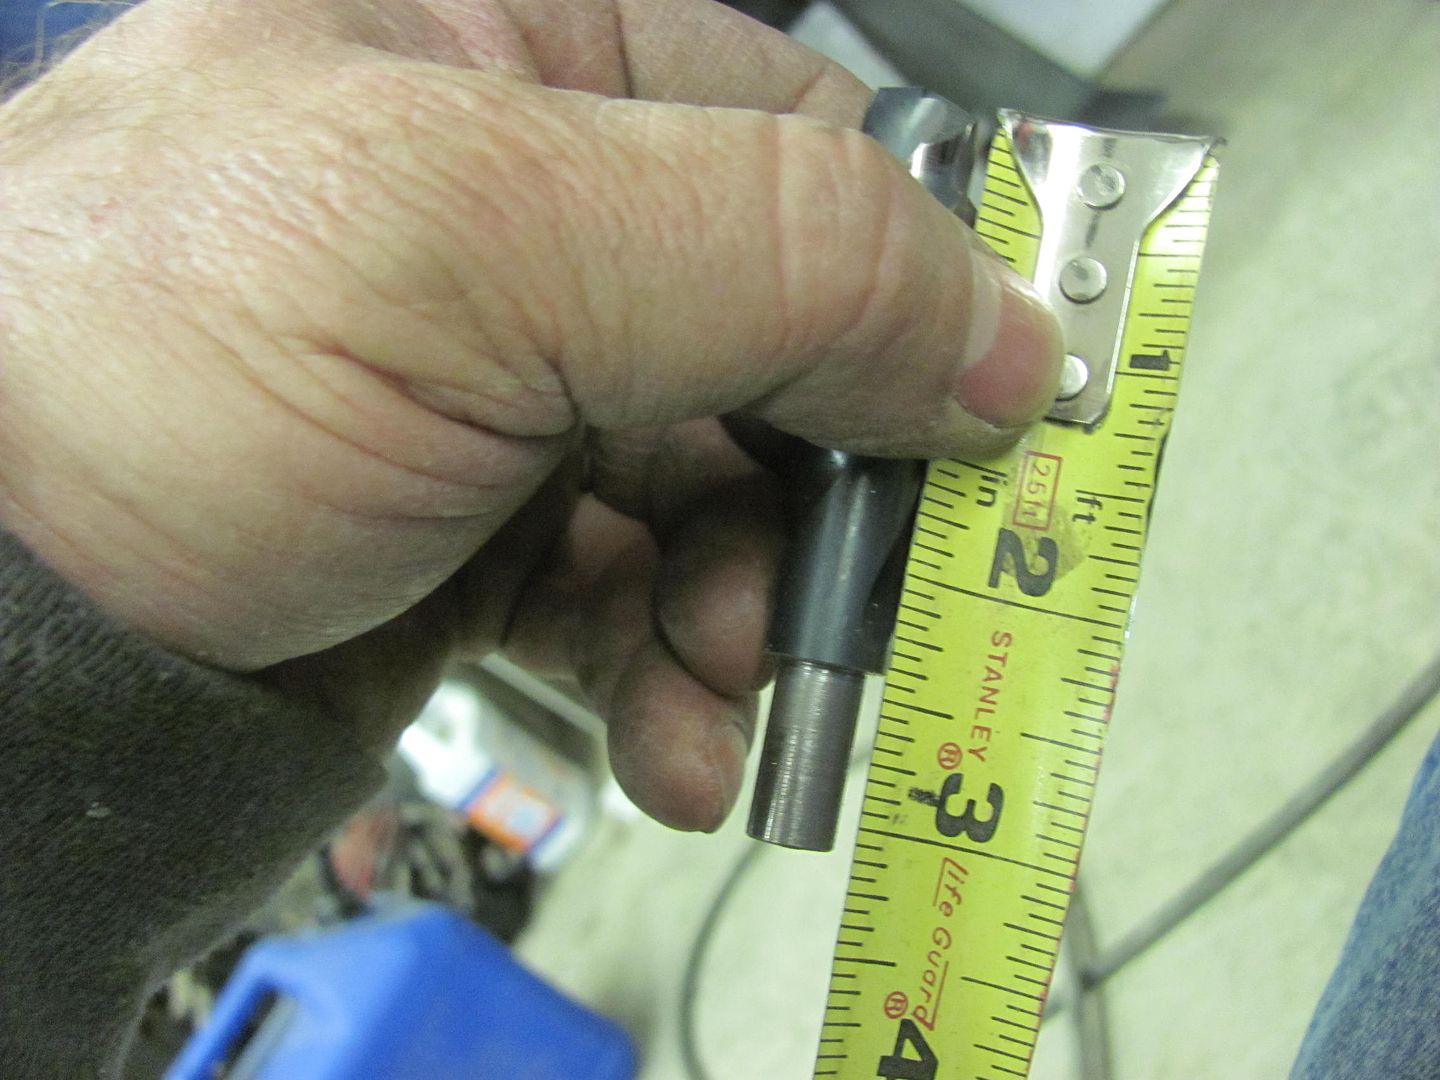
This worked for all but one hole that was directly in line with the axle pad.. So we had ordered some shorty 1/2" bits, and still had to take another inch off the length and step the diameter for the drill chuck.


Picture%204138.jpg


Picture%204139.jpg


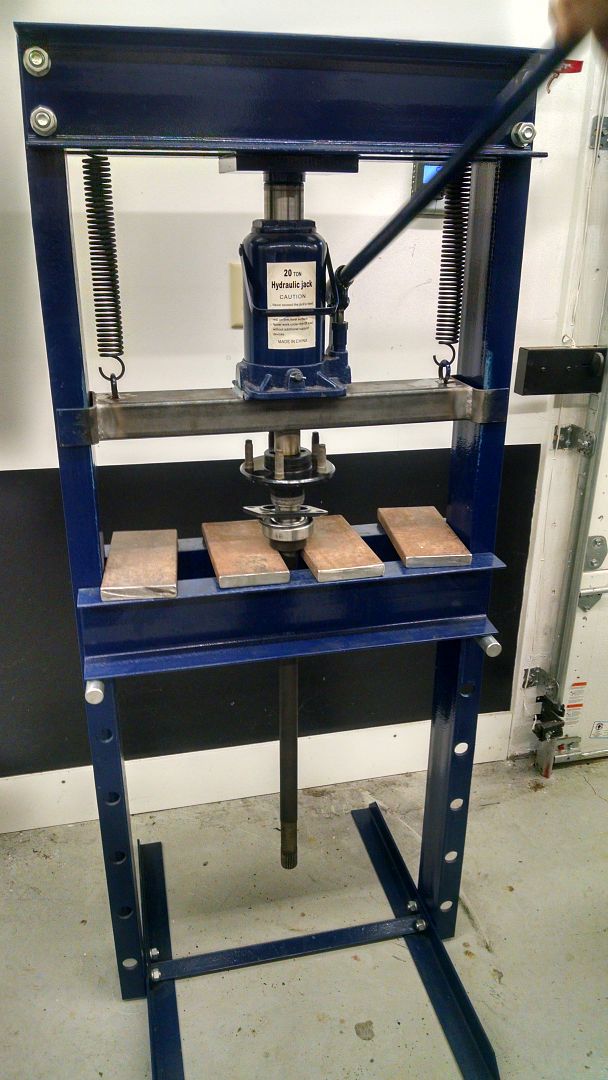
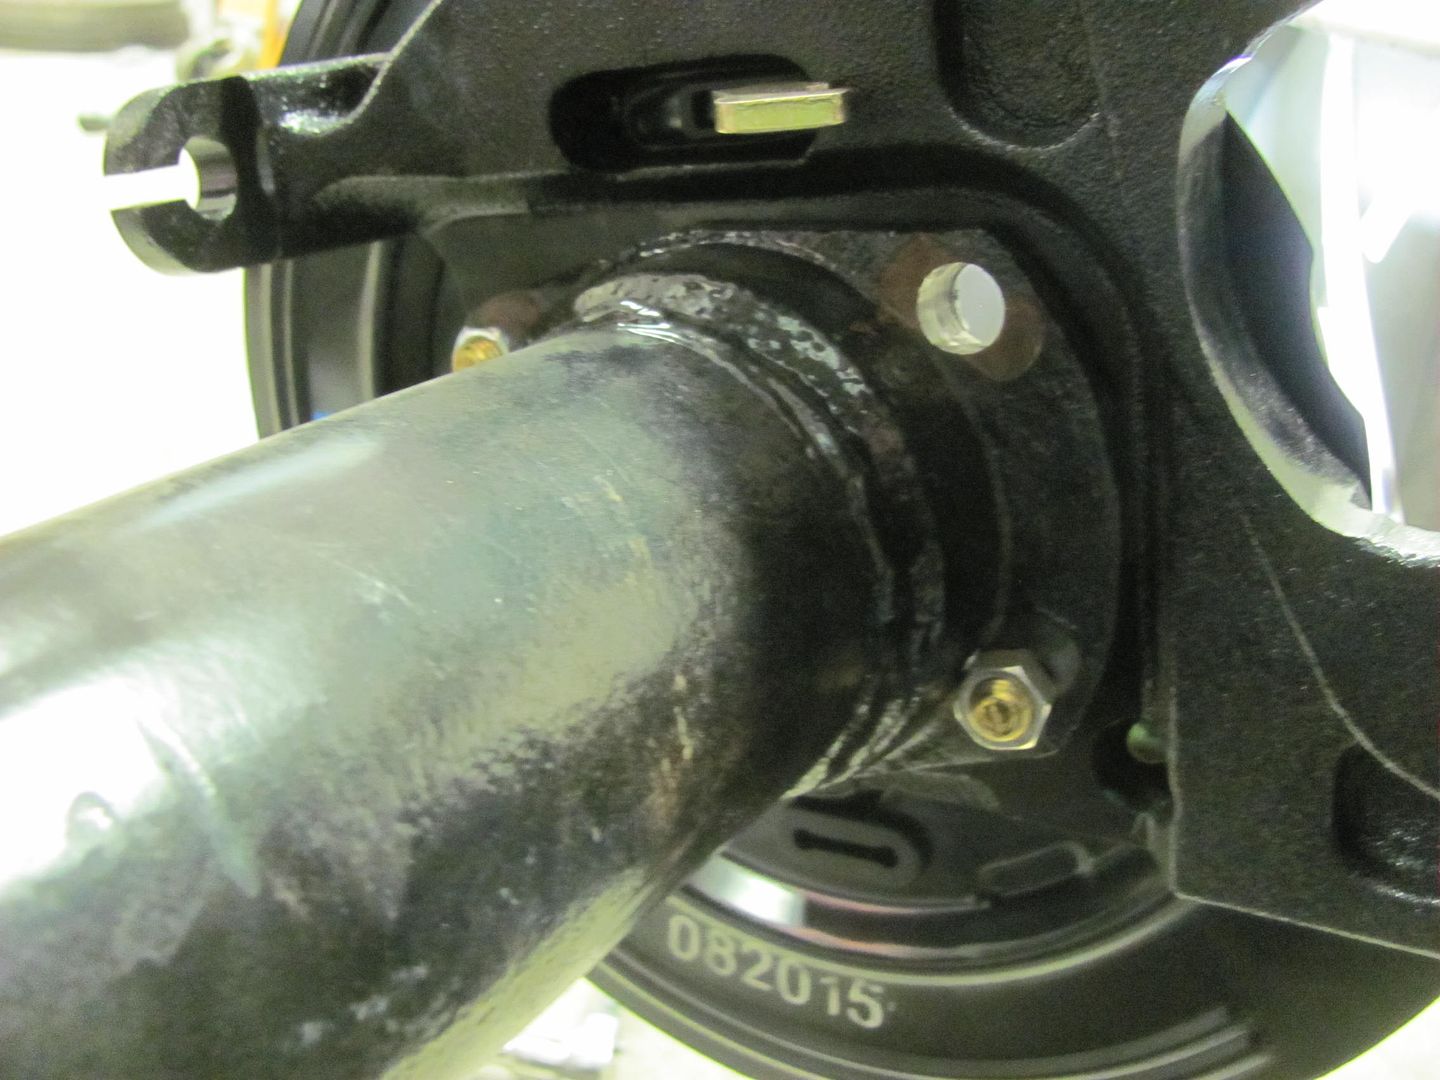
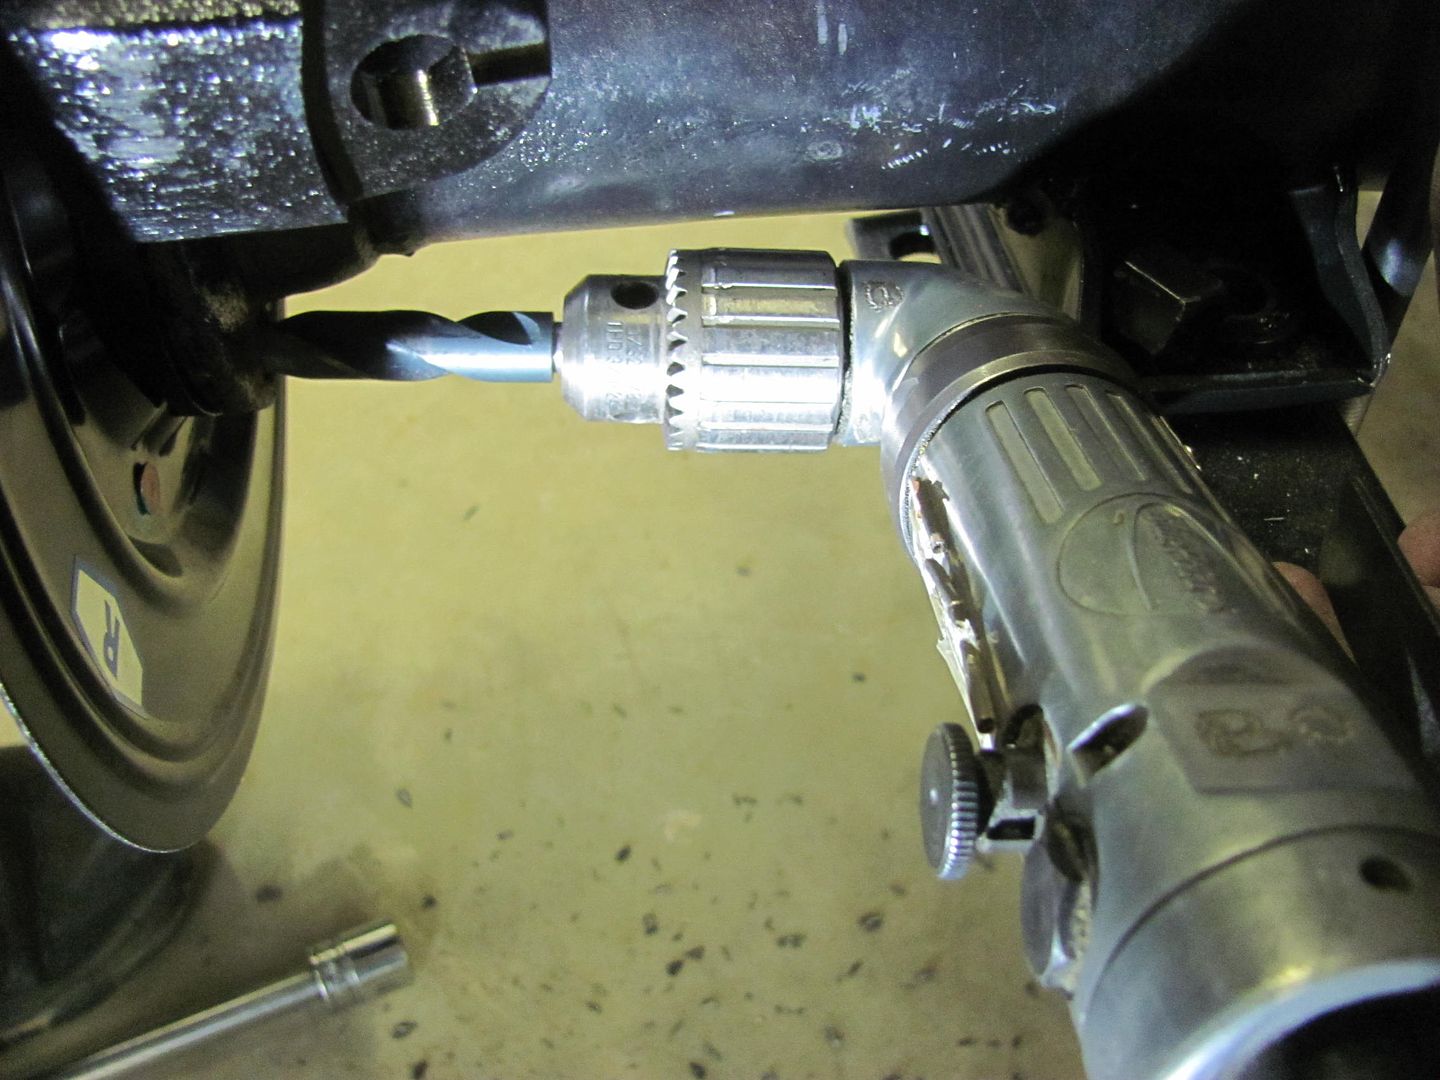
Backed into a corner? No problem!


Picture%204140.jpg


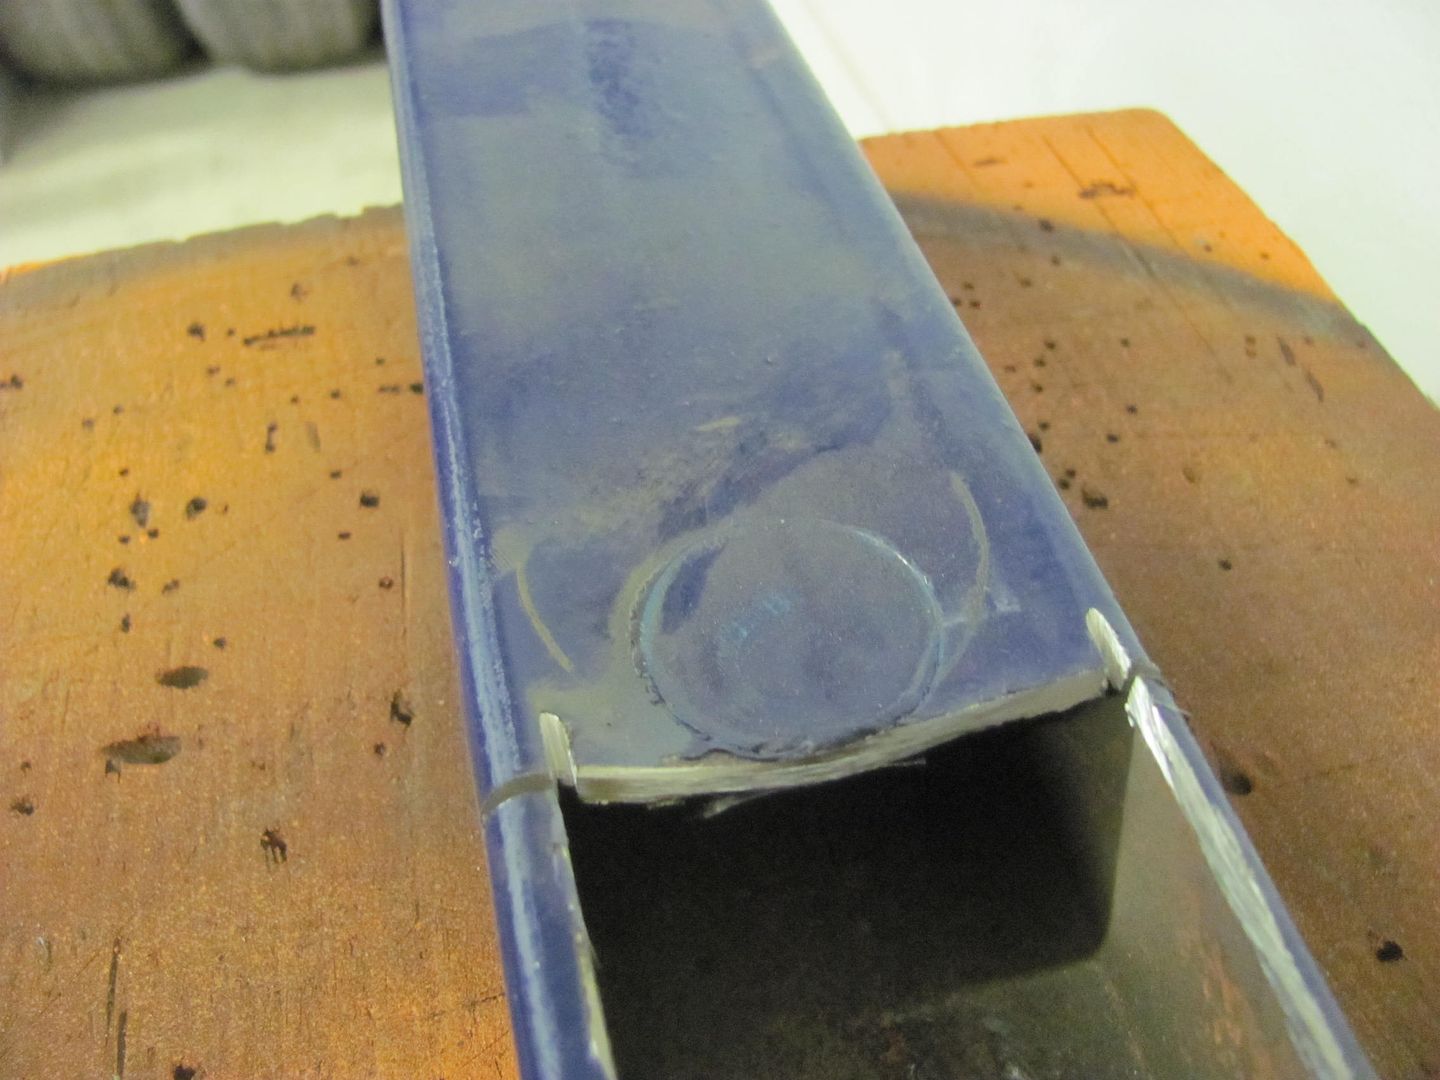
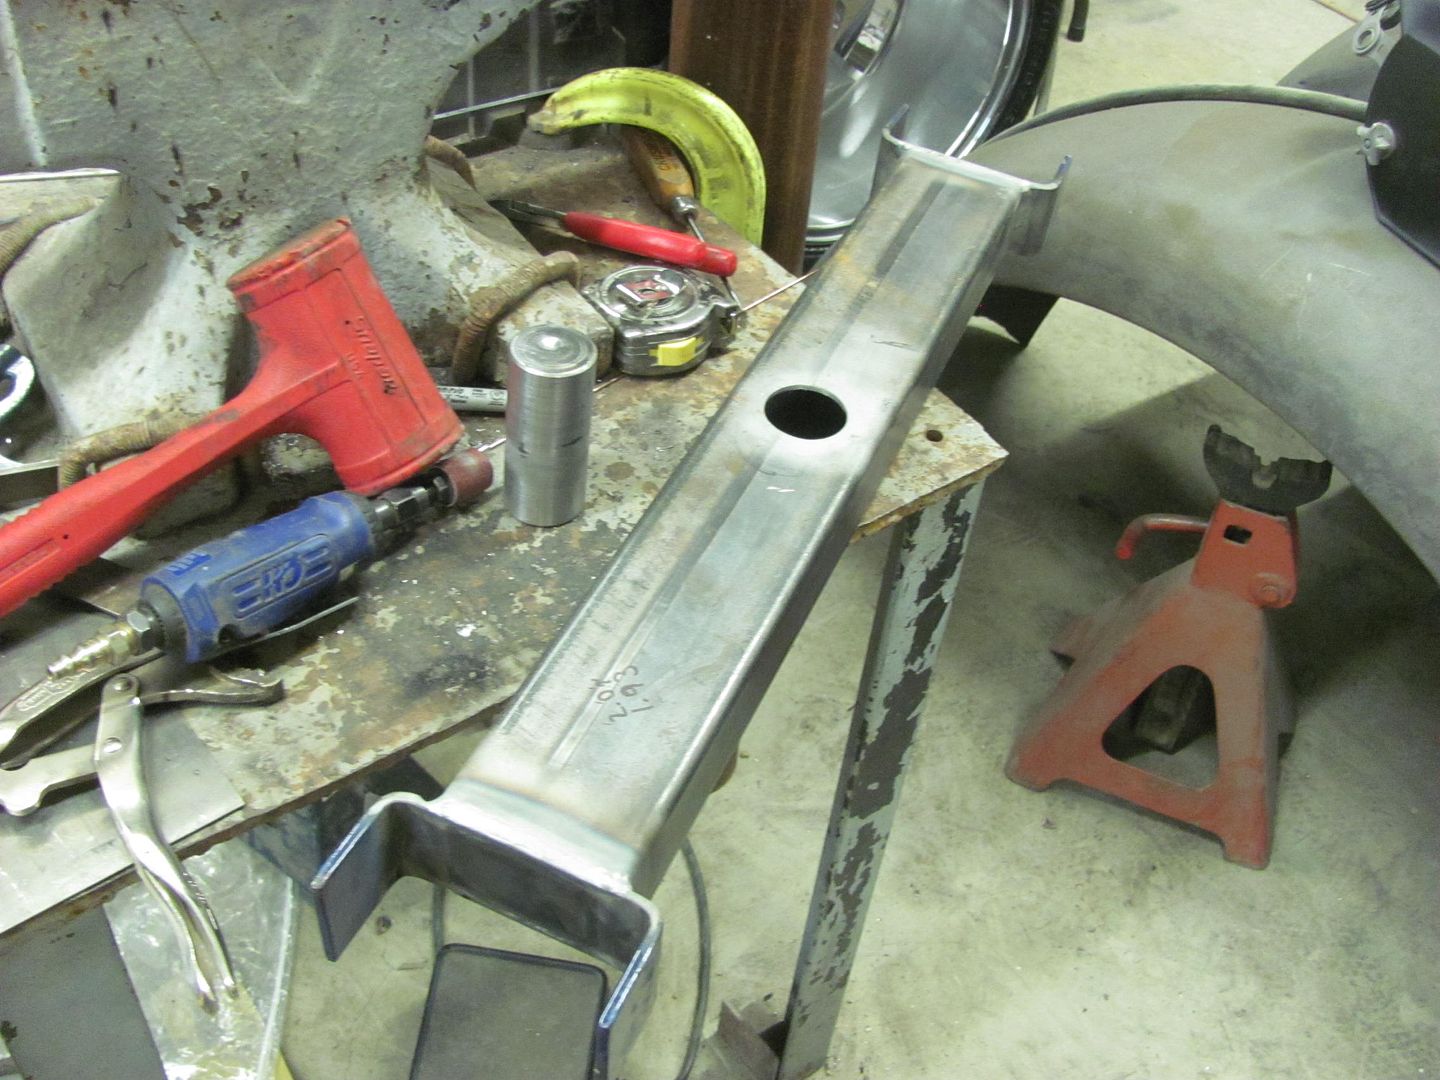
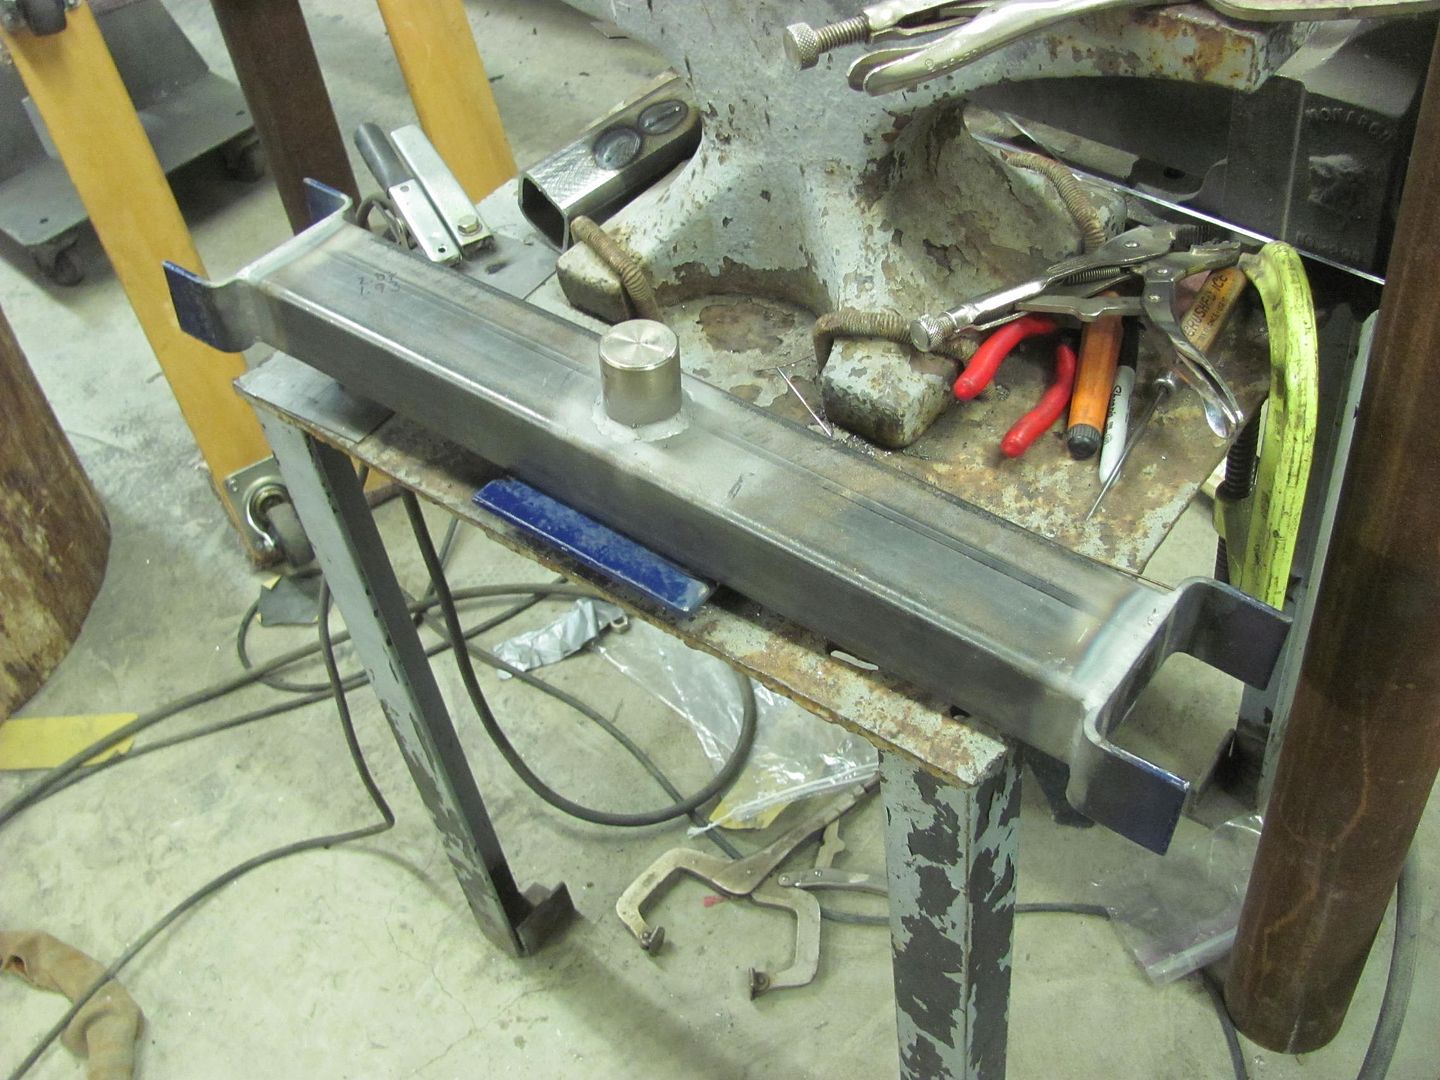
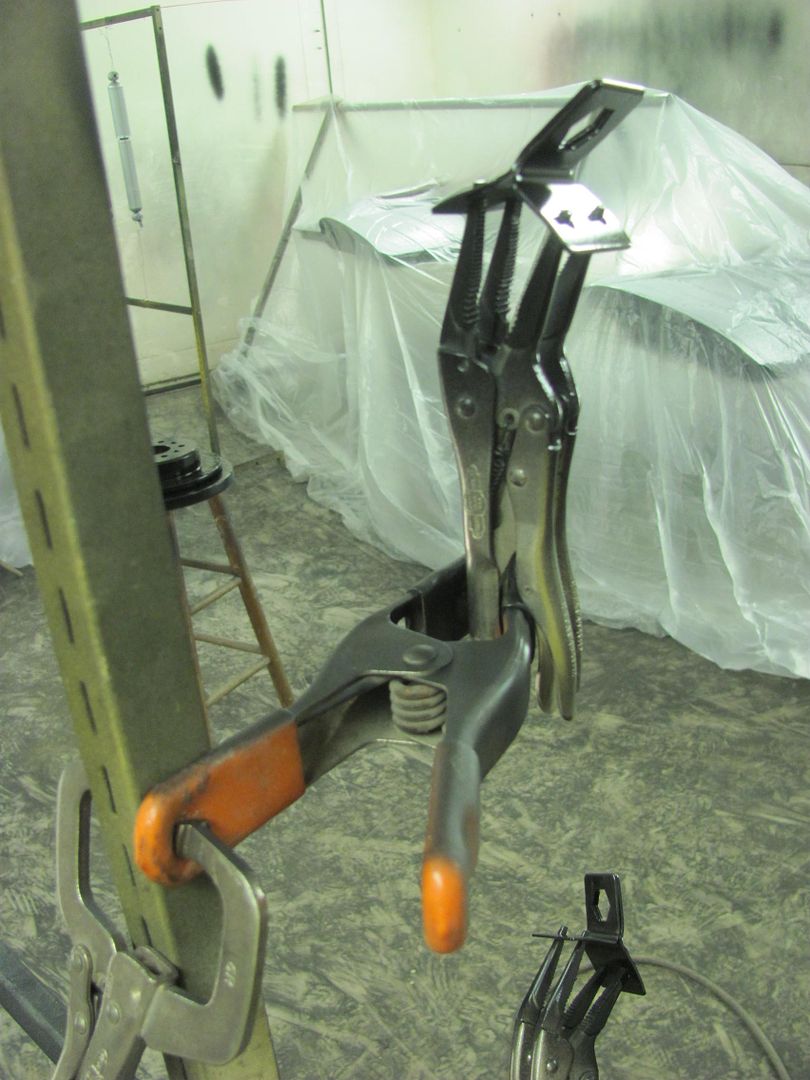
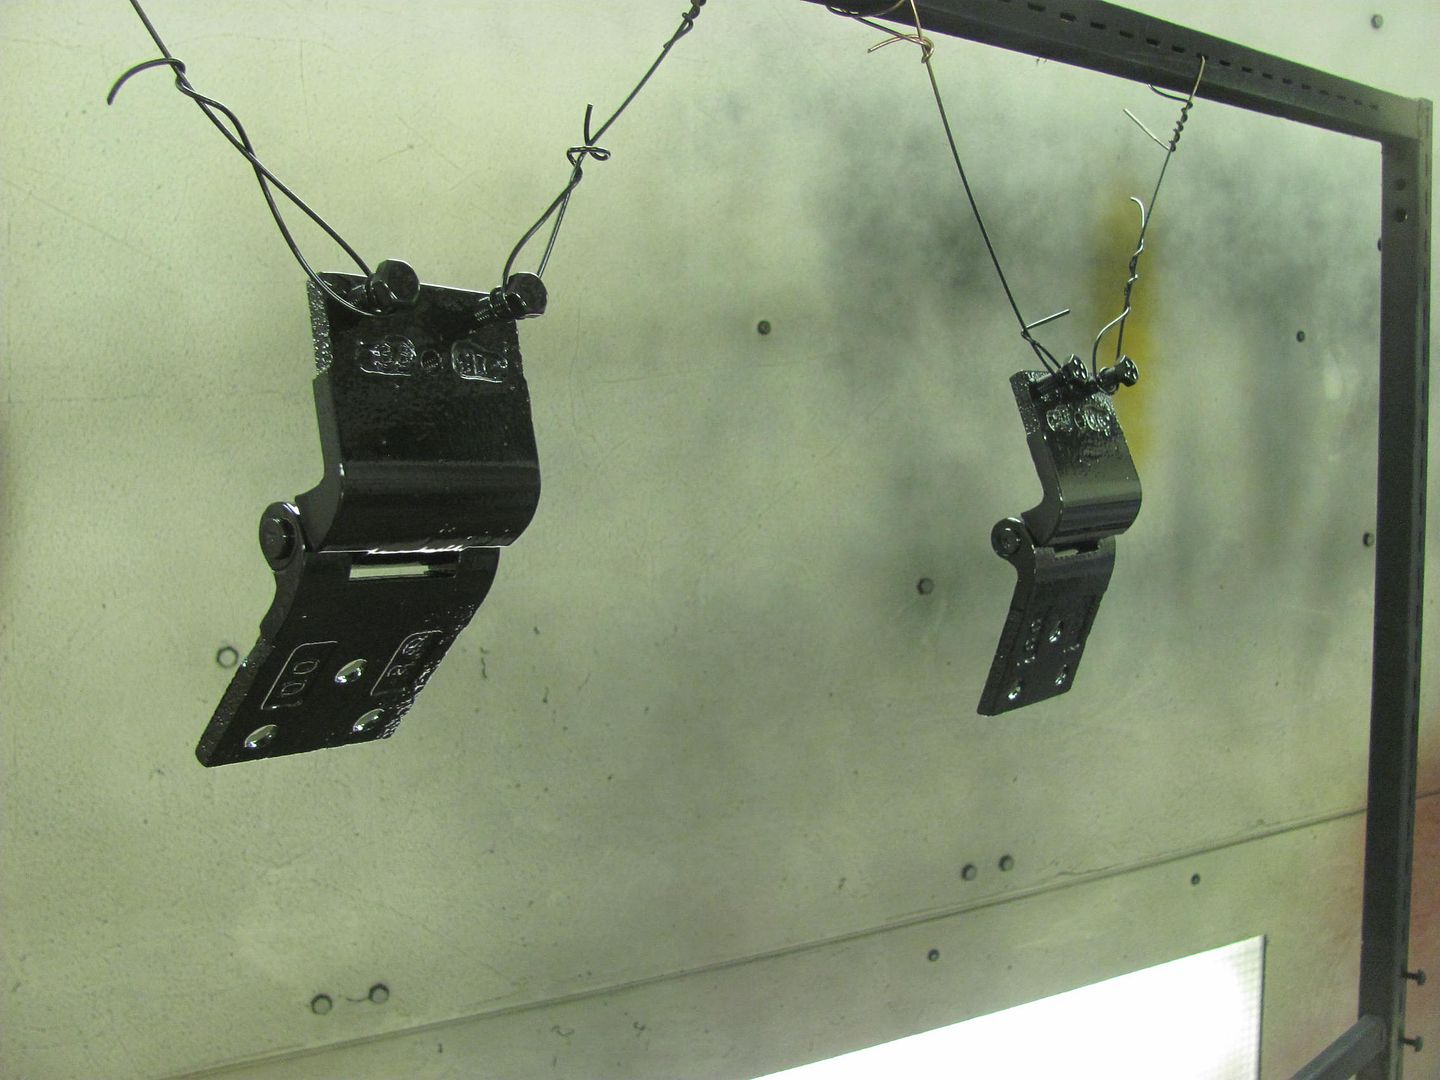
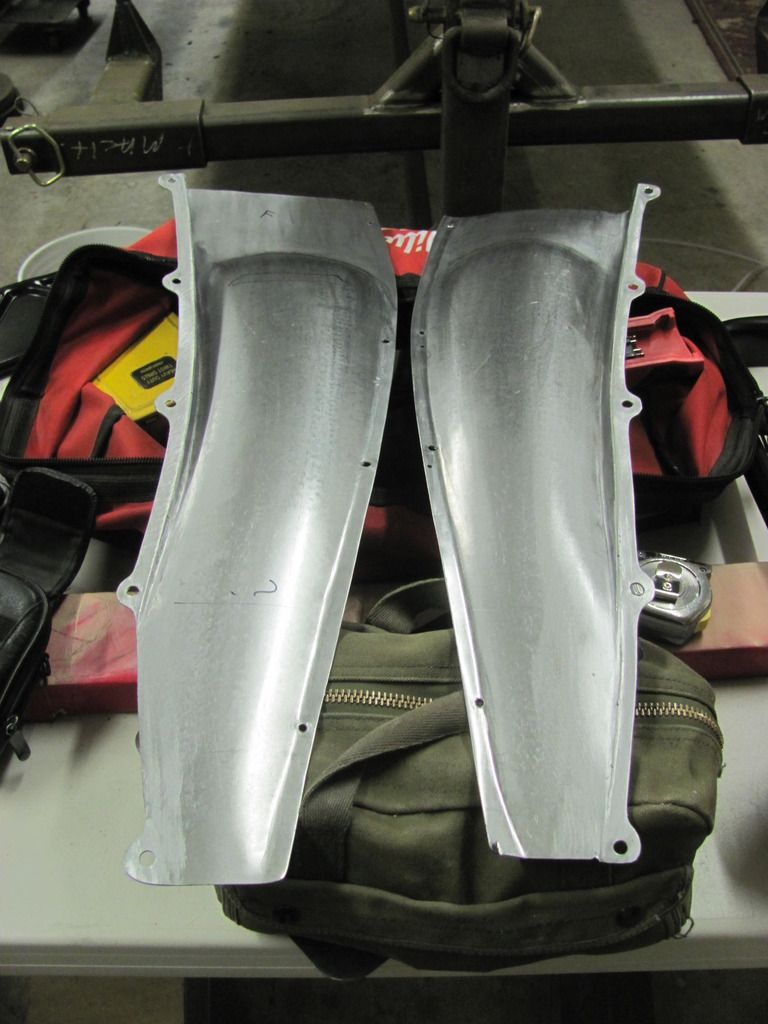
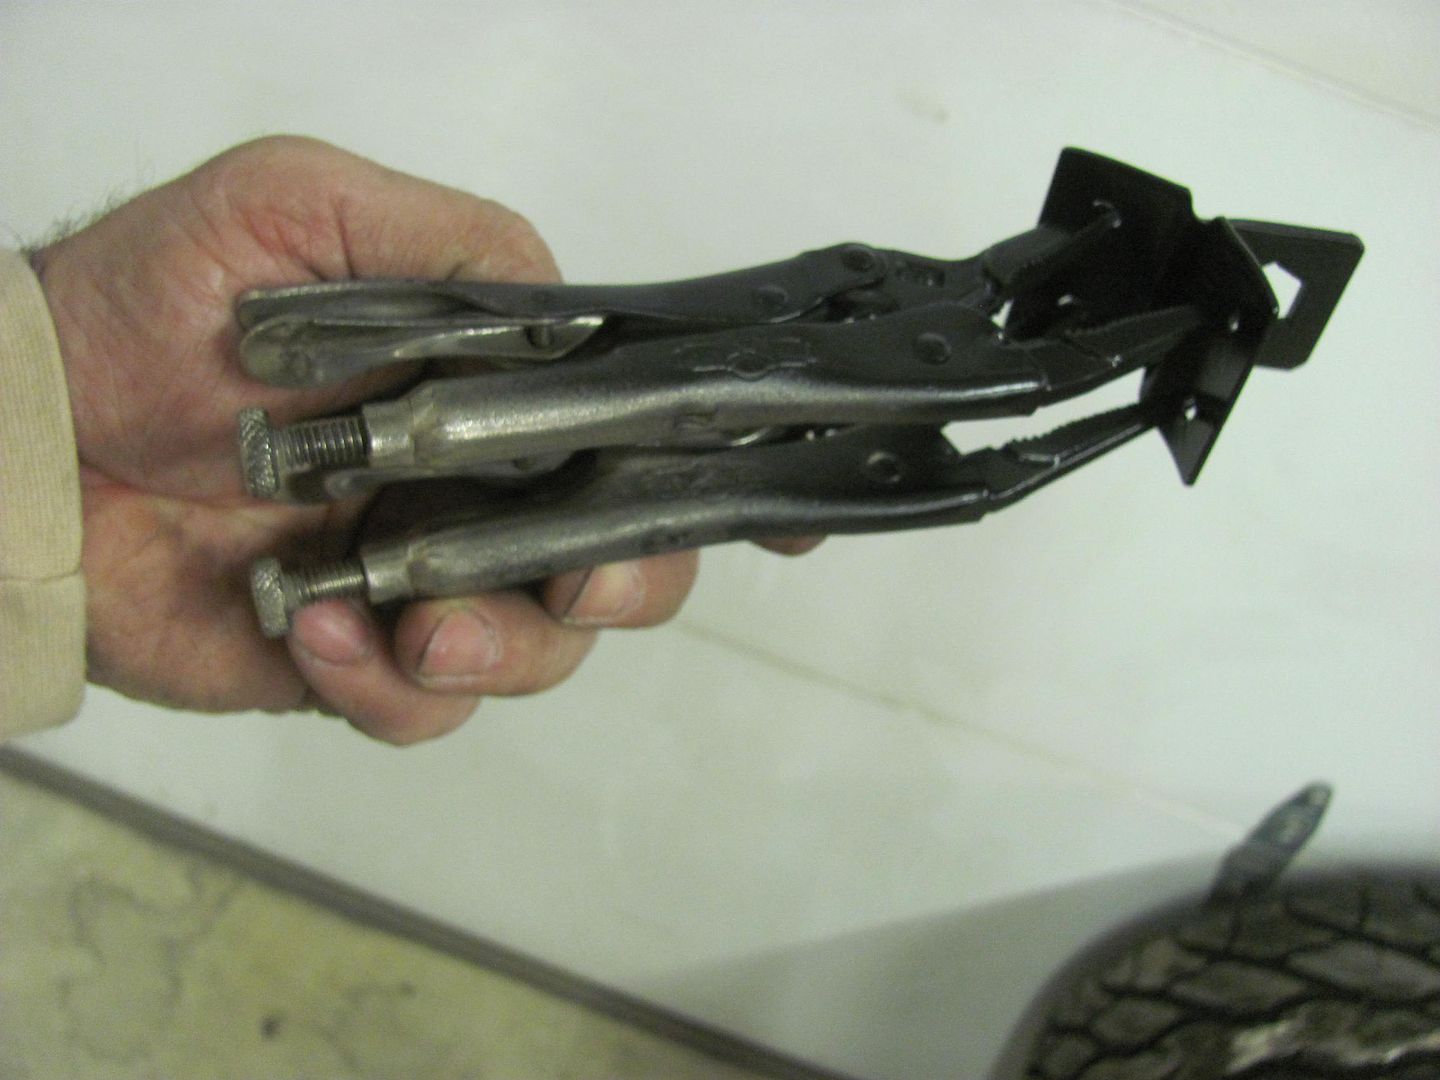
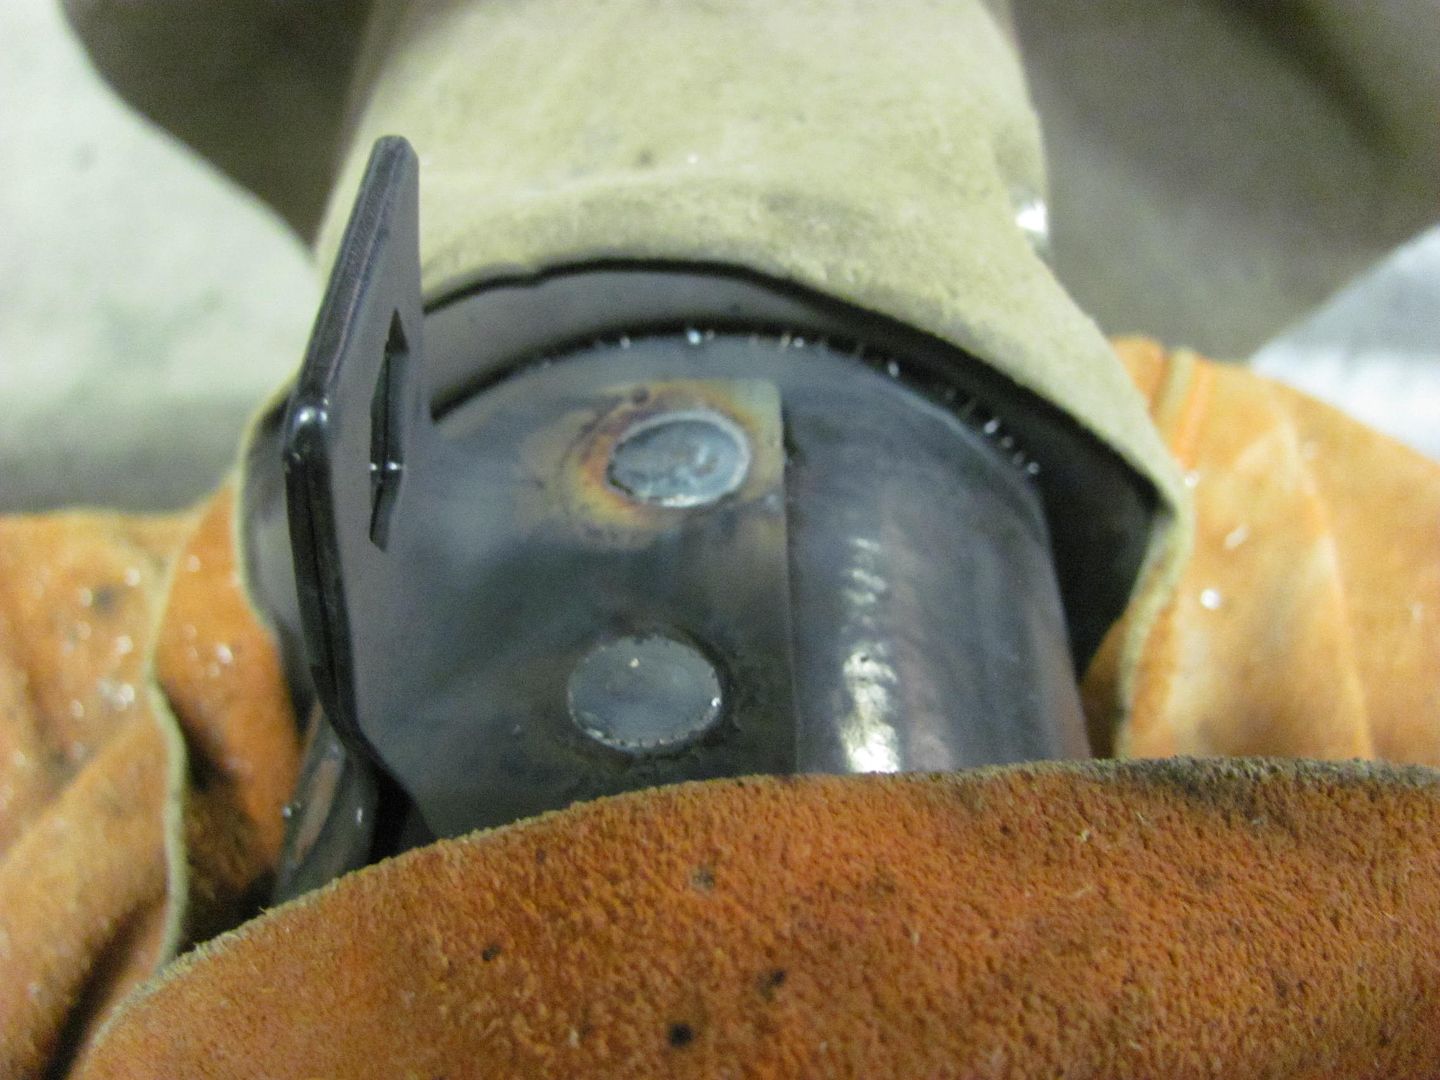
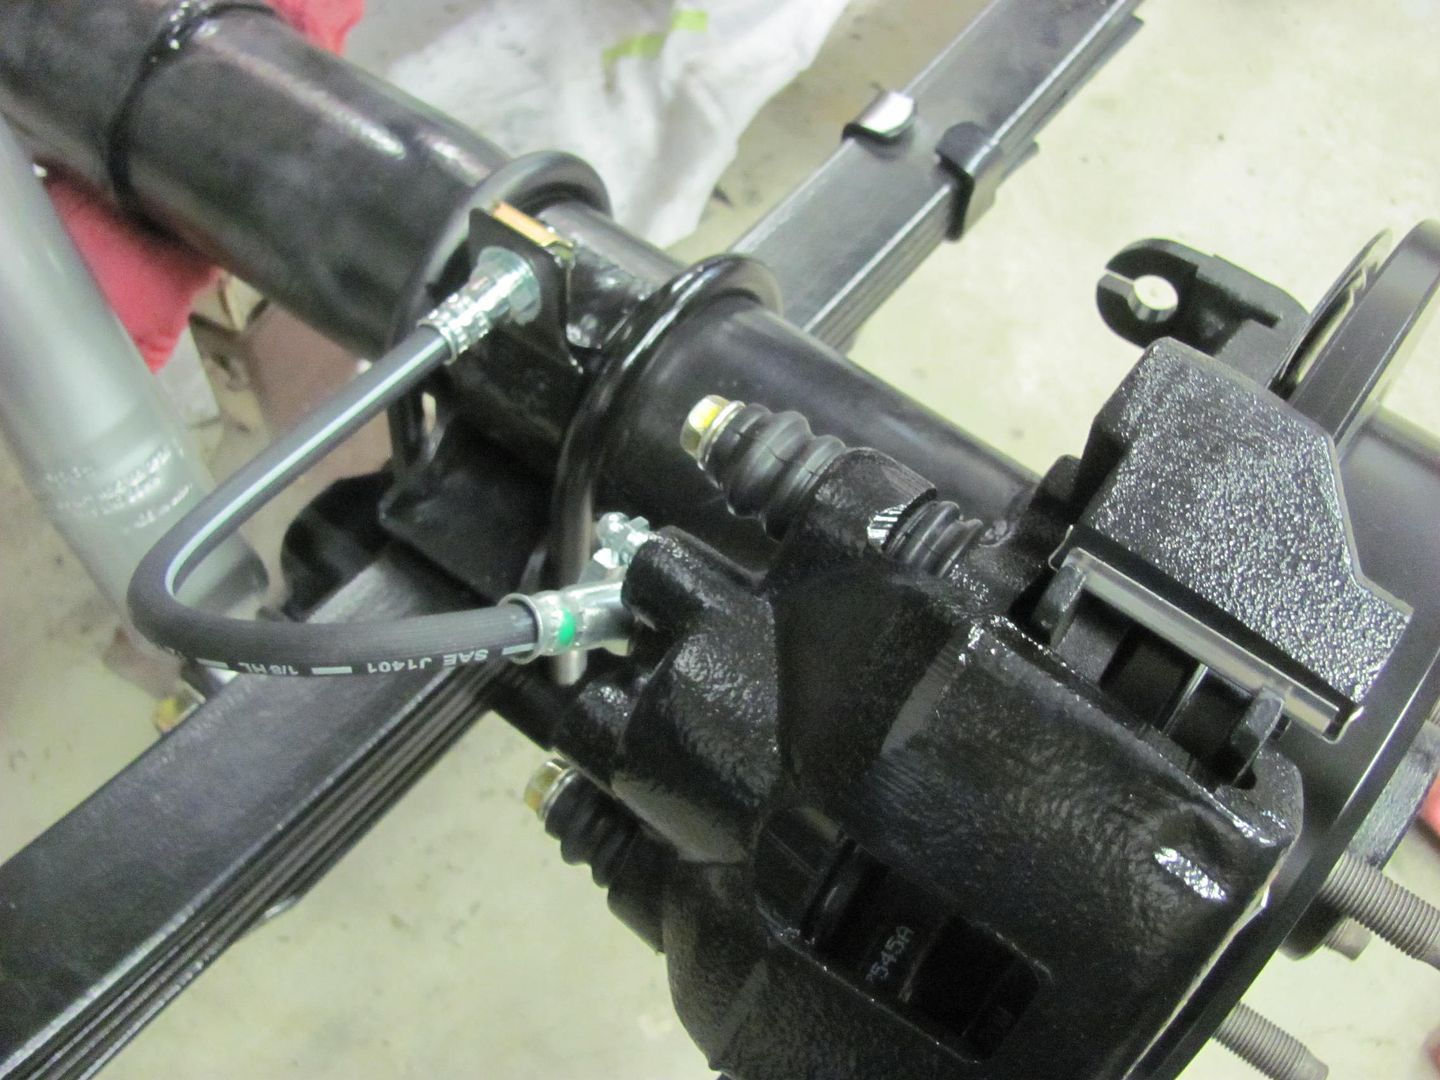
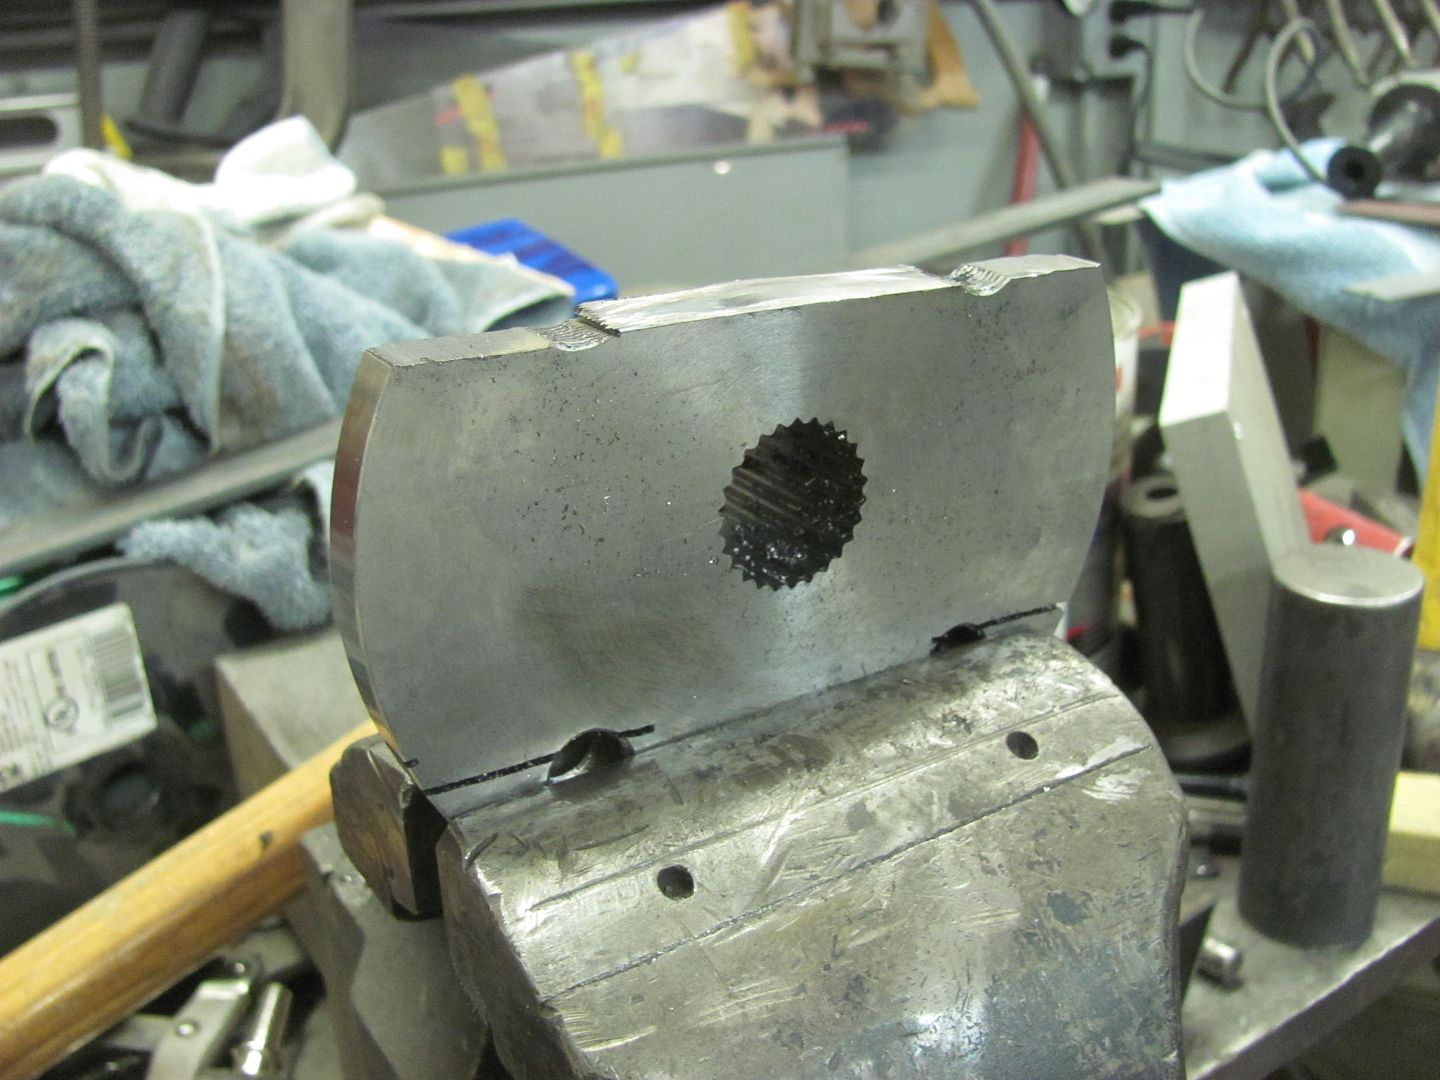
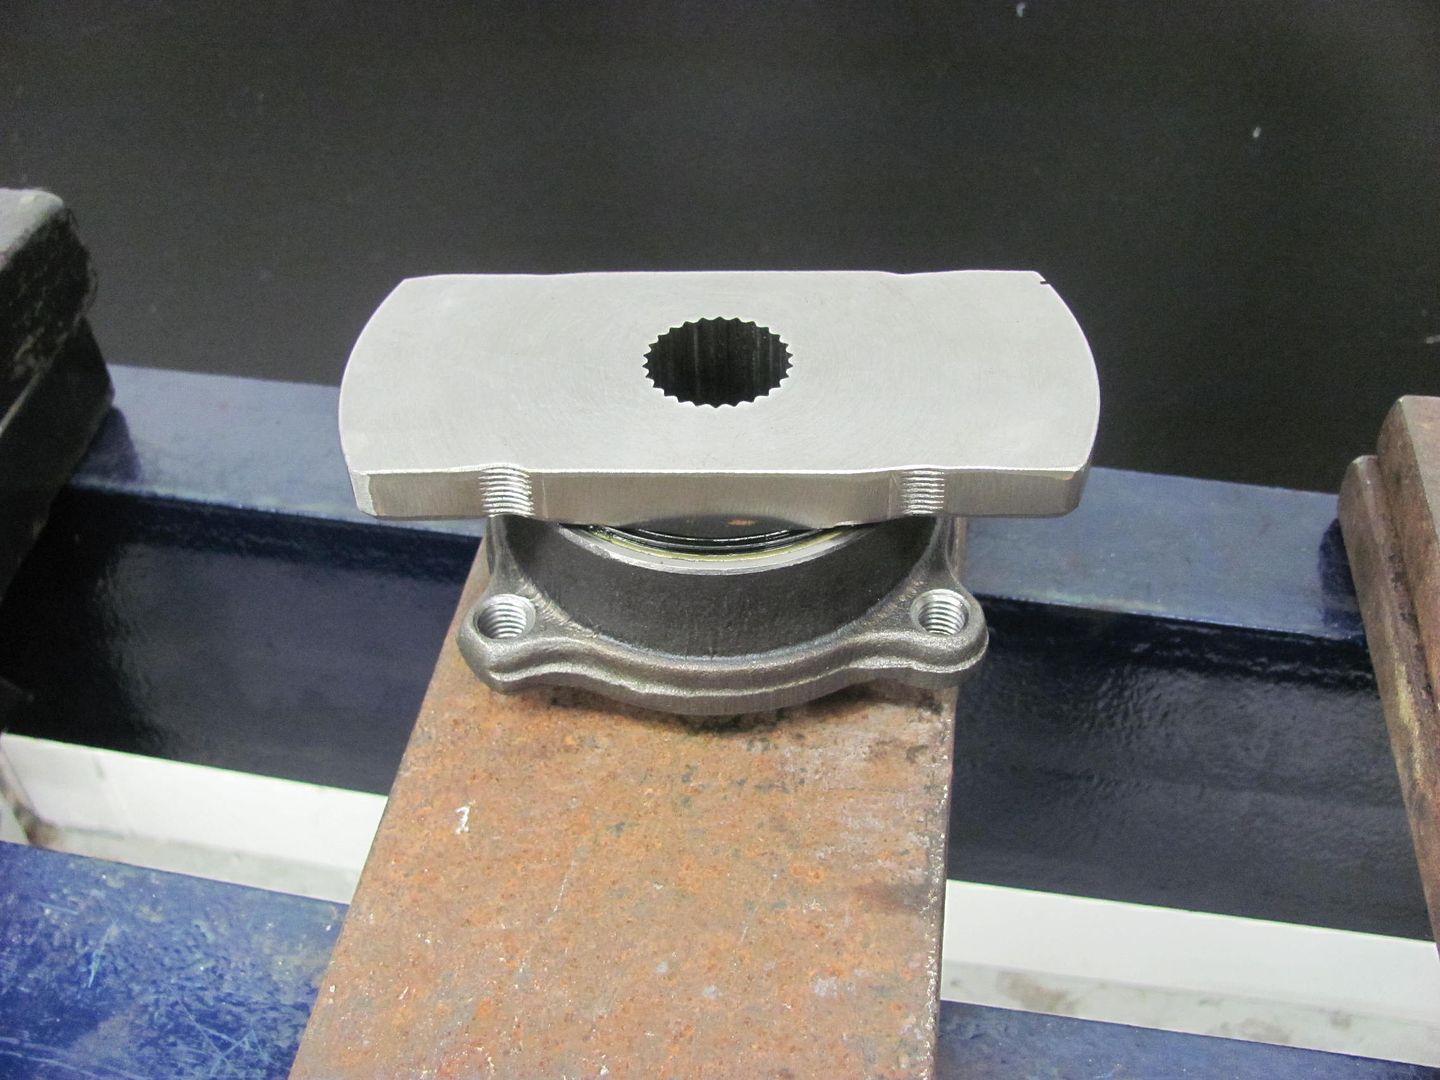
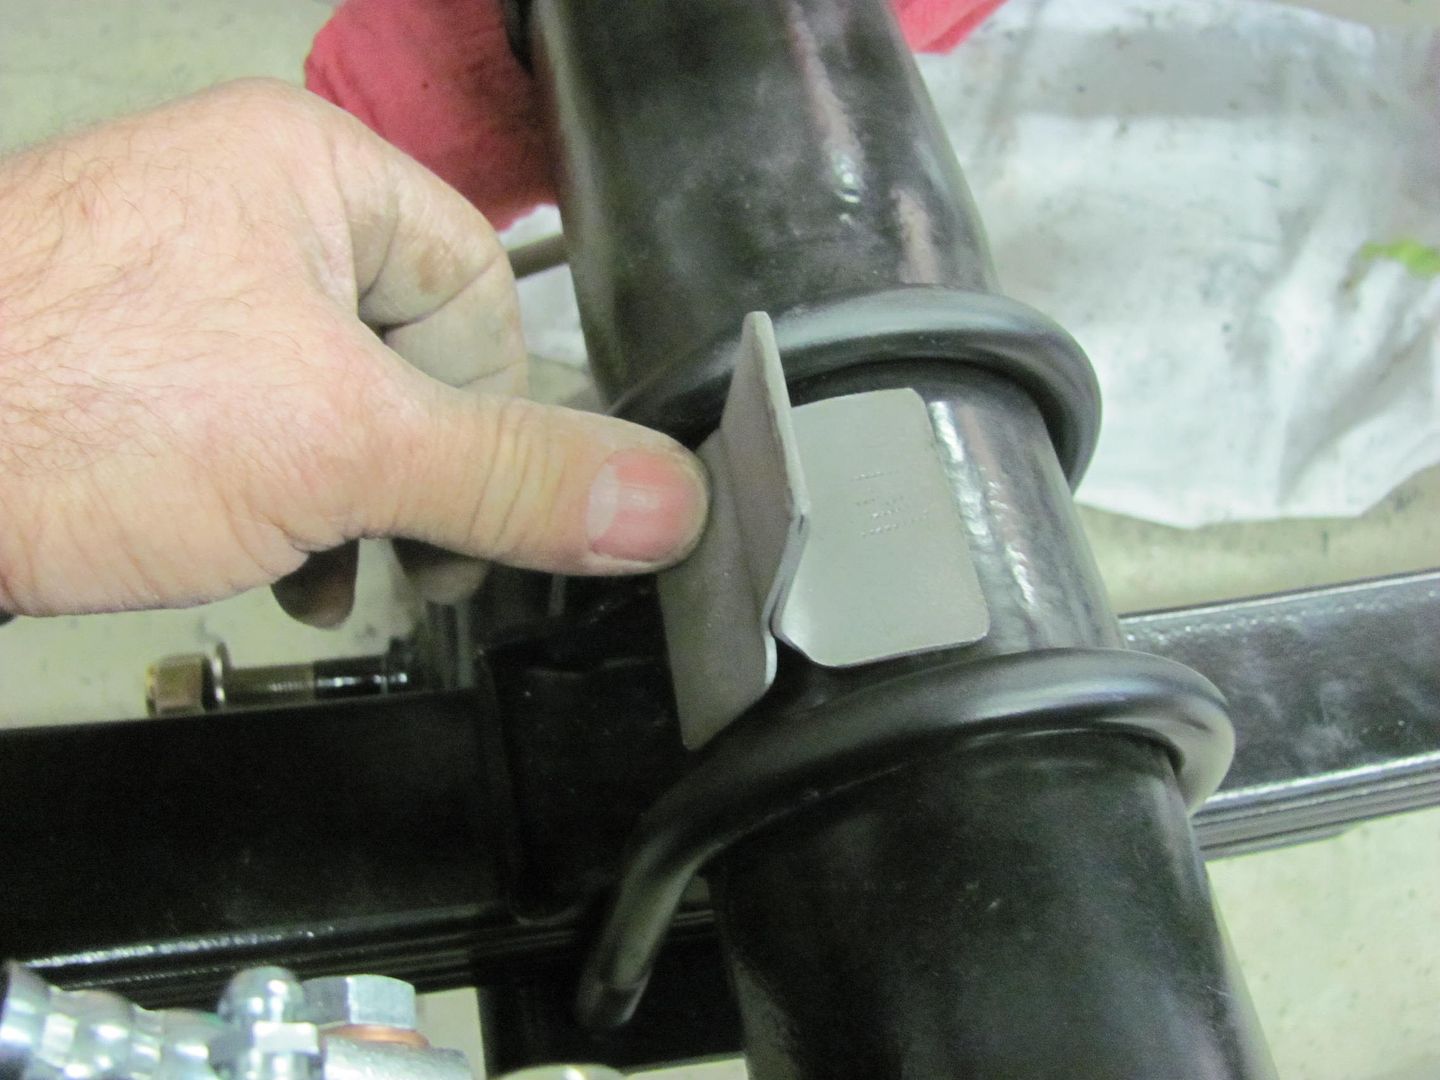
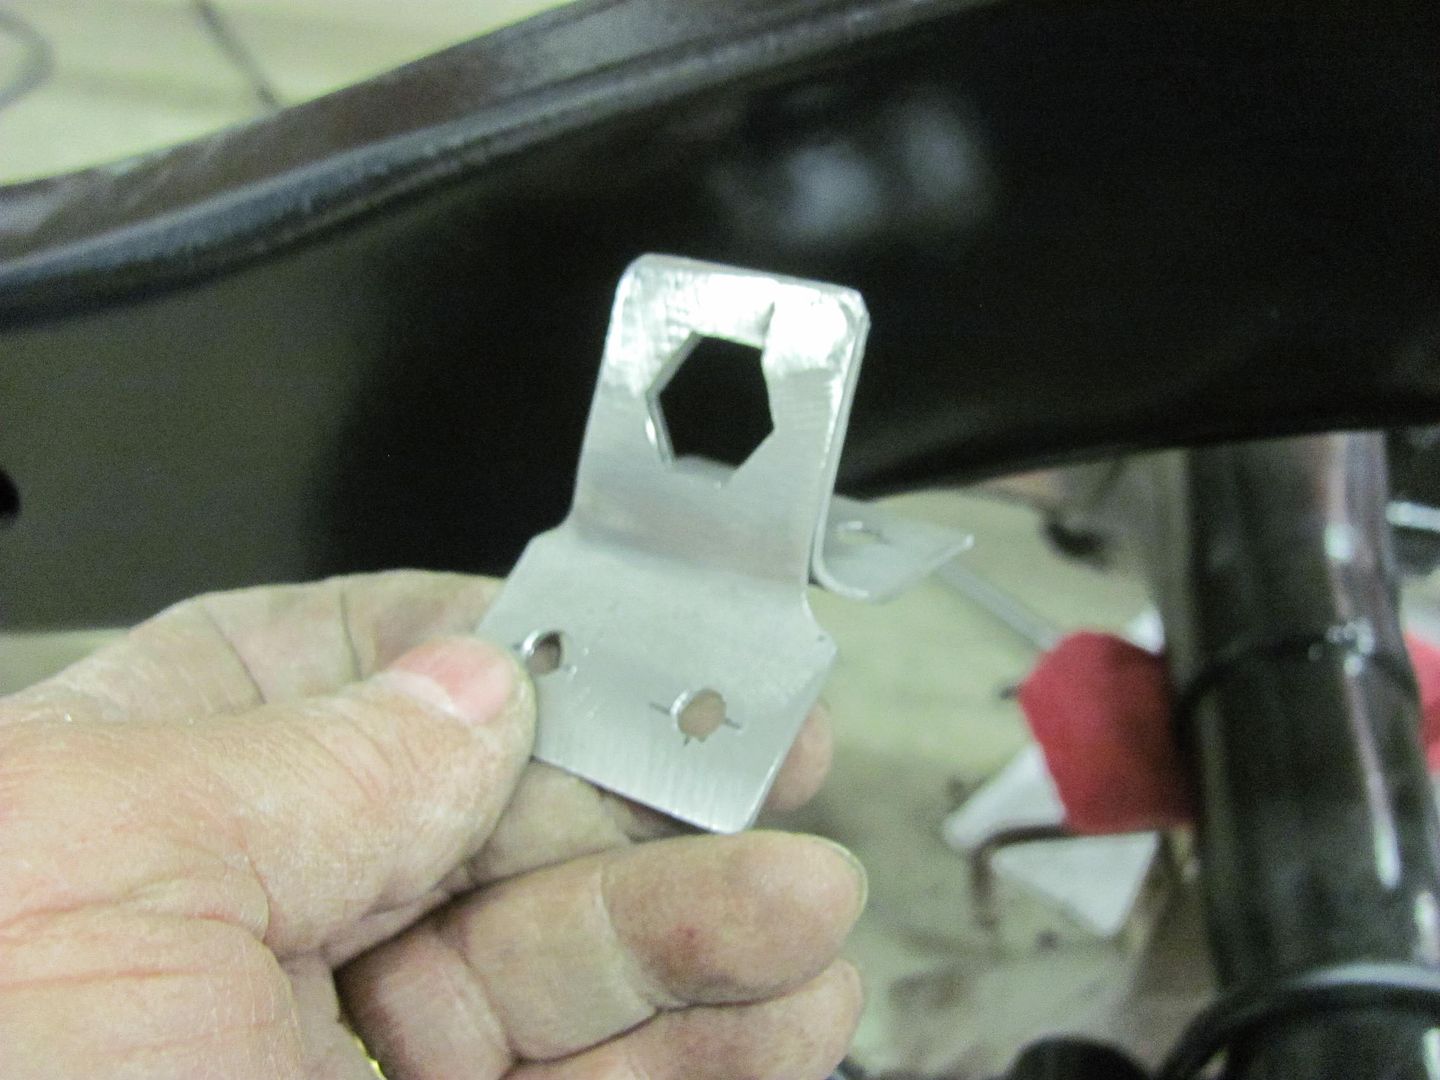
And here's our final version on the brake hose anchor bracket, by popular demand!


Picture%204141.jpg


Picture%204144.jpg


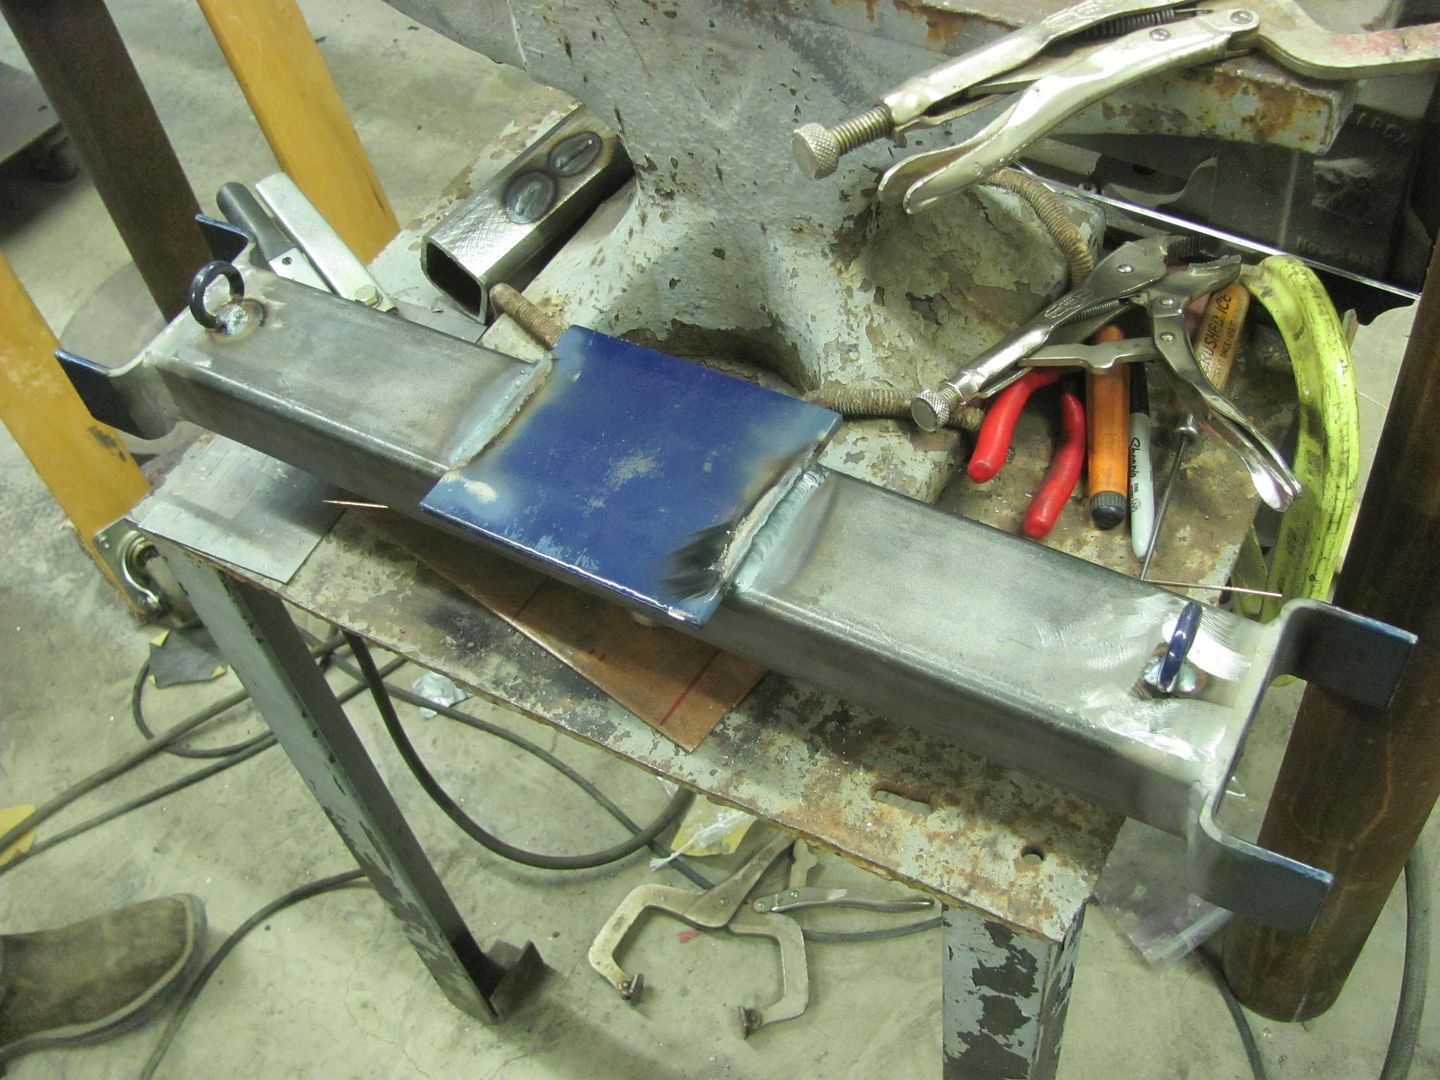
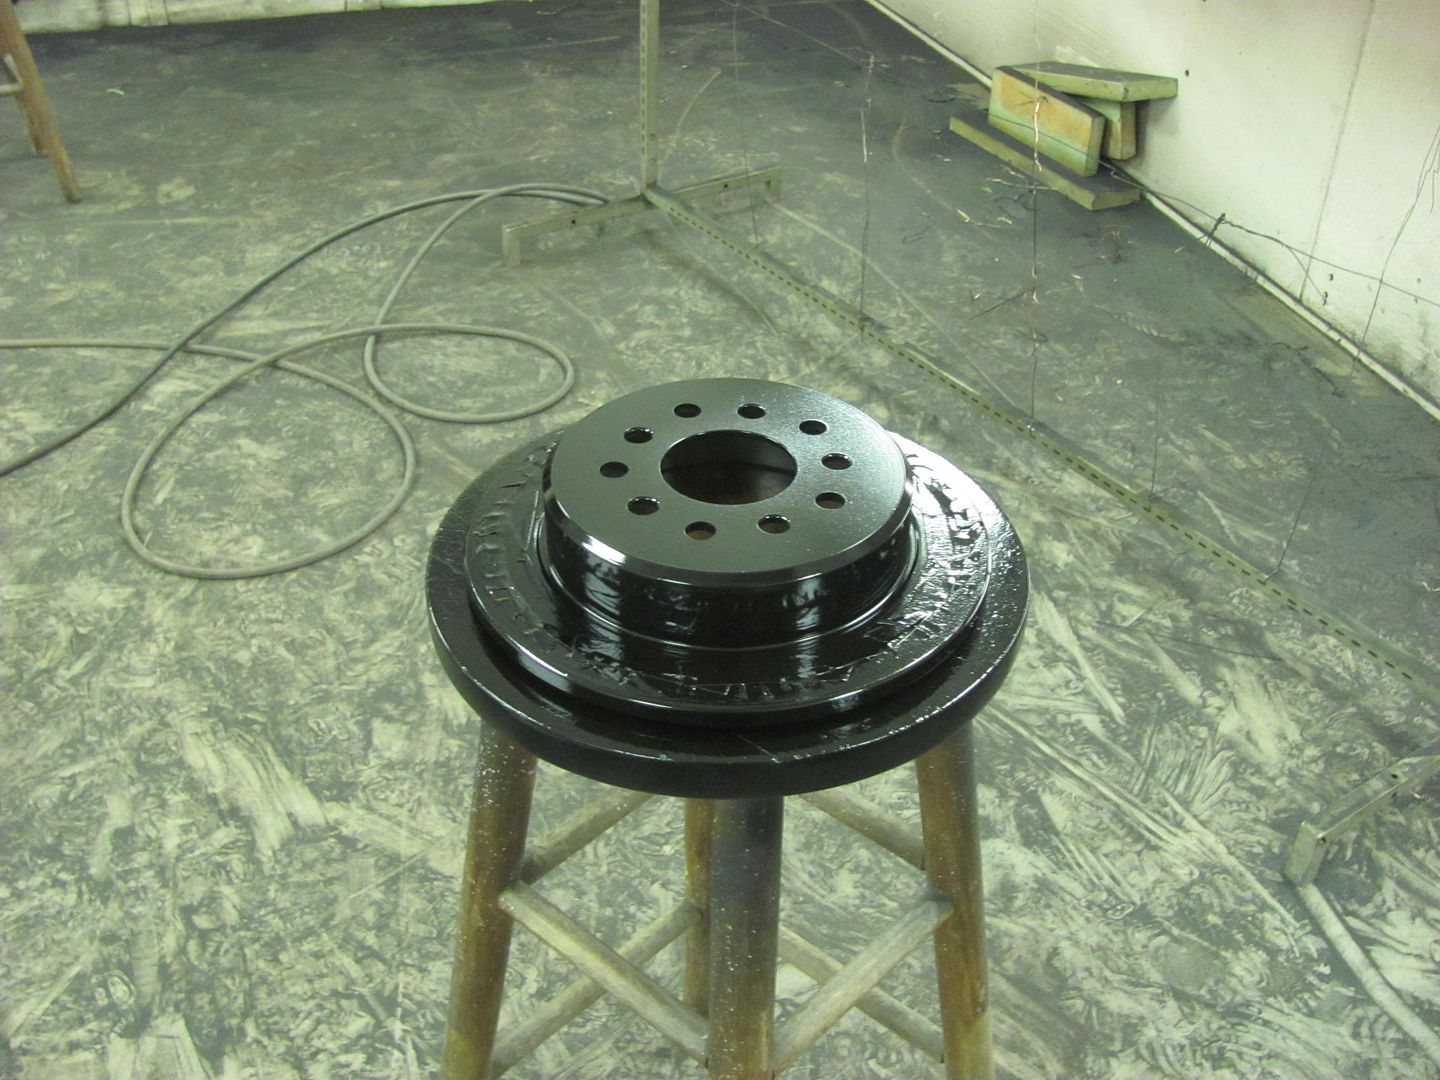
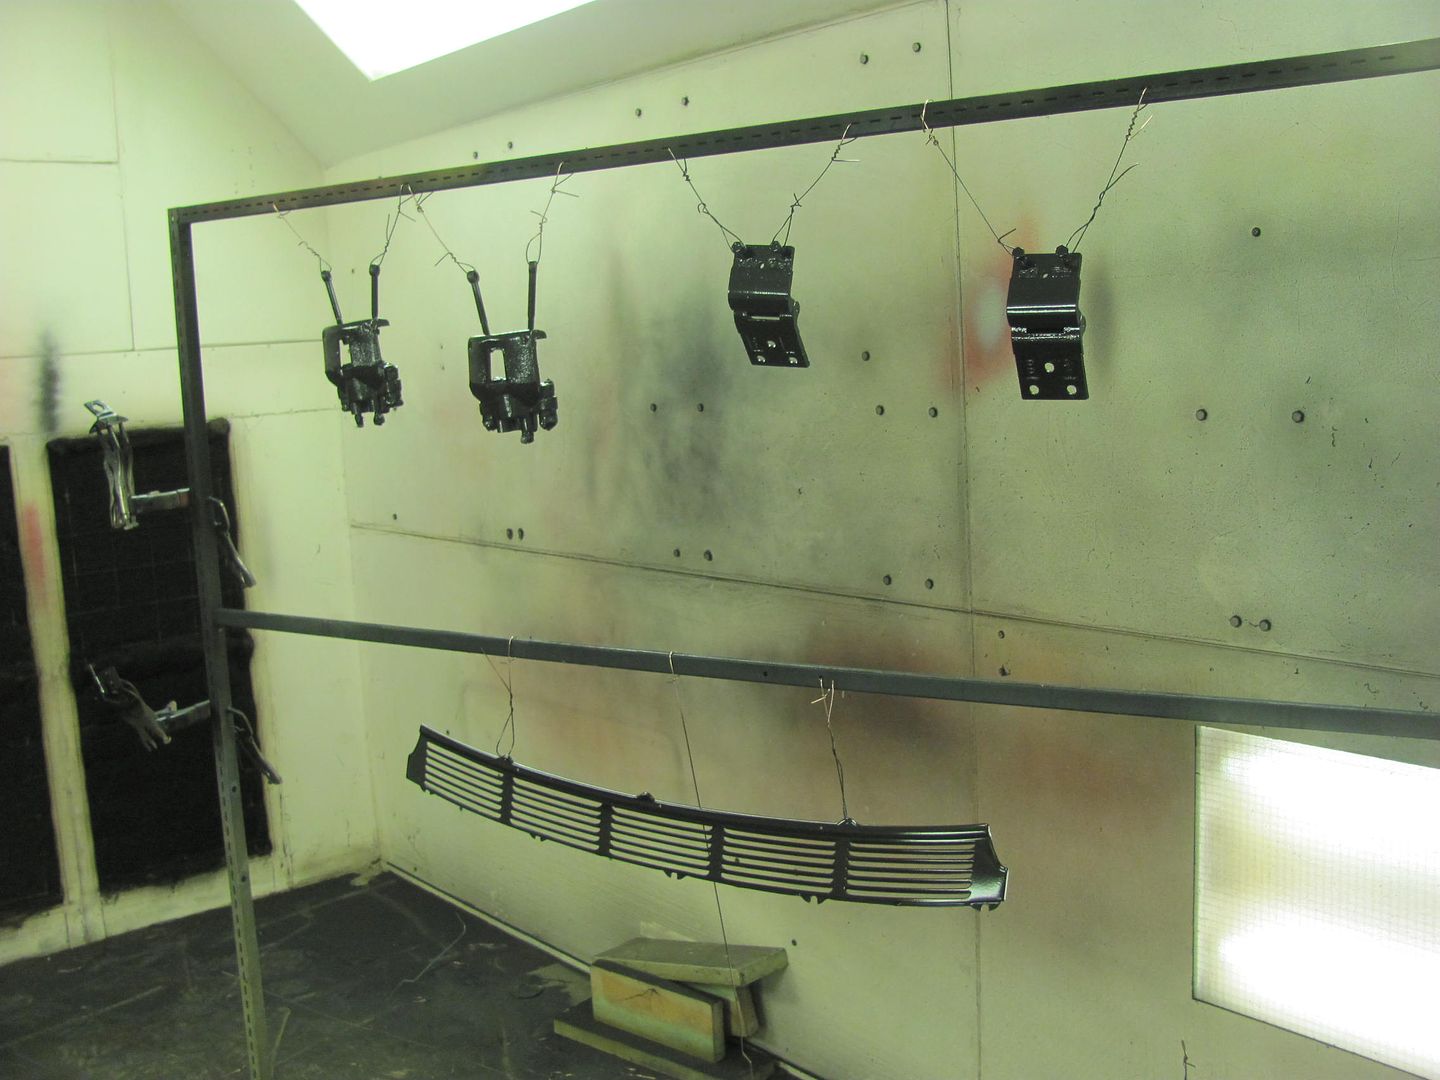
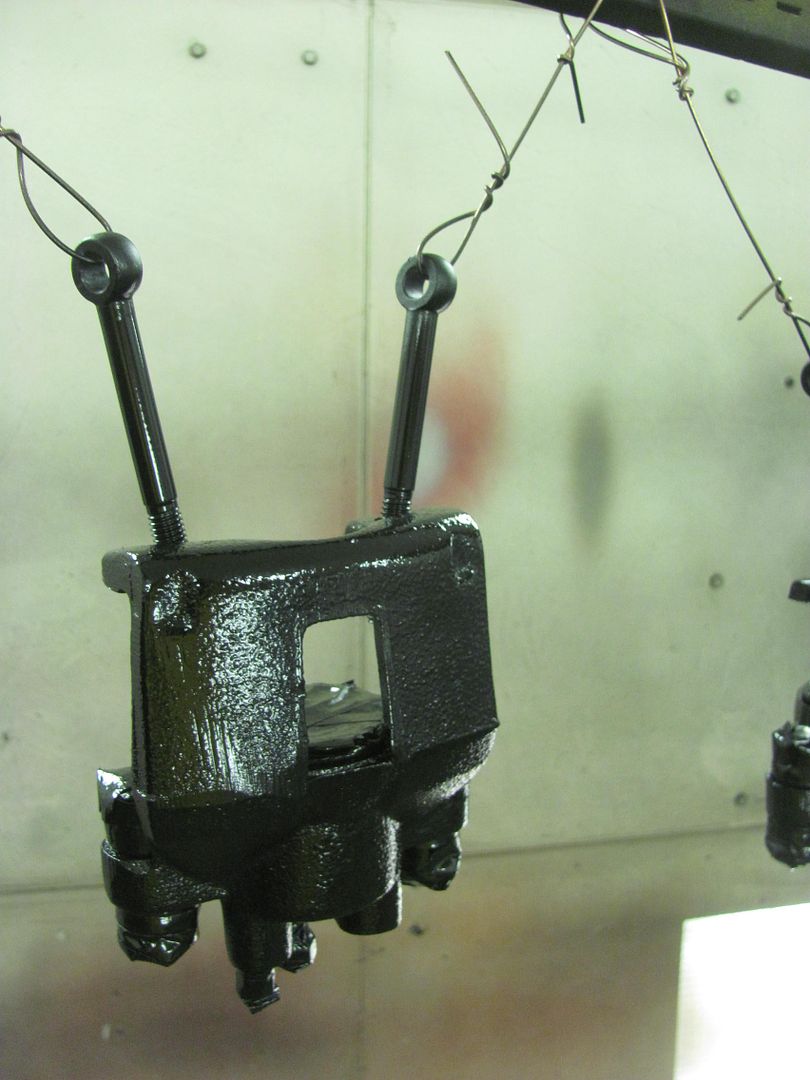
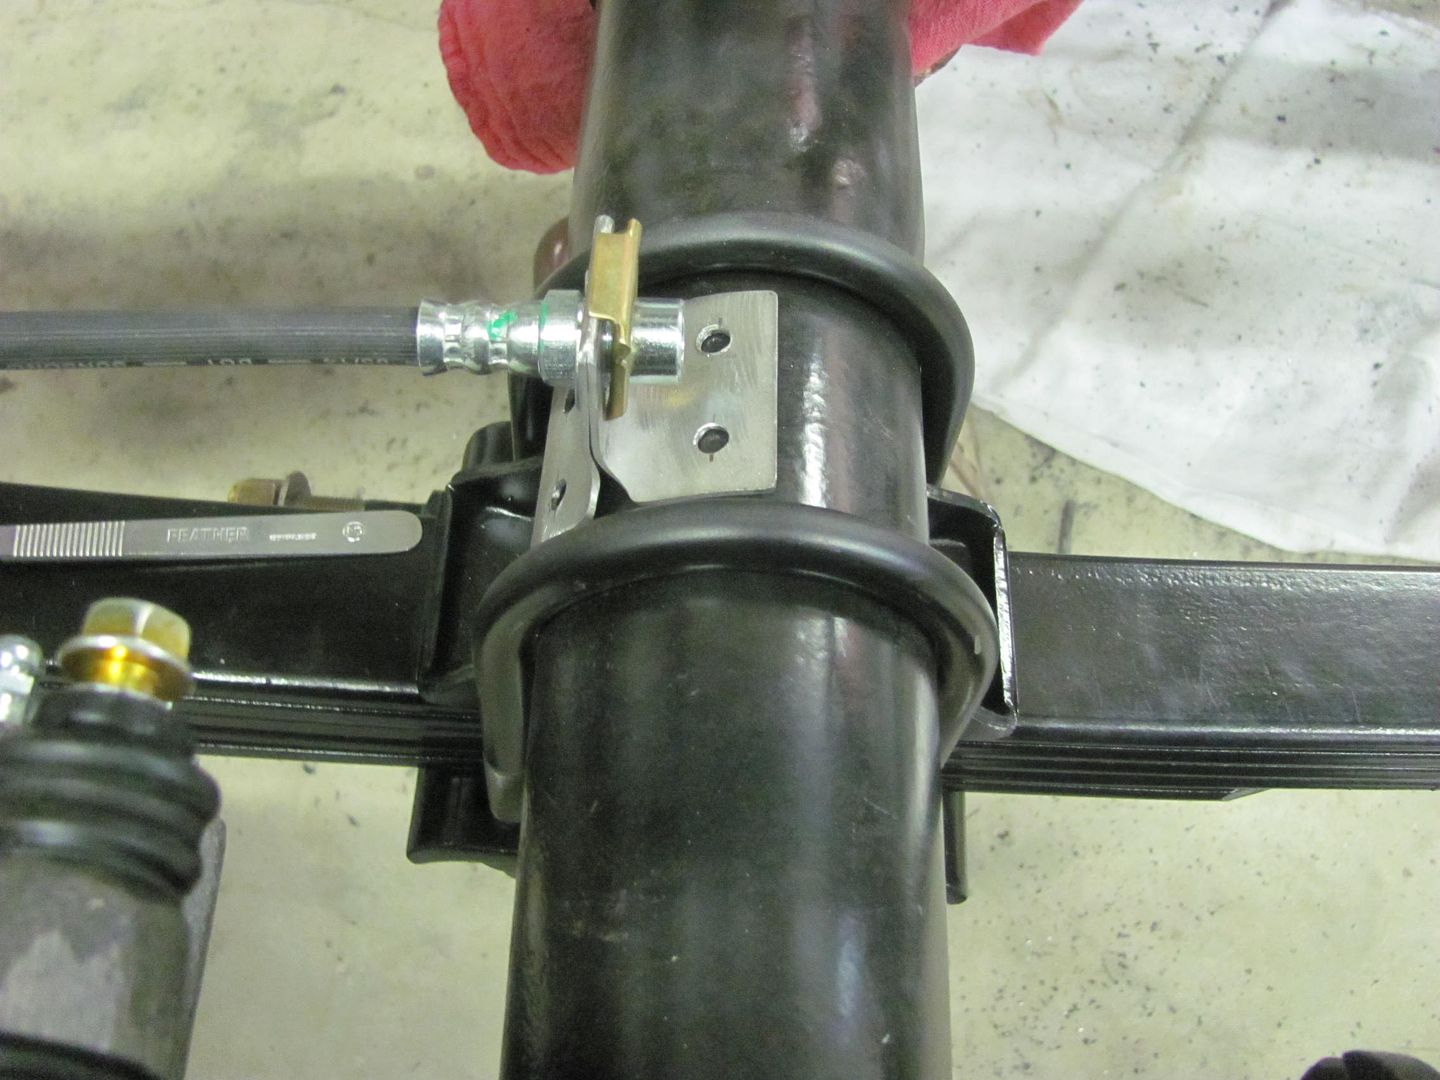
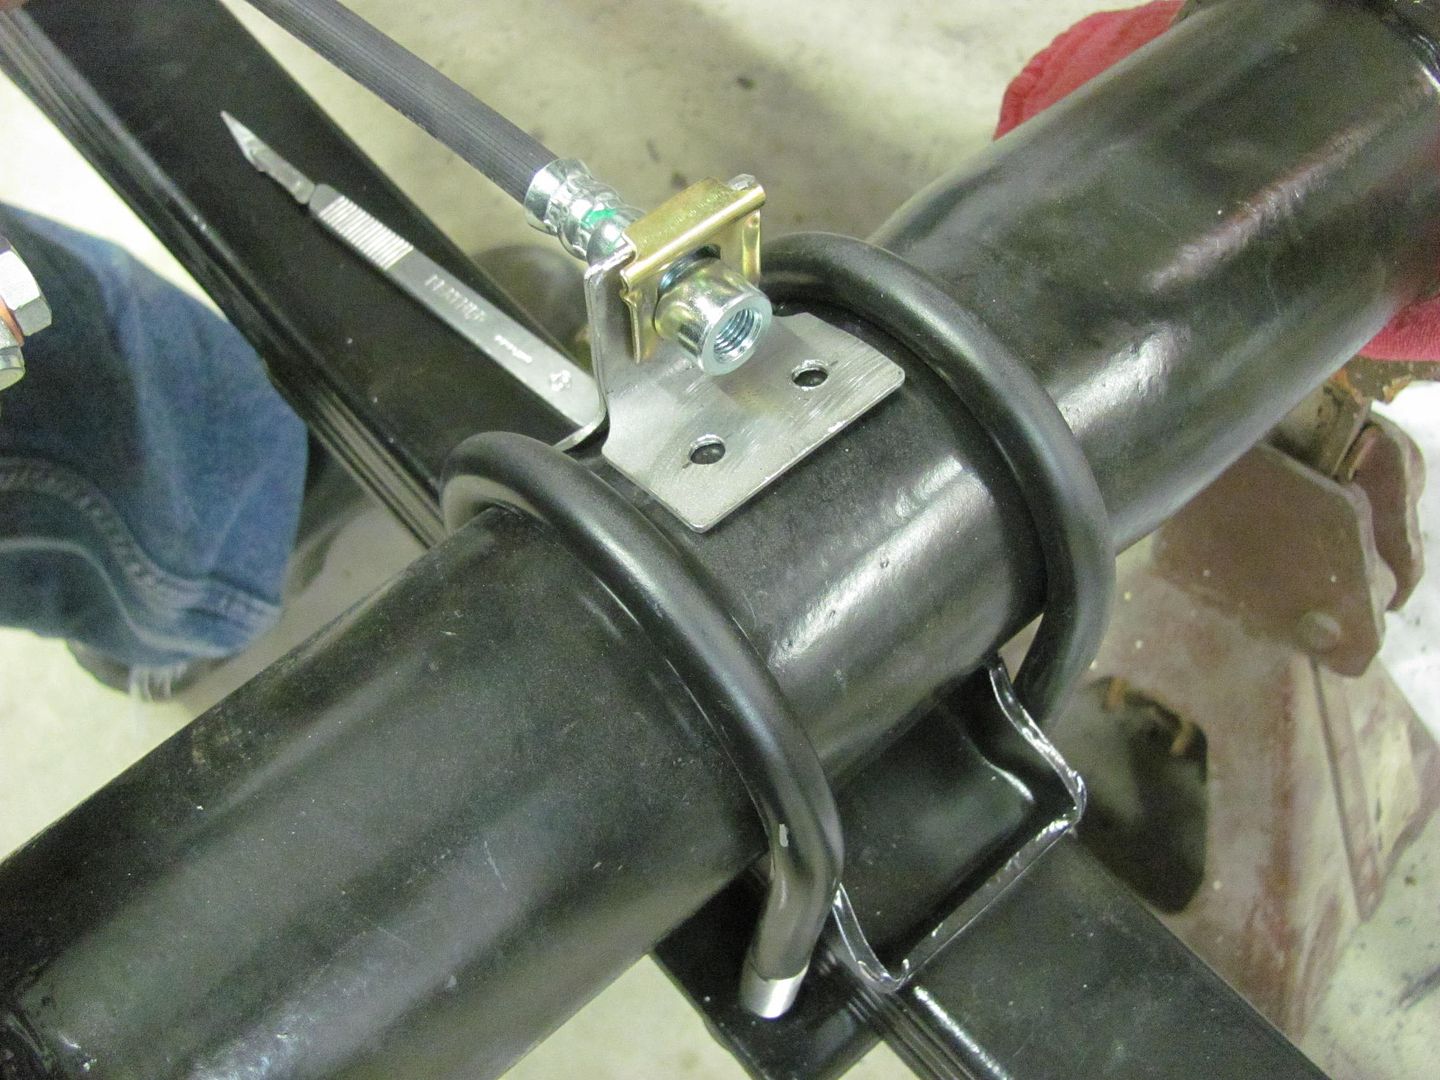
Then this will get epoxy primed along with the other bare brake parts and we'll just touch up the plug welds after welding in place..


Picture%204145.jpg


Picture%204146.jpg
 
To avoid these ads, REGISTER NOW!

Divcod

Well-known member
Joined
Jan 9, 2015
Messages
319
Location
Pacific Northwest
Robert,

Think the brake line mount turned out great!

I had been told that u bolts and nuts should not be reused so did a little investigation. Long nuts used on ubolts are designed to crush the threads when torqued down to limit spring stress as the spring flexes. With the crushed threads reuse torques would be wrong which could lead to spring failure. Anyway, you avoided a problem / cost by changing the pLan.

Still looking for the first color shot!

Dave
 
OP
M

MP&C

Well-known member
Joined
Oct 21, 2009
Messages
4,396
Location
Leonardtown, MD
Used a step drill to open a hole the same size diameter as across the flats, then a triangular file to add the corners.
 
OP
M

MP&C

Well-known member
Joined
Oct 21, 2009
Messages
4,396
Location
Leonardtown, MD
With the new brake parts all prepped for paint, and the owner not too keen on blue Monroe shocks (I told her it was Ford blue just to instigate), time for some more Epoxy this evening..

Meanwhile Kyle worked on repairing the cross piece for my brother in law's press that we tore up the other night. seems the "peg" hanging down didn't have room for the long axle under, so I put it next to it. We cracked the weld around the peg and pushed it in pretty good. So to make sure he'd let us use it again, we got some replacement parts...


Picture%204147.jpg


Picture%204148.jpg


Picture%204158.jpg


Picture%204160.jpg


The brake anchor brackets had been spread apart and a quick coat of SPI sprayed on the inside, then clamped closed with NNVG for the remaining spray session.

Picture%204155.jpg


Quite the clamping conglomeration...


Picture%204152.jpg


....and the rest of the parts...


Picture%204149.jpg


Picture%204150.jpg


Picture%204154.jpg


Picture%204156.jpg


After the shocks first coat of epoxy had flashed, they got two coats of the silver Imron...


Picture%204157.jpg
 

jimkinney

Well-known member
Joined
Jan 3, 2009
Messages
298
Location
Florida's Space Coast
Used a step drill to open a hole the same size diameter as across the flats, then a triangular file to add the corners.

All of the cool tools in the shop and it comes down to a hand file again and again.

Great project and incredible work. Thanks for letting us follow.

Jim
 

TimeWarpF100

Well-known member
Joined
Aug 21, 2010
Messages
6,784
Location
not here
Robert,

At least your painter shows up, my painter is a total slacker . . LOL

Looks like your shop is pretty well balanced.
 

bonneyman

Well-known member
Joined
Apr 22, 2010
Messages
8,752
Location
Desert SW
Geez, shortening and milling a step on that drill bit must have been a job! As hard and brittle as drill bits are. :thumbup::thumbup:

Did you have to have a coolant flow on it while milling?
 

maverick3316

Well-known member
Joined
Nov 8, 2014
Messages
66
Location
Ocala, Florida
Picture%204158.jpg


Does the solid round bar go all the way through? Did you drill a locating hole on the other side, then plug weld, grind flush, and the weld the plate on top?

Since you are painting the shocks, will the owner get an additional set painted as well for replacements when the first set wears out?


As others have stated, great work, and great attention to detail.
 

Kevin54

MEMBER EMERITUS
Joined
Jan 12, 2005
Messages
29,341
Location
Urbana, Ohio
Geez, shortening and milling a step on that drill bit must have been a job! As hard and brittle as drill bits are. :thumbup::thumbup:
Did you have to have a coolant flow on it while milling?

A drill bits flutes are hardened, but the shank of a drill bit (HSS bit) is quite a bit softer and allows for it to be easily machined.
 

bonneyman

Well-known member
Joined
Apr 22, 2010
Messages
8,752
Location
Desert SW
A drill bits flutes are hardened, but the shank of a drill bit (HSS bit) is quite a bit softer and allows for it to be easily machined.


Did not know that. Is that why drill bits always seem to snap in the flute area (harder) and not the shank part (softer = tougher)?
 
OP
M

MP&C

Well-known member
Joined
Oct 21, 2009
Messages
4,396
Location
Leonardtown, MD
Does the solid round bar go all the way through? Yes


Did you drill a locating hole on the other side, then plug weld, grind flush, and the weld the plate on top? Yes

Since you are painting the shocks, will the owner get an additional set painted as well for replacements when the first set wears out? No


As others have stated, great work, and great attention to detail.

Thanks!
 
To avoid these ads, REGISTER NOW!
OP
M

MP&C

Well-known member
Joined
Oct 21, 2009
Messages
4,396
Location
Leonardtown, MD
Well soon after the 35 Chevy returned from GNRS, Cody had it blown apart again to tackle more items on the to-do list.. One of them being inner fenders, which he had asked if we would punch some louvers in those as well. He hand fabricated these parts, seen here:


35ChevyInnerFender1.jpg


35ChevyInnerFender2.jpg


He had quite a bit of work in these and had suggested shipping them down, but we aren't that far apart so I suggested meeting in the middle to pass off the parts rather than trust them to shipping. So we guessed on Parole, MD as being close to a good midpoint, and picked the Double TT Diner to grab some breakfast and catch up on his trip to Pomona. Kyle and I arrived and had made about one lap through the parking lot when Cody pulled in, so this worked to be a good halfway point between Southern MD and Milford DE.


Here's what we picked up....


Picture%204174.jpg


This has a tighter radius than what we had done for the hood sides, so for the punch to better follow the contour, or sit perpendicular to the point of punch, we plan on a rotational fixture attached to the linear slide that the "trough" of the inner fender can be rolled from side to side.. More on that to come..

On the way home from Parole, we made a stop to look at an old fire truck that was slated for a total restoration. We did a quick survey of the truck and made some recommendations to the owner.. While we were there, also stumbled across another 35 Chevy. These 35's are coming out of the woodwork it seems..


Picture%204180.jpg


Back in the shop, getting ready to re-assemble the rear. Test fitting the rear axle bearings, as the brake kit had come with some .250 thick spacers...


Picture%204161.jpg


Picture%204162.jpg


Picture%204163.jpg


My vernier depth gauge showed that the actual distance was .203, so some trimming was in order...


Picture%204164.jpg


With all the parts now test fitted, we took the rebuilt press parts back and gave them a trial run...


Picture%204179.jpg


With the press back in business, the only thing left to do there is to add it in the mix the next time we spray some epoxy, and I generously offered some of the leftover orange from the trailer wheel painting, but my brother-in-law seems a bit apprehensive.


Brake line brackets were removed from the paint stand, and this is the first time I noticed these Vise Grips had a Gene Winfield fade paint job on them..

Picture%204165.jpg


Brackets were plug welded to the housing, welds scuffed and touched up with some SPI epoxy..


Picture%204166.jpg


Picture%204170.jpg


Picture%204172.jpg


Newly painted shocks were reinstalled, and rear brake parts all installed..


Picture%204173.jpg


Picture%204175.jpg


Picture%204176.jpg


A bit closer....
 

iajonesy

Well-known member
Joined
Feb 8, 2009
Messages
2,467
Location
Iowa
Man, you just keep me spellbound. The quality of your work and your pictures are both great, Robert. I see you used rubber brake hoses. Do you prefer these over braided lines or was it an economical choice? You need to publish this Chevy's build as a how to book. I think you would have a best seller amongst car guys.

Mike
 
OP
M

MP&C

Well-known member
Joined
Oct 21, 2009
Messages
4,396
Location
Leonardtown, MD
The brake kit she bought for the front came with some braided lines, which were too short and, IMO, too stiff for range of motion on the suspension. So I went to the local Napa store, Guy Auto Parts, where they let me look through the boxes and find what I wanted.

Need brake hoses for a 9" rear...

"what's it in?"

A 55 Chevy....

"start with these two shelves..."


:D
 

Duke55

Well-known member
Joined
Jan 18, 2013
Messages
370
Location
Utah
I'll be watching for you planishing hammer build. It's next on my list and it looks like your planning on building the same style as me.


Sent from my iPhone using Tapatalk
 

GreyOwl

Well-known member
Joined
Oct 23, 2007
Messages
549
Location
North Las Vegas
I would double check the brake line clip attachment, all I've seen in the past have the upper flange turned the other way. Maybe these are different though.
 
OP
M

MP&C

Well-known member
Joined
Oct 21, 2009
Messages
4,396
Location
Leonardtown, MD
I'll be watching for you planishing hammer build. It's next on my list and it looks like your planning on building the same style as me.


I've had my eye on that piece of pipe for a couple years. Stopped by the machine shop that had it the other day and they were moving stuff around. Thought I better pull the trigger lest it disappear.


I would double check the brake line clip attachment, all I've seen in the past have the upper flange turned the other way. Maybe these are different though.


I thought it was a bit on the loose side, thanks for the pointer (pun intended). And you guys wonder why I take all these pictures.. :D
 
OP
M

MP&C

Well-known member
Joined
Oct 21, 2009
Messages
4,396
Location
Leonardtown, MD
The Mini Cooper wheel bearing/hub assembly had come in yesterday (looks like this)

Picture%204186.jpg


....so the first order of business was to void the warranty. Made a trip over to David's shop to make sure the press was still operational, and pressed the hub out of the bearing. We need a flat surface for the new material clamps, so Kyle worked on the lathe to get rid of the excess metal here:

Picture%204188.jpg


He got this far tonight...


Picture%204181.jpg


These are the new clamps we'll be using, the single 8mm bolt will connect it to the flange Kyle it working on..


Picture%204187.jpg


Meanwhile, I cut out the plate to hold the bearing...


Picture%204183.jpg


Picture%204184.jpg


The top will be folded 90* and that flange bolted to the top of the glide blocks here...


Picture%204185.jpg


Once complete this should allow us to rotate the inner fenders as we punch the louvers. Oh, and finally, looking at the bare spot in the floor here....


Picture%204182.jpg


The English Wheel has left the building. It is headed to a Porsche restoration shop on Eastern shore, should be putting out some 356 parts soon..
 
Last edited:
OP
M

MP&C

Well-known member
Joined
Oct 21, 2009
Messages
4,396
Location
Leonardtown, MD
With the wheel hub faced, the flange is trimmed...


Picture%204189.jpg


The attachment bracket....


Picture%204191.jpg


Picture%204192.jpg


Pressed back together...


Picture%204193.jpg


Picture%204194.jpg


"test run" videos:


Picture%204195.jpg


Material clamps should be here tomorrow, so we'll try and get some louvers punched next week.
 
Last edited:

TimeWarpF100

Well-known member
Joined
Aug 21, 2010
Messages
6,784
Location
not here
With the wheel hub faced, the flange is trimmed...


Picture%204189.jpg


The attachment bracket....


Picture%204191.jpg


Picture%204192.jpg


Pressed back together...


Picture%204193.jpg


Picture%204194.jpg


"test run" videos:


Picture%204195.jpg


Material clamps should be here tomorrow, so we'll try and get some louvers punched next week.

So Cool!

Can I just stop by for a day to watch?
 
OP
M

MP&C

Well-known member
Joined
Oct 21, 2009
Messages
4,396
Location
Leonardtown, MD
eh, we only do that about once a year, need it or not. We cleaned up about a month ago so we're good for a while... :lol:
 

EdT

Well-known member
Joined
Sep 21, 2010
Messages
1,104
Location
North Georgia
Great stuff as always. I've learned a lot from your thread. Best tip so far has been using the right and left hand shears to make "stops" on a piece of sheet metal for cutting on the stomp shear. Works great for long, narrow strips. WRT the open floor space, if your shop is like mine, you should be able to see a small vortex forming over the shop roof as the sun sets and tomorrow it will have deposited a pile of something in the space while you were sleeping. That's how mine operates.
 

TimeWarpF100

Well-known member
Joined
Aug 21, 2010
Messages
6,784
Location
not here
eh, we only do that about once a year, need it or not. We cleaned up about a month ago so we're good for a while... :lol:

Whew! Then I can just hang around and watch for 11 months to learn and will leave just prior to sweeping day?

Sounds good . .
 

iajonesy

Well-known member
Joined
Feb 8, 2009
Messages
2,467
Location
Iowa
WAIT, WAIT, WAIT. Robert, I'll bring my own broom and dust pan for the chance to hang out at your shop. Heck, I'll even bring my 56 Chevy pick up project and let it hang out there too.

Mike
 

Fan Attic

Member
Joined
Dec 7, 2015
Messages
12
Location
SW Idaho
Robert, I've been reading this thread which you linked over from the HAMB for the past 10 weeks and only have a couple pages to go to be current. It's all been said already so all I can add is my thanks for sharing your valuable time with us all. I too have learned SOOO much.
I have a general question for you that I hope you or someone can help with regarding kick shrinker dies. I bought the cheap pair of shrinker/stretcher tools from Eastwood decades ago and I have worn out the shrinker dies. Can they be sharpened or are there quality compatible replacements out there? I looked around on line and I don't see even Eastwood shrinker only die sets.
 
OP
M

MP&C

Well-known member
Joined
Oct 21, 2009
Messages
4,396
Location
Leonardtown, MD
I believe Neil Dunder restipples the dies for HF and Eastwood machines. Try sending an email thru his web site, www.gogitzit.com

You may also be able to tune up you dies by cleaning out any residue that may be in the grooves and adding some grease to the ramps for better performance. That may do the trick..
 
Last edited:

Fan Attic

Member
Joined
Dec 7, 2015
Messages
12
Location
SW Idaho
I believe Neil Dunder restipples the dies for HF and Eastwood machines. Try sending an email thru his web site, www.gogitzit.com

You may also be able to tune up you dies by cleaning out any residue that may be in the grooves and adding some grease to the ramps for better performance. That may do the trick..

Thank you for the quick reply Robert, I routinely wire brush the dies and lube the ramps. They just don't have much grip any more, I may have abused them once, maybe. I'll give Neil a try.
 
To avoid these ads, REGISTER NOW!
Top Bottom