
You are using an out of date browser. It may not display this or other websites correctly.
You should upgrade or use an alternative browser.
You should upgrade or use an alternative browser.
MP&C Shop Projects
- Thread starter MP&C
- Start date


Ed, we planned on doing that to better isolate where the slice needs to be made..
George, be careful not to have the magnet too close to your weld arc, it may interfere with the arc.
Was working on finishing blocking roof and quarters Saturday when the high winds took out the power for a couple hours.. Not to be deterred, the Milwaukee flashlight comes to the rescue...
Power came back on just after lunch and we got the next dose of Epoxy applied. These sure are some long quarters, I think I'll try a Yugo for the next project, shouldn't need anywhere near the paint prep...
or the video version:
.
Capt Chrysler
Well-known member
I just happen to have an 87 Yugo in stock! Let me know when your ready.
Capt. Chrysler
Capt. Chrysler

stsmytherie
Well-known member
Just my opinion: I'd swap the colors, pewter on the bottom, green on top.
My thinking is, that dark green is going to make the wagon look really bottom heavy vs the light greenhouse. If you reverse it, the greenhouse openings take away a lot of "mass" from the green paint vs the expanse of pewter below. Balance.
Love the shade of green, but looks a bit "thick". Maybe even more pearl. But that's delving even further into the world of my personal preference.
Anyway, not my rod so...
Mr onetwo
Well-known member
Robert, I just have to say that the stuff you guys are doing takes my breath away! I wish I lived closer so I could just sit in the corner of your shop and learn by osmosis.
I wish I lived closer so I could just sit in the corner of your shop and learn by osmosis.36racin
Active member
Robert, I just have to say that the stuff you guys are doing takes my breath away!
I second that....Hell I wish you were closer so my car could be inline to be done.
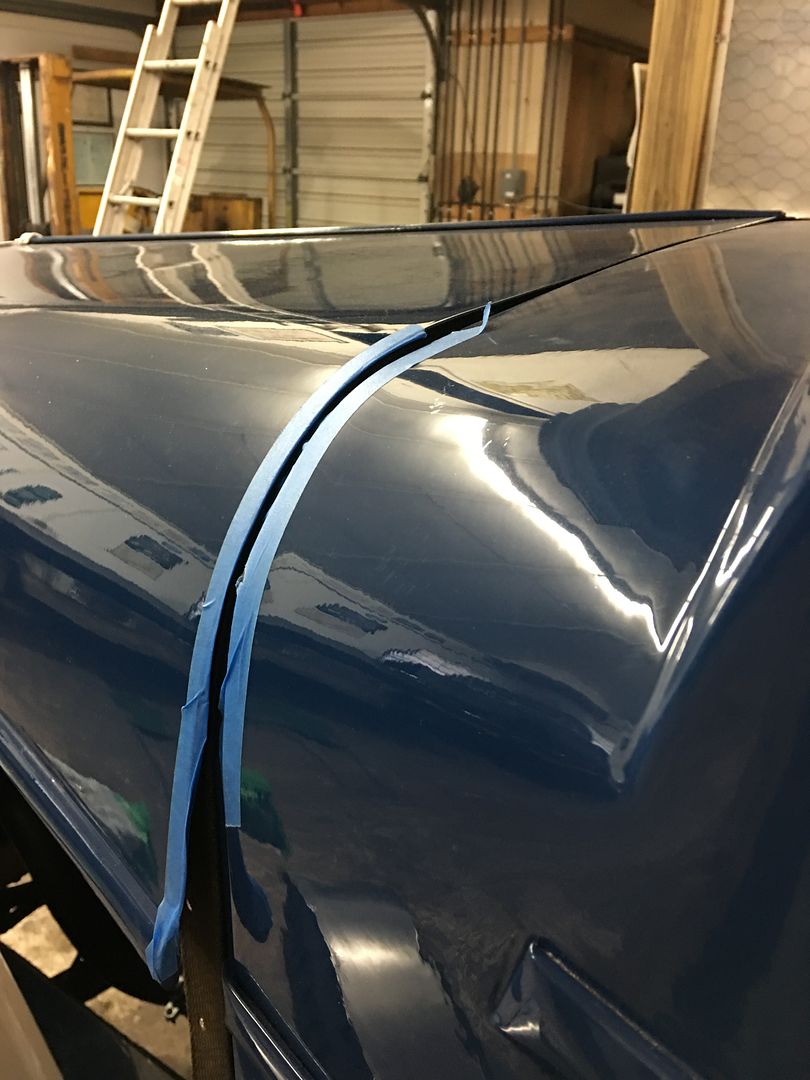
IDK, with my progressive bifocals that slight mis-alignment between the hood and cab doesn't look so bad.
Since the paint matches I'd almost be tempted to leave it. Just mentally figuring how much adaptation work would be needed to correct that slight "bump" makes me dizzy.
Since the paint matches I'd almost be tempted to leave it. Just mentally figuring how much adaptation work would be needed to correct that slight "bump" makes me dizzy.
Duck
Well-known member
Fantastic work Robert!
You are definitely a metal master.
Check your PM's too.
Duck
You are definitely a metal master.
Check your PM's too.
Duck
Thanks for all the comments guys!
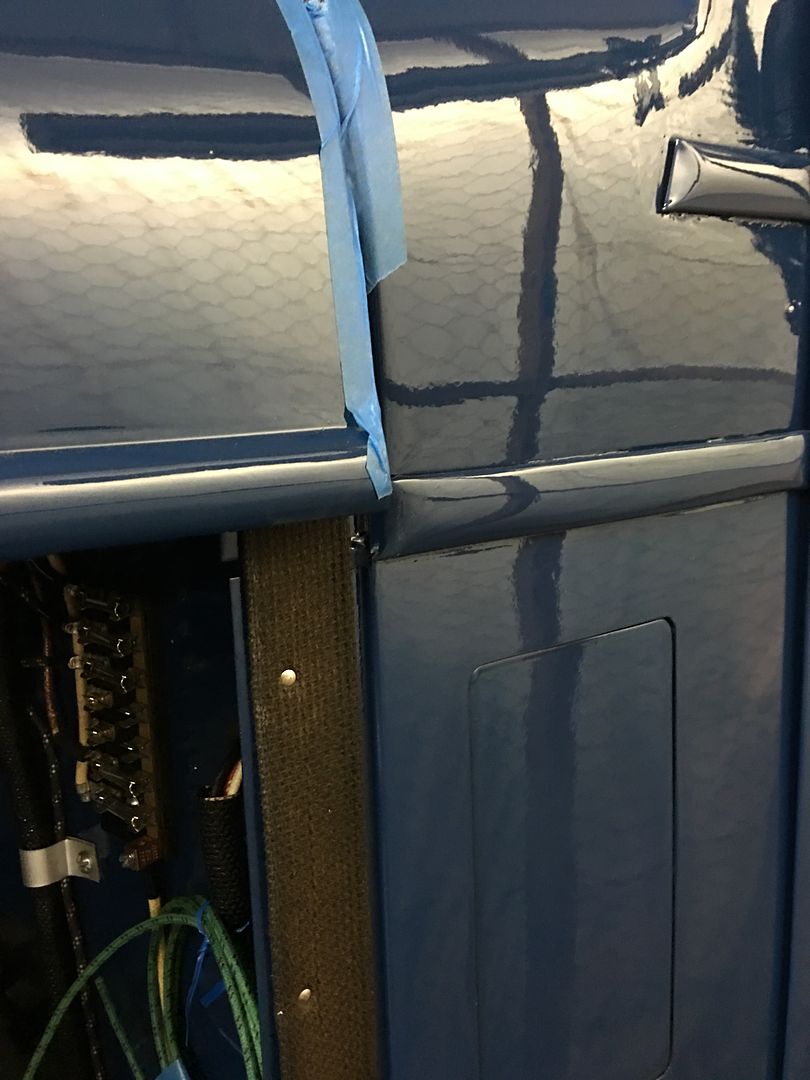
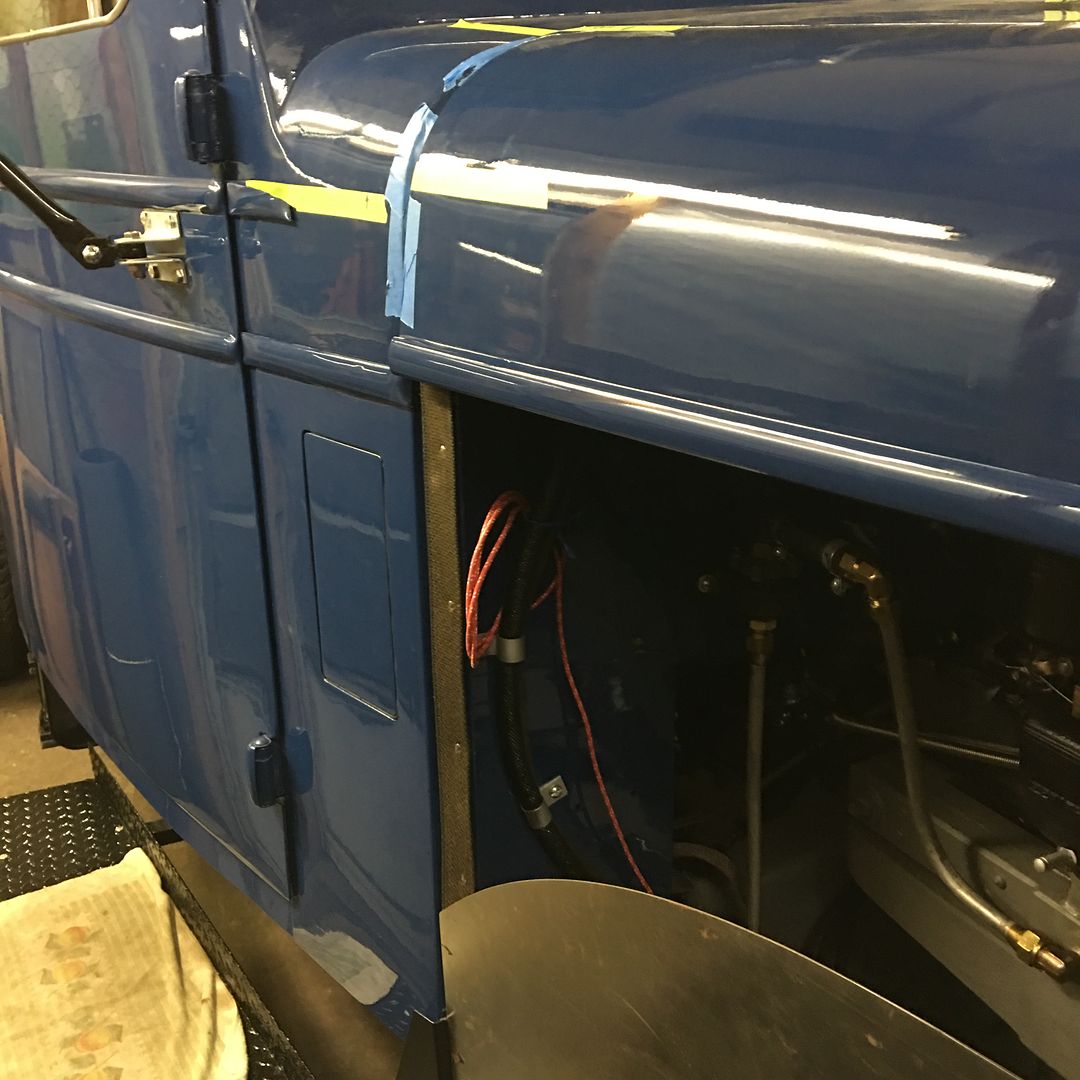
On the belt line beading, the door and cowl match but the back of the hood is about 1" high. This is not something likely to be missed by anyone at a truck show, so it will be repaired.
IDK, with my progressive bifocals that slight mis-alignment between the hood and cab doesn't look so bad.
Since the paint matches I'd almost be tempted to leave it. Just mentally figuring how much adaptation work would be needed to correct that slight "bump" makes me dizzy.
On the belt line beading, the door and cowl match but the back of the hood is about 1" high. This is not something likely to be missed by anyone at a truck show, so it will be repaired.
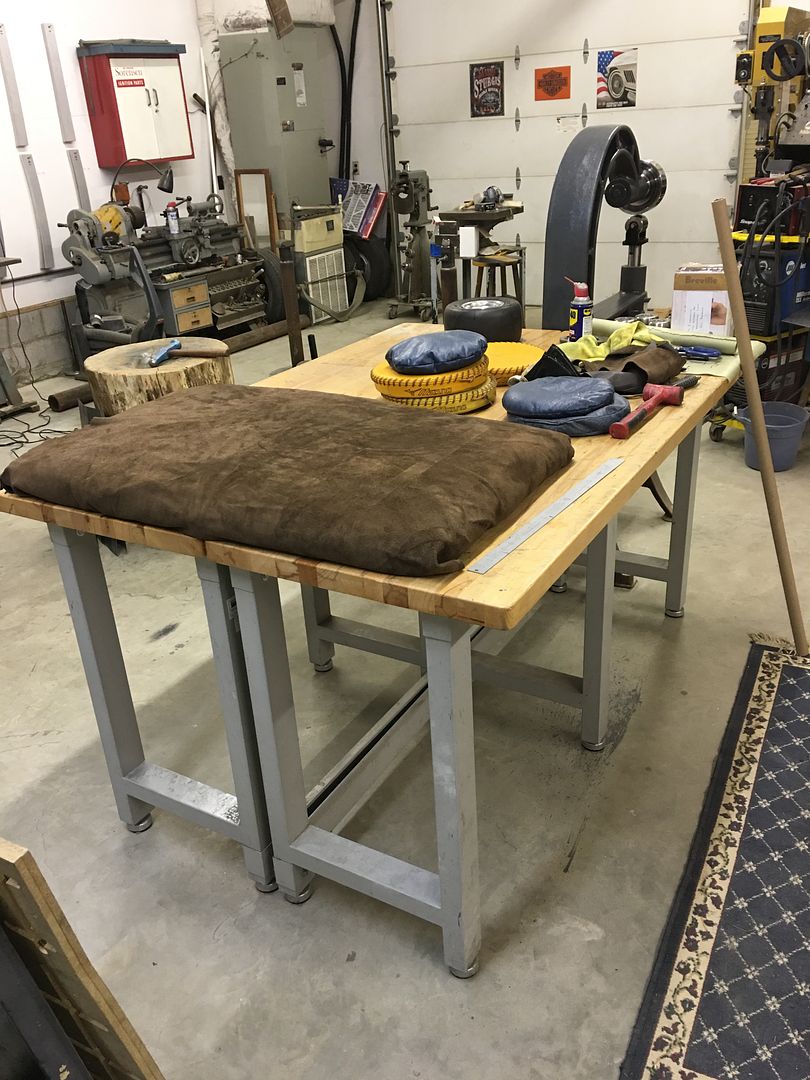
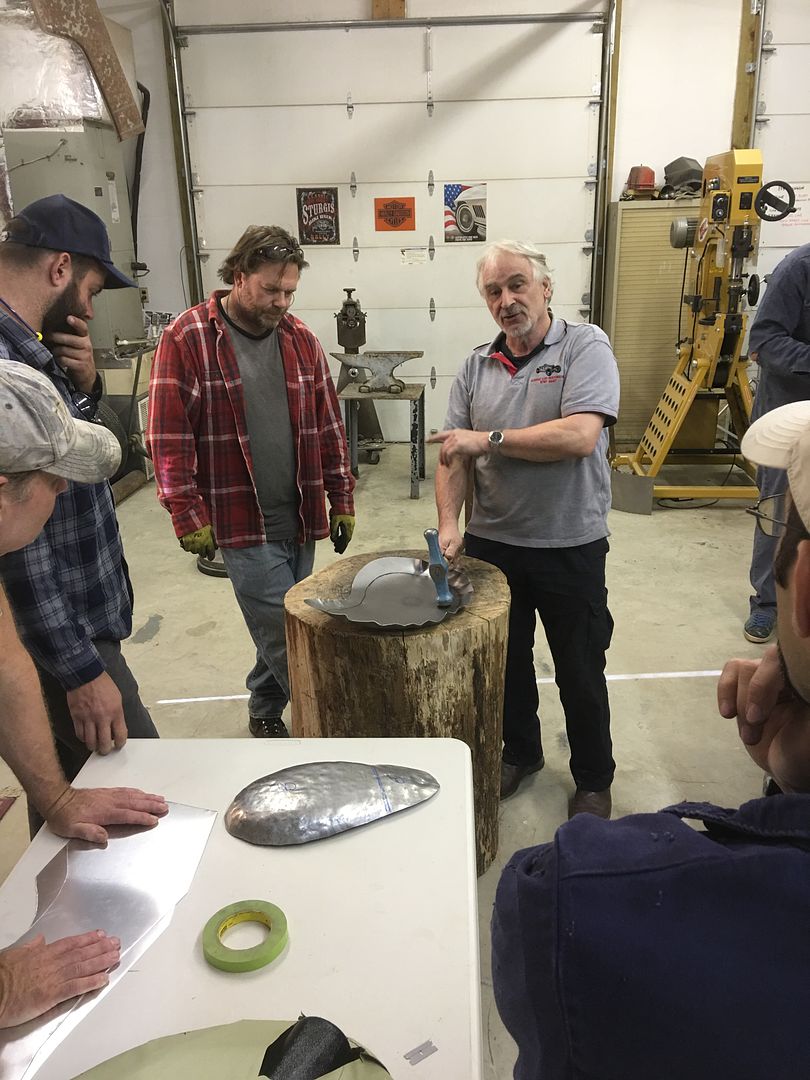
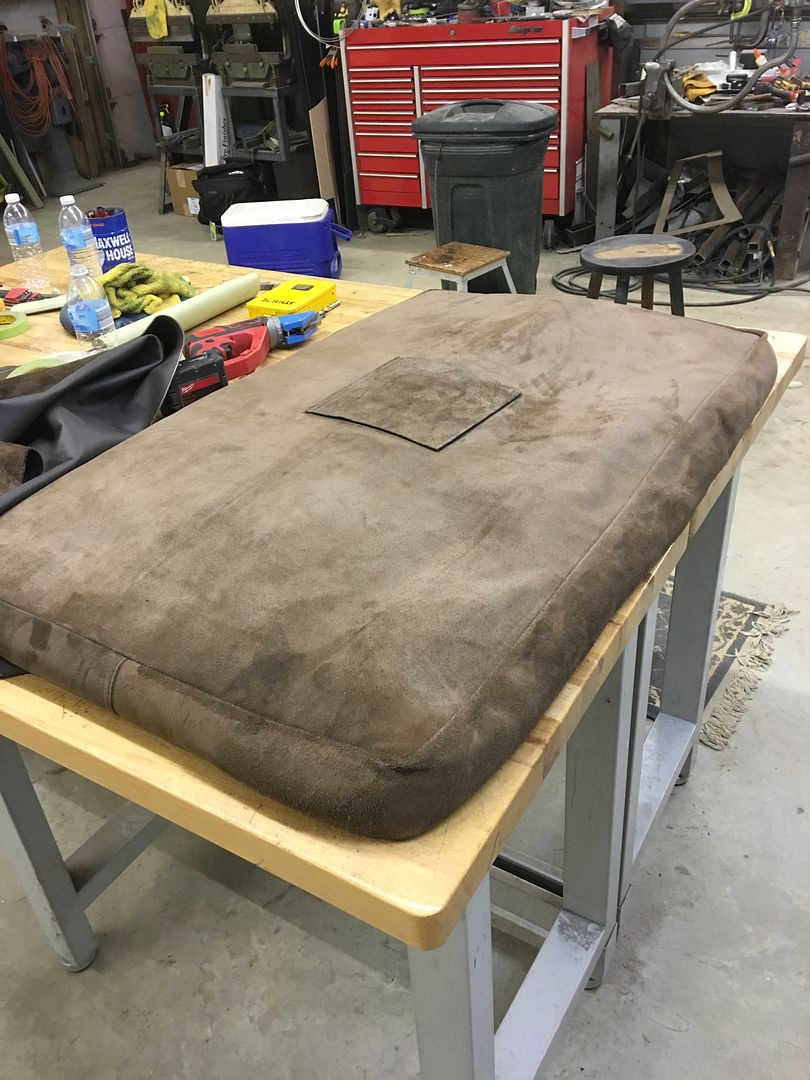
Sorry for the lack of posts, we've been cleaning the shop for the 2016 MD Tommasini Metalshaping Class. Here is a new sand bag we made up for the class, made from a full cow hide, it measures 40" x 24" x 4" high. We had some loose leather left over, so the top was wrapped to provide additional protection from any sharp metal... This uses just over four 5 gallon buckets of saved blast media to fill the bag, so we don't need any holes letting all that pour out on the floor!
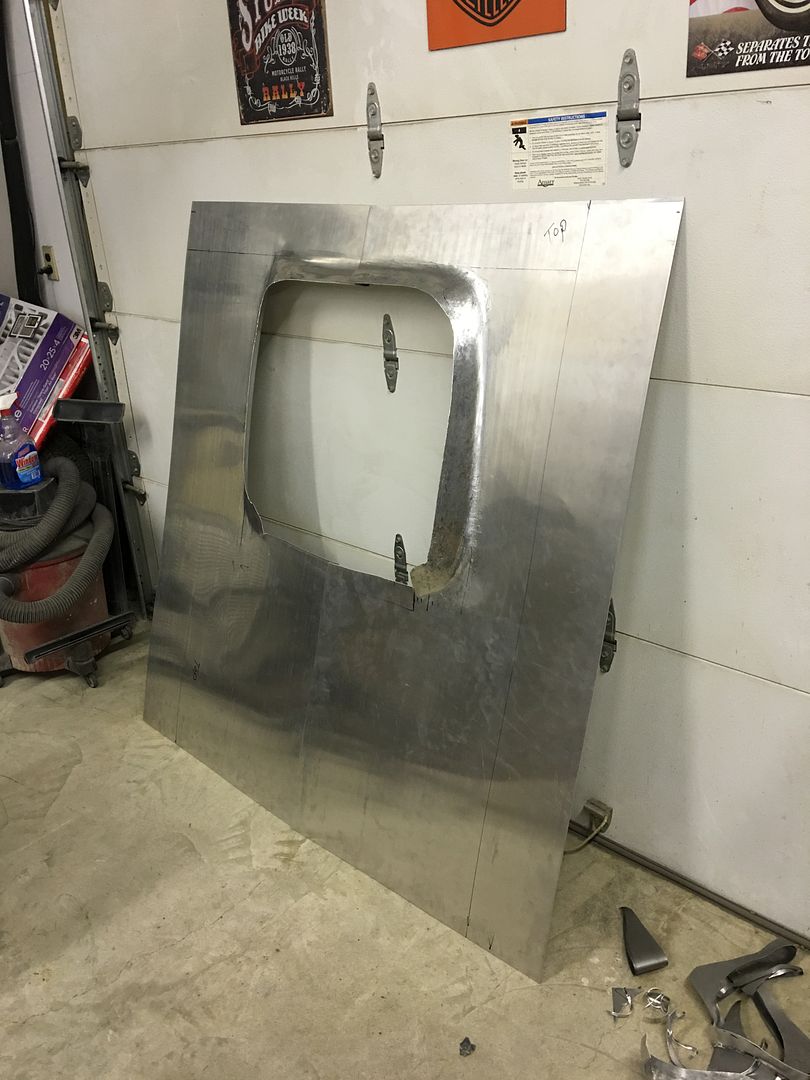
Some of the projects include duplicating these repro BMW saddlebags in aluminum, and this Mopar hood in aluminum......
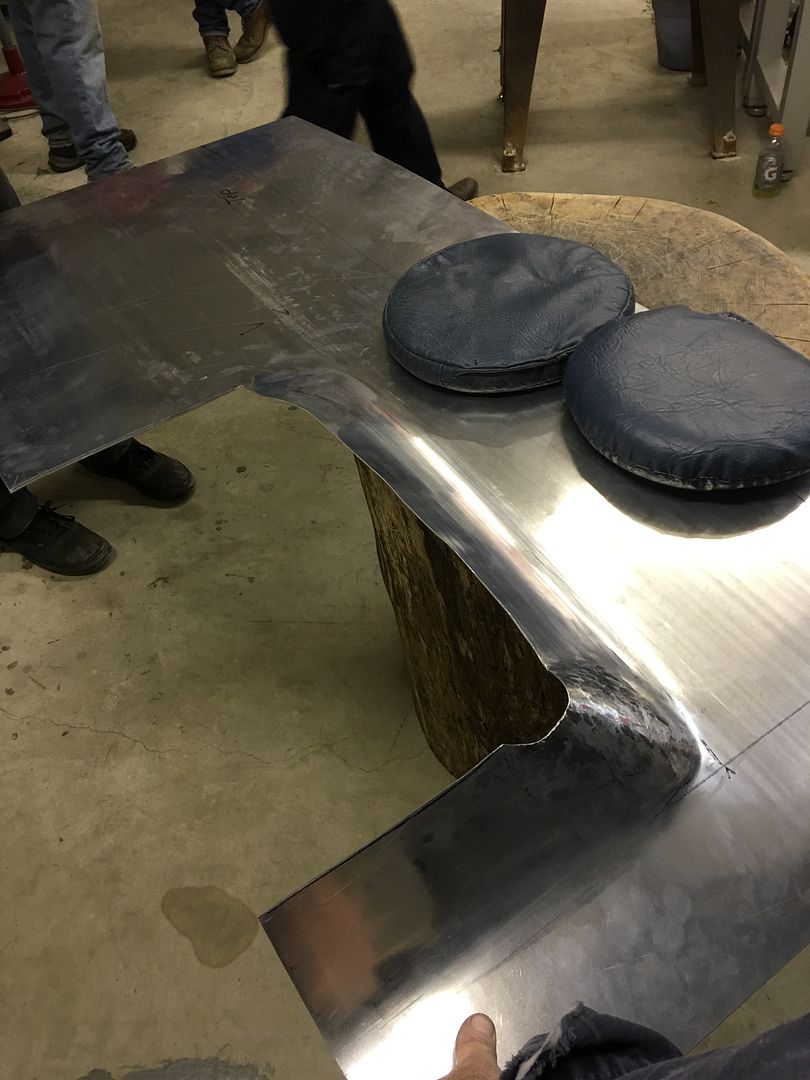
Here Peter shows using the stump for tuck shrinking
Here Peter modifies the heel of a ball peen hammer for less marking while tuck shrinking...
Here it is in use....
Duplicating the hood....
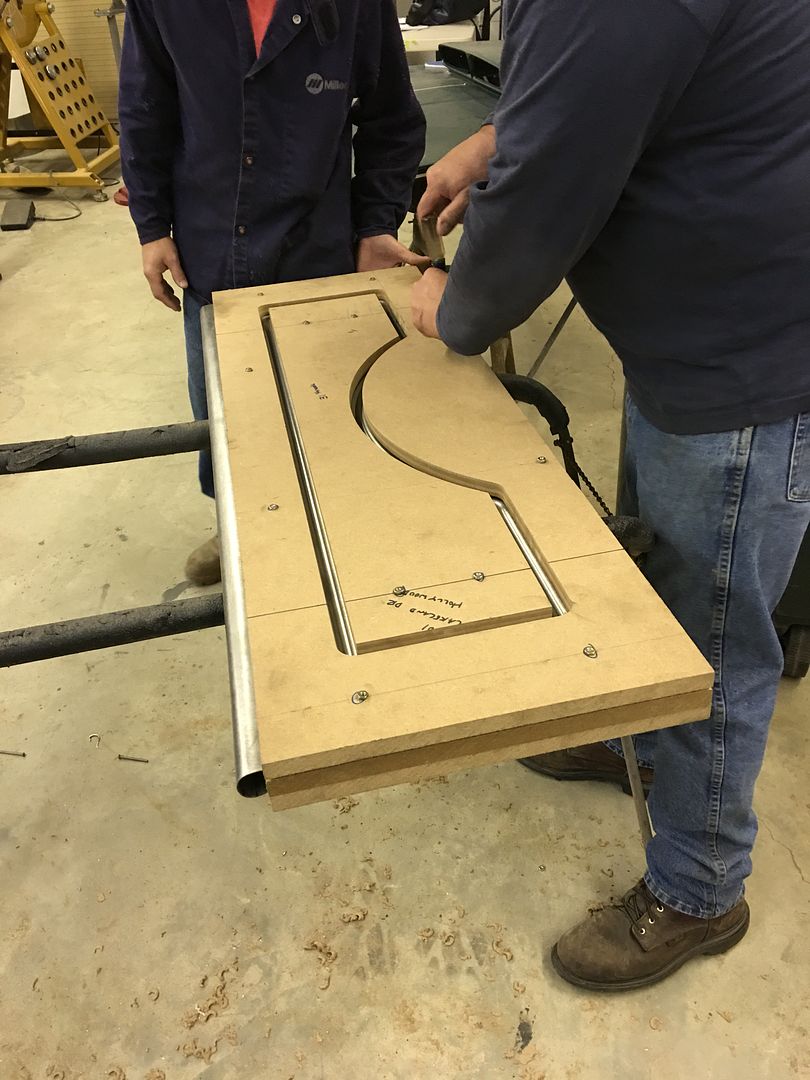
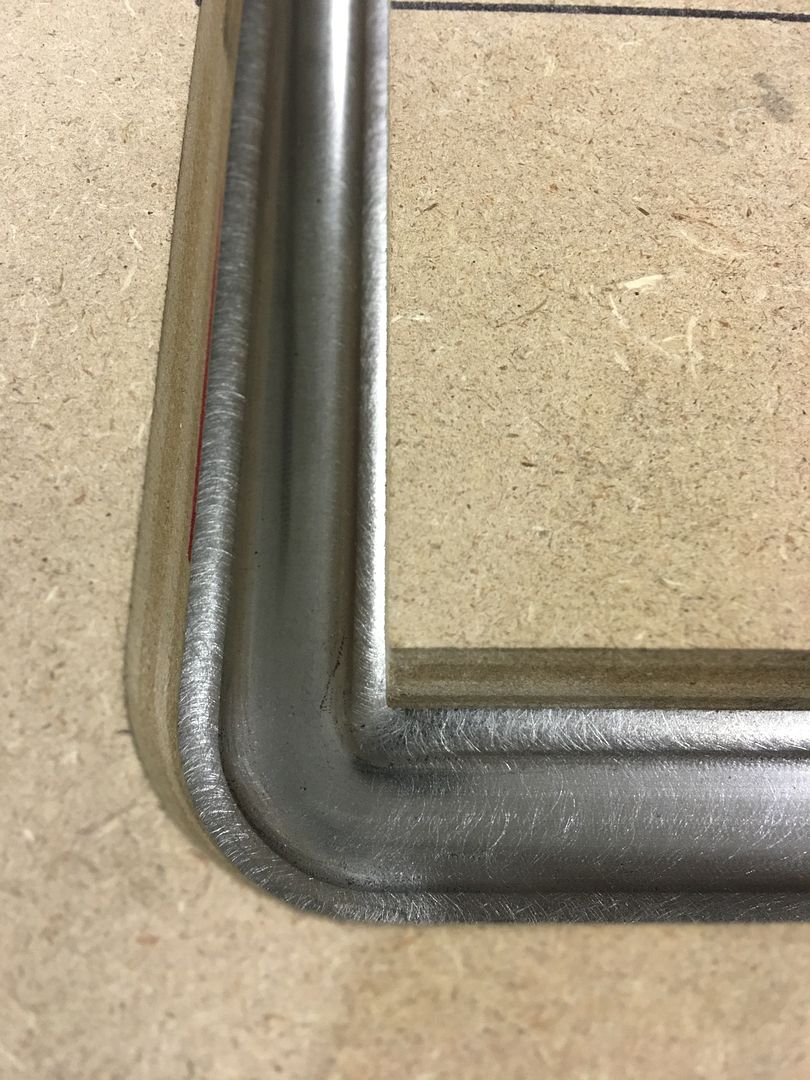
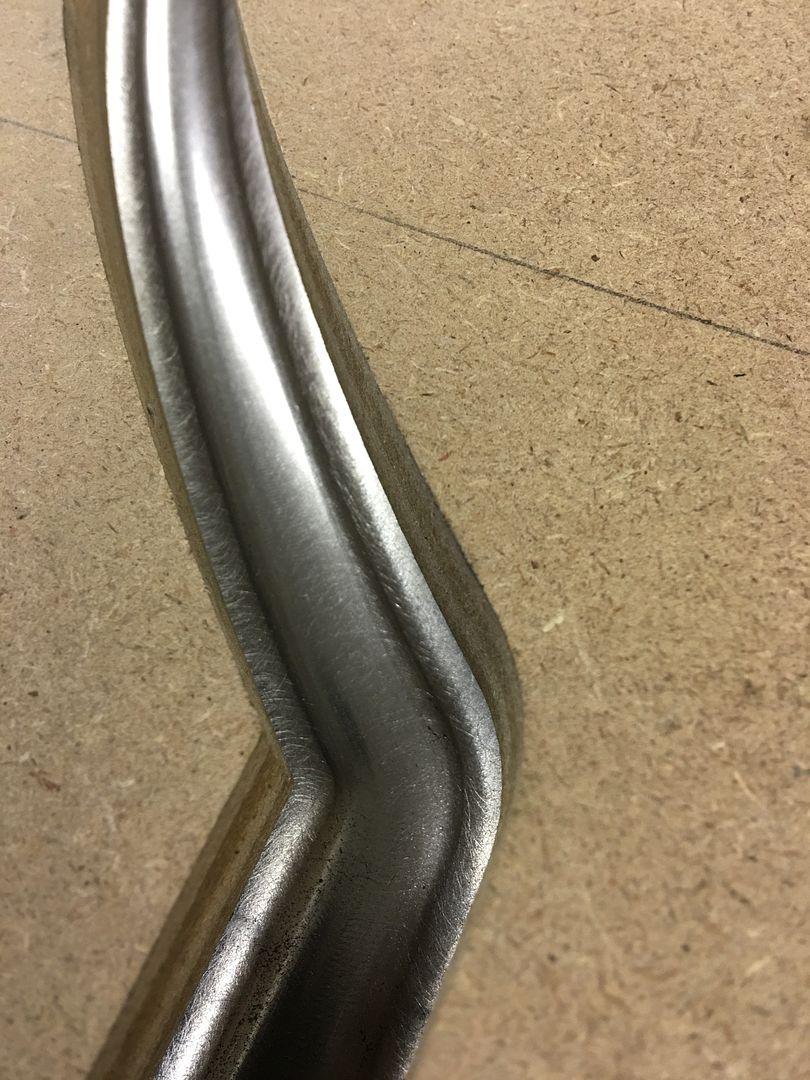
A local source was used to CNC a template for bead detail on some Model A p/u bedsides....
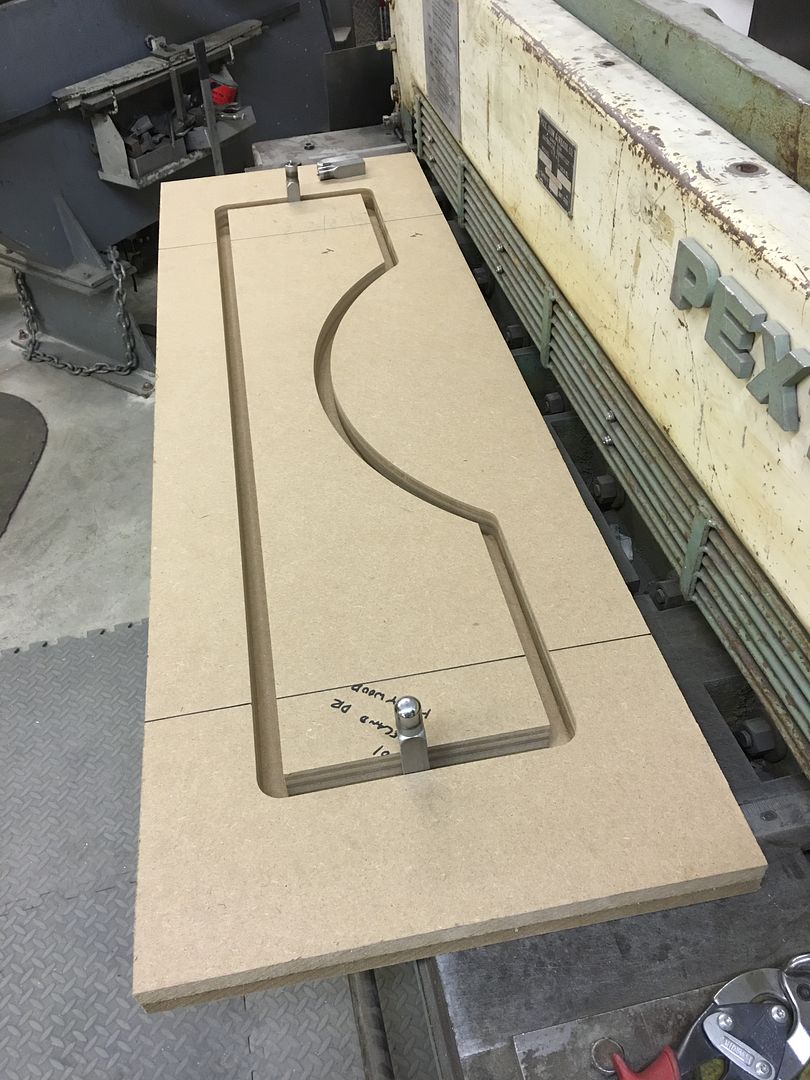
Bead added....
Motion picture version:
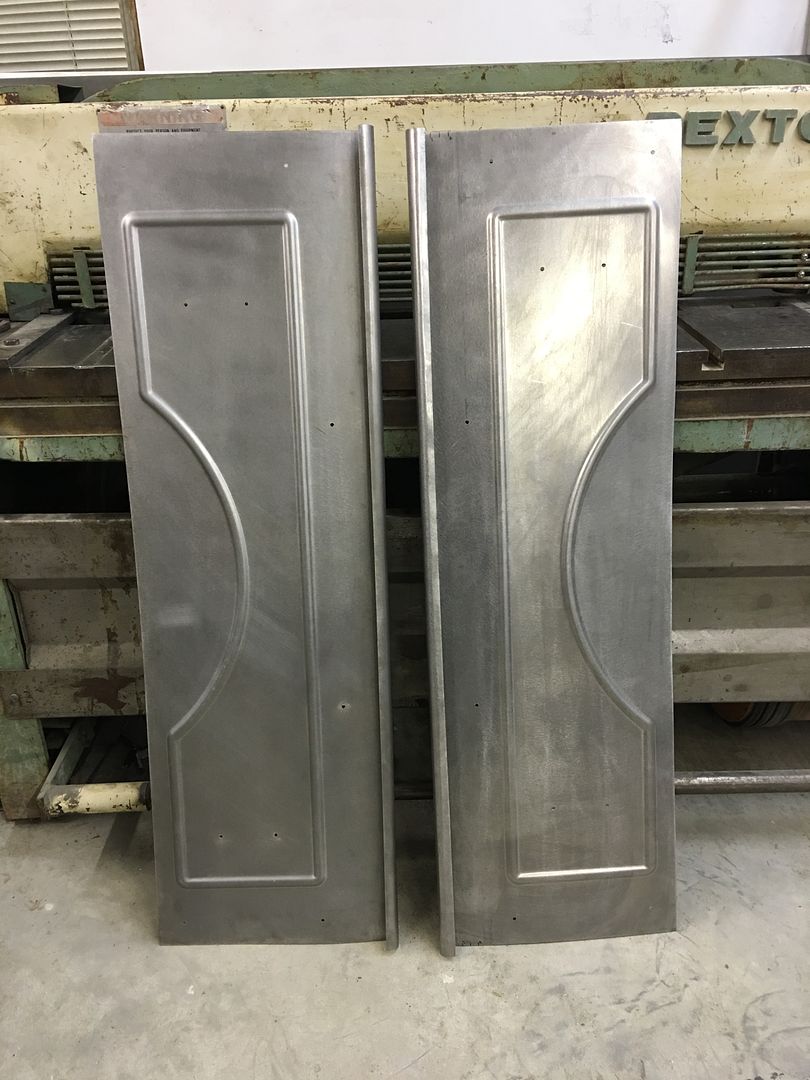
Close-ups of the results...
1937 Dodge coupe door repairs... the lower inner and lower door skins are fabricated...
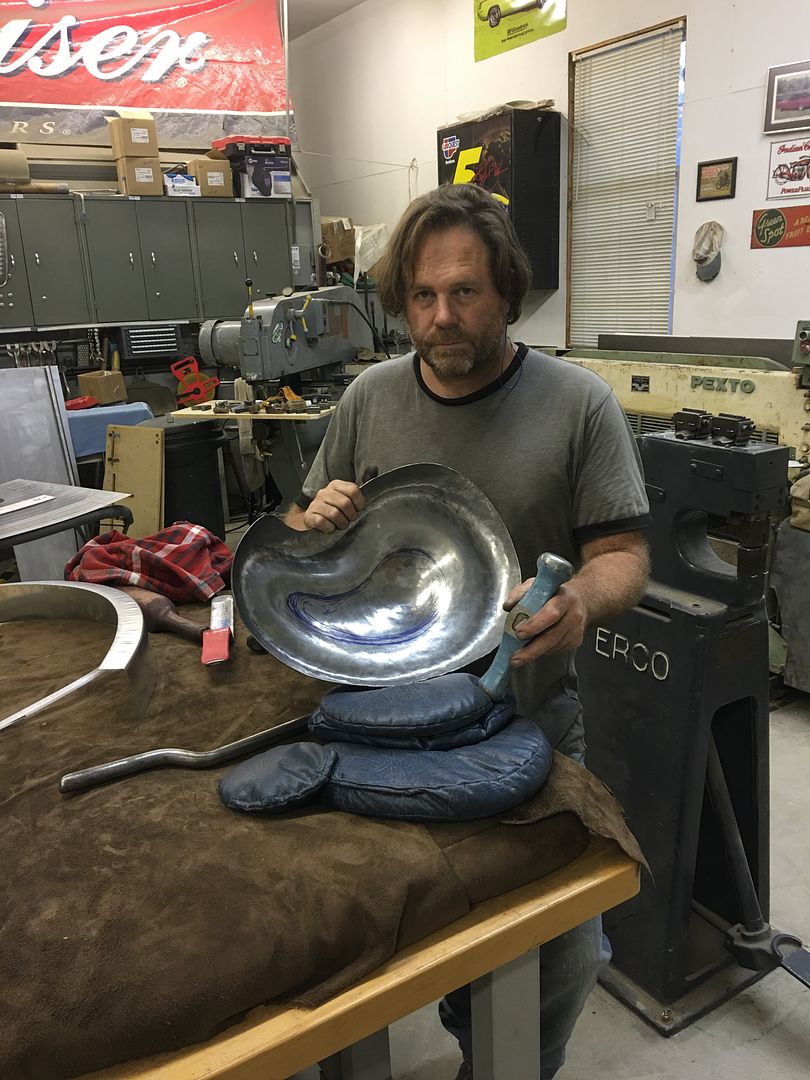
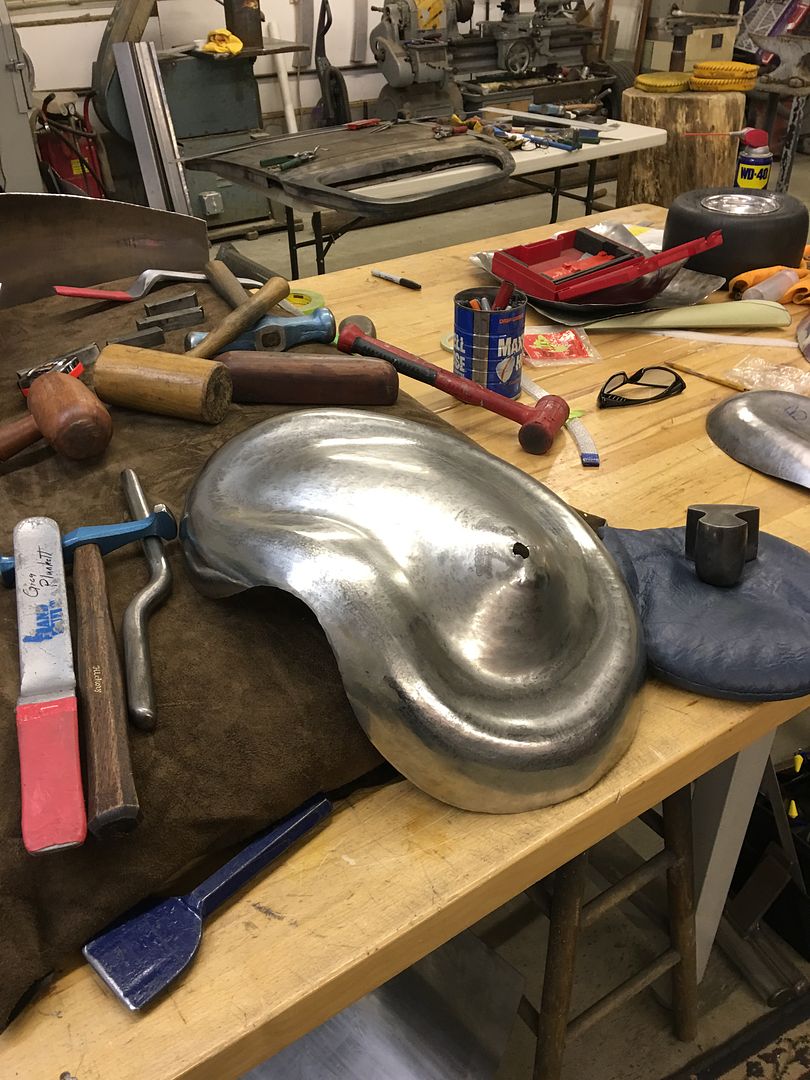
A complex architectural piece that was shrunk, stretched, planished, and reverses added, all with the same hammer...
Saddle bags in process...
after wheeling...
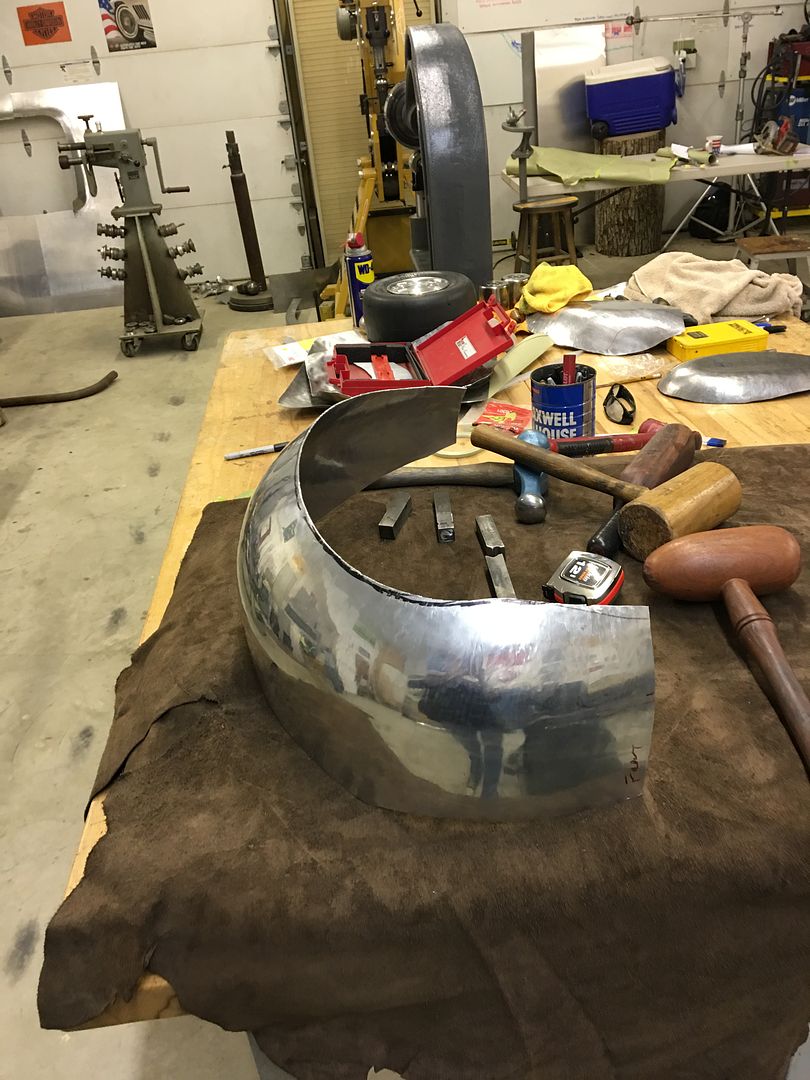
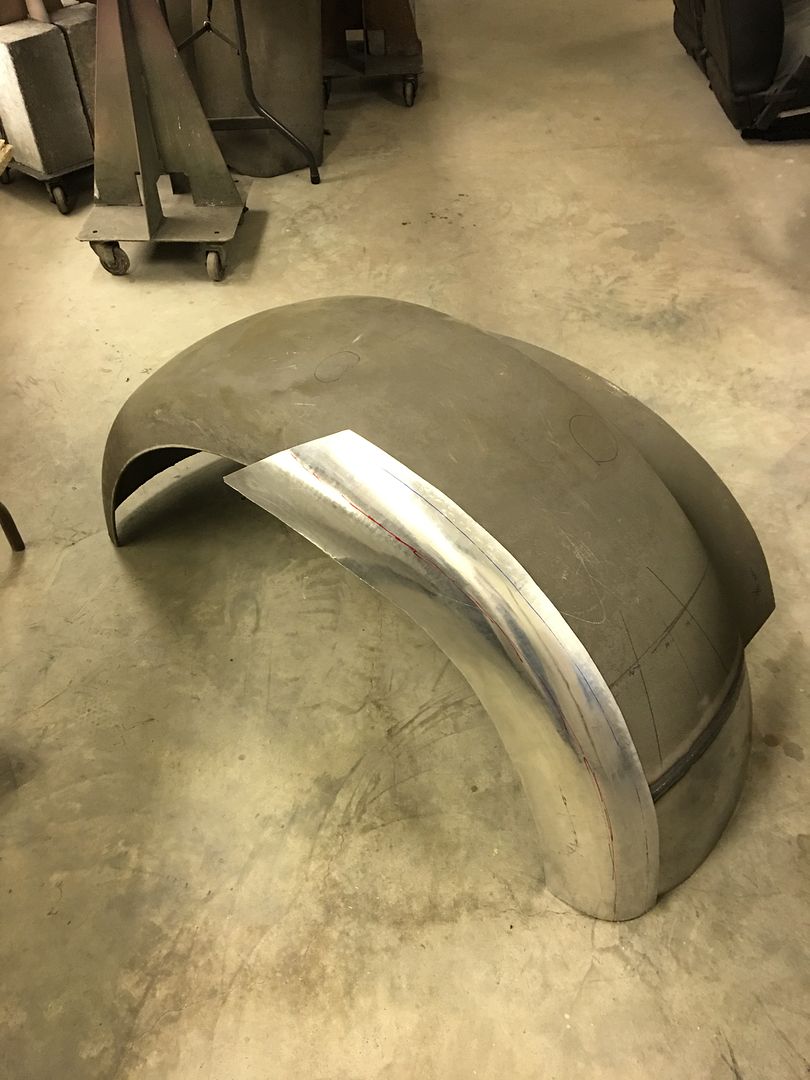
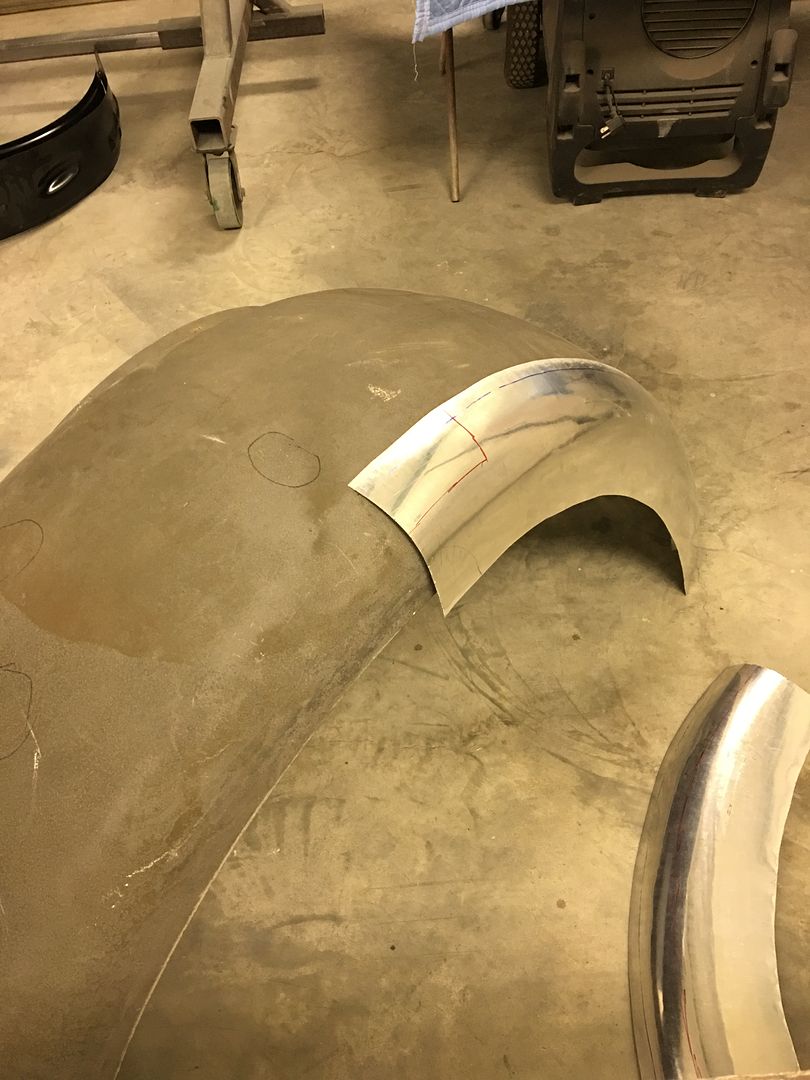
Some other efforts of shrinking, blocking, and planishing in making a fender profile and rear corner of a T-bucket in aluminum...
Two days in the books, two to go!
Some of the projects include duplicating these repro BMW saddlebags in aluminum, and this Mopar hood in aluminum......
Here Peter shows using the stump for tuck shrinking
Here Peter modifies the heel of a ball peen hammer for less marking while tuck shrinking...
Here it is in use....
Duplicating the hood....
A local source was used to CNC a template for bead detail on some Model A p/u bedsides....
Bead added....
Motion picture version:
Close-ups of the results...
1937 Dodge coupe door repairs... the lower inner and lower door skins are fabricated...
A complex architectural piece that was shrunk, stretched, planished, and reverses added, all with the same hammer...
Saddle bags in process...
after wheeling...
Some other efforts of shrinking, blocking, and planishing in making a fender profile and rear corner of a T-bucket in aluminum...
Two days in the books, two to go!
Ohmthis
Well-known member
Nice Robert, on the pu parts, can you explain on how you put the bead in. I see the part is sandwiched in between the mdf. What tooling was used in the groove to work the bead? Did you have a beginners class in the beginning like you stated last year?
TRS63
Well-known member
Hi Robert,
I finally finished reading your whole thread and I want to send you a huge thanks for sharing so much knowledge!! I will try to put as much as possible in application!
Greetings from Germany
Antoine
I finally finished reading your whole thread and I want to send you a huge thanks for sharing so much knowledge!! I will try to put as much as possible in application!
Greetings from Germany
Antoine
Nice Robert, on the pu parts, can you explain on how you put the bead in. I see the part is sandwiched in between the mdf. What tooling was used in the groove to work the bead? Did you have a beginners class in the beginning like you stated last year?
The upper die is the same one shown a couple pages? back that we used for the wagon's wheel wells. The MDF on the top acts as the guide, the one underneath as the female die, and the table height adjustment controls effective punch depth. We had a couple guys that were slightly green, the rest have some metalshaping under their belt.
Hi Robert,
I finally finished reading your whole thread and I want to send you a huge thanks for sharing so much knowledge!! I will try to put as much as possible in application!
Greetings from Germany
Antoine
Antoine, thanks! Hope the insight helps out on your project.
Thanks guys!
The final two days of the Maryland Tommasini Metalshaping Class. We had two stumps that we gave to students to take home, here is the final version carved....
I had some requests to show the mammoth sand bag with the loose cover removed... It saw quite a bit of use and came in handy!
More repair parts were made for the 37 Dodge doors...

The crease or "swage" at the top center of the hood was difficult to locate through the paper pattern.
So the upper and lower "crease" was highlighted by using fineline tape alongside. Then a pencil was used on the outside of the paper pattern, which now showed the location. Better shown here:
The halves still need to be welded together using O/A.
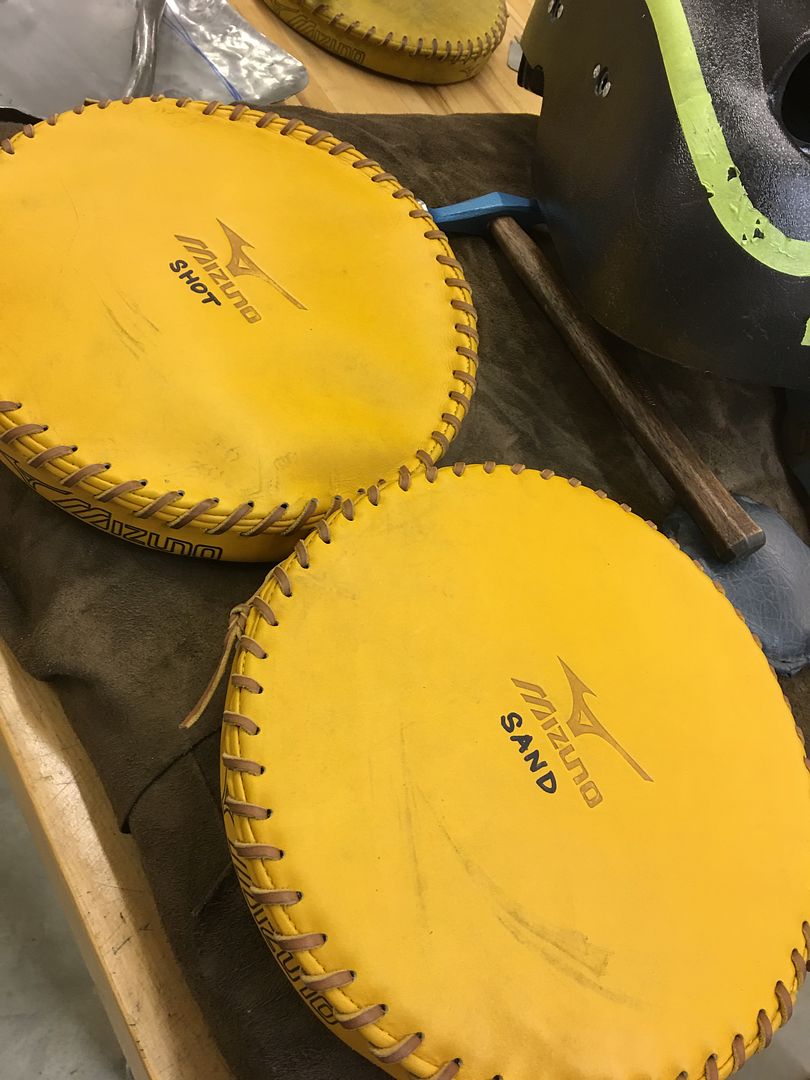
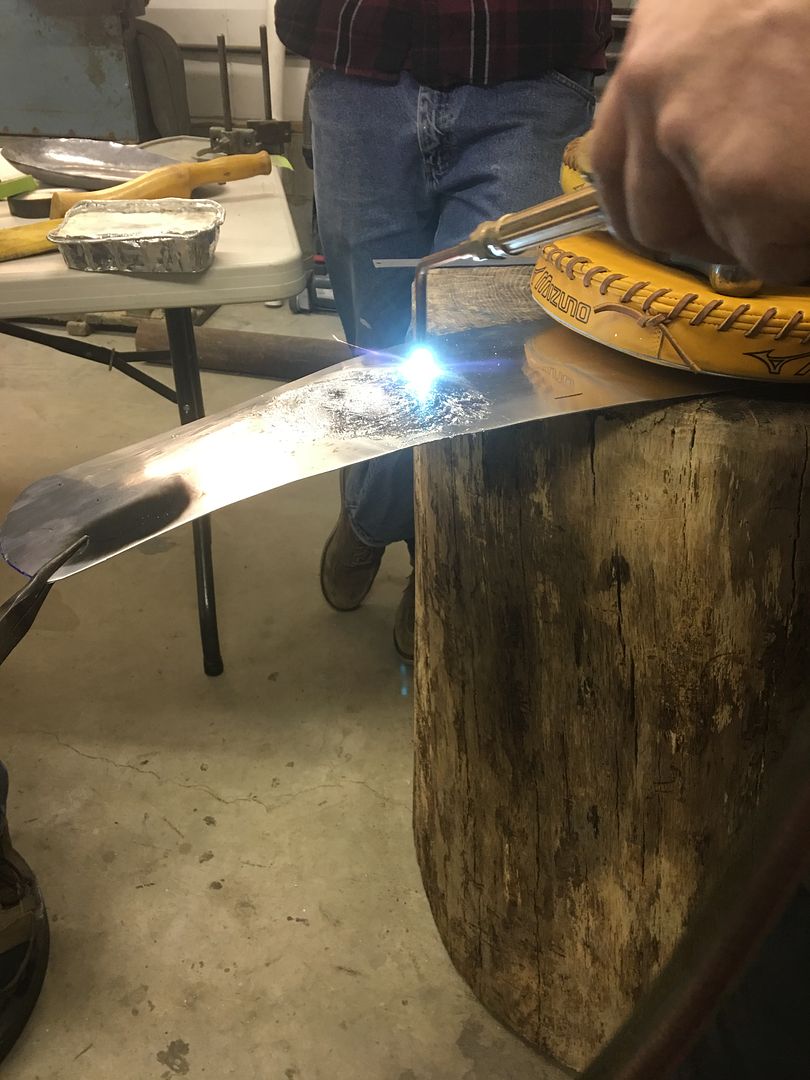
Two of the ball glove pounding pads were put into service for metalshaping, one using shot, the other using sand..
Peter showed lead loading method for aluminum...
The final two days of the Maryland Tommasini Metalshaping Class. We had two stumps that we gave to students to take home, here is the final version carved....
I had some requests to show the mammoth sand bag with the loose cover removed... It saw quite a bit of use and came in handy!
More repair parts were made for the 37 Dodge doors...
The crease or "swage" at the top center of the hood was difficult to locate through the paper pattern.
So the upper and lower "crease" was highlighted by using fineline tape alongside. Then a pencil was used on the outside of the paper pattern, which now showed the location. Better shown here:
The halves still need to be welded together using O/A.
Two of the ball glove pounding pads were put into service for metalshaping, one using shot, the other using sand..
Peter showed lead loading method for aluminum...
Last edited:
Ohmthis
Well-known member
Ok, now I understand. Thanks for sharing with us!
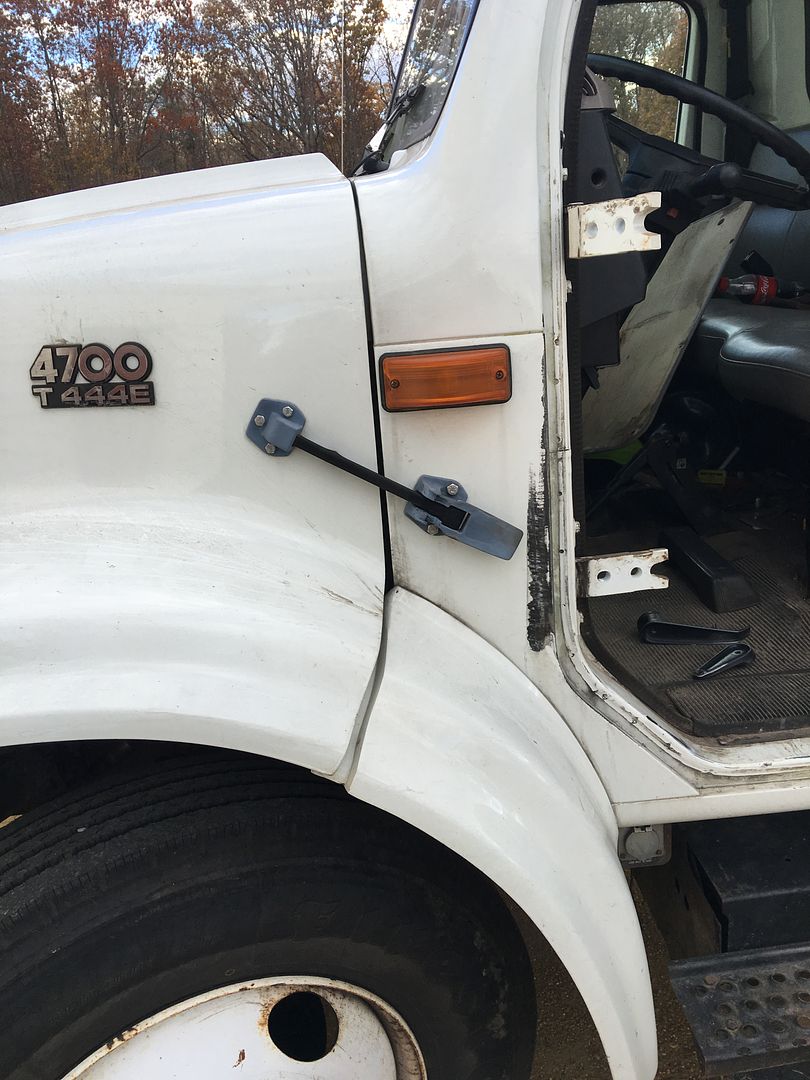
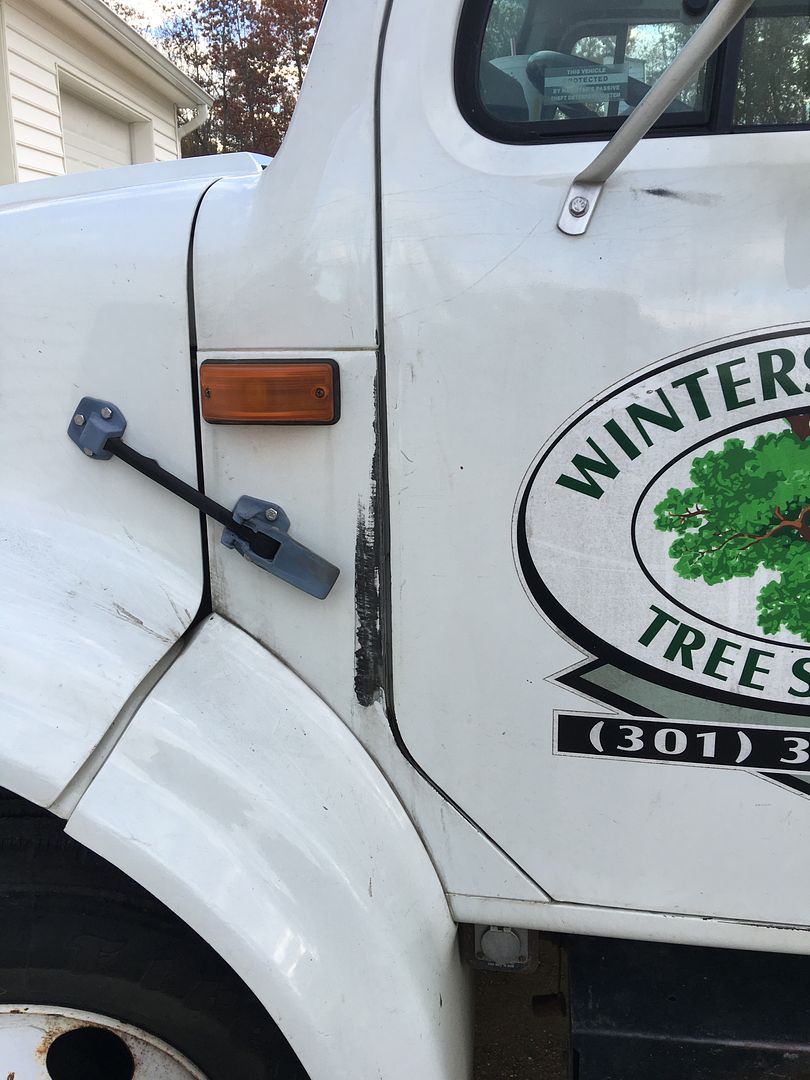
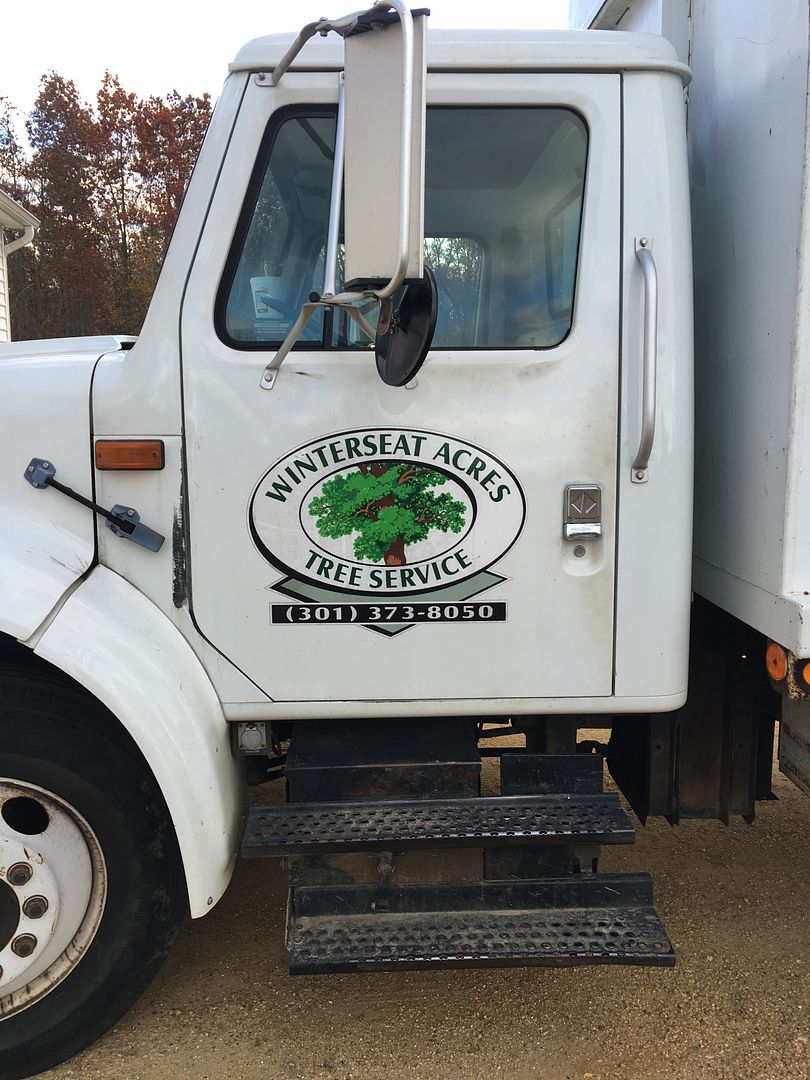
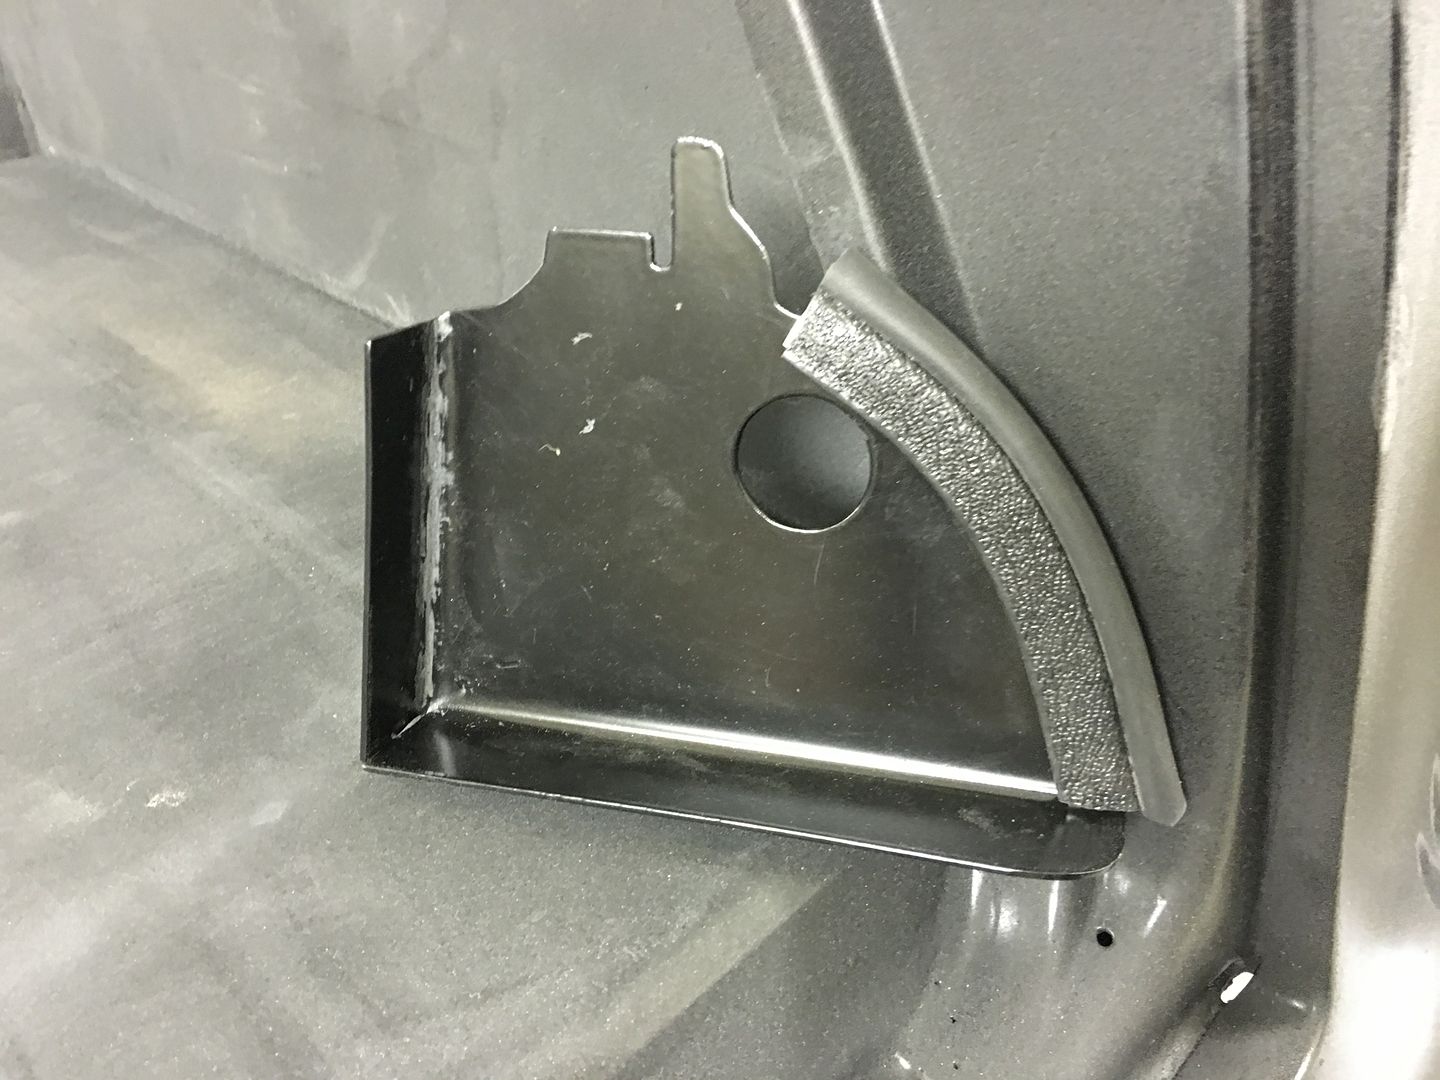
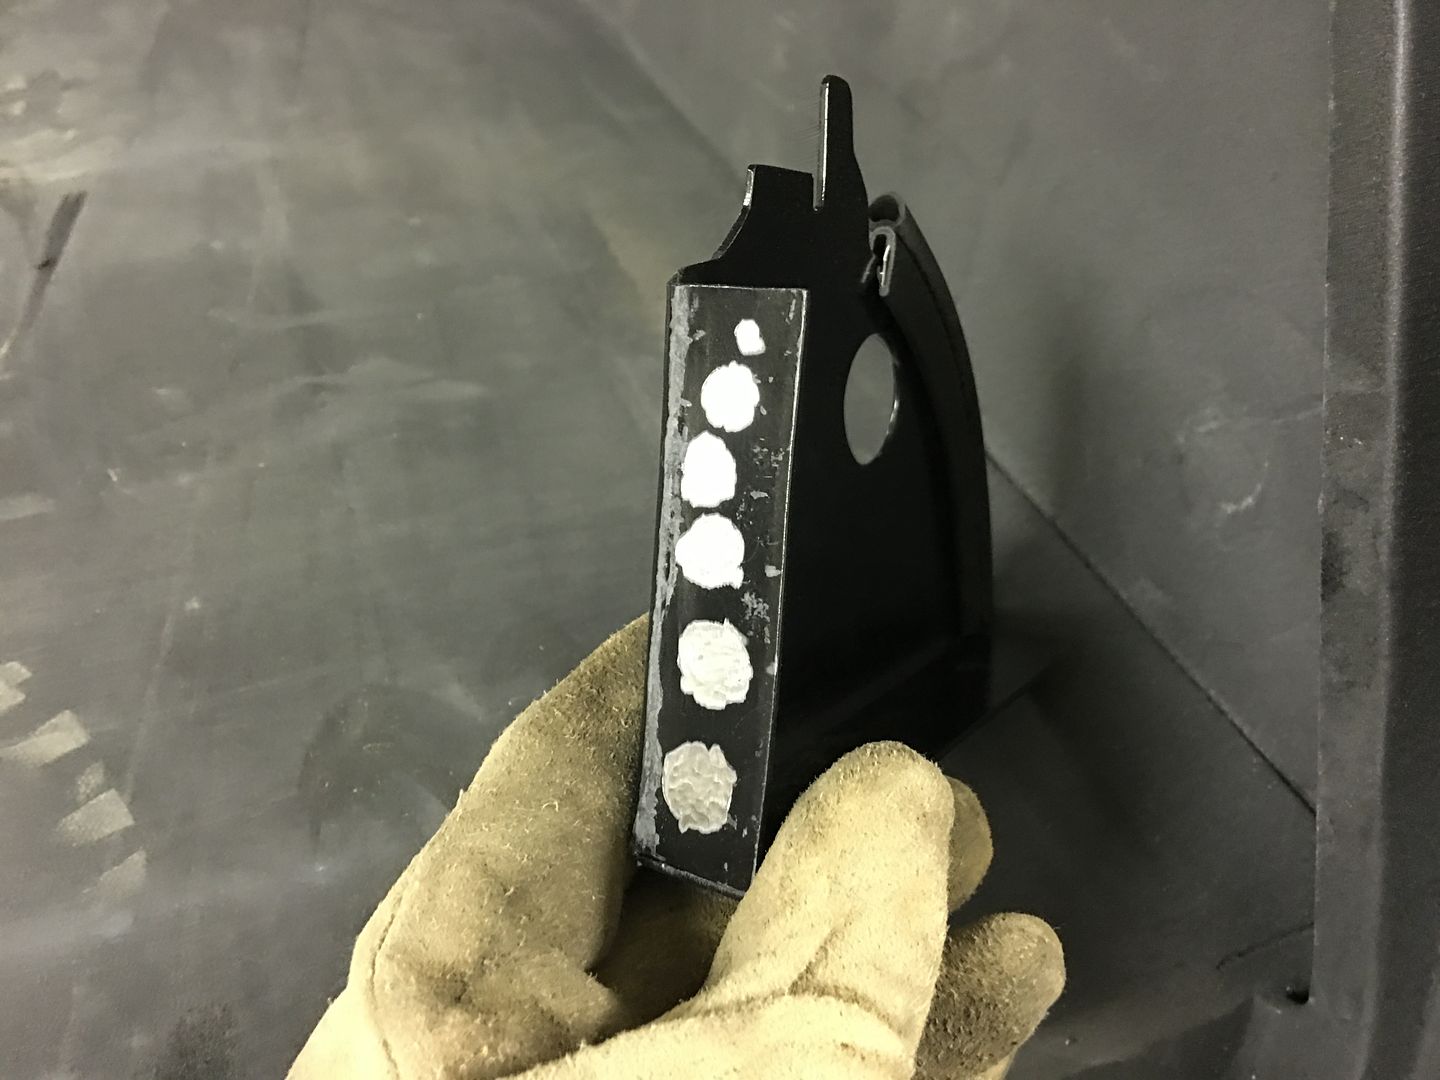
Today found us doing some repairs on a 4700 International. This is the second of these I've done in the past couple years. It seems International doesn't use quite enough heat on the spot welds holding the doors together. The panel inside the door that serves to bolt to the hinges is prone to separation from vibration and just plain day to day abuse that these trucks see. So we drilled out all the spot welds that had already failed, drilled some 1/8" holes to pull the panel back in place with some wing nut clecos, and plug welded things back in place..
The missing paint shows how much the door was flopping around. There was only a few spot welds left up at the top..
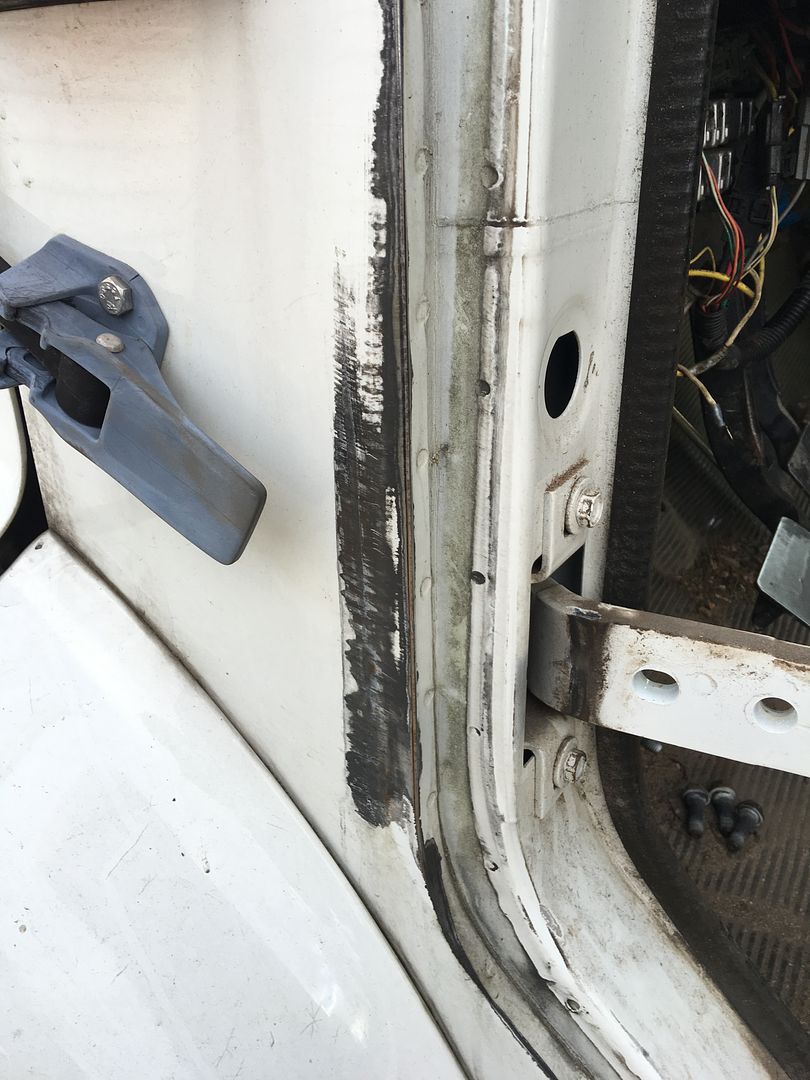
With the hinge panel welded back in place, the door sets where it belongs now, good gaps, and the latch holds!
The missing paint shows how much the door was flopping around. There was only a few spot welds left up at the top..
With the hinge panel welded back in place, the door sets where it belongs now, good gaps, and the latch holds!
Bring the class home to you!
For those that have watched along with the classes we have held in the shop with Peter Tommasini, I have ONE complete set of his DVD's left over from the class.
DVD Series 1, 2 and 3
Basic shrinking and stretching metal plus Paper patterns
Using tools and Bulbous shapes
Making return shapes
DVD Series 4, 5 and 6
How to make a rust repair section with hand tools
Gas welding, repair and metal finishing lesson
How to make a door skin using the English Wheel
DVD Series 7, 8 and 9
Stretching and shrinking
Hand swaging
Hand forming
(Advanced skills in Panel Fabrication and Forming with hand tools. All techniques displayed during the fabrication of a HK Monaro rear quarter panel)
DVD 10 (NEW RELEASE THIS YEAR) covers hot shrinking, file finishing, and other such finish work..
These normally sell for $40 each DVD, here's your chance to get the entire set, DVD 1 through 10. $300 for the complete set.. first come first served.
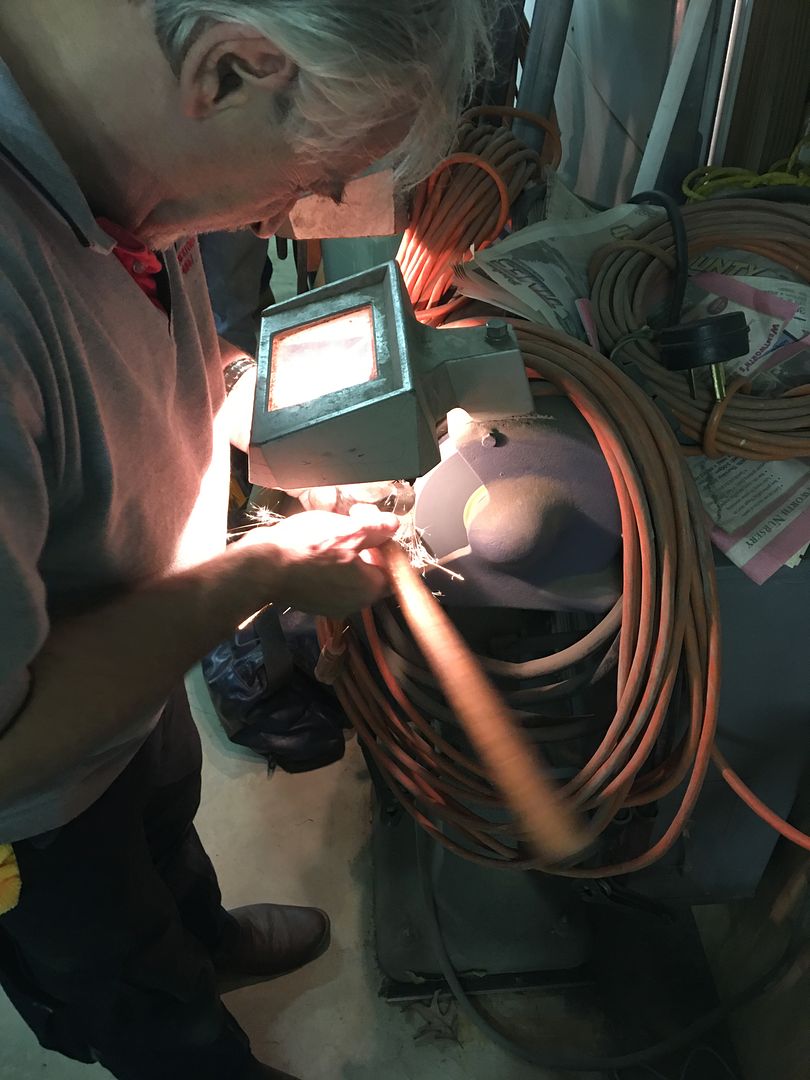
Started the evening off with some TIG practice, here tacking two panels together....
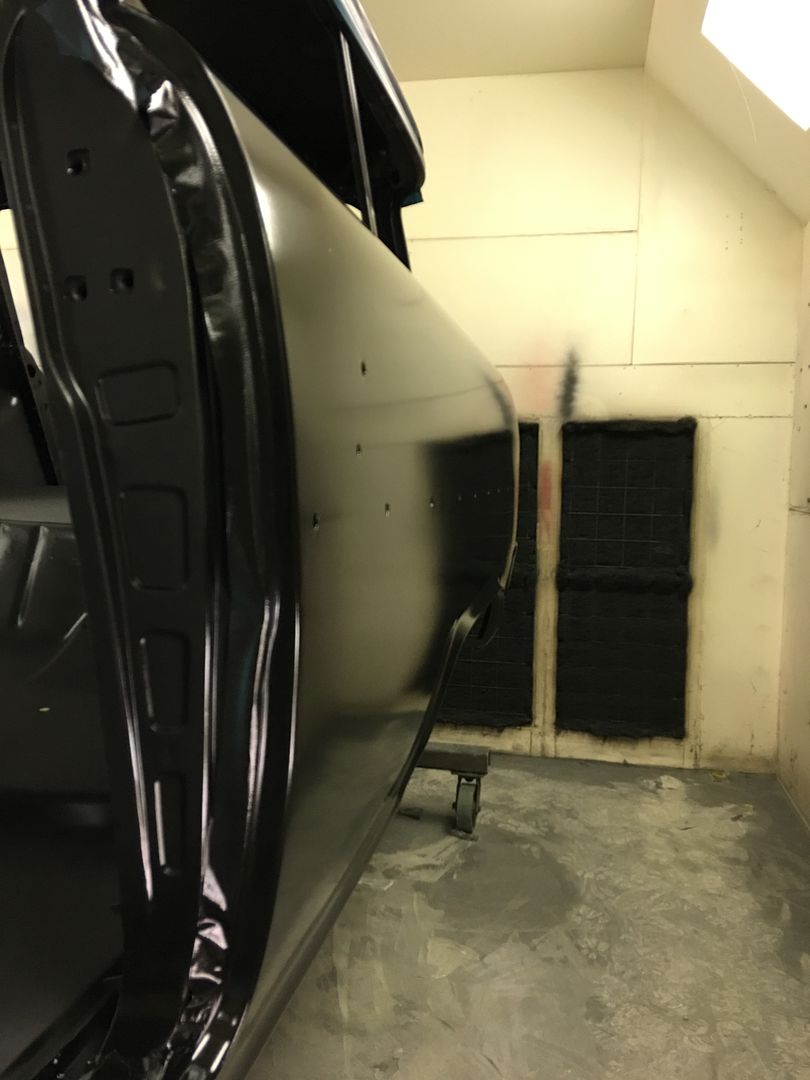
Next, to use our fancy dancy paint rollers, getting epoxy inside the rocker panels and inner quarter in prep for installing the wheel wells...
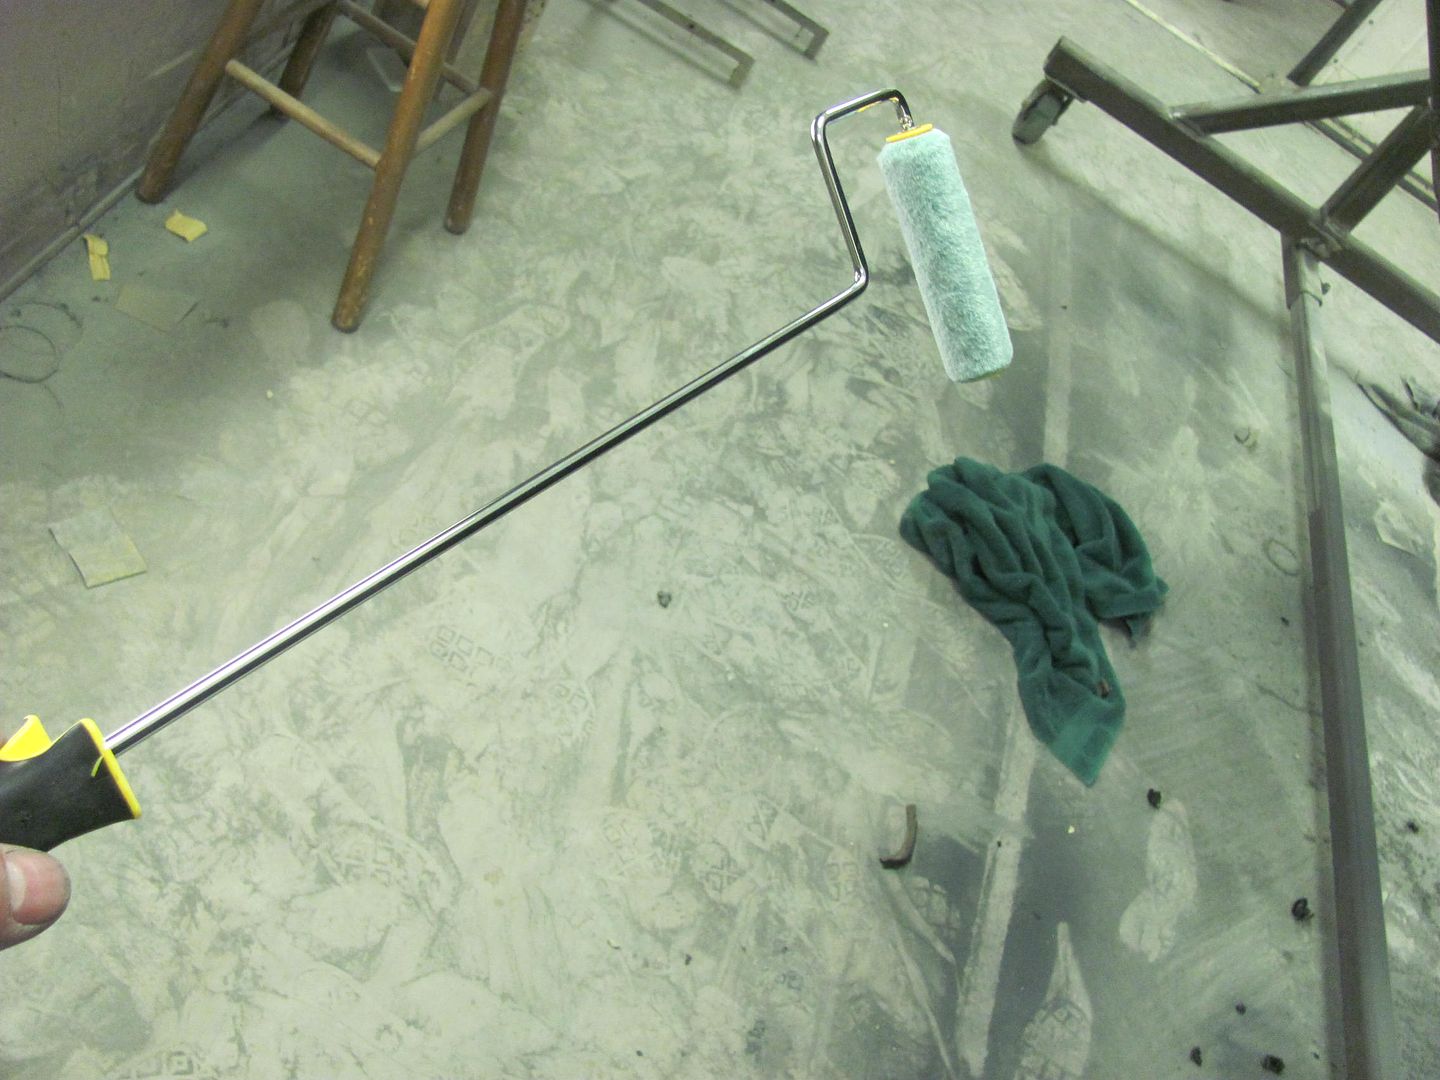
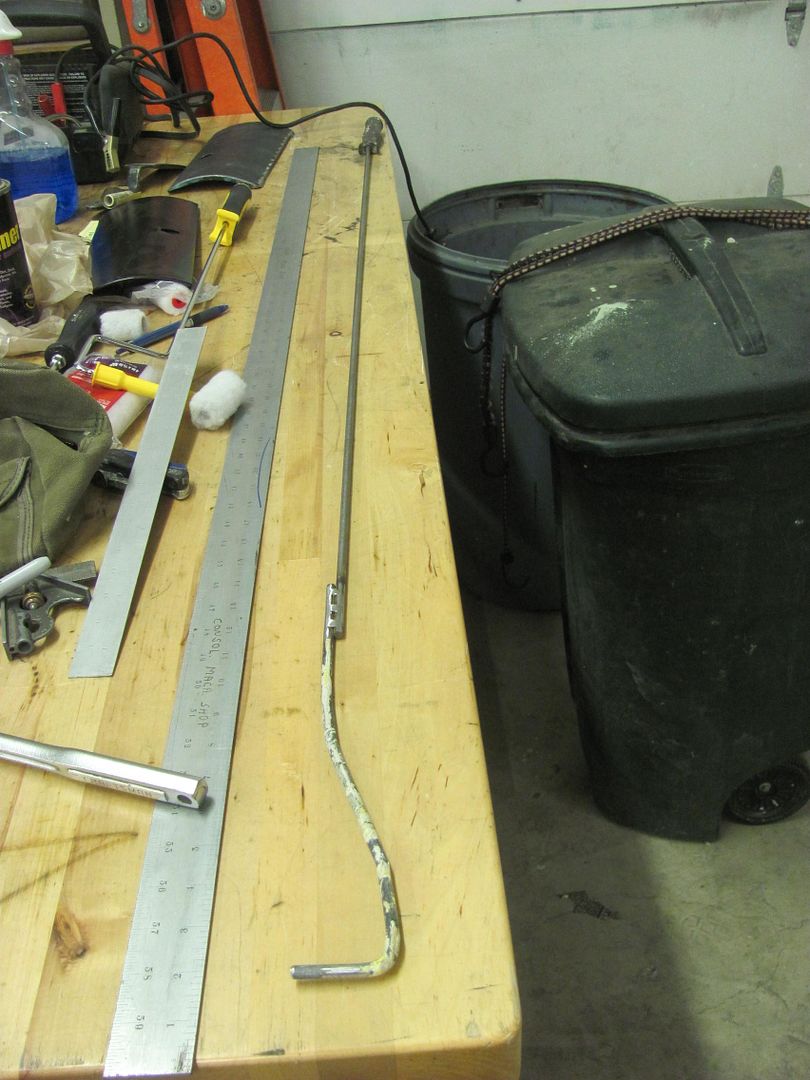
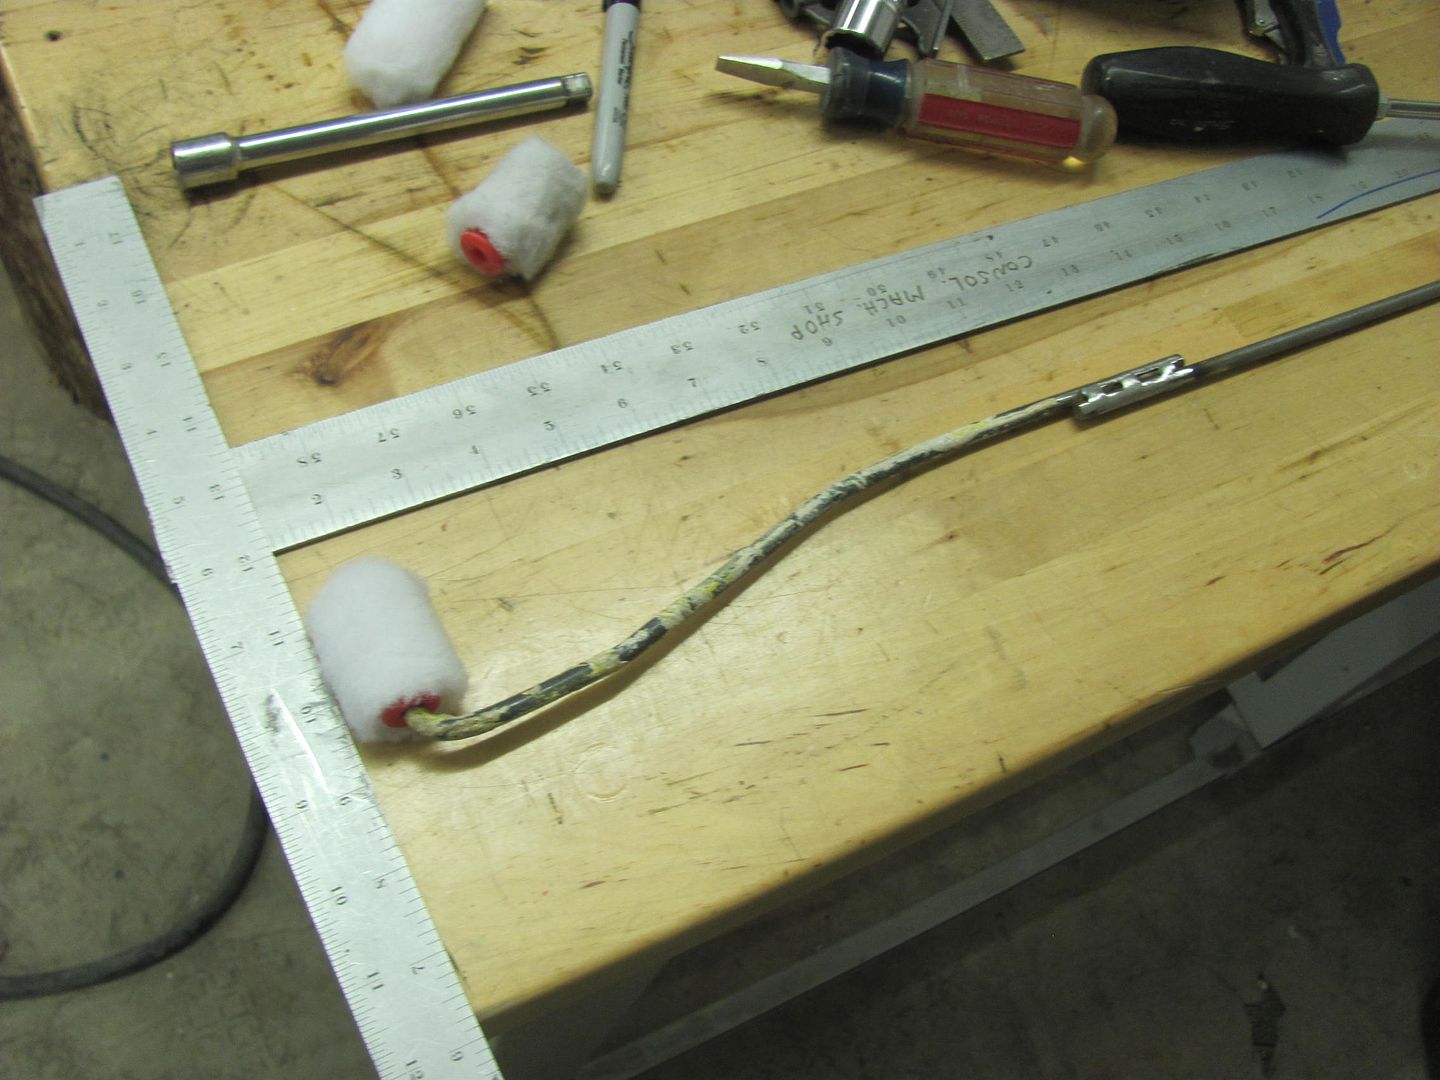
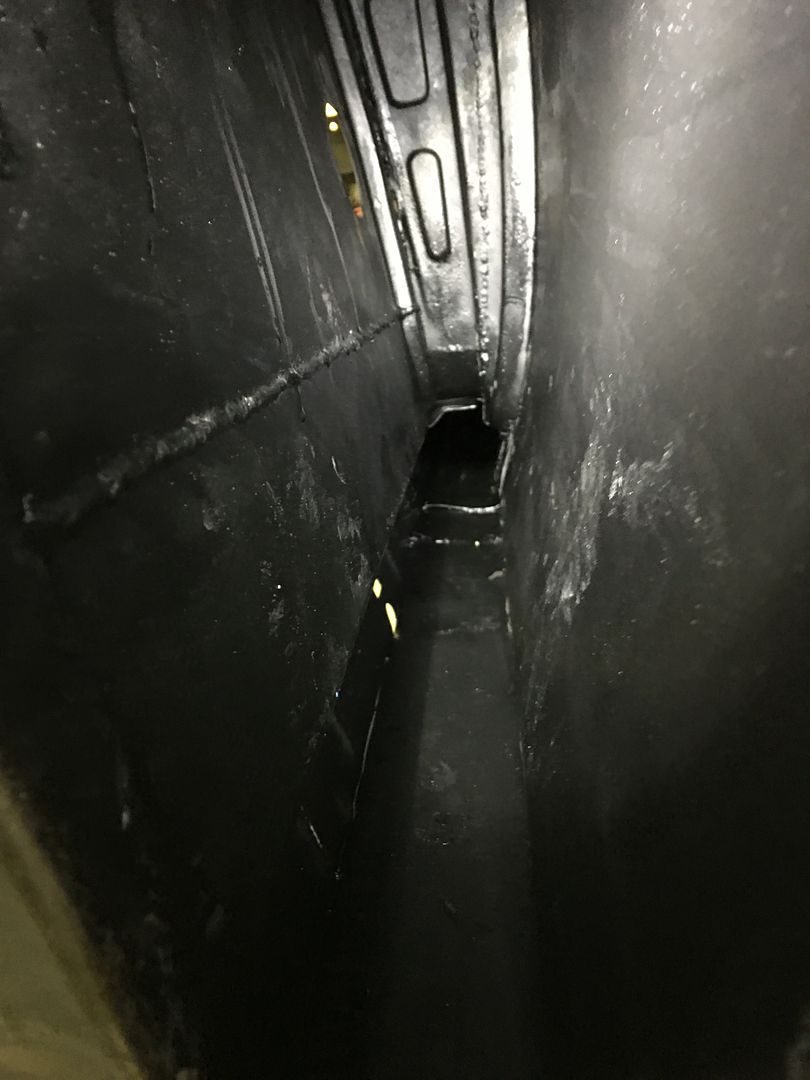
...and used a brush to cover the bare metal that was above the quarter panel's baffle..
There was a bit of overflow, or dust control shall we say.
One rocker down, one to go..
Next, to use our fancy dancy paint rollers, getting epoxy inside the rocker panels and inner quarter in prep for installing the wheel wells...
...and used a brush to cover the bare metal that was above the quarter panel's baffle..
There was a bit of overflow, or dust control shall we say.
One rocker down, one to go..
Kevin54
MEMBER EMERITUS
Robert....quick question......I had my hood stripped by burning it in a huge oven. In doing so, it also takes out the sealer or whatever it is called, that goes between the hood skin and the inner reinforcement panel. What do you suggest to put back in there, and would you do it before priming or after priming?
Thanks
Thanks
The oven likely also took away the paint inside that cavity. I would want to get some epoxy primer inside on that bare metal and worry about the sealer afterward. Not sure what was used (is this the Dodge p/u or one of the Olds?) but your local autobody supply should have something similar in a caulking tube form to take the place. I would think you'd want something that remains semi-pliable that it allows a minimal amount of movement when the panel heats up in the sun.
Bring the class home to you!
For those that have watched along with the classes we have held in the shop with Peter Tommasini, I have ONE complete set of his DVD's left over from the class.
DVD Series 1, 2 and 3
Basic shrinking and stretching metal plus Paper patterns
Using tools and Bulbous shapes
Making return shapes
DVD Series 4, 5 and 6
How to make a rust repair section with hand tools
Gas welding, repair and metal finishing lesson
How to make a door skin using the English Wheel
DVD Series 7, 8 and 9
Stretching and shrinking
Hand swaging
Hand forming
(Advanced skills in Panel Fabrication and Forming with hand tools. All techniques displayed during the fabrication of a HK Monaro rear quarter panel)
DVD 10 (NEW RELEASE THIS YEAR) covers hot shrinking, file finishing, and other such finish work..
These normally sell for $40 each DVD, here's your chance to get the entire set, DVD 1 through 10. $300 for the complete set.. first come first served.
DVD set has been SOLD! Jason will be unstoppable now!
Last edited:
Kevin54
MEMBER EMERITUS
The oven likely also took away the paint inside that cavity. I would want to get some epoxy primer inside on that bare metal and worry about the sealer afterward. Not sure what was used (is this the Dodge p/u or one of the Olds?) but your local autobody supply should have something similar in a caulking tube form to take the place. I would think you'd want something that remains semi-pliable that it allows a minimal amount of movement when the panel heats up in the sun.
I forgot about that area not having primer. Yes, I'll have to find something to use that I can get primer in there. I do have some stuff that the jobber sold me for use in cracks/seams where you can't get paint or primer. It is supposed to be thin enough to wick inside tight seams. I don't know how good it will work though as it has a straw for it, but it comes out like a foam. I bought it mainly for the bottom of the doors on the inside, where everything was cooked out. I'll run down tomorrow and speak with them to see what they recommend. I just though that you might have something specific that you use. I trust you over almost anyone.

BTW....this is on the Olds. Well one of the Olds. I'm trying to get things ready to try and get the hardtop together. It's not going to be a show car, but I want things to look nice and last. The car will be a Spring, Summer, and Fall driver. Although, I am going to pull the frame out from under it and pretty it up along with the underneath of the car. It's by no means going to be a nut and bolt restoration though. Nothing like what you are going through on the '55 Wagon.
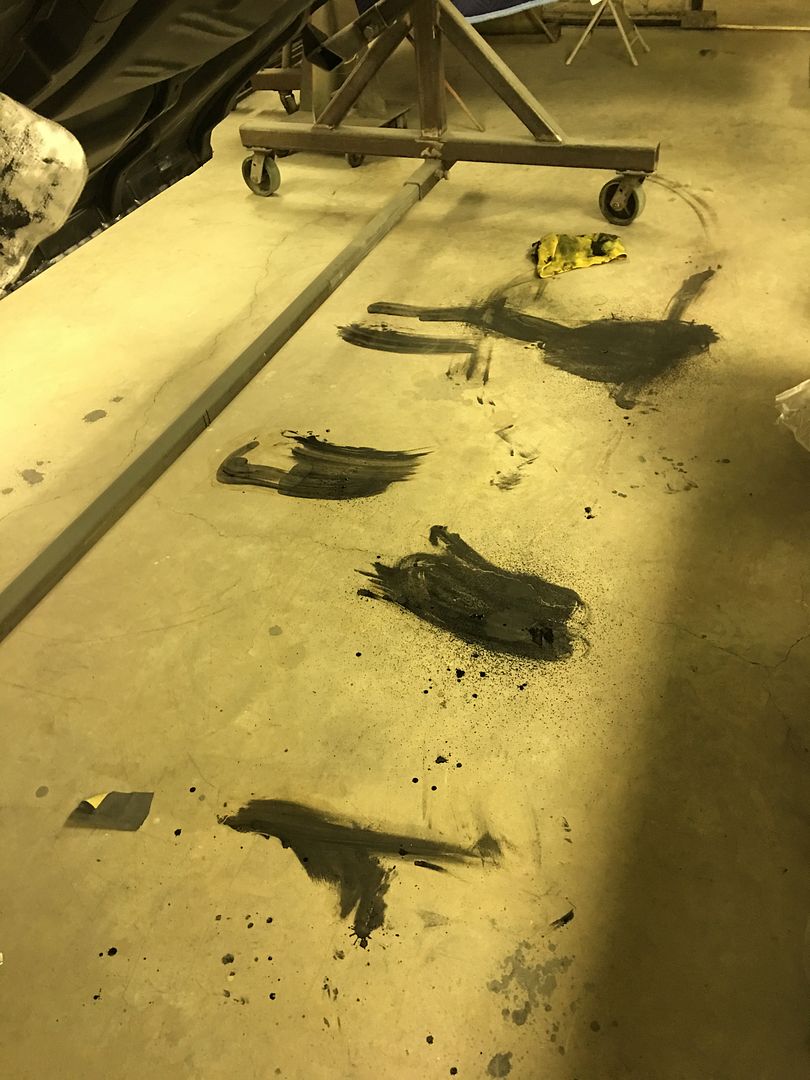
Kevin, likely due to hack bodywork I've seen using expandable foam (think construction) in providing support for body filler where none existed, I tend to stay away from foam type products as IMO they help to contain moisture. I would mix up some epoxy primer, pour into the cavity, and roll the panel around to coat the inside. As indicated by my floor picture above, you may need cardboard on the floor or a warm day outside in the yard. And clothes you're not too fond of. For the doors, same thing applies. Clean out the inside the best you can, wire brush/abrade any loose scale, Scotchbrite or sand remaining, and pour some epoxy inside the door. Again, drop cloth or cardboard as it will run out.
Last edited:

Welded some more TIG coupons this evening. I had some questions about weld placement, so I decided to do some samples that mimicked various body shape types.
First, we have a flat version, this would simulate the flat area at the bottom of a door skin...
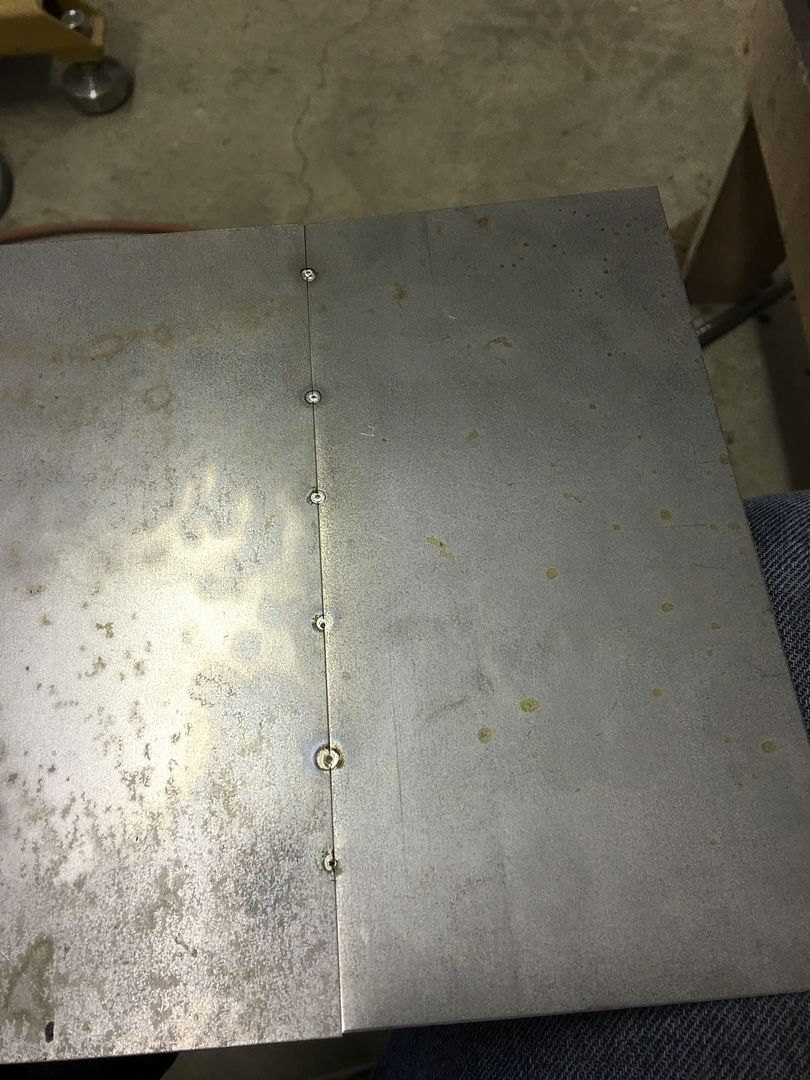
The second panel has more crown, such as toward the top of a quarter/door skin....
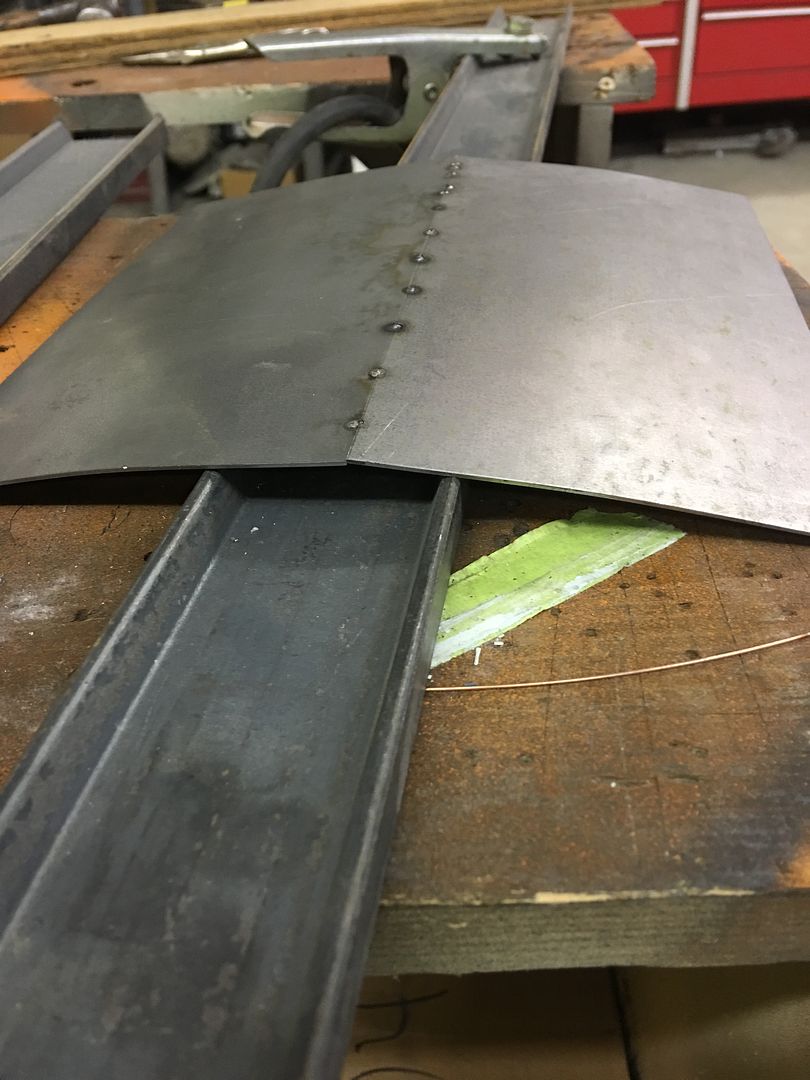
Comparing the two...
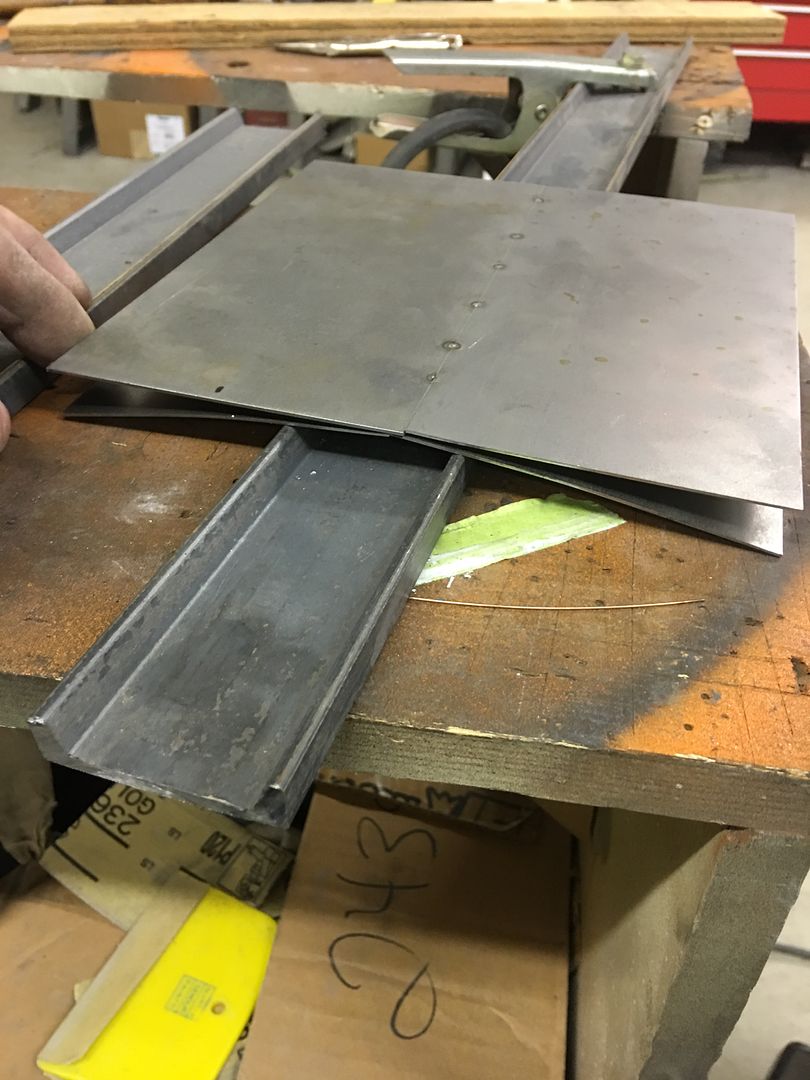
Next, we have a repair piece that is joined at the beltline bead...
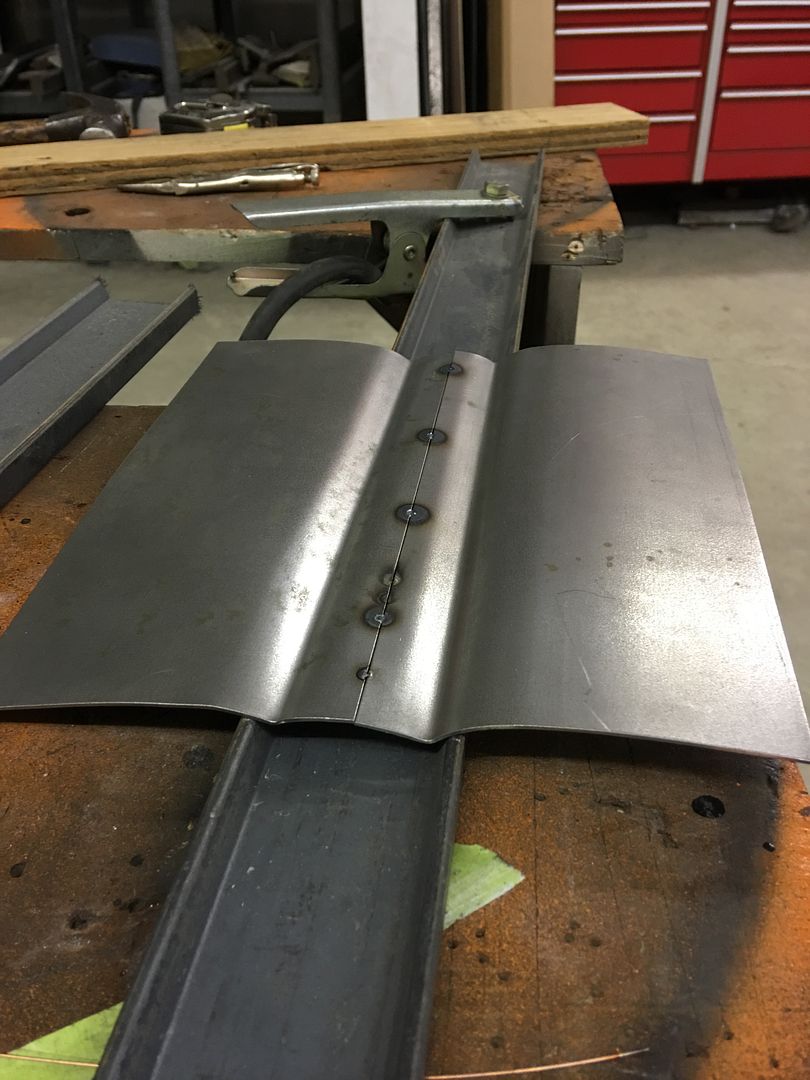
The flat area distorts quite a bit... Normally we would planish the weld after cooling to remove this distortion, but here it was left to better compare distortion amounts..
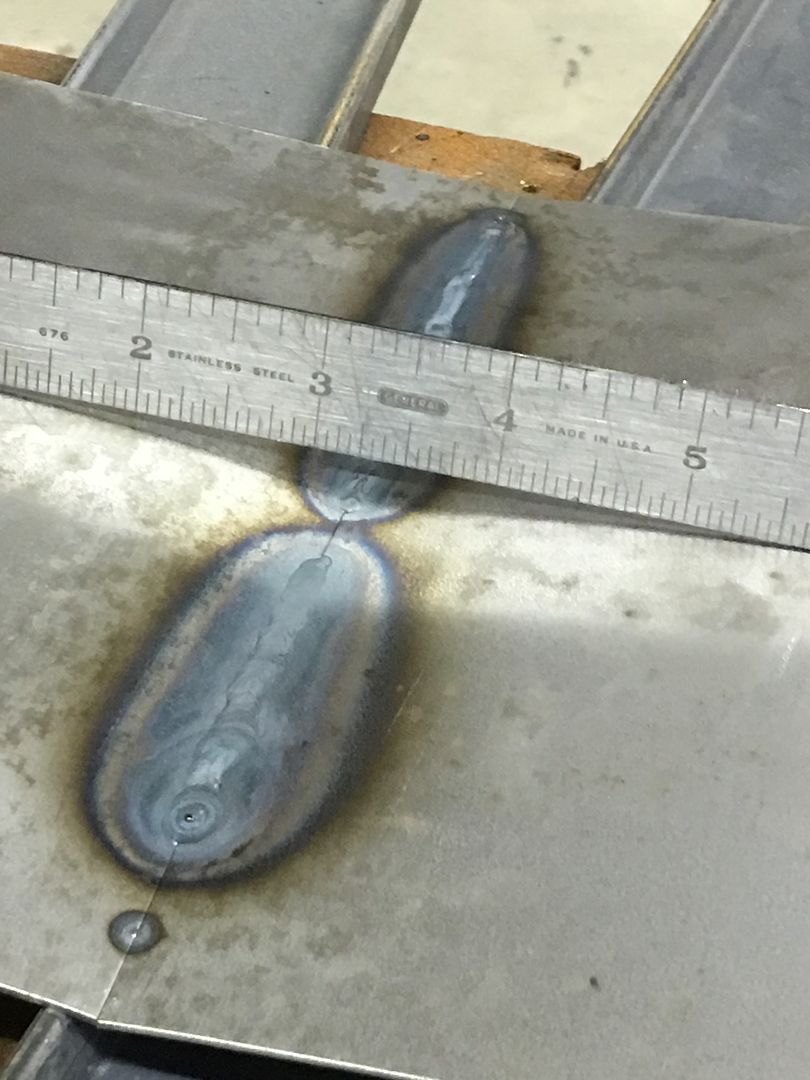
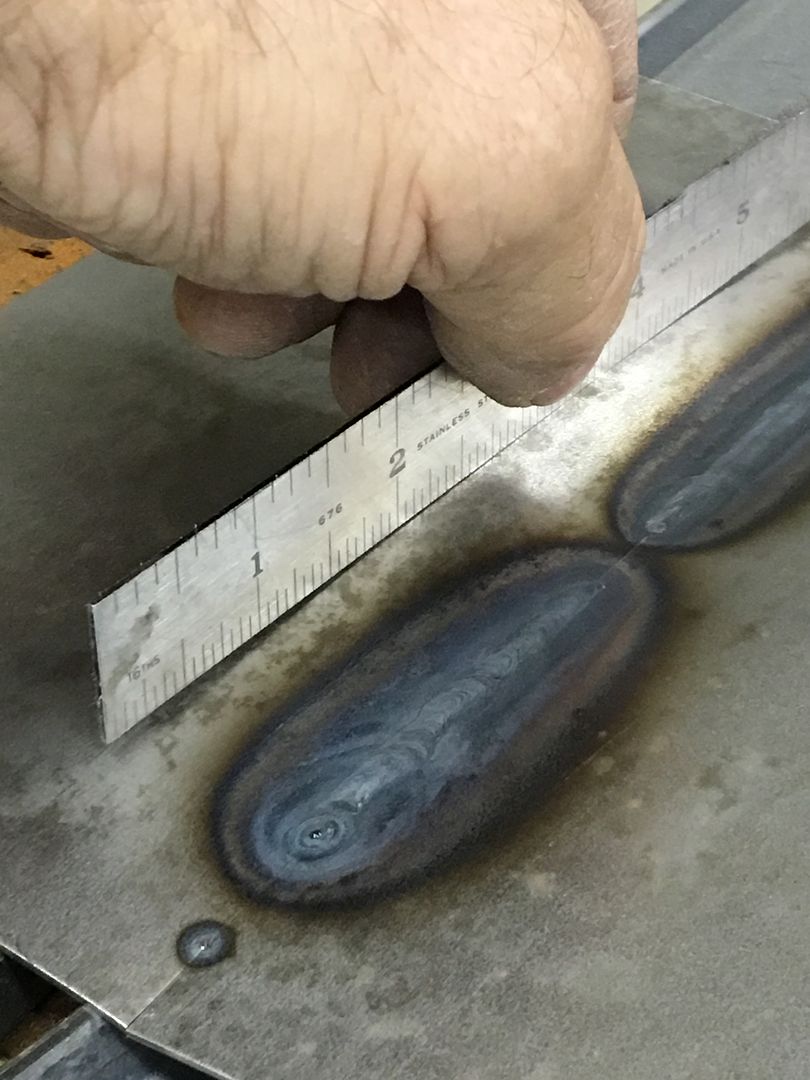
Looking at the three samples, the flat one moves/distorts the most. The crowned panel a bit less, the beltline bead even less..
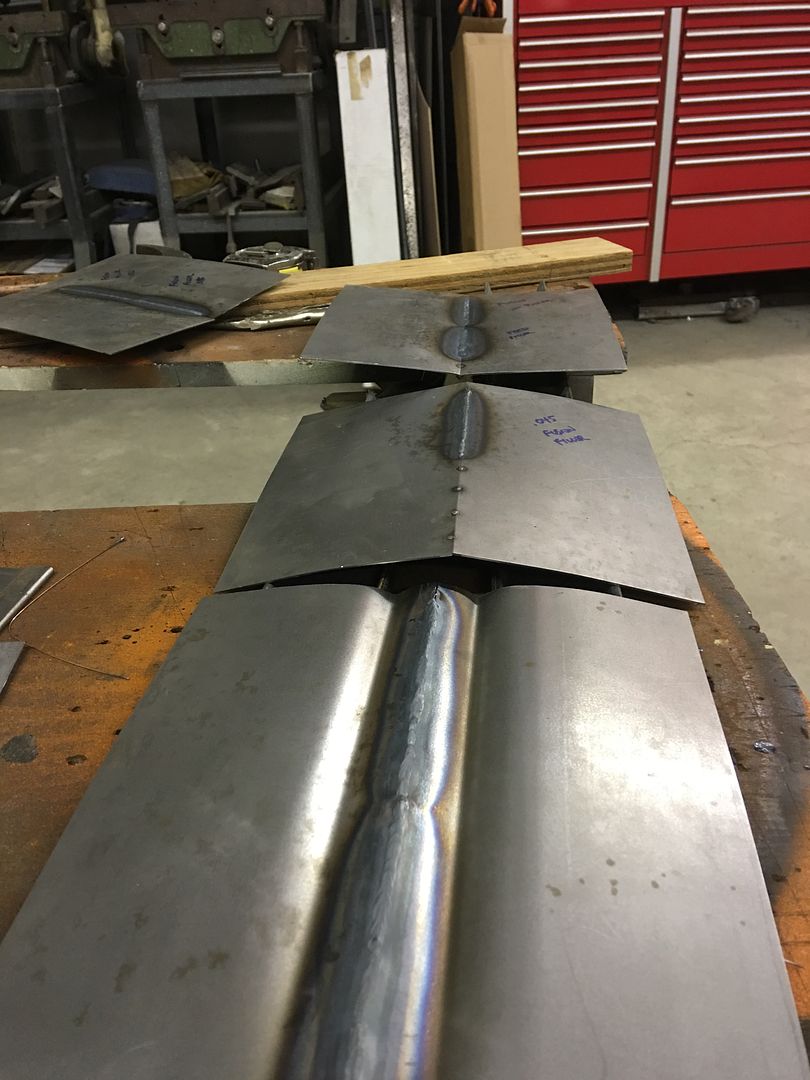
This helps to show the benefit of weld seam locations, we should select anything but the low crown/flat areas if at all possible..
First, we have a flat version, this would simulate the flat area at the bottom of a door skin...
The second panel has more crown, such as toward the top of a quarter/door skin....
Comparing the two...
Next, we have a repair piece that is joined at the beltline bead...
The flat area distorts quite a bit... Normally we would planish the weld after cooling to remove this distortion, but here it was left to better compare distortion amounts..
Looking at the three samples, the flat one moves/distorts the most. The crowned panel a bit less, the beltline bead even less..
This helps to show the benefit of weld seam locations, we should select anything but the low crown/flat areas if at all possible..
Last edited:
shortykorte
Well-known member
Thank you for doing and sharing this exercise. Great examples. You're the bomb.
Dennis Leigh Henry
Well-known member
subscribed!
rockwithjason
Well-known member
Dvds arrived in perfect shape. Thanks robert
rockwithjason
Well-known member
Yup, big screen in the garage will be in use
Kevin54
MEMBER EMERITUS
Yup, big screen in the garage will be in use
Glad to hear someone else has a big screen in the garage.

No screens at all in the shop for me. Can't get work done now....
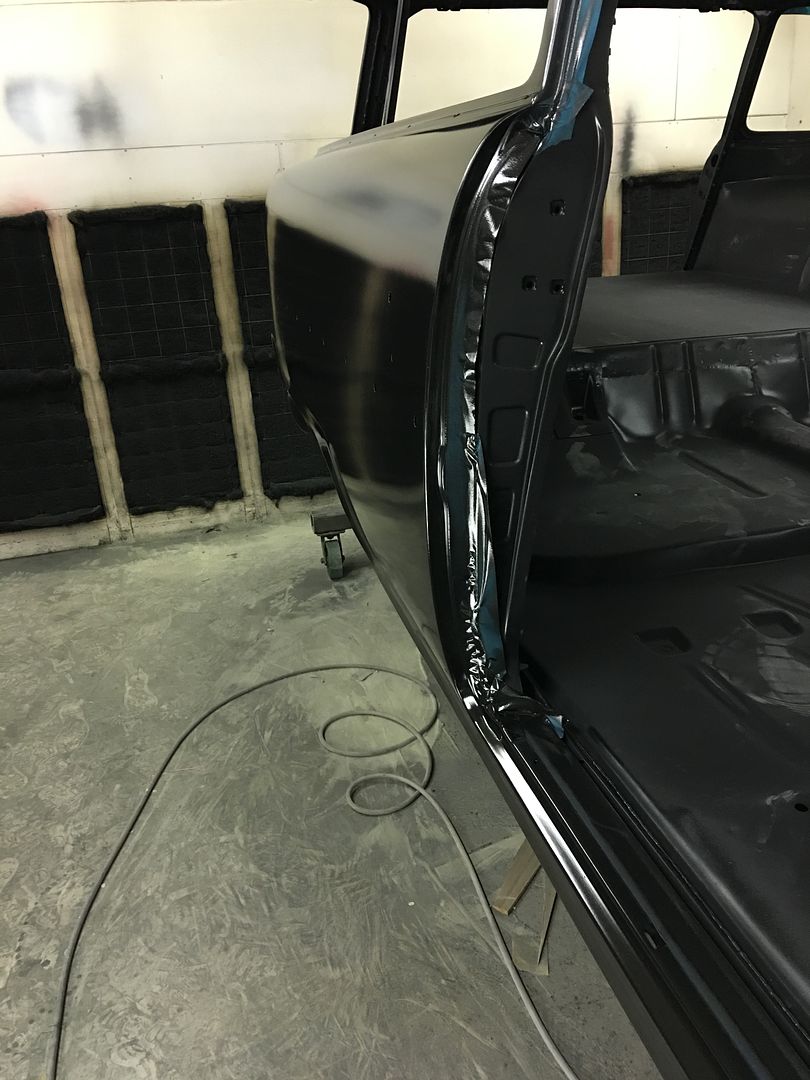
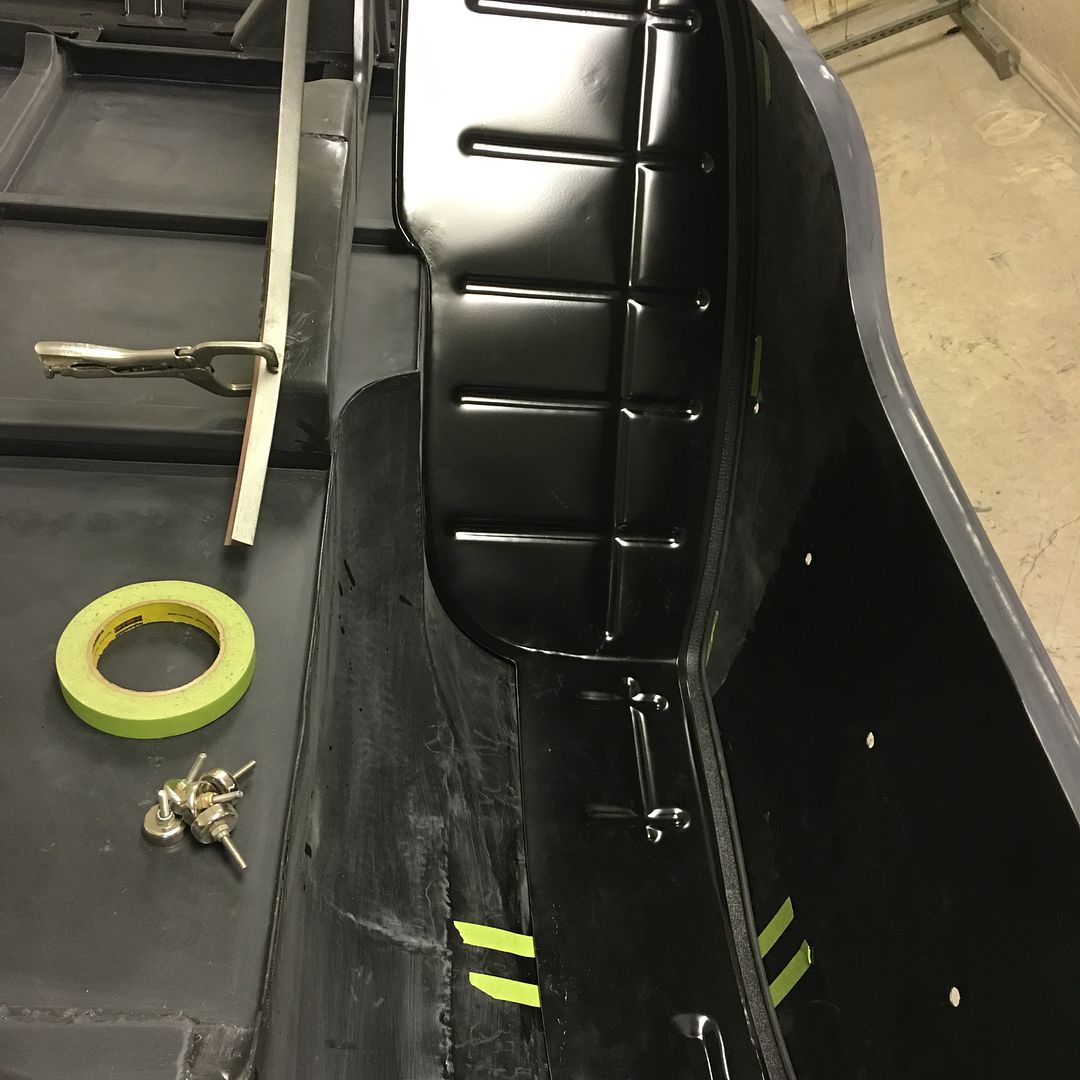
With the rockers and inner quarters covered with some SPI epoxy primer, tonight we'll get the quarter panel baffles welded in place so we can install the wheel wells.
Here's our home-made baffles:
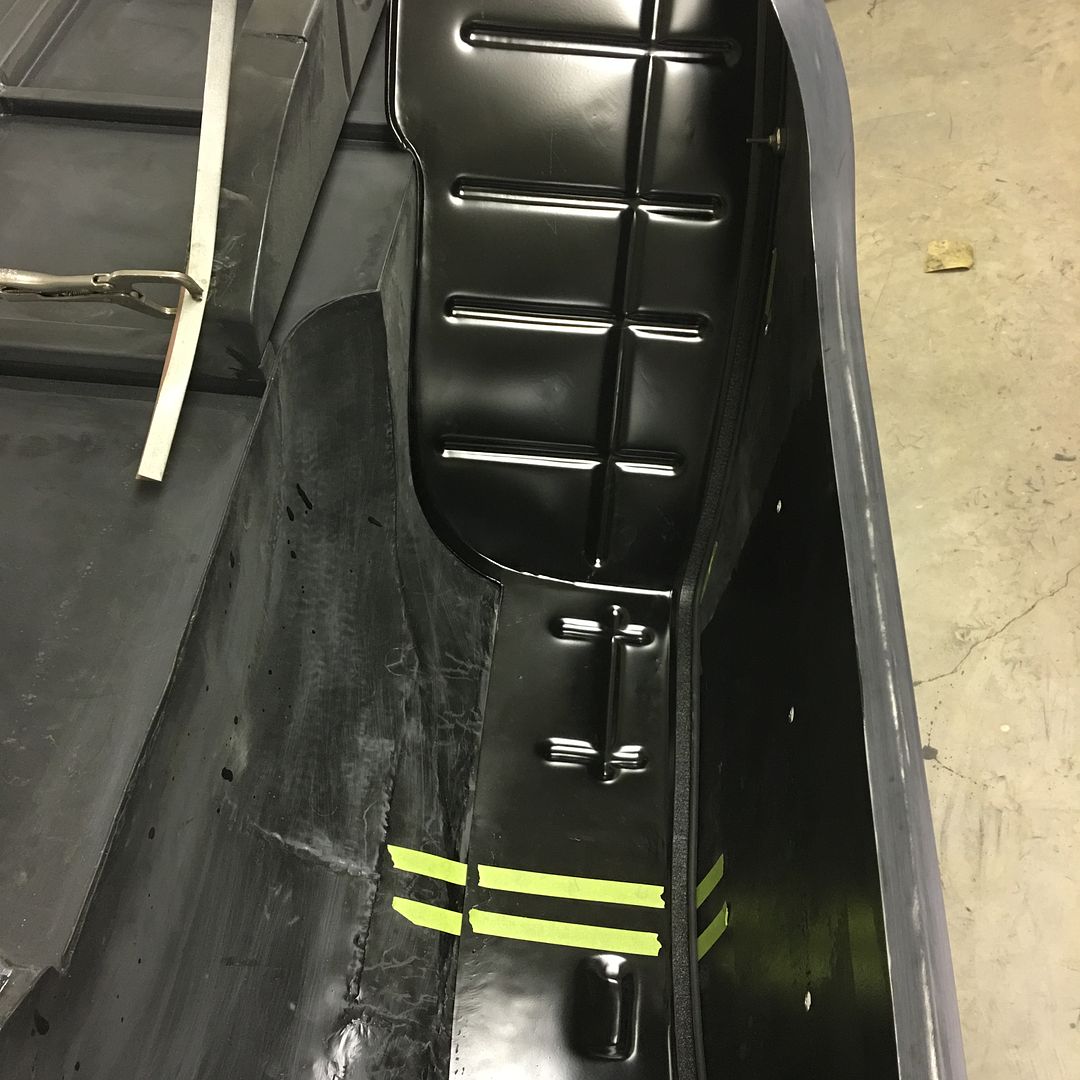
Primer cleaned off for the plug weld holes..
Kyle plug welding:
Now plug welded in, we'll clean up these welds tomorrow evening, epoxy prime and seam seal around the top profile of the baffle inside the window extrusion area.


With the rockers and inner quarters covered with some SPI epoxy primer, tonight we'll get the quarter panel baffles welded in place so we can install the wheel wells.
Here's our home-made baffles:
Primer cleaned off for the plug weld holes..
Kyle plug welding:
Now plug welded in, we'll clean up these welds tomorrow evening, epoxy prime and seam seal around the top profile of the baffle inside the window extrusion area.
rockwithjason
Well-known member
Glad to hear someone else has a big screen in the garage.
Thats how we roll

We got the plug welds dressed this evening, a coat of epoxy primer applied on the bare steel areas, and seam sealer applied between the baffle and upper section of the quarter. Missed getting photos, so we'll show that later. Then we headed over to John's to see if we could figure out what to do with the 47 Biederman and its poor hood fitment.
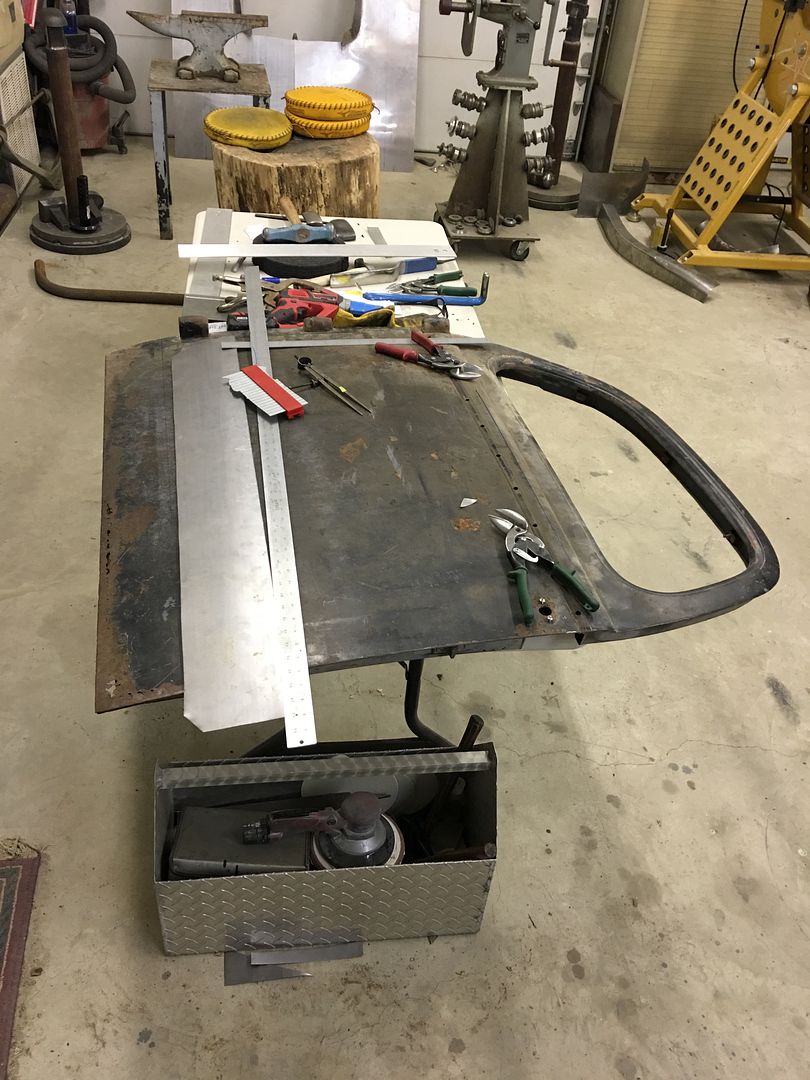
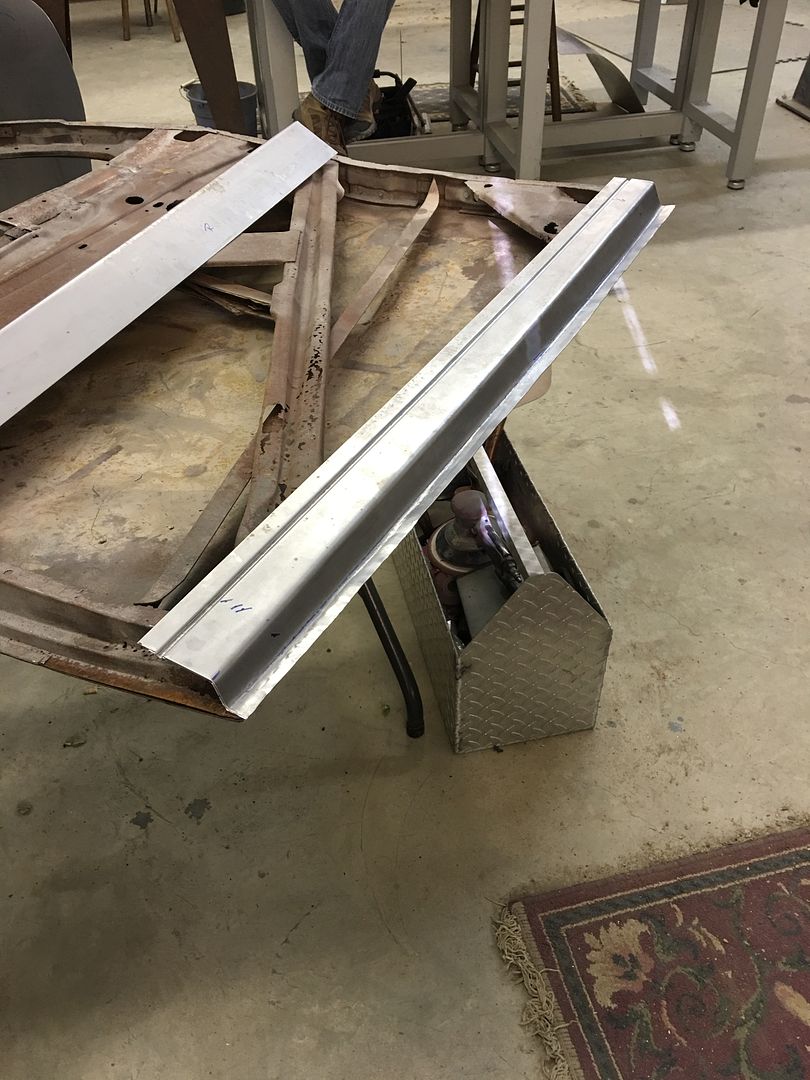
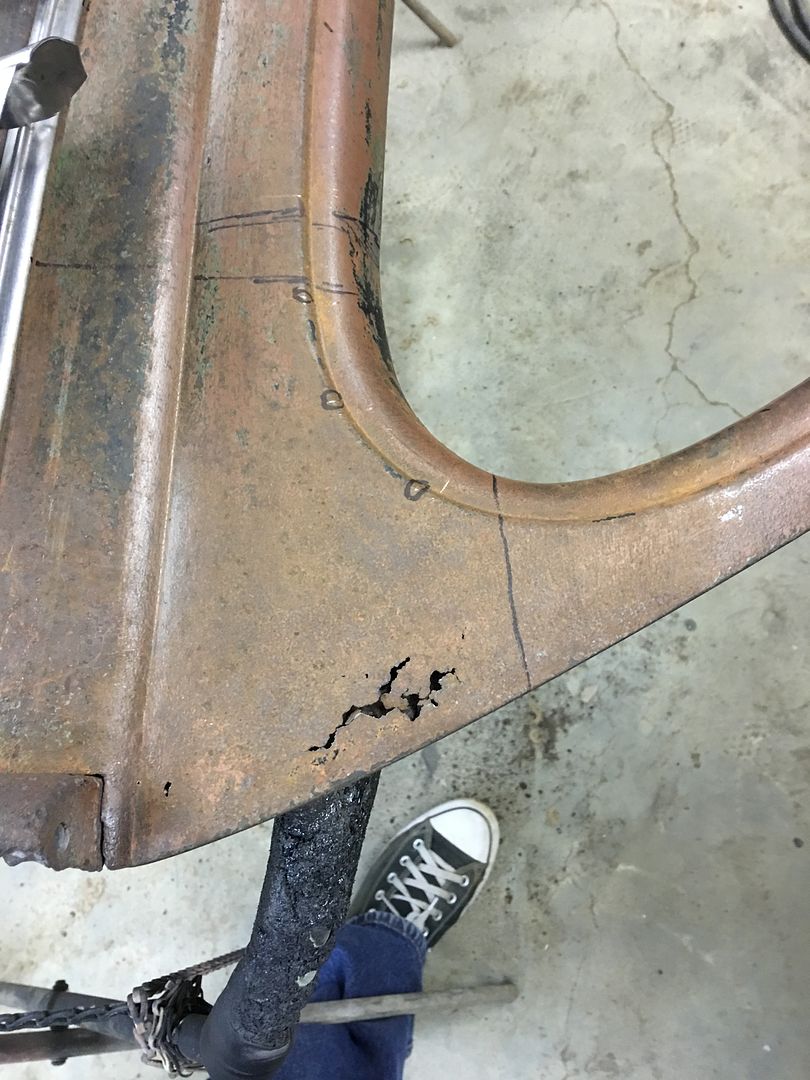
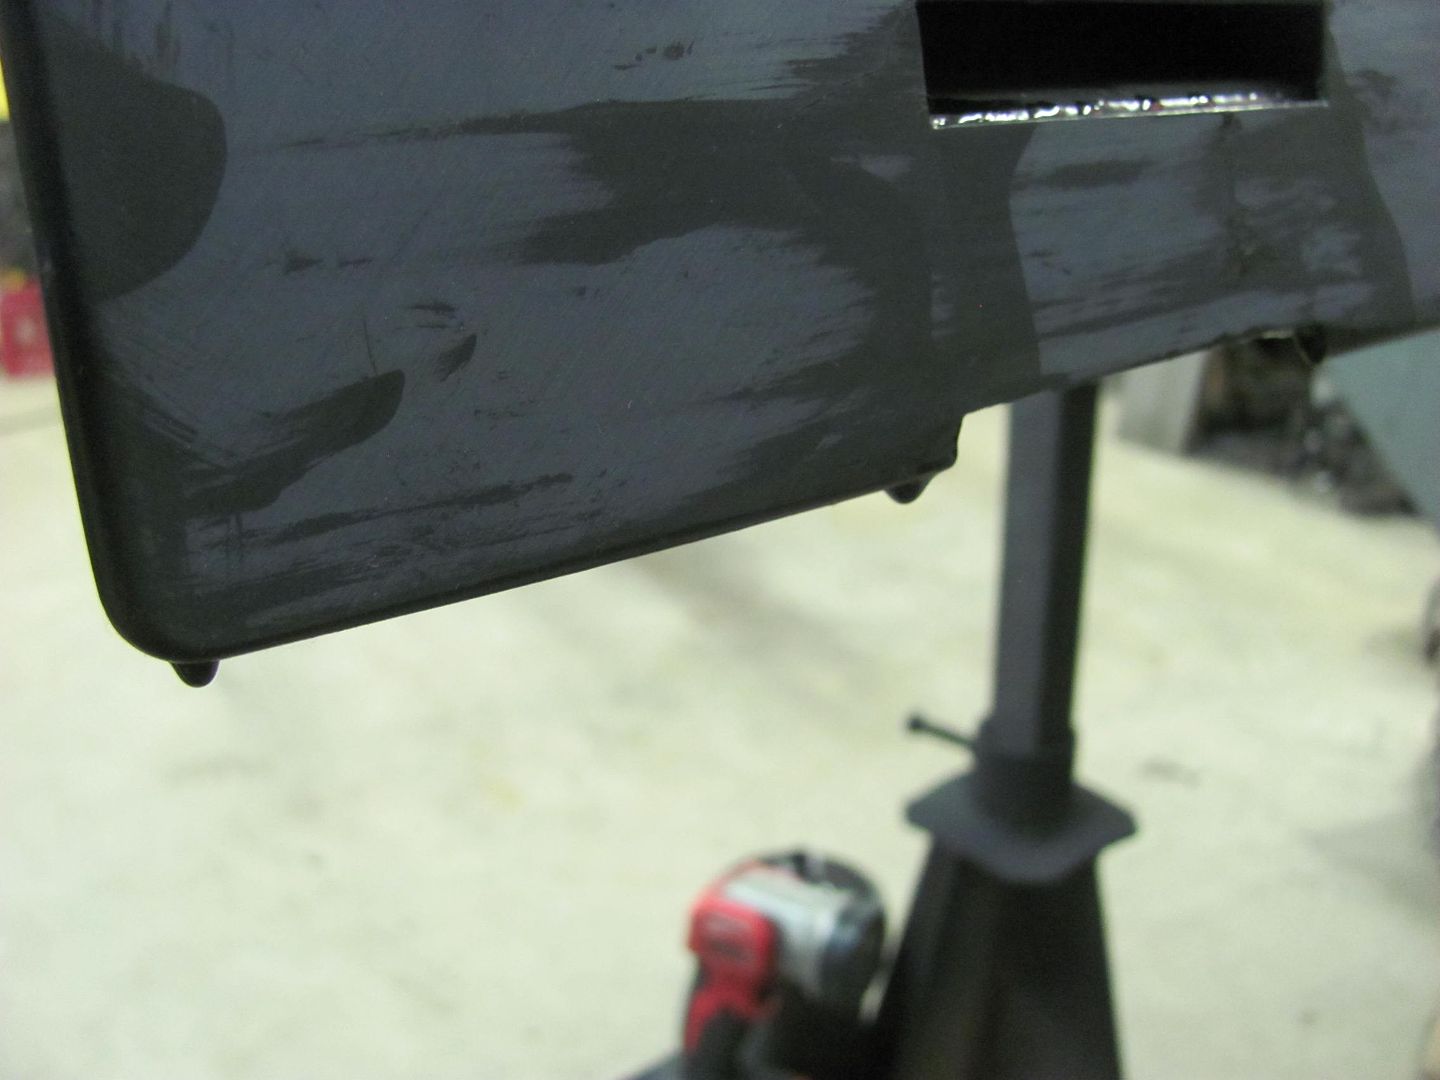
The truck is a 1947 and still had the original composite cab when he bought it, which means a wood subframe structure covered in steel sheet, including the doors. Similar to the early 30's cars with wood and steel, the wood holds the moisture, the steel rots away. So John's original cab would have required EXTENSIVE repairs of the wood structure and nearly all of the steel panels. He did find a 1950 Oshgosh donor truck that had the same manufacturer cab, but by 1950 it was now completely steel construction, and thus much more solid. He was initially looking for the doors, but as nice as the cab was, it only made sense to use it as well. The hood was already gone, so he used the original 47 hood with the 50 cab. Unfortunately, the first time the hood was test fit to the new cab was after paint was complete, and we find that the dimensions changed slightly. So, now that you're caught up to speed, what we have is a hood that fits the grille shell fine, but sits up too high on the back side by about an inch on each side and the radius doesn't match...
I had originally told John we could slice down through the radius from the back to just shy of the front and add a pie wedge to add the inch needed at the back. So we pulled the hood loose this evening to see where we would have to make the cuts to install the wedge and also fit the radius of the cab....

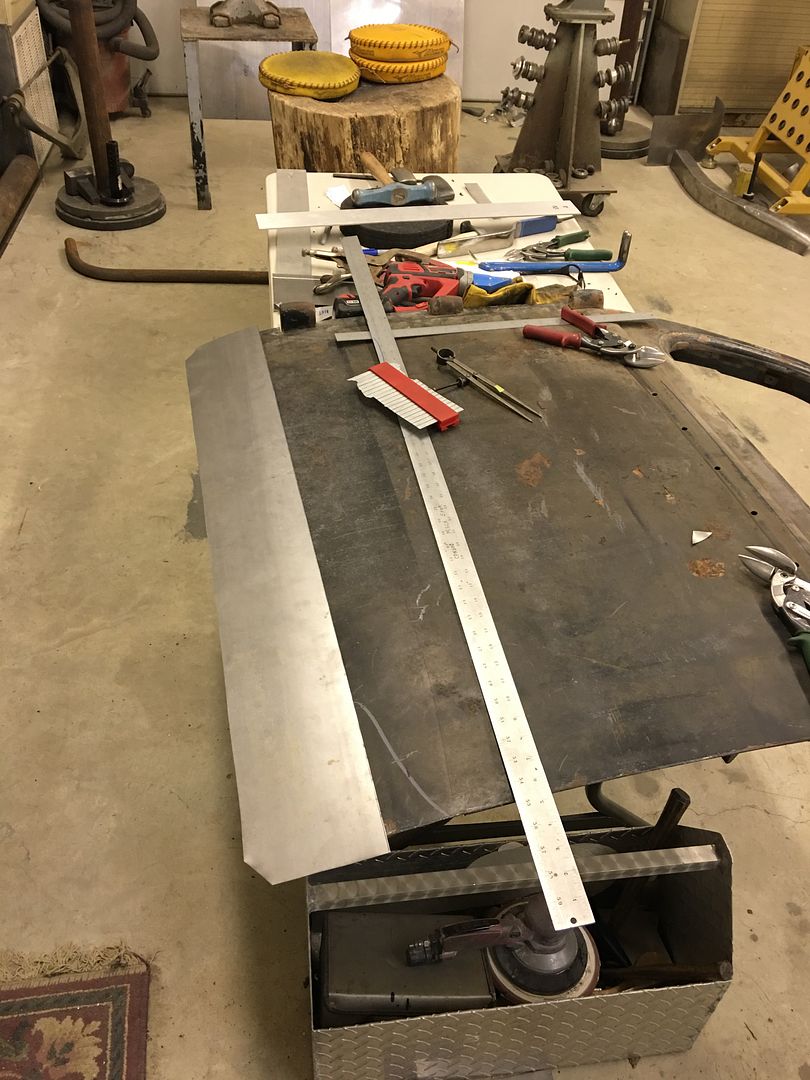
Now using a true pie wedge would also give us compounding shrinking effects where the HAZ of each crossed at the front of the hood. As a possible remedy, we looked at making a wider slice, radius on the front end, widen to what was needed, and cut the filler to fit...
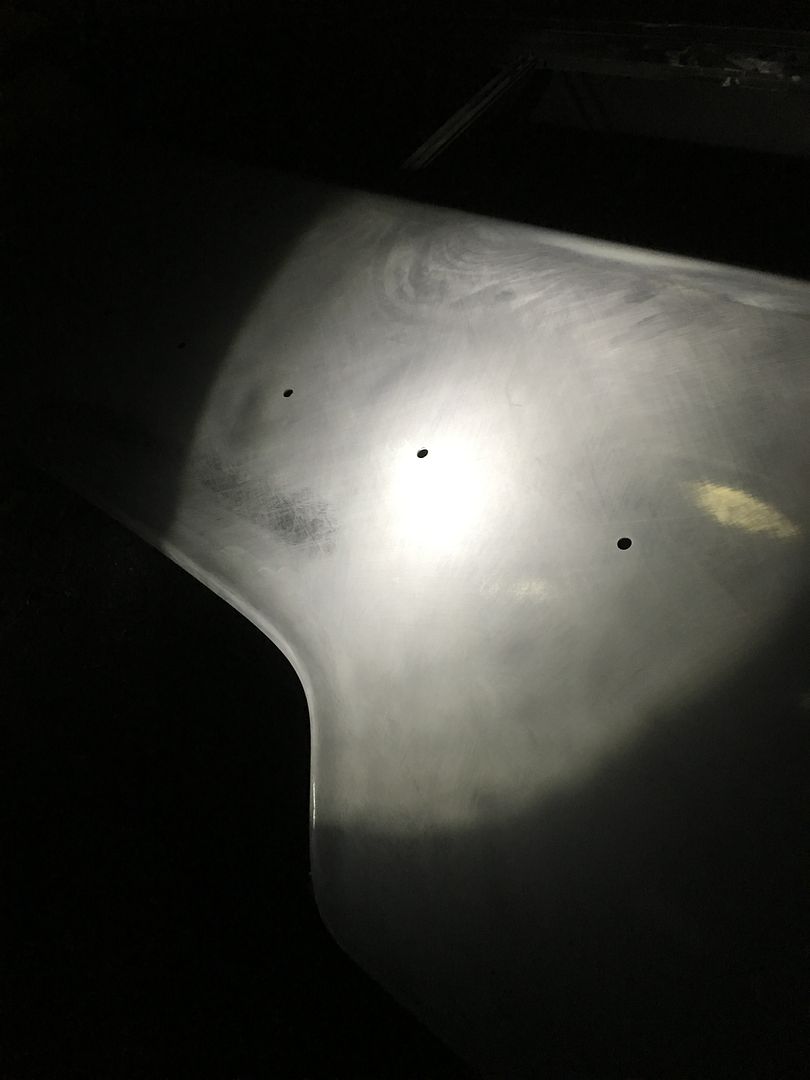
The more we looked at this and all the welds, trimming, etc that would be needed, it became clear that a totally new hood could be made in about the same amount of time and give a much nicer job in the end. So it looks like we're ordering more 16 gauge steel and have a hood to make in addition to all the fender work..
The truck is a 1947 and still had the original composite cab when he bought it, which means a wood subframe structure covered in steel sheet, including the doors. Similar to the early 30's cars with wood and steel, the wood holds the moisture, the steel rots away. So John's original cab would have required EXTENSIVE repairs of the wood structure and nearly all of the steel panels. He did find a 1950 Oshgosh donor truck that had the same manufacturer cab, but by 1950 it was now completely steel construction, and thus much more solid. He was initially looking for the doors, but as nice as the cab was, it only made sense to use it as well. The hood was already gone, so he used the original 47 hood with the 50 cab. Unfortunately, the first time the hood was test fit to the new cab was after paint was complete, and we find that the dimensions changed slightly. So, now that you're caught up to speed, what we have is a hood that fits the grille shell fine, but sits up too high on the back side by about an inch on each side and the radius doesn't match...
I had originally told John we could slice down through the radius from the back to just shy of the front and add a pie wedge to add the inch needed at the back. So we pulled the hood loose this evening to see where we would have to make the cuts to install the wedge and also fit the radius of the cab....
Now using a true pie wedge would also give us compounding shrinking effects where the HAZ of each crossed at the front of the hood. As a possible remedy, we looked at making a wider slice, radius on the front end, widen to what was needed, and cut the filler to fit...
The more we looked at this and all the welds, trimming, etc that would be needed, it became clear that a totally new hood could be made in about the same amount of time and give a much nicer job in the end. So it looks like we're ordering more 16 gauge steel and have a hood to make in addition to all the fender work..
Last edited:
NASTYZEN
Well-known member
First thing that popped in my head Robert. More work to fit than build a new one. Specially with your skill set and tooling. Always enjoy to see how you do things.
Thanks for the comments guys!
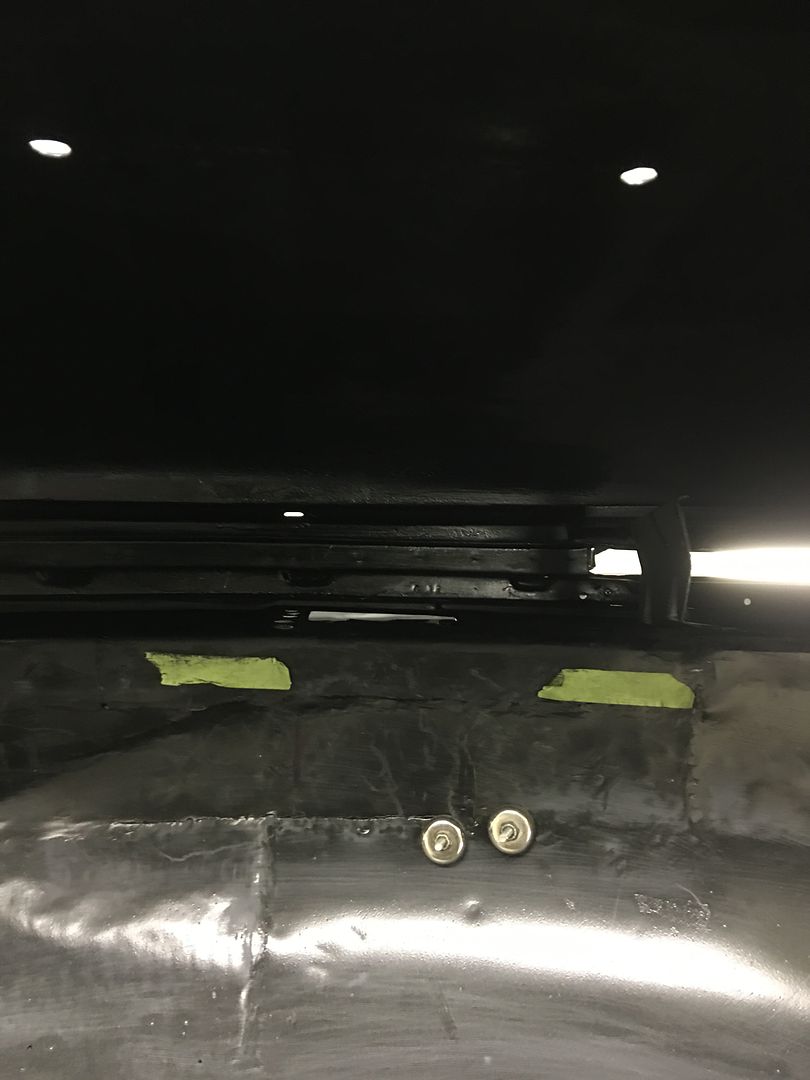
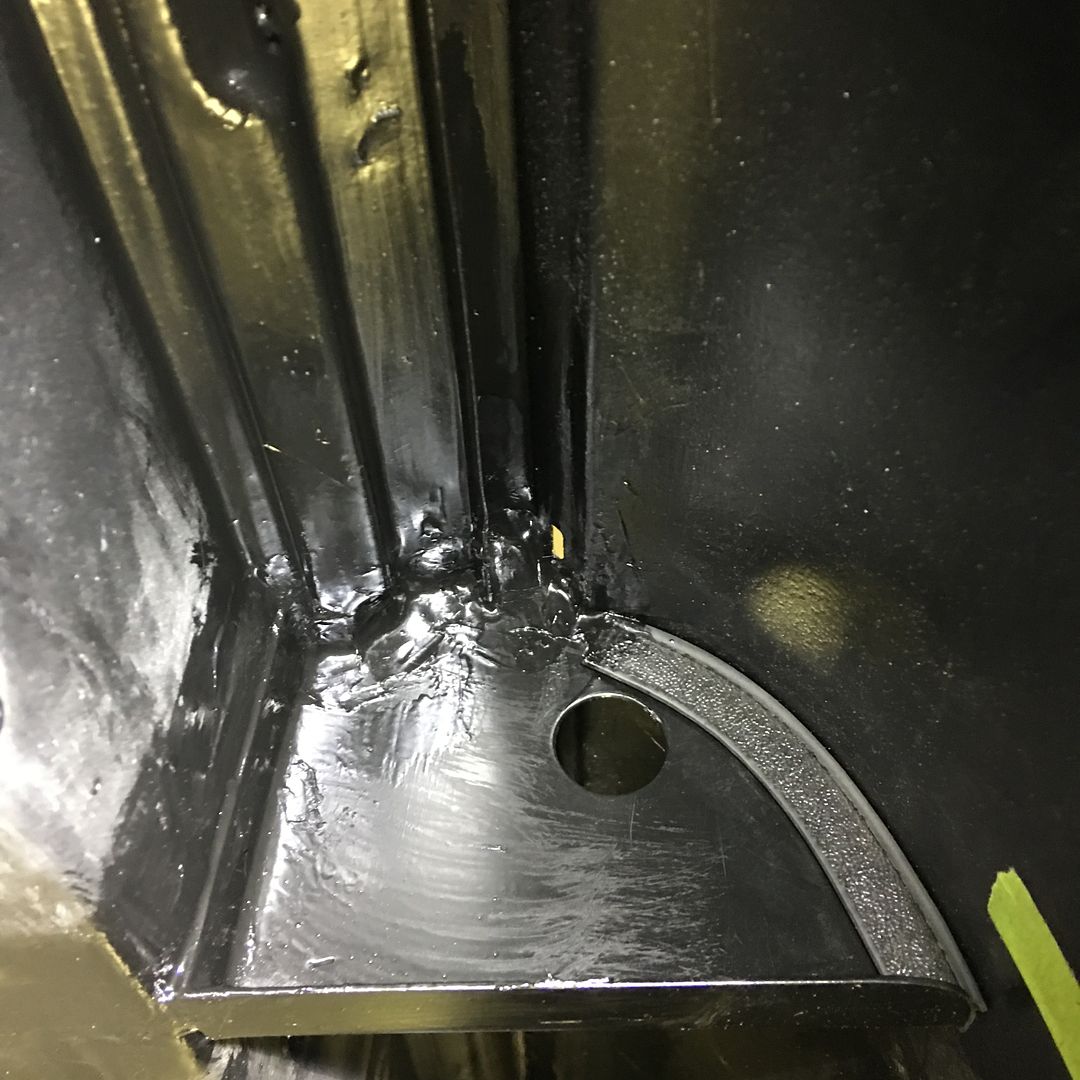
When we fabricated the quarter panel baffles we trimmed the upper profile to leave about a 1/16" gap, so that any possible body flex would be less likely to rub paint..
Plus, it gives a good anchor for the seam sealer....
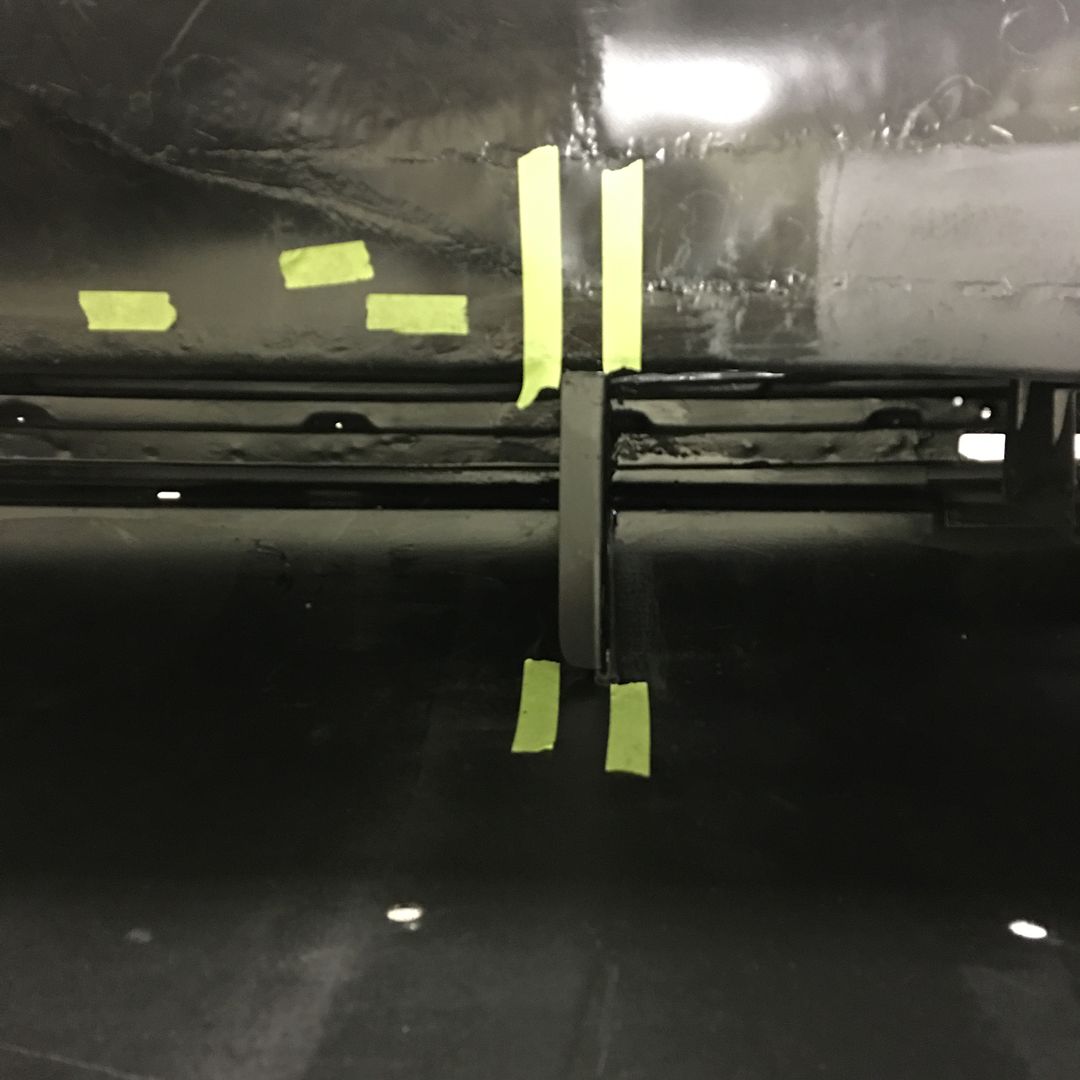
Then we used masking tape to mark off the edges of the flange so we could transpose these to the wheel well for drilling plug weld holes...
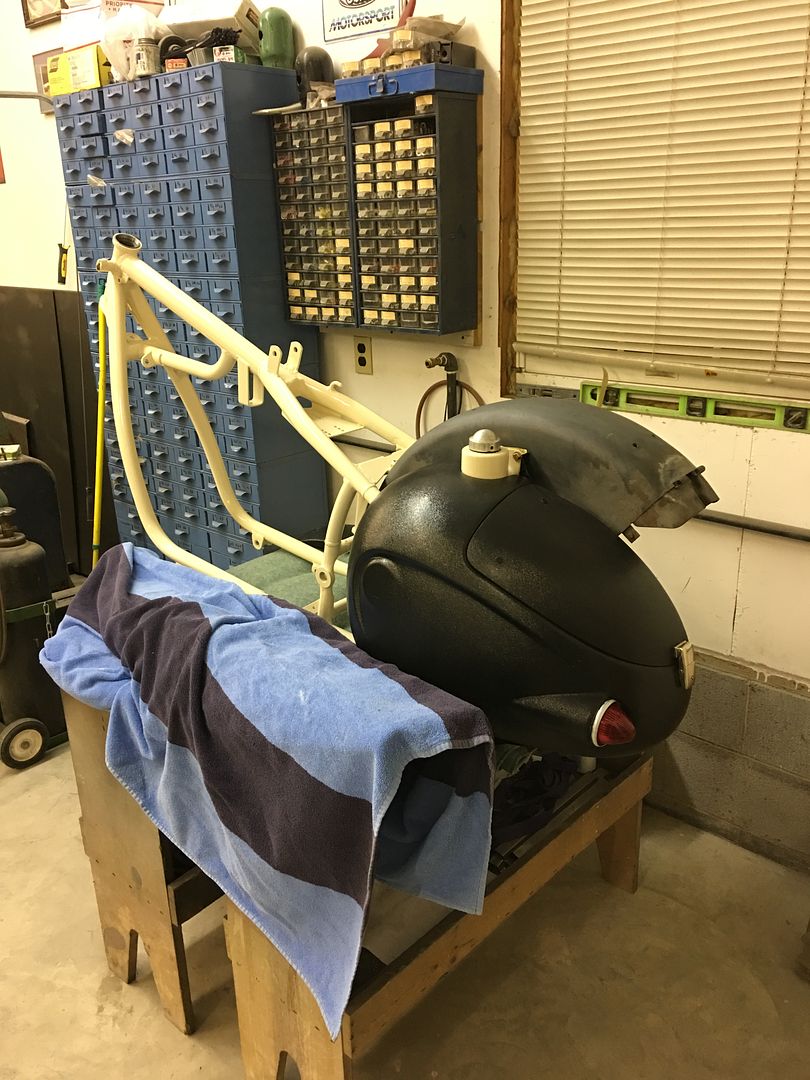
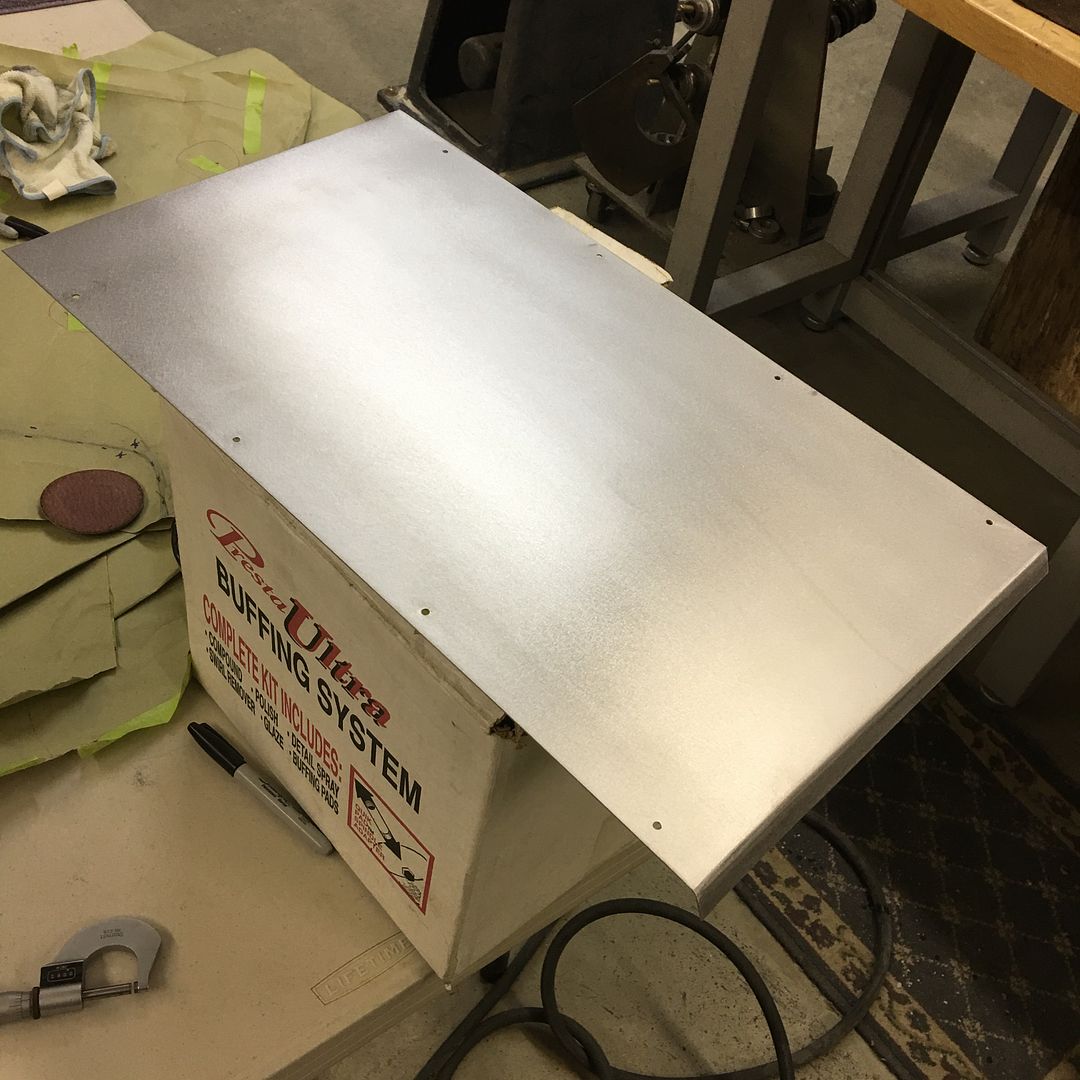
Next, we have another yellow vehicle to work on. A new driver at a local high school missed seeing the bright yellow oversized vehicle as it passed, and backed into the side of it..
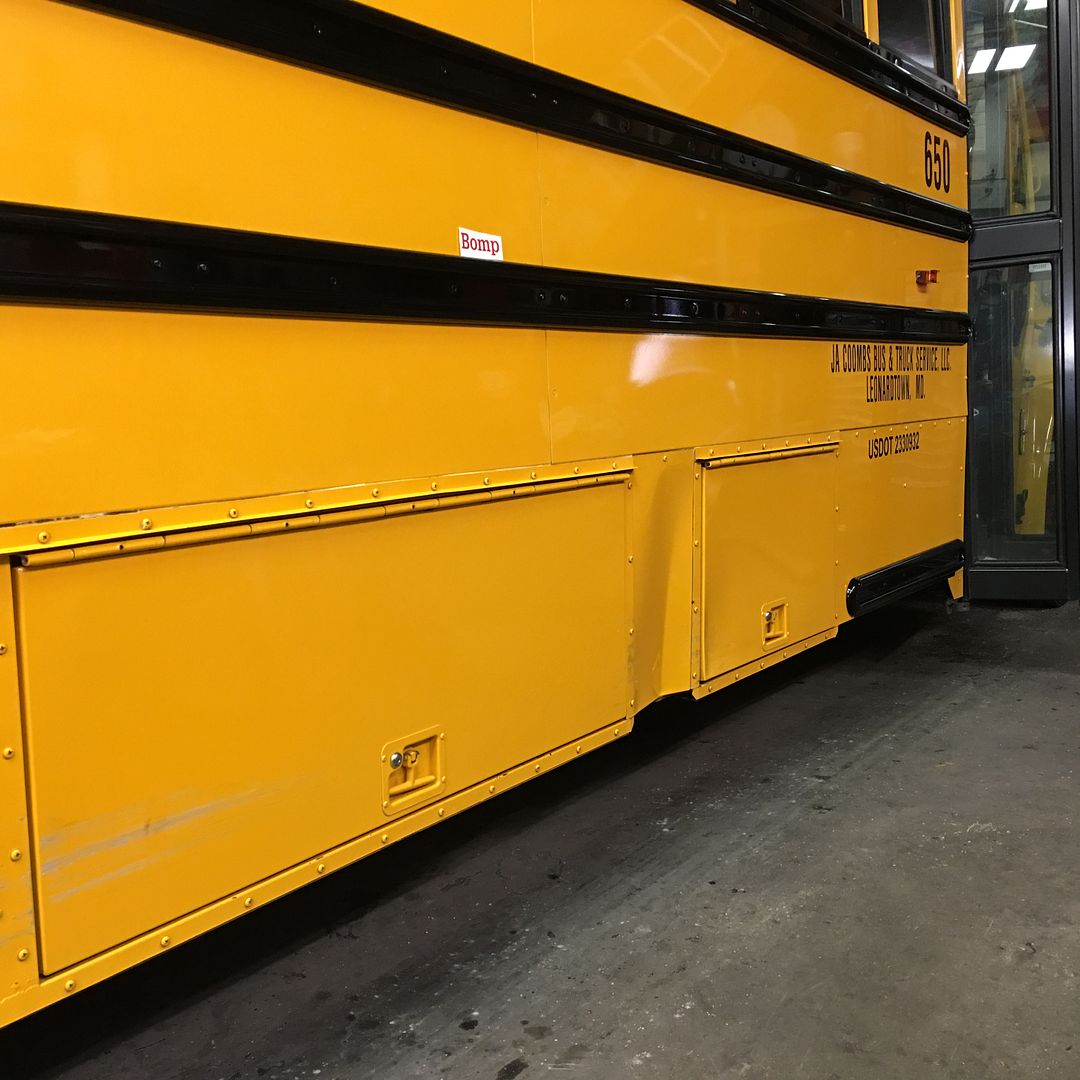
New filler panel was made out of 18 gauge steel, ready for some SPI epoxy..
When we fabricated the quarter panel baffles we trimmed the upper profile to leave about a 1/16" gap, so that any possible body flex would be less likely to rub paint..
Plus, it gives a good anchor for the seam sealer....
Then we used masking tape to mark off the edges of the flange so we could transpose these to the wheel well for drilling plug weld holes...
Next, we have another yellow vehicle to work on. A new driver at a local high school missed seeing the bright yellow oversized vehicle as it passed, and backed into the side of it..
New filler panel was made out of 18 gauge steel, ready for some SPI epoxy..