You are using an out of date browser. It may not display this or other websites correctly.
You should upgrade or use an alternative browser.
You should upgrade or use an alternative browser.
MP&C Shop Projects
- Thread starter MP&C
- Start date

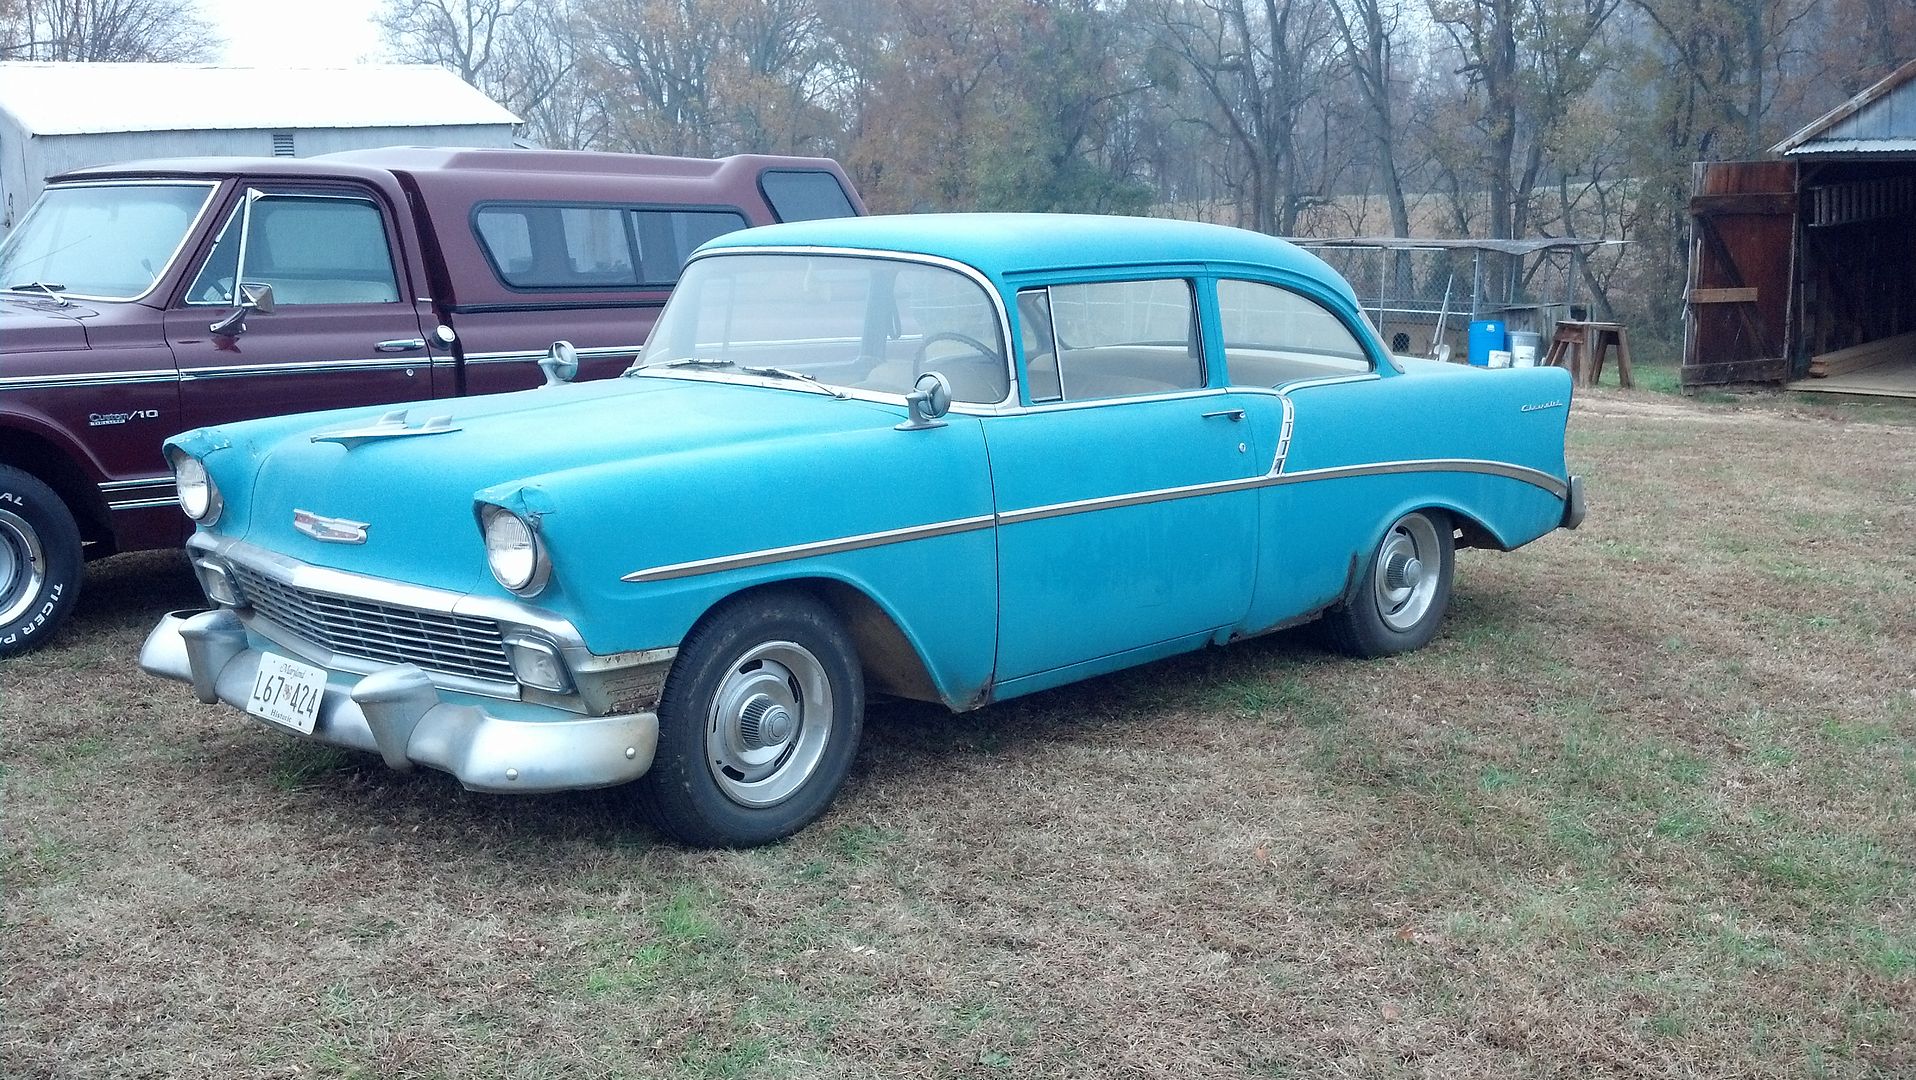
Chateau Slate 66
Well-known member


scrumpy
Well-known member
Wow, 1 hour, 46 minutes. Very impressive.
matt_i
Well-known member
I just wanted to say I have gotten thru about 30% of this thread. Thank you for such a great education! I wanted to ask about silicon bronze + tig. My first boss when i got out of college swore by this, the example I recall was drilling a hole in a sheet, dropping in a flange nut possibly with a bit of downward "funnel" in the metal and then filling it back with silicon bronze to create an easy panel nut of sorts. He had access to some sort of metallurgical lab services and had submitted some "samples" and the conclusion that i recall was that it wasn't just a solder-y substance that wet the surface but had some co-mingling with the base metal. Just curious if there are any negatives or if its sometimes used in other ways?
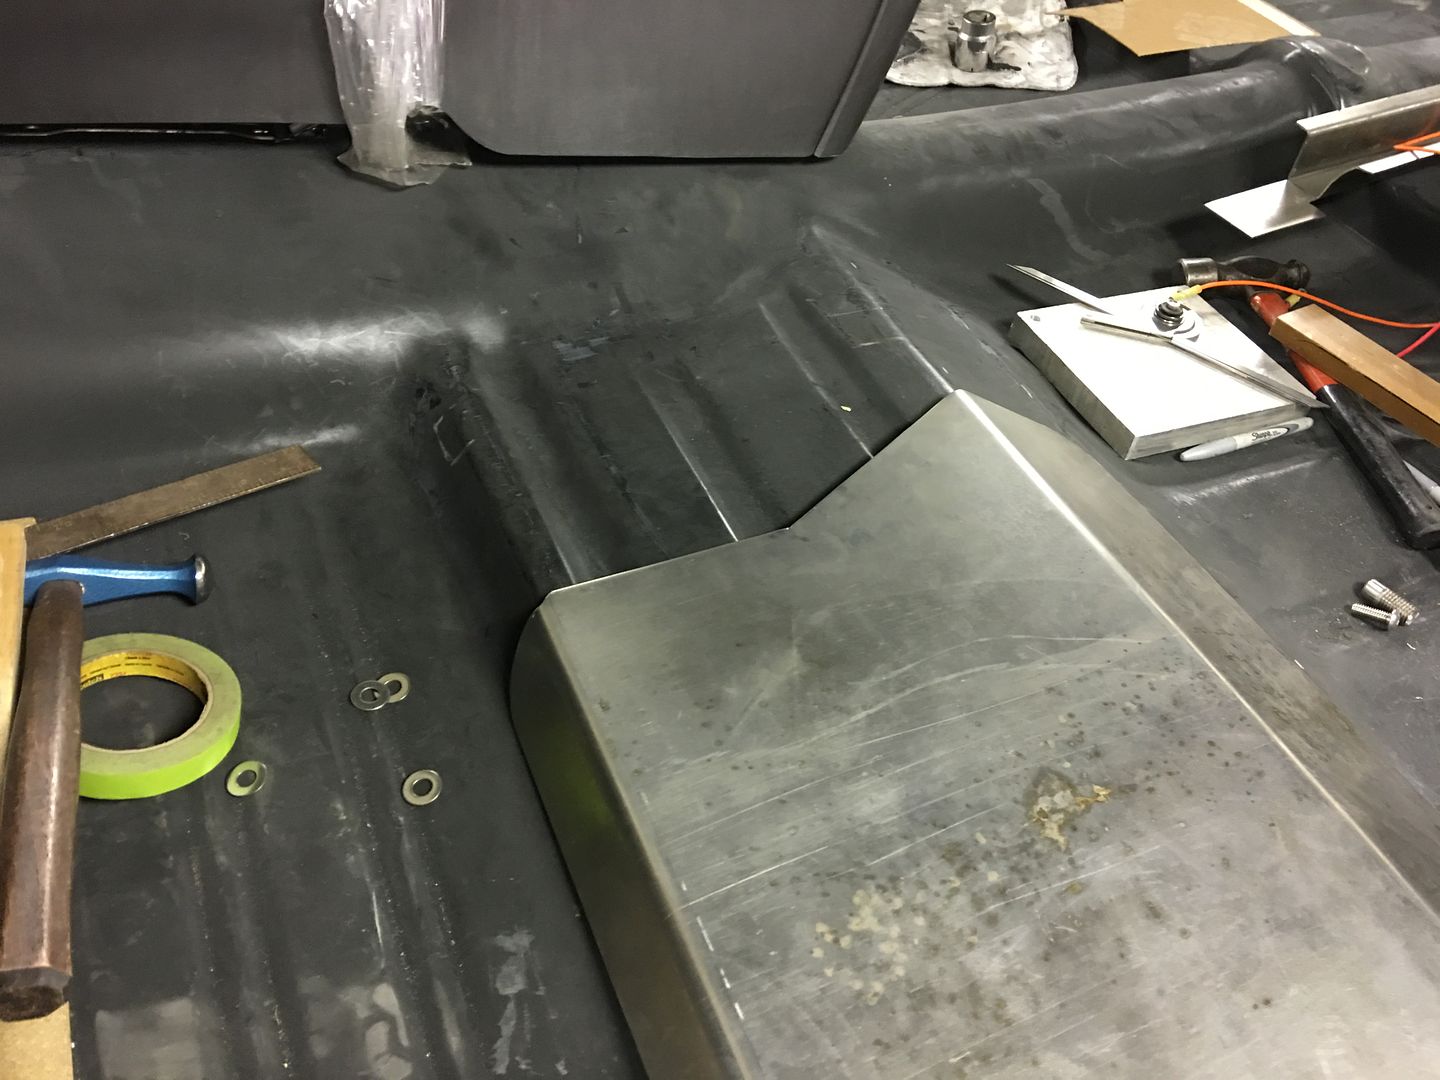
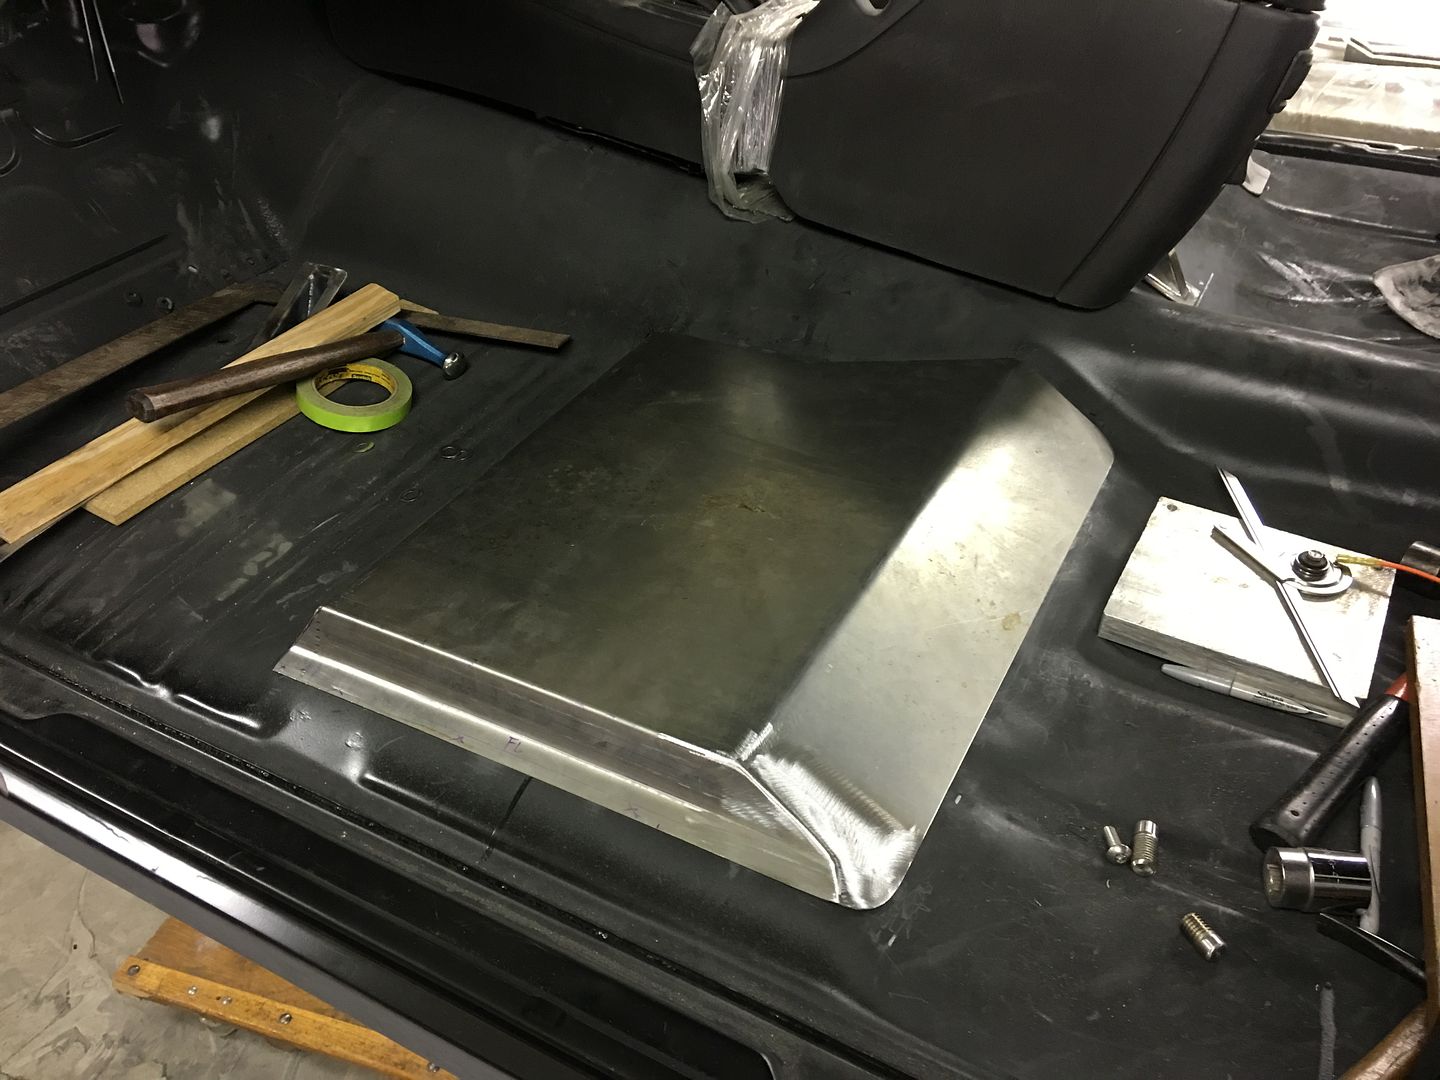
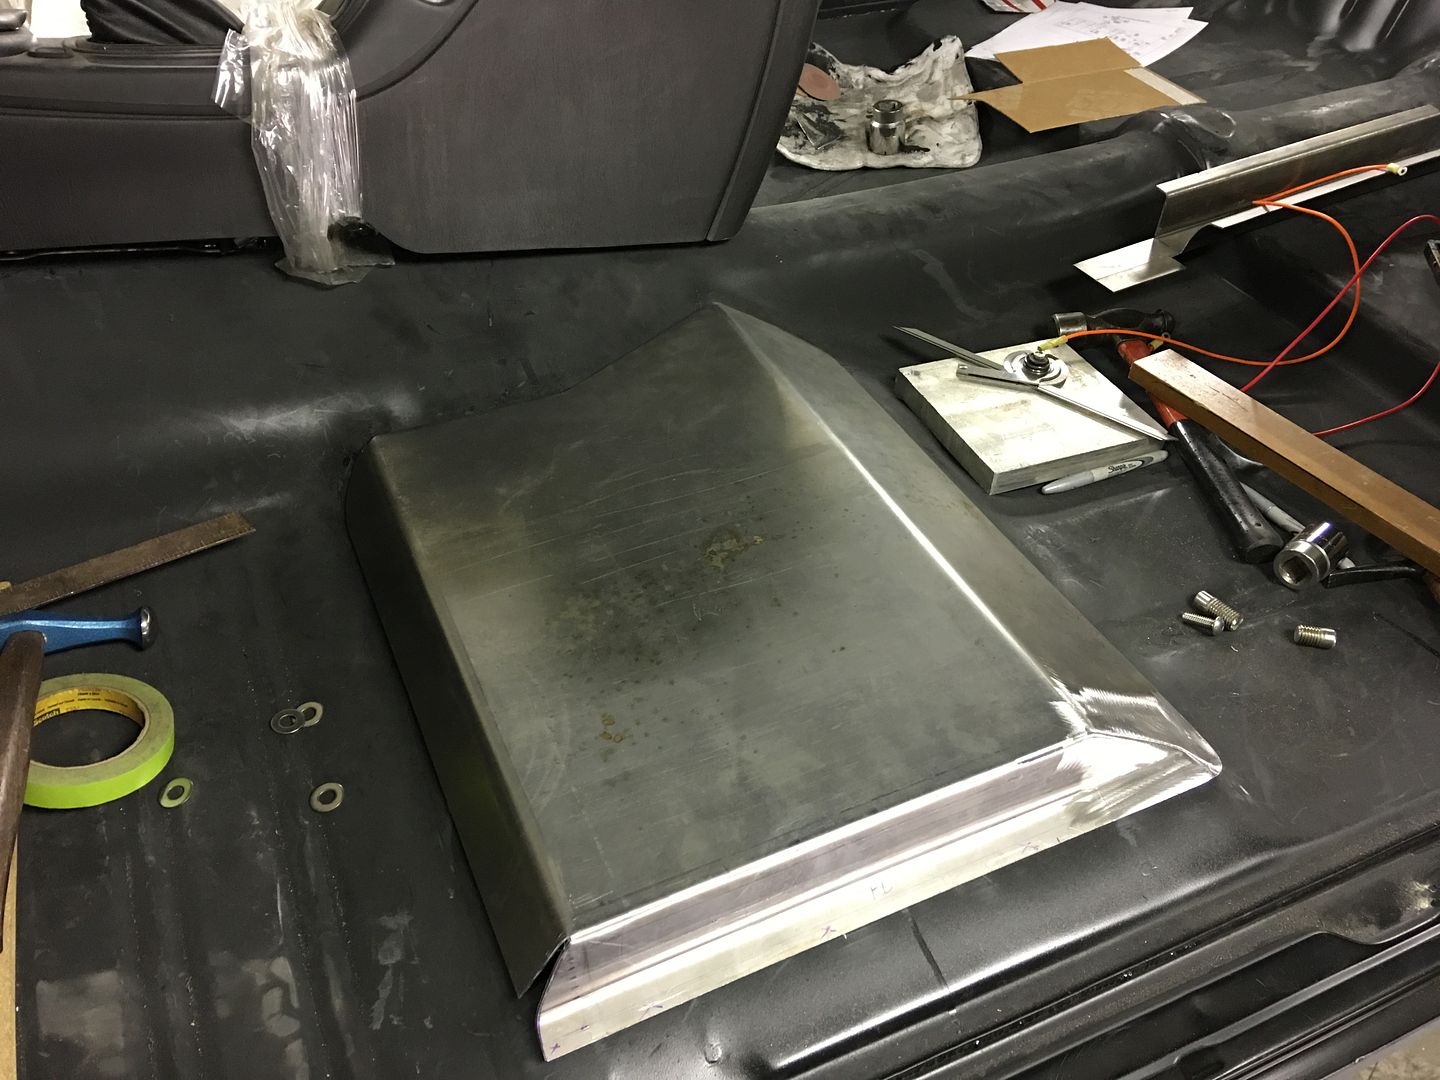
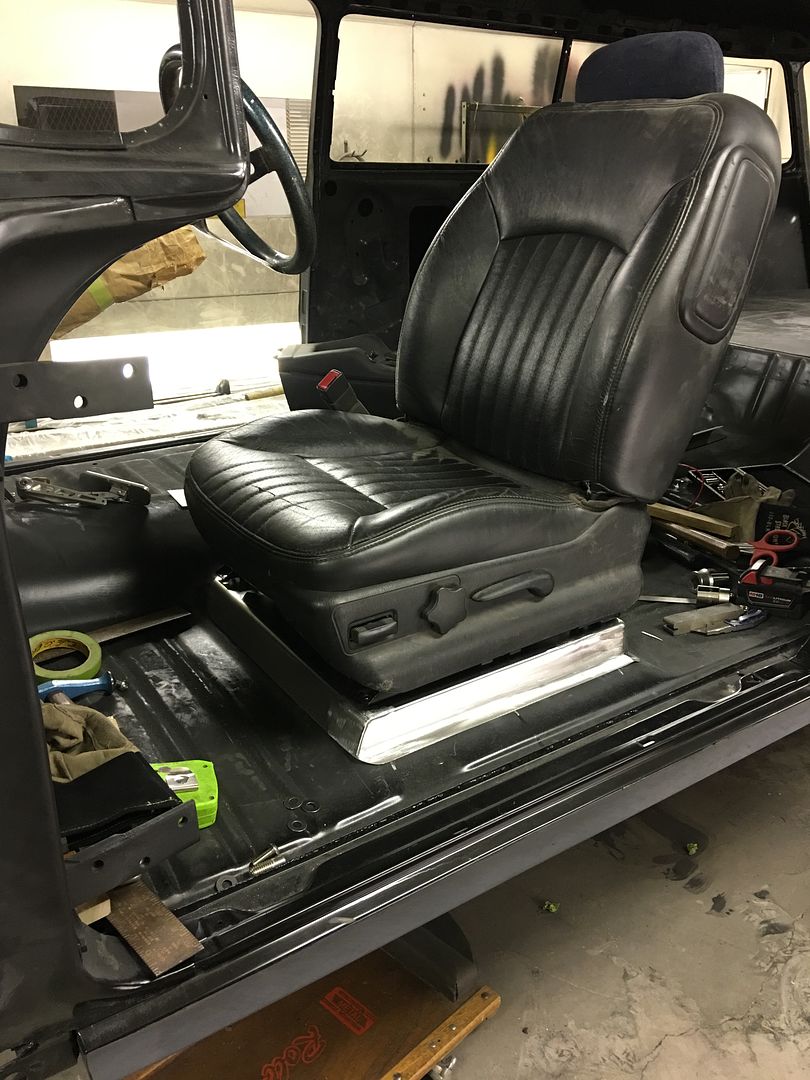
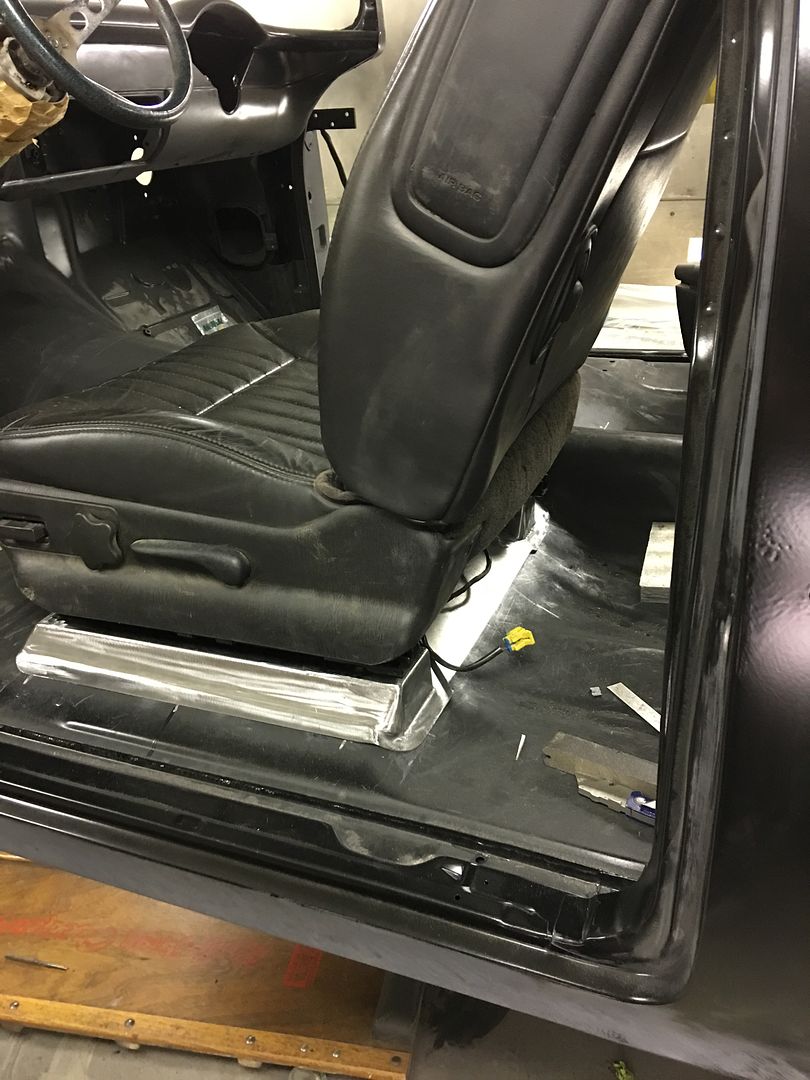
Well, let's back up and punt one more time. The owner of the 55 stopped by about a week ago and sat in the mocked up bucket seat. She said it sat too high, so our version 2 seat brackets were out. Cutting the floor pan was over-ruled (for recessing the brackets) so we opted for a 14 gauge flat seat pan directly on top of the floor, which also gave us a shape we could eliminate the "step" in the floor.
Next is to add the wedges to the rear ramp for attaching the rear of the track slides...
Next is to add the wedges to the rear ramp for attaching the rear of the track slides...
johnyg
Well-known member
nice work...no great work but who is paying for all this??? that wrong bracket was a work of art. thank you for your time showing your skills!!!
The owner.. (she) Yeah, we also moved it rearward almost two inches.. She sat in the car as it was up on the rotisserie, so I thought that may be giving a false sense of being too high. So we went to my B-I-L's to sit in his still original 56 and compare.
Where the seat heights were the same, the original 56 seat has more "compression" to its springs . The buckets are both power heated seats so we opted to slam them down as far as we could without cutting the floor pan, they can always be adjusted up.
Where the seat heights were the same, the original 56 seat has more "compression" to its springs
. The buckets are both power heated seats so we opted to slam them down as far as we could without cutting the floor pan, they can always be adjusted up.larry4406
Well-known member
Awesome as usual!
Nice 56! Next?
Nice 56! Next?
larry4406
Well-known member
Divco milk truck is next in line, BIL wants to keep 56 as it sits. It's only original once, he says..
Divco will be cool. Looking forward to it. Understand on BIL's only original once.
Bighead38
Well-known member
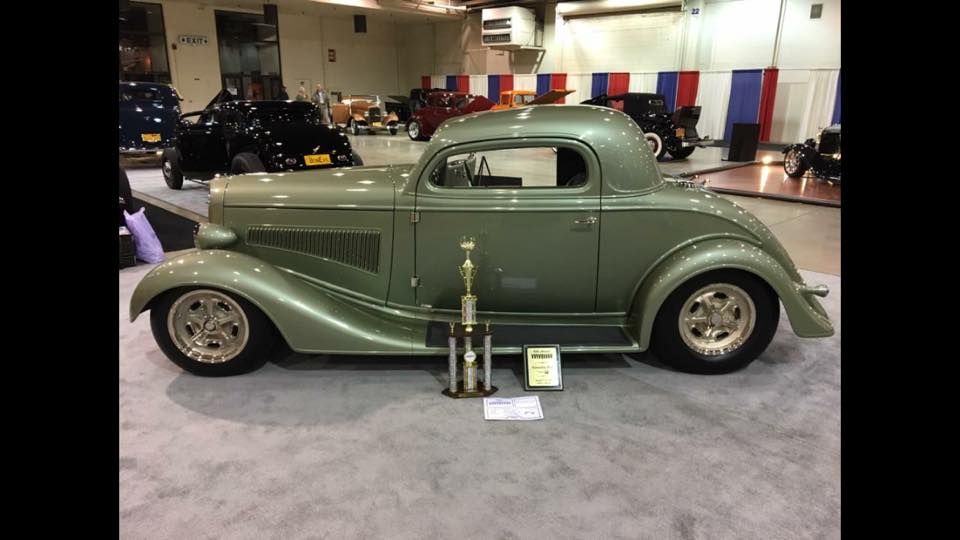
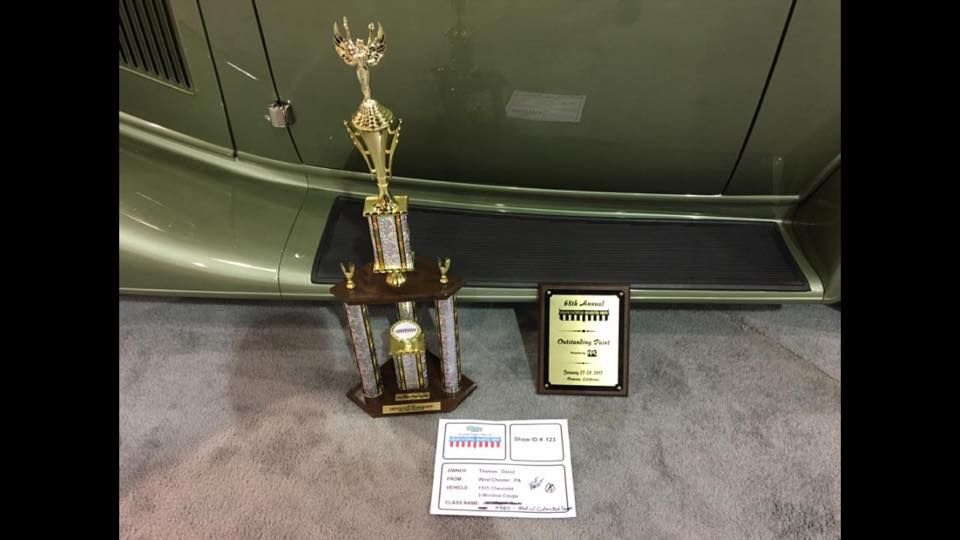
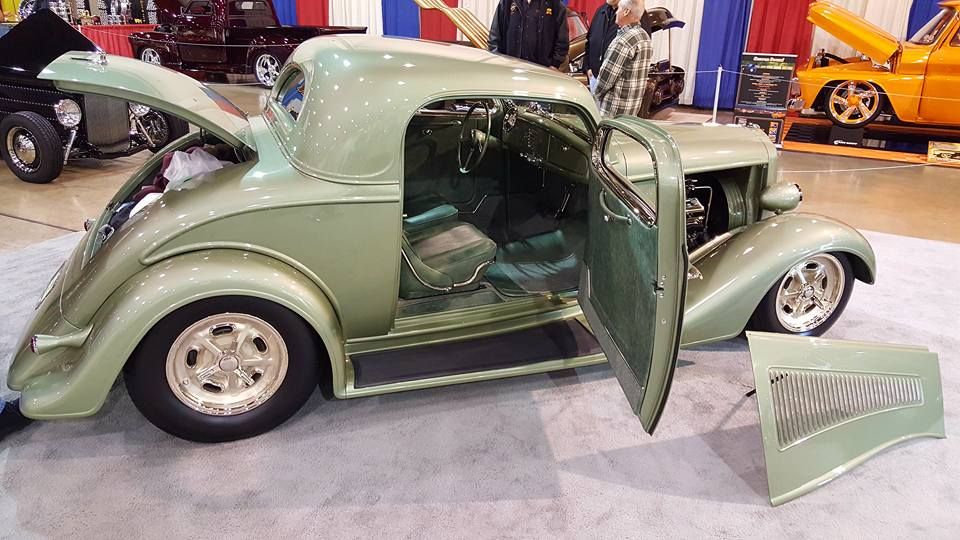
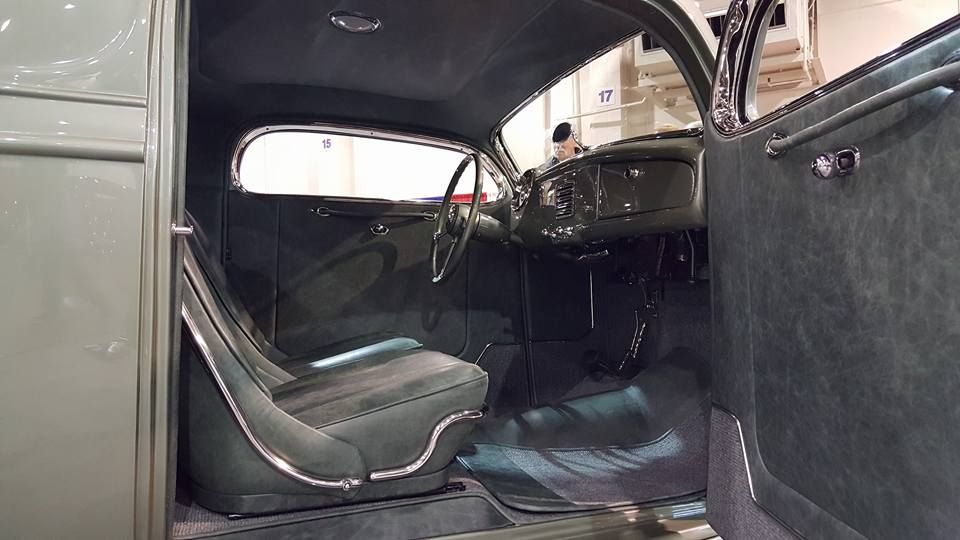
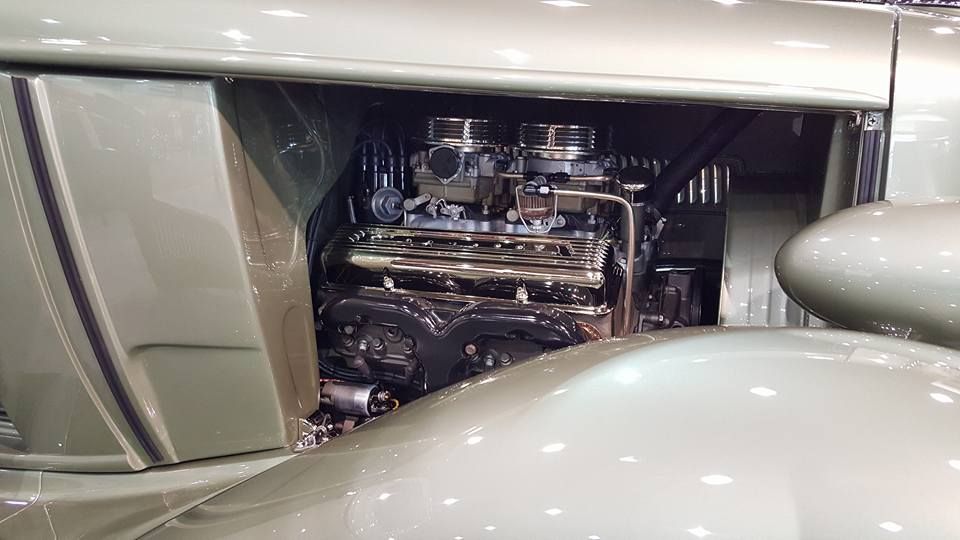
Cody Walls took the Dave Thomas 35 Chevy to Pomona this weekend for the GNRS, the car took 2nd place in it's class and also received a paint award for the 57 Cadillac Biarritz colored finish. Well done Cody!
Any more pics? Would like to see the car from the front.
Strouty
Well-known member
Most of the newer power seats have a lot of travel, but up and down is usually limited, you may want to test them before getting too far. Of Course you can easily add a spacer if needed.
Any more pics? Would like to see the car from the front.
Here's some night time pics from when it was being loaded up for the trip home...


Most of the newer power seats have a lot of travel, but up and down is usually limited, you may want to test them before getting too far. Of Course you can easily add a spacer if needed.
Oh, it's plenty tall now. Sitting on the second version of seat brackets and seat all the way down, anyone over 6' tall would have been smacking there head when getting out unless they ducked..
BORING HOP YARD
Well-known member
Hello Robert, I was just wondering what class the 35 Chev was entered.
Thank you.
Thank you.
Classification Place Name City, State Vehicle
Class Results Summary
-
Booth
4350.0 Custom Rod Coupe - 35-48
c Paul 6-322 Bradley San Jose, CA 1935 Ford 5 Window Coupe
c 8-304 Lane Myers South Jordan, UT 1935 Ford Coupe
2nd 4- Dennis Mariani, Sr. Winters, CA 1941 Willys Coupe
460D
1st 7-520 Tony Wille Gillette, WY 1940 Ford Coupe
4370.0 Full Custom Rod Coupe - 35-48
2nd 7-200 Dan Wathor Rio Linda, CA 1937 Ford Coupe
1st Donald Cannella Colorado Springs,
CO
5-424 1940 Ford Coupe
4380.0 Radical Custom Rod Coupe - 35-48
c 5-01 Mike Bello Chula Vista, CA 1940 Chevrolet Deluxe
c 7-412 Linda Lowry Fallbrook, CA 1940 Ford Coupe
2nd David Thomas West Chester , PA 1935 Chevrolet 3 Window Coupe
1st 7-218 Thomas Zink Gresham, OR 1941 Ford 2 Door
Sunday, January 29, 2017 Page 18 of 22BORING HOP YARD
Well-known member
Wow small world, one of the guys in my office is good friends with the guy that did the paint work on Tom Zinks car that took home 1st.
They wanted to enter it into the Detroit Autorama Ridler but were blown away by the effort it takes to get one in the show.
Greg
They wanted to enter it into the Detroit Autorama Ridler but were blown away by the effort it takes to get one in the show.
Greg
BORING HOP YARD
Well-known member
I have seen 3-4 pictures on a cell phone from the person that I work with took.
I will ask Monday if I can get copies. If I can get them, I will post them up.
I will ask Monday if I can get copies. If I can get them, I will post them up.
Please do..
Just read that Street Machine magazine in Australia picked the 35 as one of the 15 "coolest cars" at the GNRS.

Cody Walls of Traditional Metalcraft in Milton, Delaware received huge attention after finishing his custom two-tone green, straight six-powered ’59 Chevy wagon a few years ago which has recently landed on Aussie shores with its new Canberra owner. One of his latest achievements is this stunning 1935 Chevy coupe, built for Dave and Deana Thomas. It’s powered by an immaculate Corvette small-block mill screwed together by Davis Race Engines and the beautiful paint colour was laid on by Richard and Brandon Glymph. Their work was enough to earn the car an Outstanding Paint award at the show, alongside a Second In Class.
https://www.streetmachine.com.au/ev...rs-from-the-2017-grand-national-roadster-show
Just read that Street Machine magazine in Australia picked the 35 as one of the 15 "coolest cars" at the GNRS.
Cody Walls of Traditional Metalcraft in Milton, Delaware received huge attention after finishing his custom two-tone green, straight six-powered ’59 Chevy wagon a few years ago which has recently landed on Aussie shores with its new Canberra owner. One of his latest achievements is this stunning 1935 Chevy coupe, built for Dave and Deana Thomas. It’s powered by an immaculate Corvette small-block mill screwed together by Davis Race Engines and the beautiful paint colour was laid on by Richard and Brandon Glymph. Their work was enough to earn the car an Outstanding Paint award at the show, alongside a Second In Class.
https://www.streetmachine.com.au/ev...rs-from-the-2017-grand-national-roadster-show
GLTHFJ60
Well-known member
Subscribed.
Thanks!
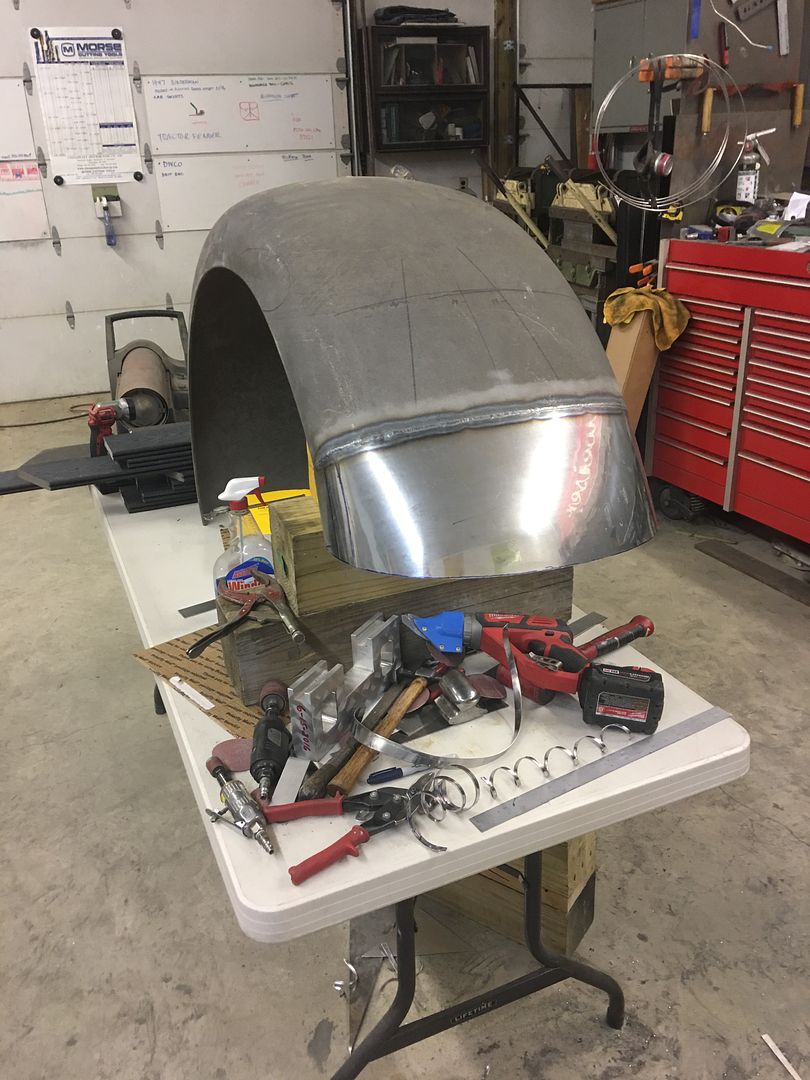
Well, I need to make a little progress on a 16 gauge fender, so the highly precise stand for the Laser Level was used. We have about 13-3/4" difference in height from back edge of fender to front edge. So Laser is set at 13-3/4 above the table, with heights verified to all four corners of the table.
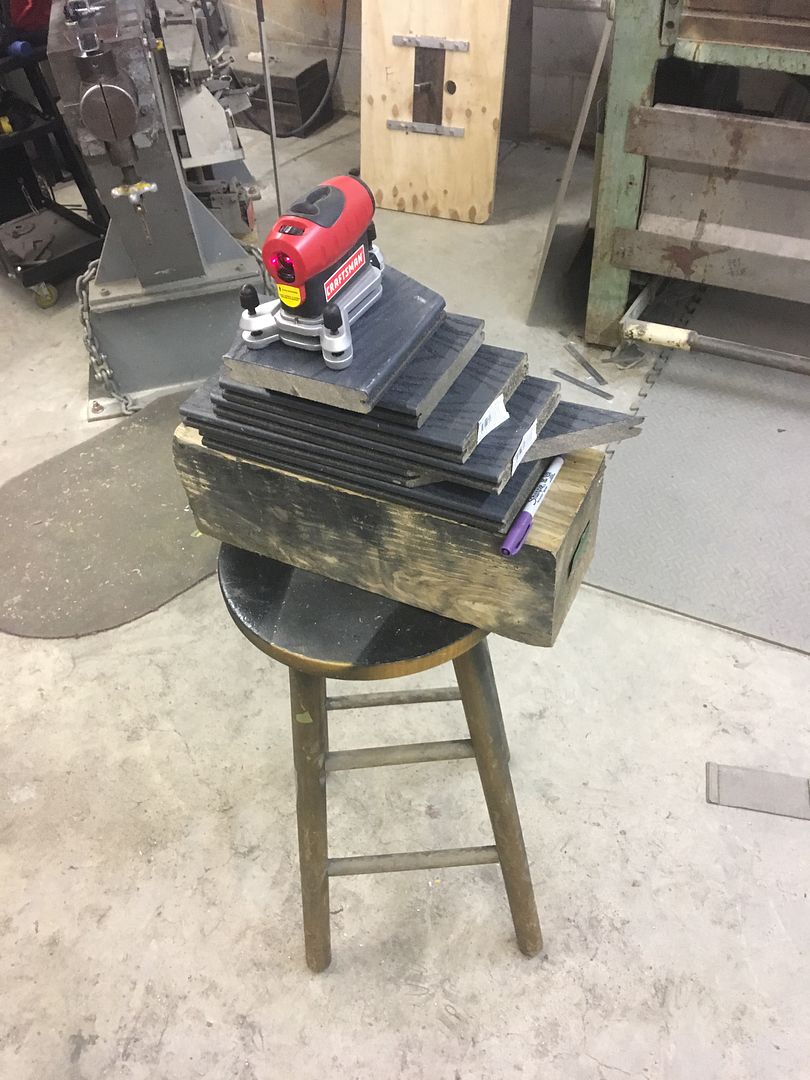
Prior to trimming the front of the fender we had measured some reference marks to the front edge for locating the new cut line..
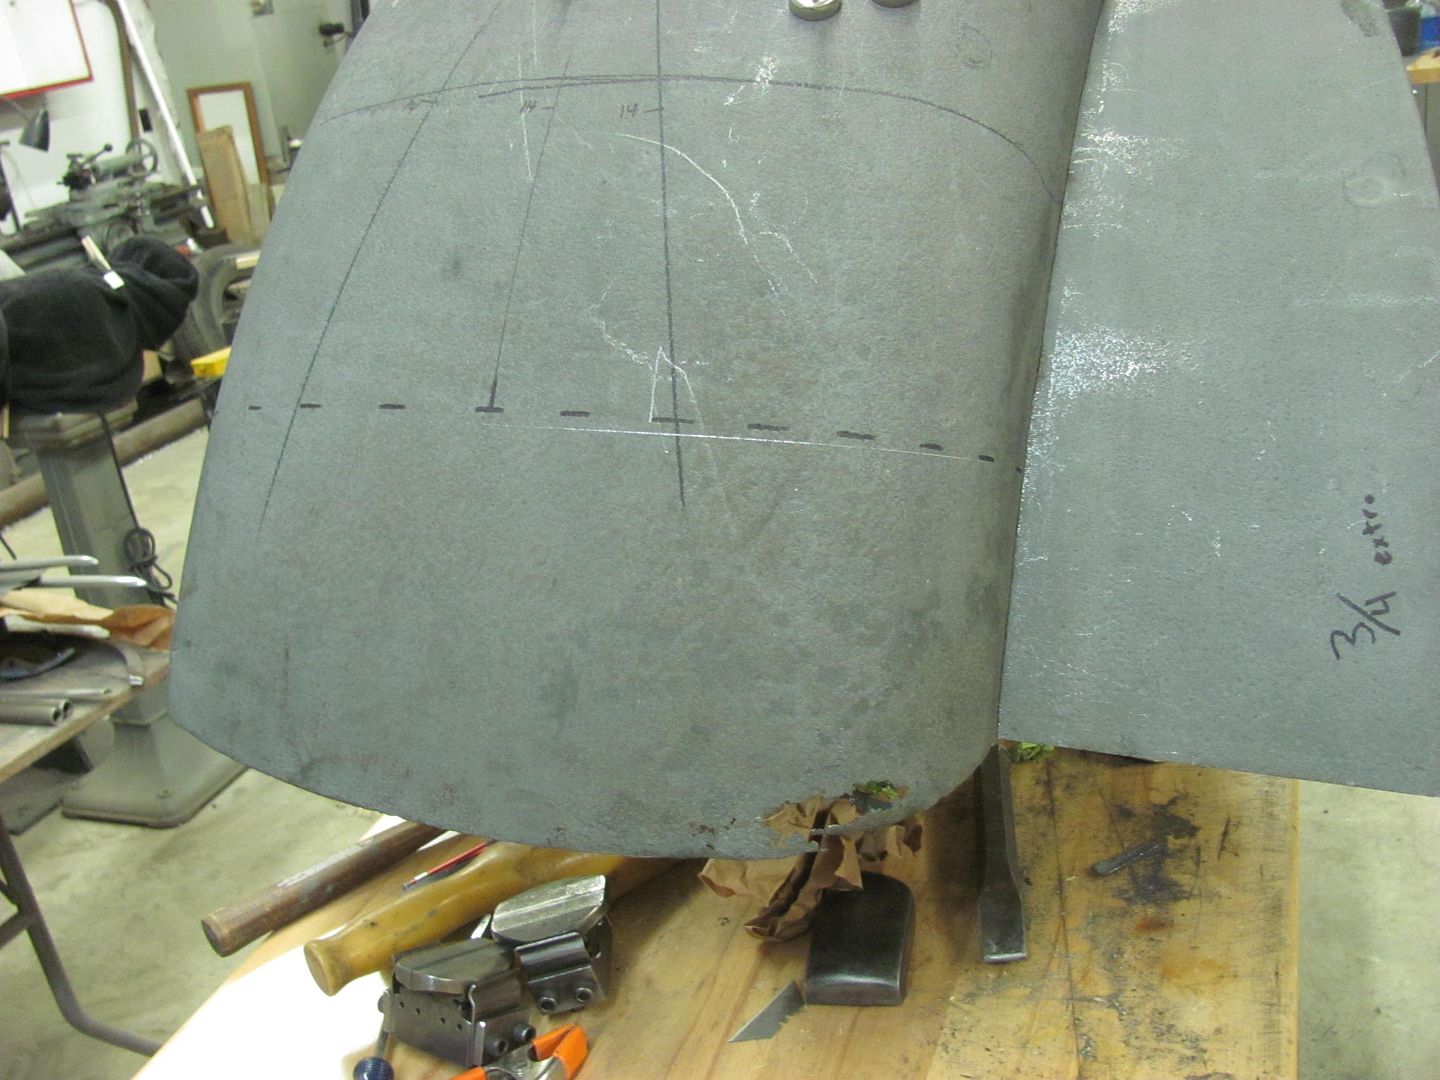
Adding those lower edge marks back on our fender patch, we adjusted the height of the fender front for the laser to match those marks by sliding our jack stand fixture around inside the fender until we had the correct height. Hey, this is technical stuff!

And traced the laser mark with the sharpie...
Initial cut to remove the bulk was done with the Milwaukee shear, the final was done with Midwest Shears. I figured slower = more precise...
Well, I need to make a little progress on a 16 gauge fender, so the highly precise stand for the Laser Level was used. We have about 13-3/4" difference in height from back edge of fender to front edge. So Laser is set at 13-3/4 above the table, with heights verified to all four corners of the table.
Prior to trimming the front of the fender we had measured some reference marks to the front edge for locating the new cut line..
Adding those lower edge marks back on our fender patch, we adjusted the height of the fender front for the laser to match those marks by sliding our jack stand fixture around inside the fender until we had the correct height. Hey, this is technical stuff!
And traced the laser mark with the sharpie...
Initial cut to remove the bulk was done with the Milwaukee shear, the final was done with Midwest Shears. I figured slower = more precise...
stinkity stoink
Well-known member
Great stuff Robert !!!!!! Always have great info, thanks !!!!!
BORING HOP YARD
Well-known member
Sorry for the delay, I had robotics after work. These are the only pictures I could get of the car.
I would like to see the front end.
Metal work was done by Donn Lowe in Oregon City, I don't know Donn but my co-worker said Donn is considered one of the best. The car then went to Marsh Burns to do the Paint work as well as some fabrication work. Marsh has been customizing car in the Gresham area for at least 40 years, could be more like 50 years.
I was told there may be some pictures on face book, If I can get any more pictures I will do so and post them.
Greg
Attachments


TimeWarpF100
Well-known member
Thanks!
Well, I need to make a little progress on a 16 gauge fender, so the highly precise stand for the Laser Level was used. We have about 13-3/4" difference in height from back edge of fender to front edge. So Laser is set at 13-3/4 above the table, with heights verified to all four corners of the table.
Prior to trimming the front of the fender we had measured some reference marks to the front edge for locating the new cut line..
Adding those lower edge marks back on our fender patch, we adjusted the height of the fender front for the laser to match those marks by sliding our jack stand fixture around inside the fender until we had the correct height. Hey, this is technical stuff!
And traced the laser mark with the sharpie...
Initial cut to remove the bulk was done with the Milwaukee shear, the final was done with Midwest Shears. I figured slower = more precise...
Nice use of those custom "height" tools!
How about a tripod next time you need a certain height for the laser?
Infinite adjustment . .


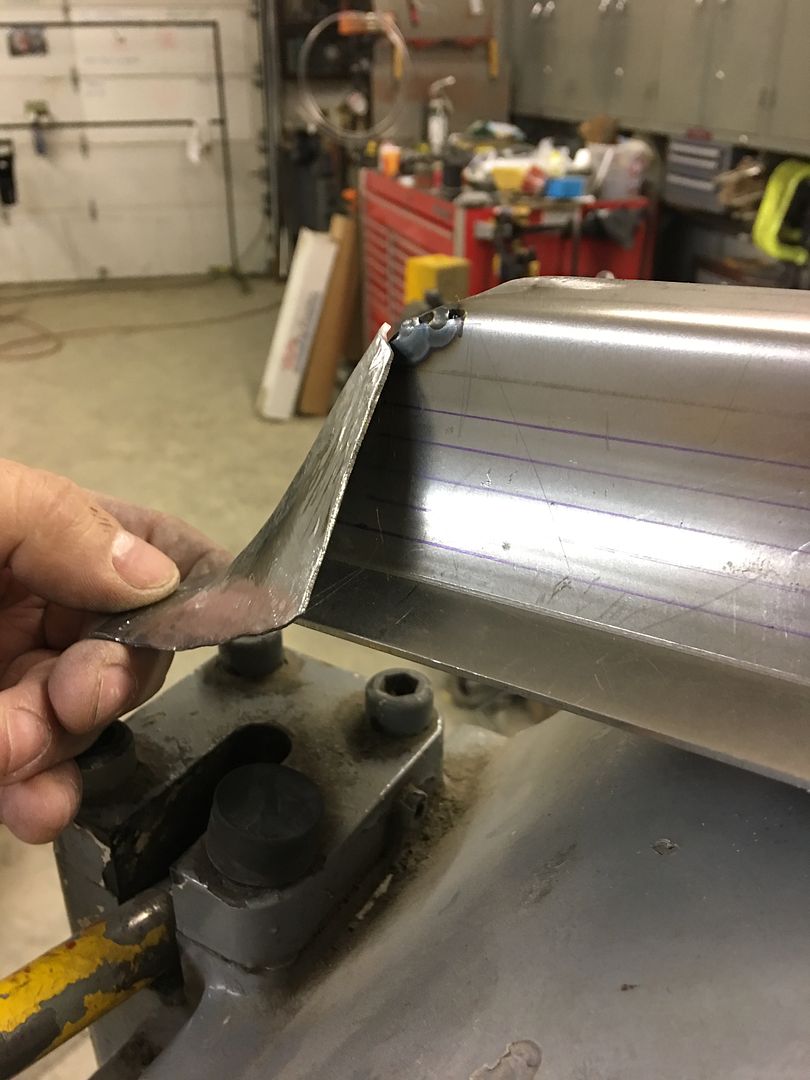
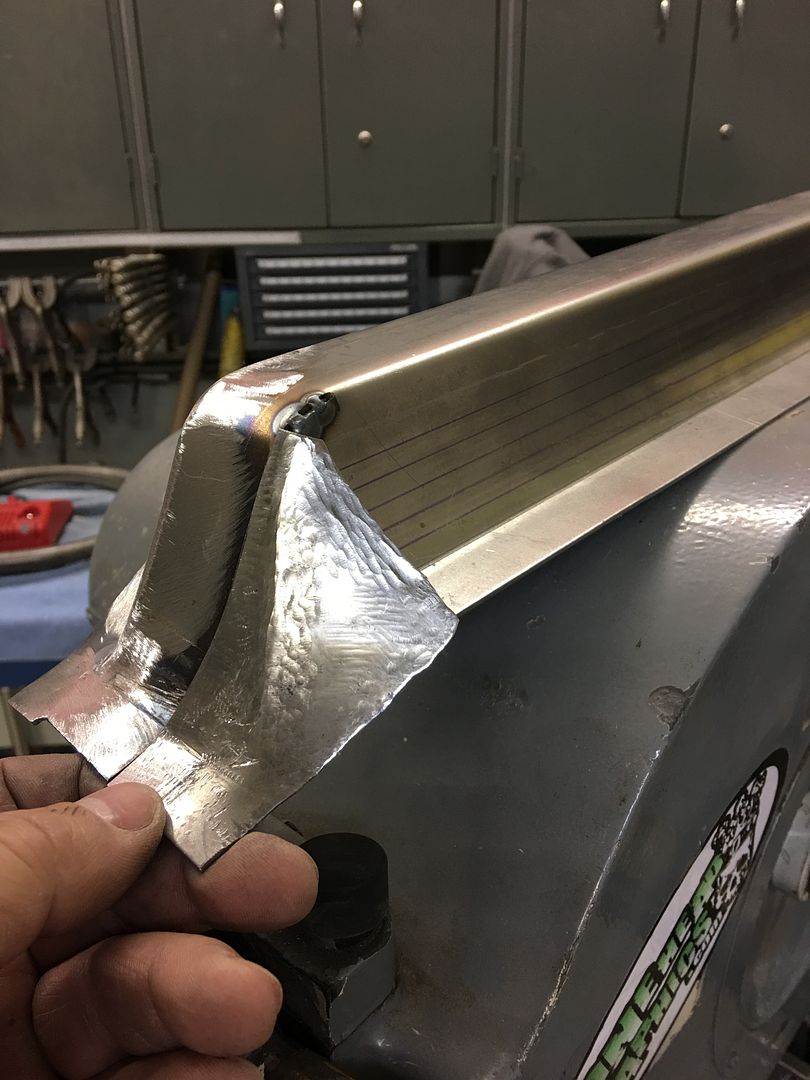
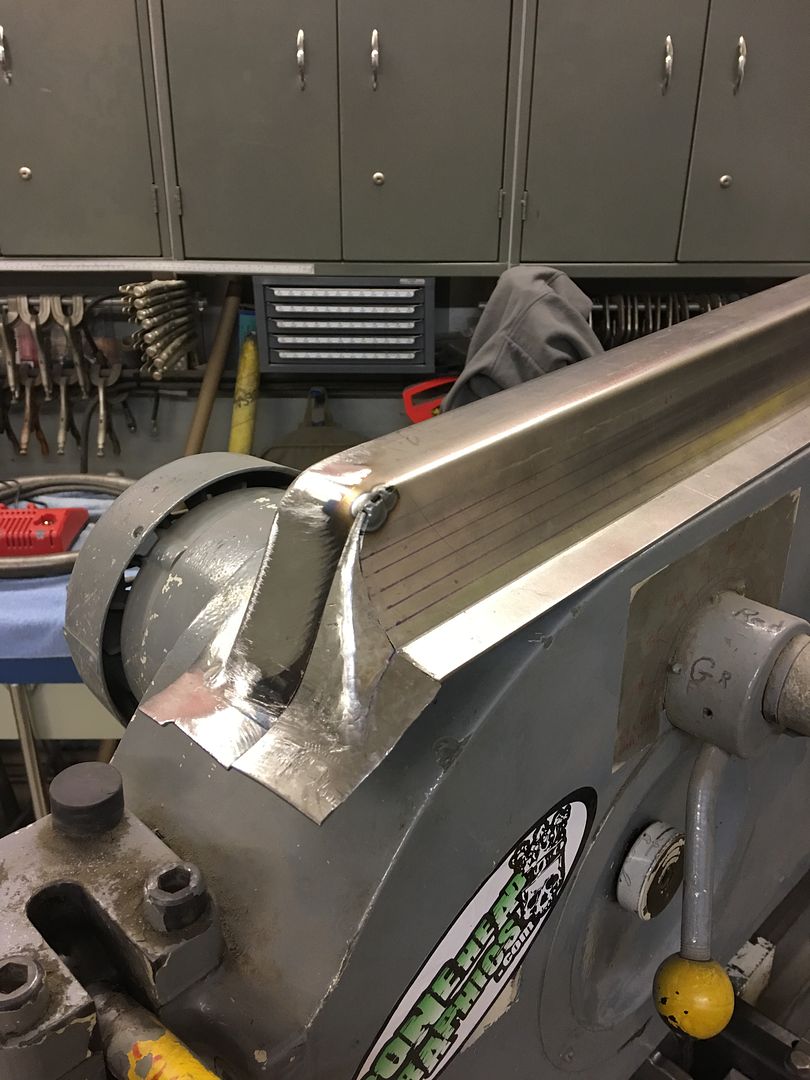
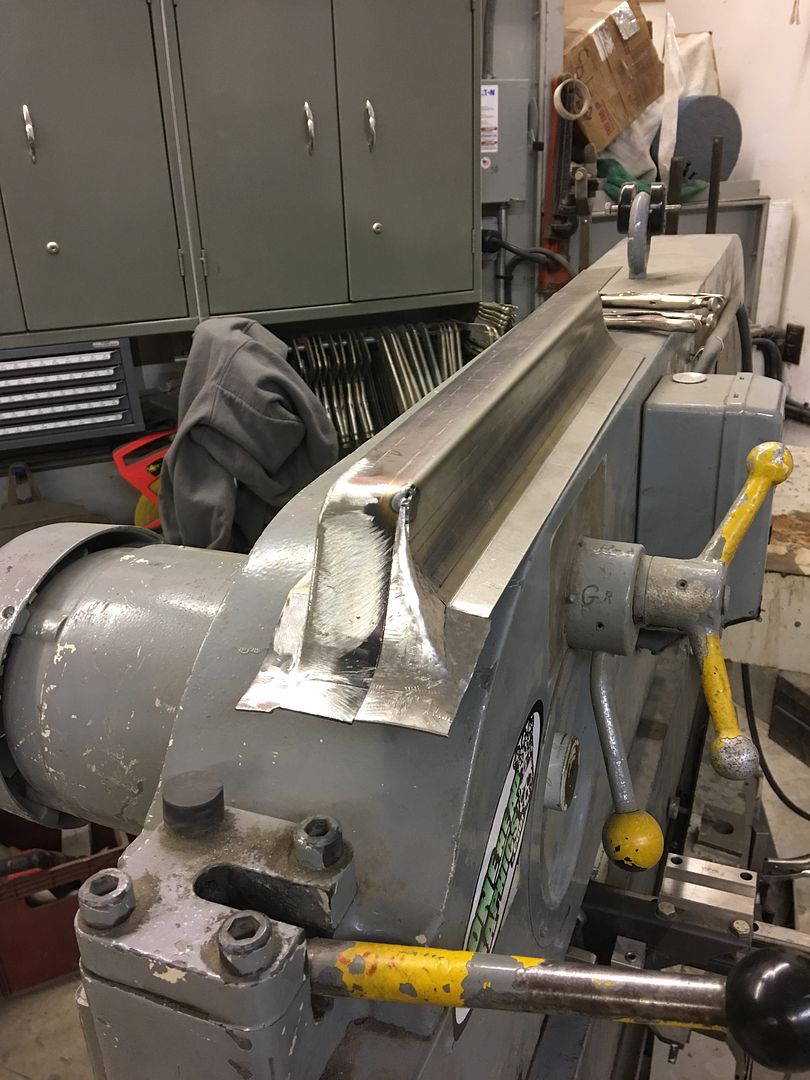
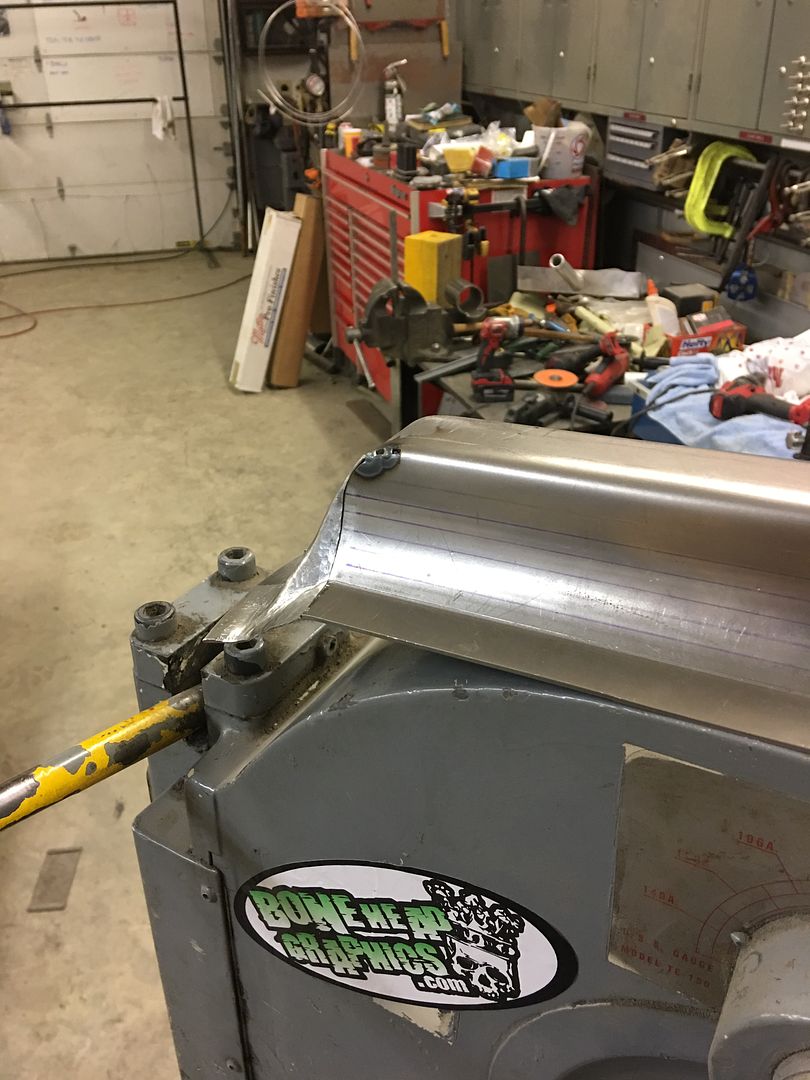
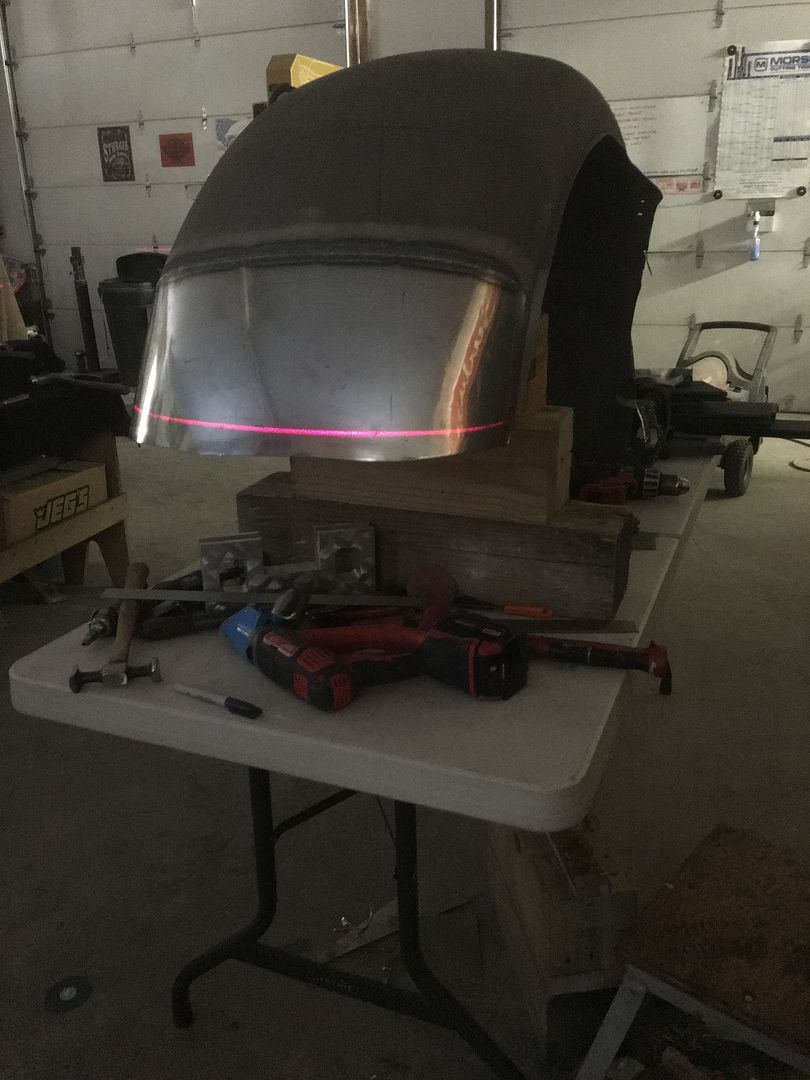
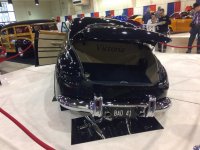
Doing a test fit of the Biederman fender....
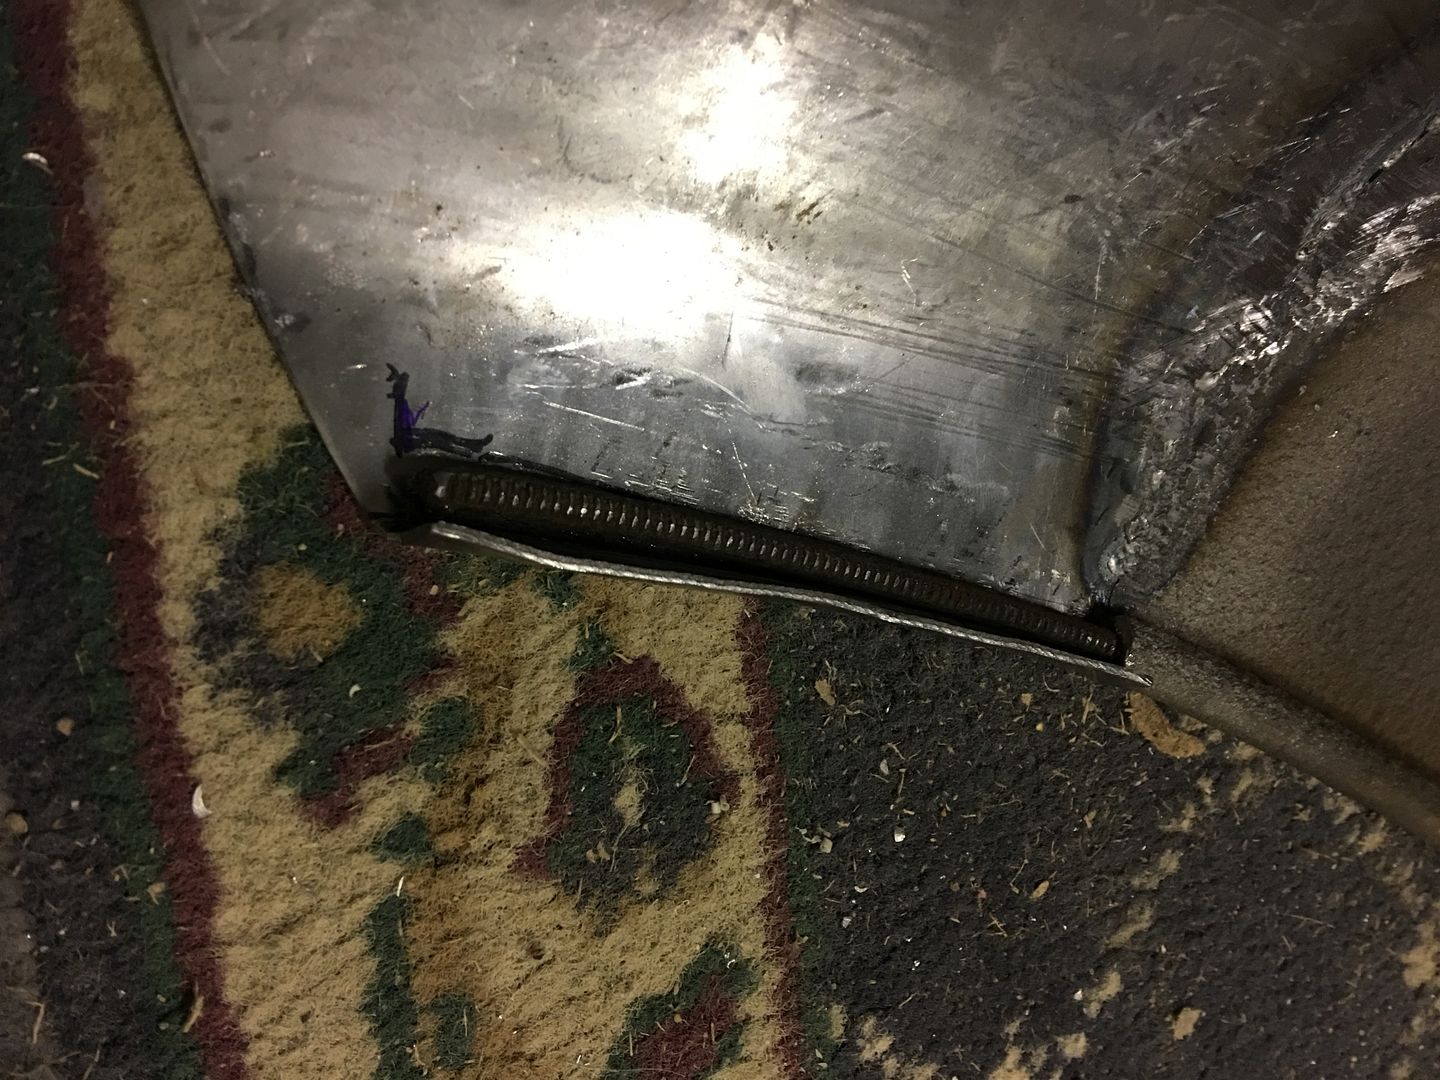
Was going to do a little bit of touch up on the front weld seam, needs more shape..
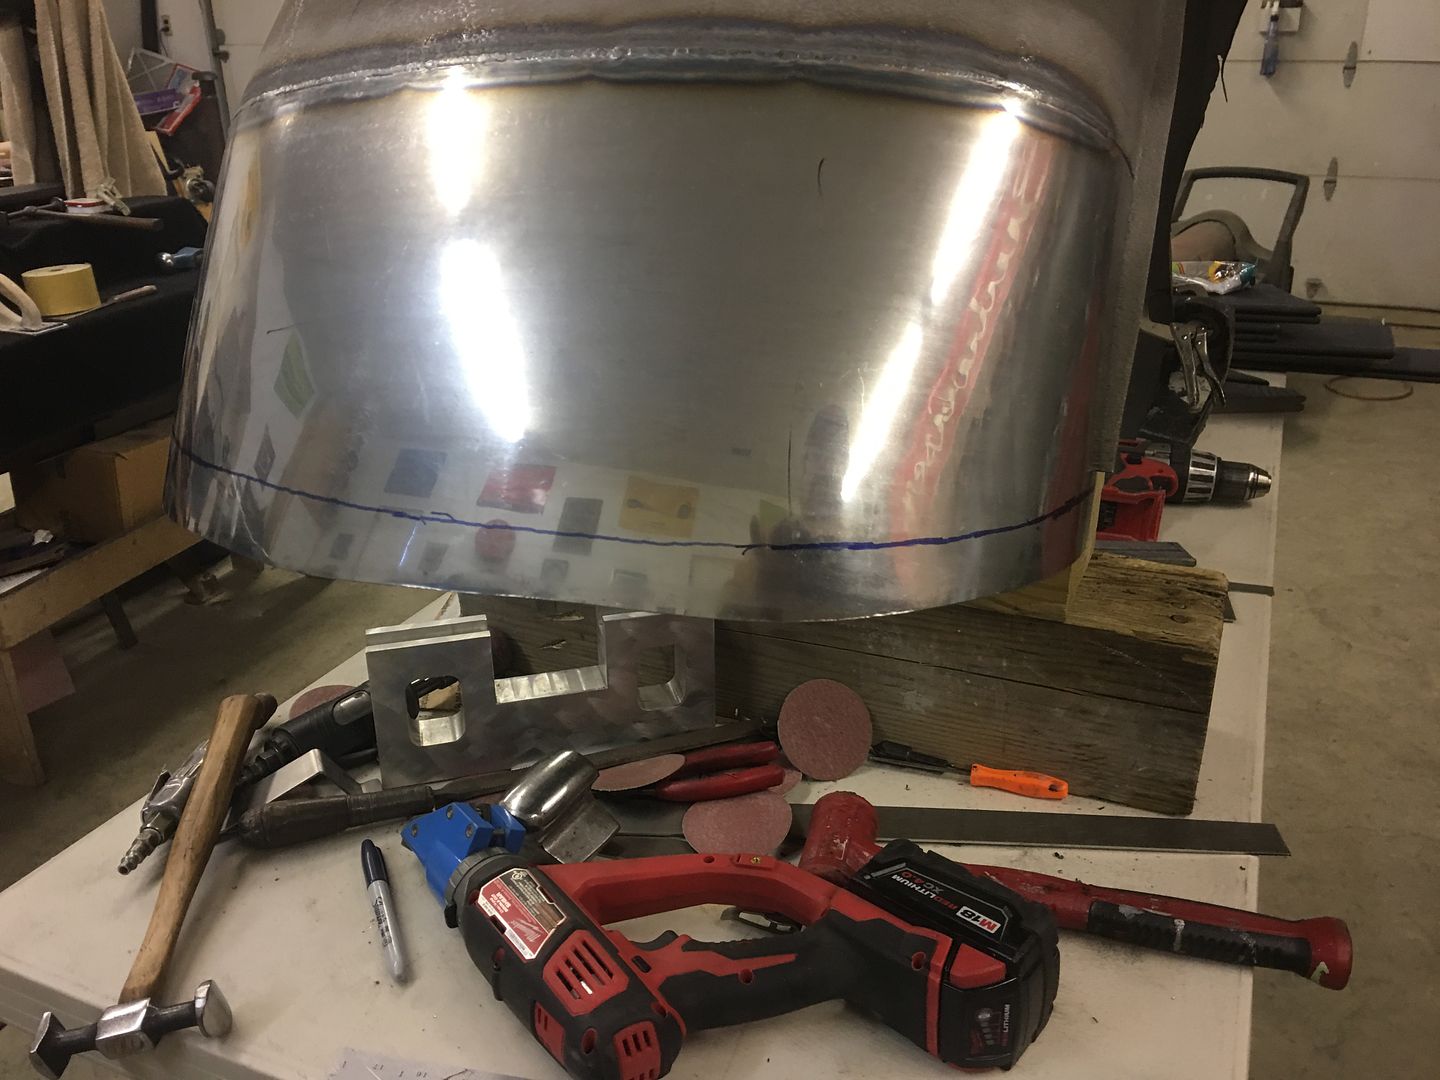
The fender spans about 53" at the bottom, where it wouldn't fit in the wheeling machine sitting on the floor. We added a lift kit under the legs, except for one which needed to be open under the leg..
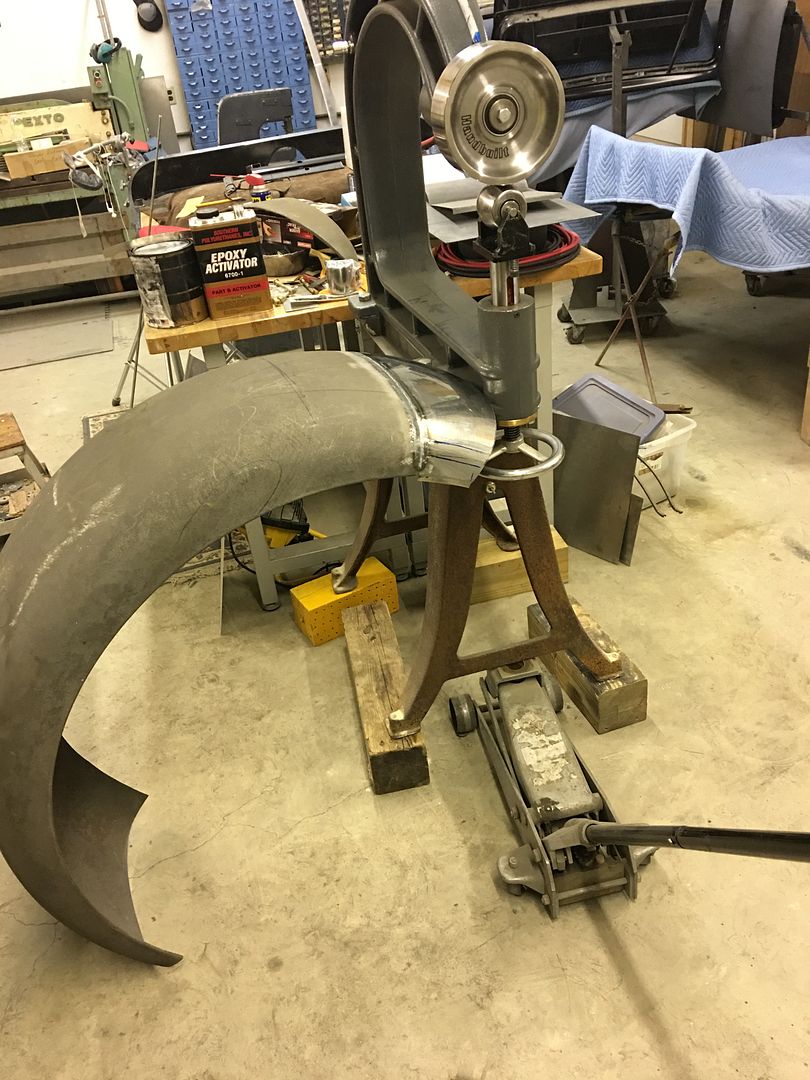
in process....
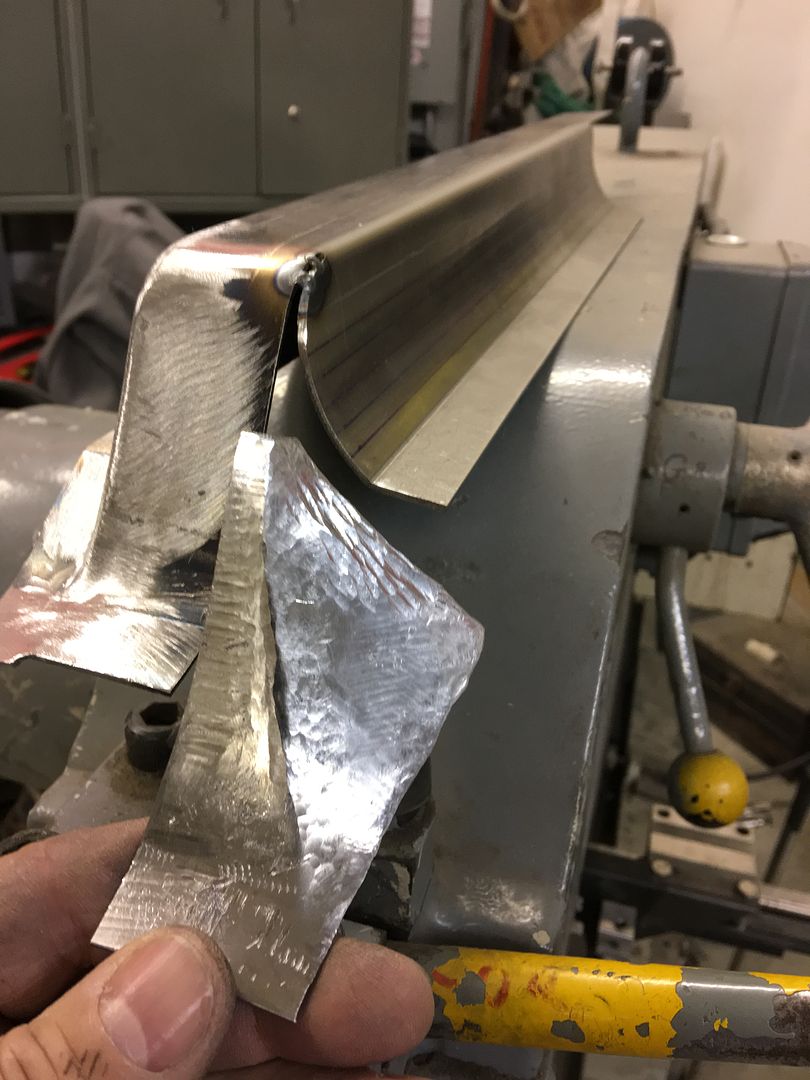
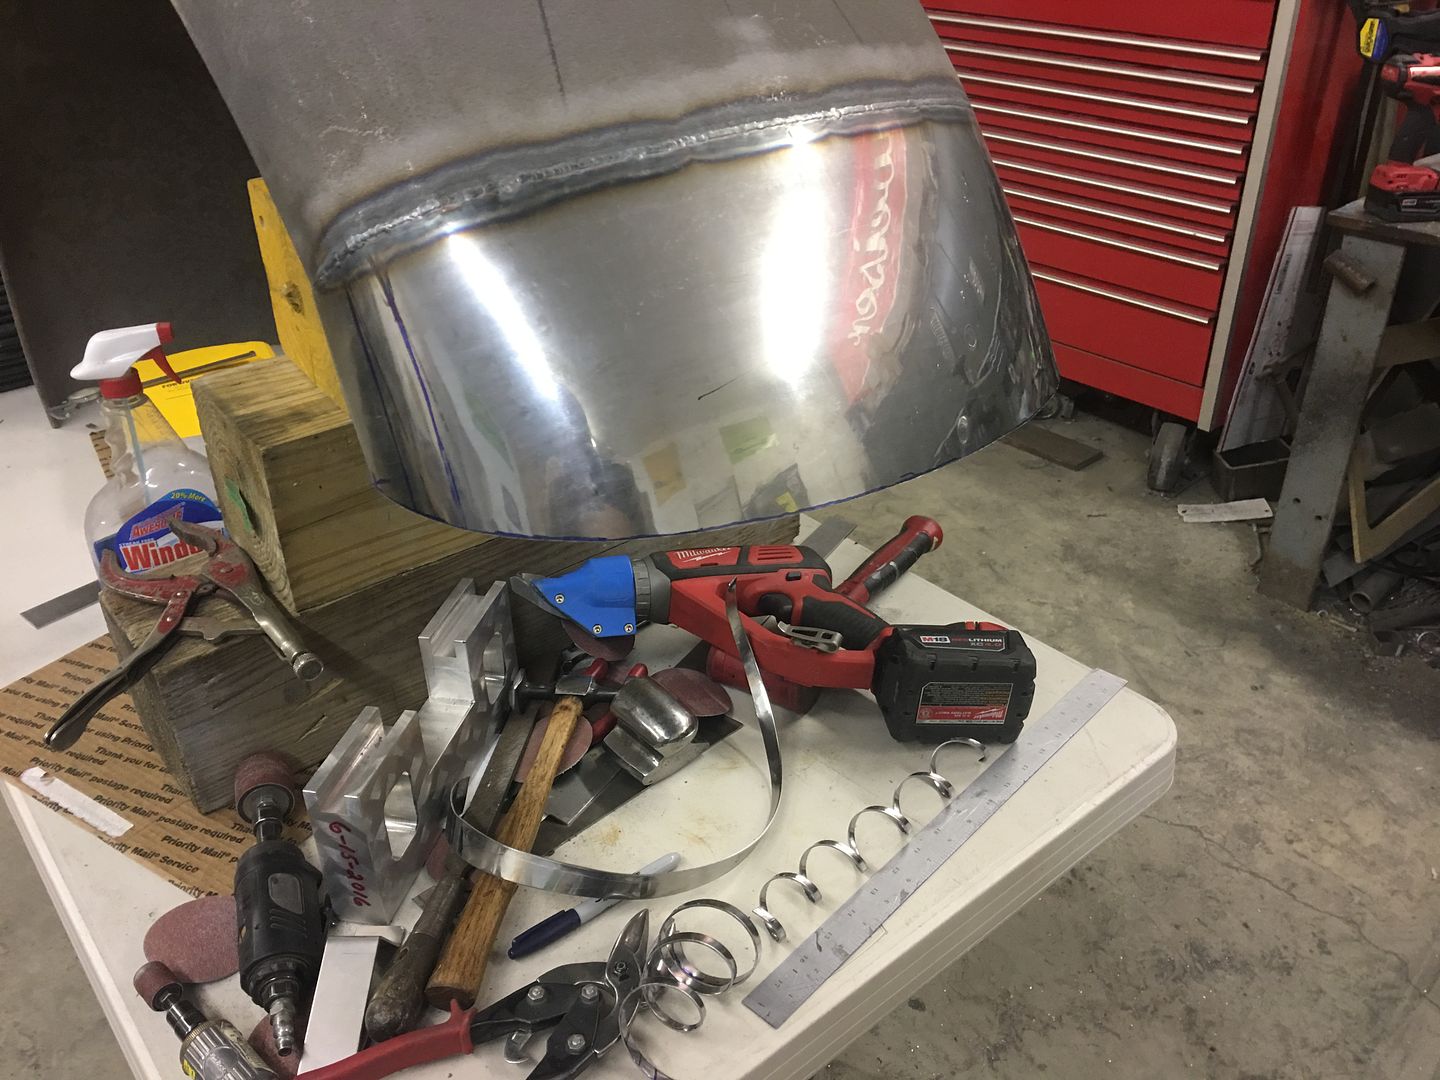
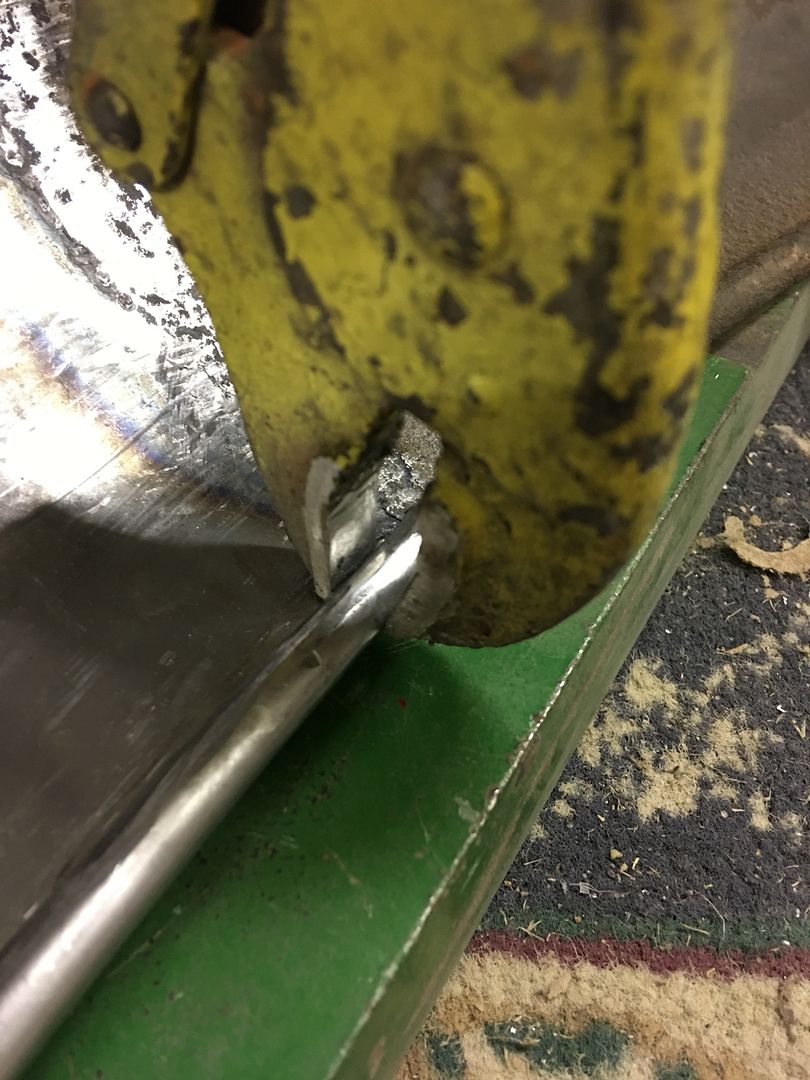
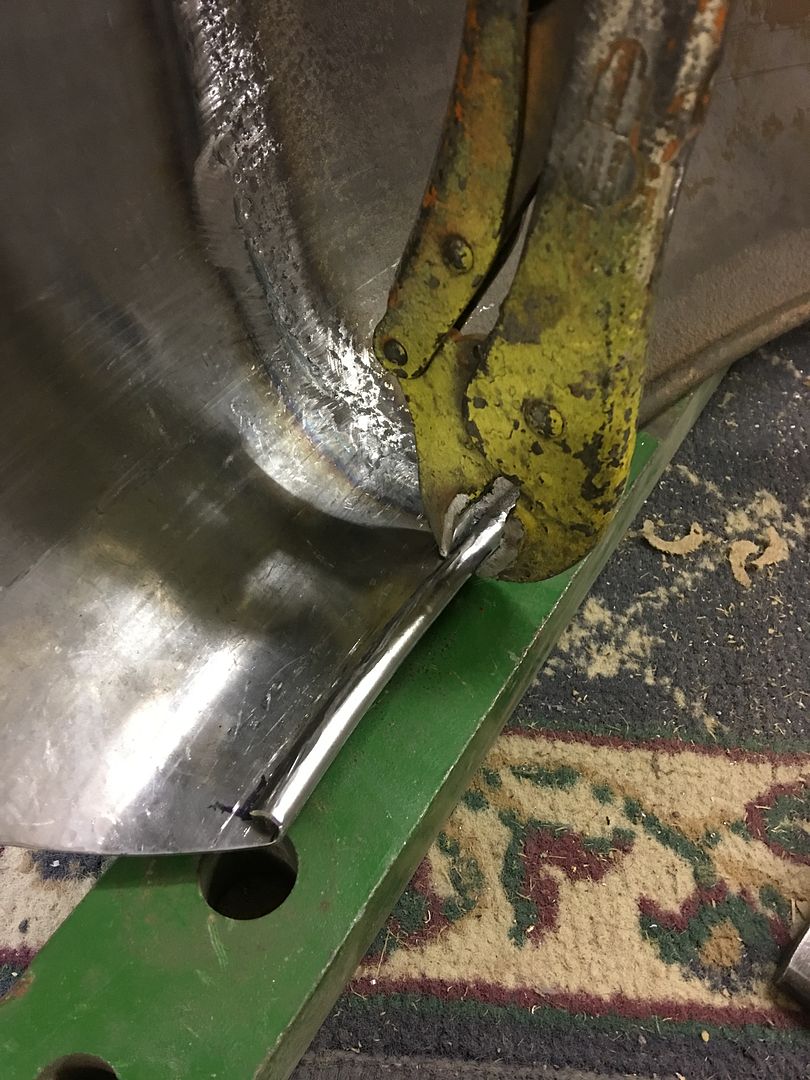
Needed to wrap the wire edge....
Note the genuine John Deere anvil...
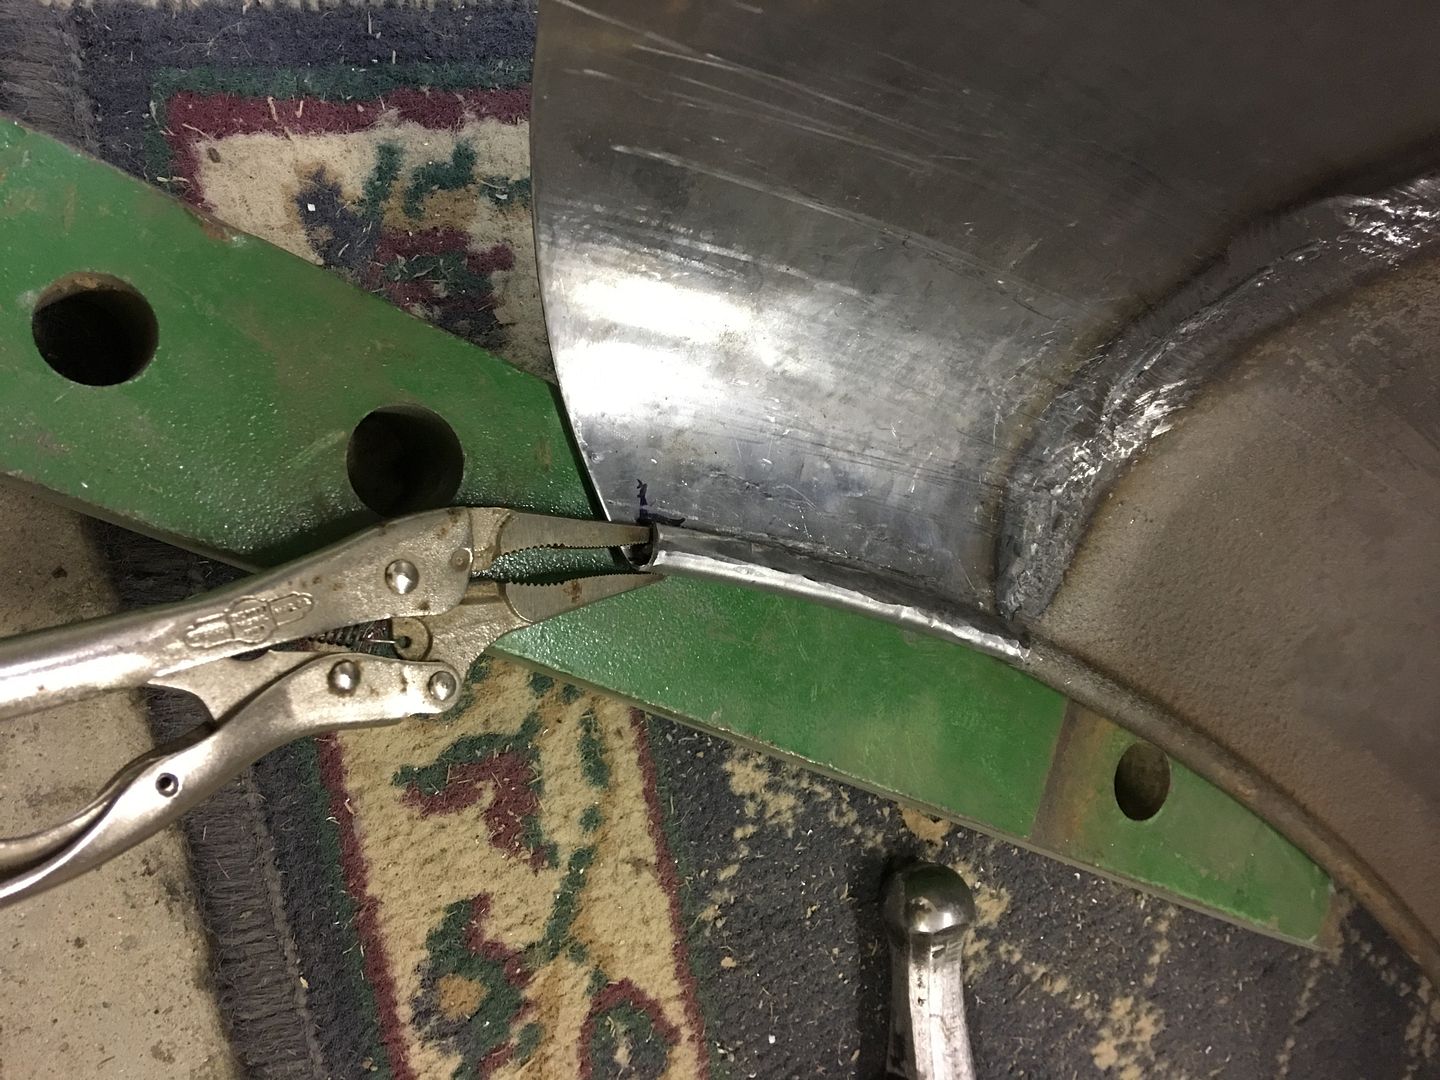
The flange was hammered over using various hammers and dollies (anvils) with the final wrap tightened up with a pair of vise grips modified with smooth jaws...

Was going to do a little bit of touch up on the front weld seam, needs more shape..
The fender spans about 53" at the bottom, where it wouldn't fit in the wheeling machine sitting on the floor. We added a lift kit under the legs, except for one which needed to be open under the leg..
in process....
Needed to wrap the wire edge....
Note the genuine John Deere anvil...
The flange was hammered over using various hammers and dollies (anvils) with the final wrap tightened up with a pair of vise grips modified with smooth jaws...
Ohmthis
Well-known member
Timewarp and Robert, awesome ideas on the laser and tripod. I need to "invest" I a couple junk tripods
BassProCamaro97
Well-known member
I love this thread. I hope to have 1/2 your talent one day
zmotorsports
ALLIANCE MEMBER
Love the way the seat base turned out Robert. Great job as usual.
Mike.
Mike.
GLTHFJ60
Well-known member
Damn, nice work.
I love this thread. I hope to have 1/2 your talent one day
Too bad you're not closer!
Timewarp and Robert, awesome ideas on the laser and tripod. I need to "invest" I a couple junk tripods��
Love the way the seat base turned out Robert. Great job as usual.
Mike.
Damn, nice work.
Thanks for the comments guys!