To avoid these ads, REGISTER NOW!

My 24x30 garage expansion project.

Fastback

Well-known member
Joined
Oct 5, 2010
Messages
518
Location
Indy
Well, I started this project in October 2010. I purchased a car on Sept 1 and soon realized I wanted to tinker in a big way.
Once the weather started to shift I knew I did not have enough room to take on a winter project in my current garage space, it seems my wife wants to park in the garage...WTF?

I have done work in the past in my current unheated garage but never really liked working in the winter months. I rebuilt the motor from my FXR last winter and it sucked bigtime. I would spend money on kerosene to heat the space, wait for the heater to warm the shop up, then go back outside to find the tools and metal stay freezing. Im not interested in doing that again.

Anyway, after much discussion about the current economy, finding a decent amount of help and everything else that goes into this kinda project we decided to go for it, it was either that or make the wife park outside and scrape ice off of her car? I guess she REALLY likes not doing that.

I was initially going to build on another 15 feet to the side of my current 24x30, just enough to work on one project at a time in a heated space. I figured I would be leaving the air compressor and grinders, lathe and other mess makers on the "Dirty side" because in the warm weather months I need them for my business.

Anyway, the wife, being just about perfect told me to "go big or stay home", she actually said it wont cost much more to double the current garage space over just adding 15'. Wow. In reality she was right, the labor really did not change at all, and the materials difference was low.

So, I doodled up some stuff on Google sketch-up (after I learned how to use it) and came up with a design.
(Do not scale the drawing)
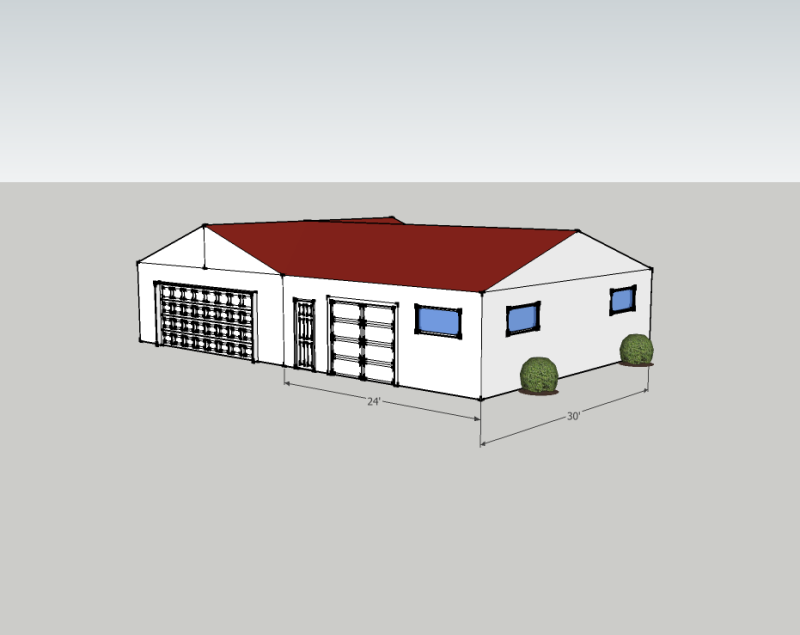
doublegaragefrontdoor.png


I initially had the service door on the side of the building, but the wife pointed out that if I wanted to carry anything from the door to the old side of the garage I would need to walk past my car and bikes....so I moved the door to the front, good catch!


I knew I wanted windows for light, I drew these in without thinking about cost, but it turns out that they were under $100 each for thermo-pane.

------------------------------------------------------
 
To avoid these ads, REGISTER NOW!
OP
F

Fastback

Well-known member
Joined
Oct 5, 2010
Messages
518
Location
Indy
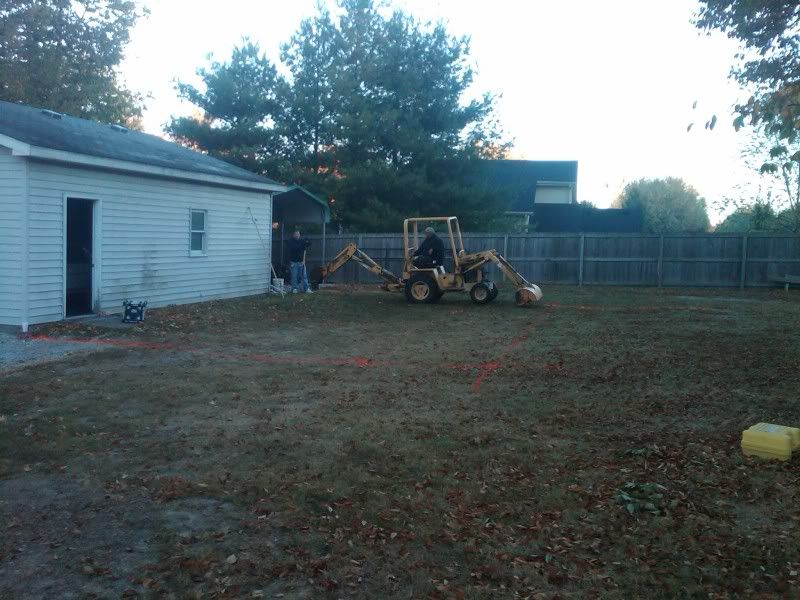
Basically I just took that google drawing and a few others in for the permits, and handed them to a couple of guys that I know could build it, they had done work for us in the past. They have day jobs building large commercial buildings and were doing this on weekends. They started on the footings.

I happened to have a Terramite laying around, so that saved me some money for sure, but the guys would have preferred a nice Mini-X.

Trench.jpg


We put 2" foam around the inside of the footers.
footers.jpg


It actually took a while to get it to this point. I wanted it level and square, good thing that's not extra.

We put another course of 4" solid block on top of the block shown, this block in the photo would end up being the forms for the slab.

foundation.jpg


My garage door opening is just 10" wide. I did not want another wall that opens up...to much R value lost, and I wanted more wall space.

wallsphoto.jpg
 
Last edited:
OP
F

Fastback

Well-known member
Joined
Oct 5, 2010
Messages
518
Location
Indy
It slowed some for Thanksgiving and we had much discussion about how to pour, who would pour etc... The guys building really did not want to handle that, it seems the boss is a **** and wanted it perfect, but I decided to have an old friend do it that does most of the Wall-marts and Super targets around here.
I was really lucky that it was nearing the end of the season, and that he had some time on a Saturday to help me out. We talked back and fourth about using cement with integral color like the local Super Target and Wally worlds. I really liked how they looked all "Swirly" and asked him if he could do that for me...No problem he said.

I already had the insulation and PEX installed with the PEX attached to the steel and the steel elevated on chairs. After doing some research I decided that having the PEX elevated in the slab was essential. People spend serious money on 2" foam just to staple the PEX right to it, I do not subscribe to this method at all.

Here is the red mud being dumped.
pour.jpg


Here it is poured and mid-trowel. you can see a hint of the black swirls.

Powertrowell.jpg
.

Sofcutt machines do a nice job!
soffcut-floor.jpg


I know some of you are wondering...24" OC 2x4 studs?
 
Last edited:
OP
F

Fastback

Well-known member
Joined
Oct 5, 2010
Messages
518
Location
Indy
Now, the point of all this was to have a warm place to work in the winter, and 2x4 walls 24" on center is not exactly optimal, but if you look the bottom plate is a 2x8. I basically built two walls, one for the outside and one for the inside. Once I put up the interior 2x4 studs I ended up with a thicker wall then I would have with a 2x6 stud, and I have less telegraphing of temperature since the studs are not always tight against each other.

I did not get any shots of the studs, but it was not rocket science. Here is a shot of the R-30 insulation going in and some wall boards going up. I know the R-30 was compressed slightly, but not much. I used 7/16 OSB for the interior walls.

IMG00175-20101213-1427.jpg


The ceilings needed to be high in case I ever got a lift, the original garage has 9' tall walls and I wanted these to be 10' at least, the builder just cut the soffit back on the old wall and moved the transition over into the old roof-line so you could not tell the buildings have two different wall heights.

We ended up with 11'4 to the ceiling, with lights that will put me at 11' in height for 16' in length, and I can deal with that.

IMG00187-20101228-1845.jpg


More R-30 on the ceiling, where the ceiling has an angle we had to drop down to R-19. You can see the old window that goes into the old shop, we took the siding off and cleaned and painted the plywood.
 
OP
F

Fastback

Well-known member
Joined
Oct 5, 2010
Messages
518
Location
Indy
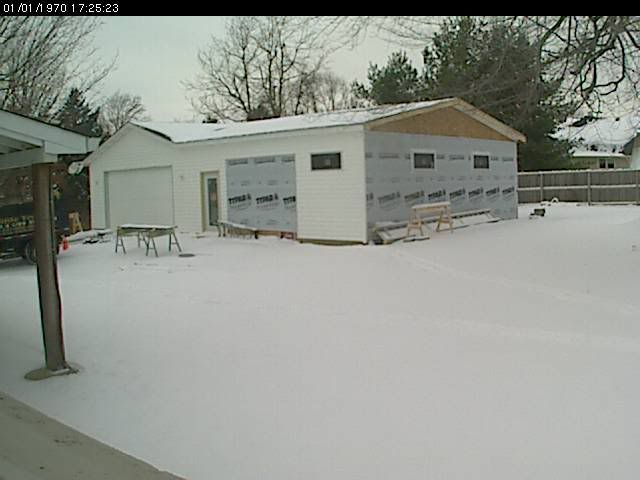
Here is a shot taken during the siding installation. It actually looks like my sketch-up!
12_13_10.jpg


We painted the walls with an airless sprayer and it really did not take nearly as long as the prep. The ceiling was put up after the walls were primed and painted, that was a real time saver, we just had to lay plastic down to cover the floor.

The ceiling is "Dura-panel" from Menards. It's basically a thinner gauge metal than they use on exterior barn sides. The ceiling and J-Chanel came in right at $400 on sale/basic white for my 720SF.

I used six 8' fixtures that use 4' bulbs, I dont think I need much more than that, but I can add more later since I ran everything in conduit.

IMG00199-20110105-1601.jpg


To get the floor looking good I needed to make the floor warm enough to fill the saw cuts and apply a sealer, that meant I had to figure out how to build a radiant heat system. I started with a cheap instant hot water heater that we already had, these things are only $200 on Ebay and while it may not be the cheapest way to make a BTU I cant see $4000 for a LP unit right now. I think I would go with a wood boiler first and then let this little unit kick in on those weeks/months that dont justify a fire.

Here is my DIY system with handy call outs that may answer some questions.
IMG00214-20110118-1236-1.jpg


Next up Flooring!
 
OP
F

Fastback

Well-known member
Joined
Oct 5, 2010
Messages
518
Location
Indy
OK, now on to the floor finish. I have had Epoxy in the past, and it's great, but it's $3 a square foot. So 720sf x $3 =$2160, on top of the slab costs. I started looking at the floors in large commercial areas and found that I really liked the floors in the large marts around here, I saw it in different colors and visual textures and the marble look is really cool, and it's not on top, but its "in there". I was going to acid stain it, but my friend the pro talked me into paying up front for the color in the mix and it turned out that it was really not that expensive. I did have to pay $100 per truck extra just for a wash fee.

The first thing I had to do was clean out the cuts and insert backer rod, then I masked off both sides of the joints and filled with SL-1 self leveling filler in the standard limestone.

IMG00216-20110120-1205.jpg


This actually took a while to prep and apply, then I let it sit for a few hours and unmasked. Then I allowed it to dry overnight.

Then next morning it was a good mop job, then it was time for the clear.
Here is the floor in it's dry state with just a little cure-n-seal left on it, I hit the darker spots with some xylene and feathered the edges.

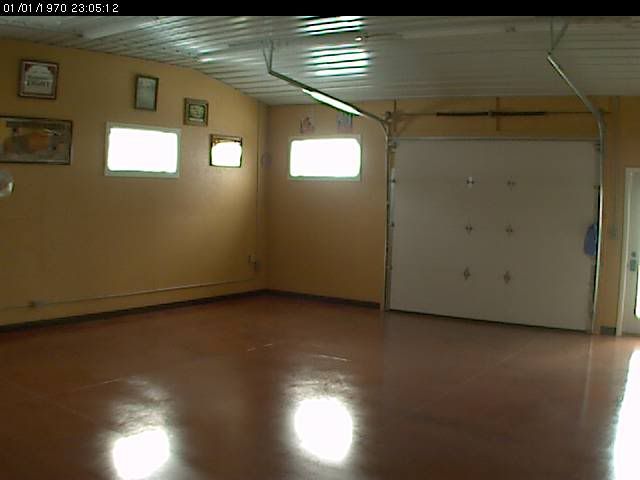
In this photo some of the damp spots from the mop remain., its just a screen grab from the security camera.

floorbefore.jpg


In this picture you can see the same shot with the clear once it has dried.

floorafter.jpg


Here are some more shots from my Blackberry.

IMG00226-20110126-1538.jpg


IMG00225-20110126-1537.jpg


IMG00224-20110126-1536.jpg


Different lighting and angles change the look. For the time and money invested I think this is a cheaper way to turn a slab into flooring, and the red makes it have a warmer feel. Down the road I can always use some clear epoxy if I feel I need it.
 
OP
F

Fastback

Well-known member
Joined
Oct 5, 2010
Messages
518
Location
Indy
Then I moved on to audio, decorating and hanging some of my beer signs, for some reason my wife would never let me hang these in the house? Go figure?

IMG00228-20110126-1539.jpg


(This pic is actually pre-shiny floor)
garagewall.jpg


This is two cheap RTA night stands that I pinned together with some steel dowel, it holds the HK stereo amp in the bottom and two 1/2 rack pieces, a Parasound Tuner and pre-amp. The speakers seen are Klipsch Hersey's.

IMG00227-20110126-1538.jpg


In this pic you can see the top of the garage door tracks, I had the installer cut some of the top track just before the bend and tilt it to match the ceiling angle. You can also see the Bissell garage vac, best bang for the buck out there and nothing to fall over when I try to move about the shop, 30' of hose!
IMG00230-20110126-1539.jpg
 
OP
F

Fastback

Well-known member
Joined
Oct 5, 2010
Messages
518
Location
Indy
Well, the other day I took a trip to both Gregg Smith Equipment and Complete Hydraulics. Indy is the home base for Gregg Smith, and I gotta say they had one hell of a display!

Here is a shot from the front door.
IMG00223-20110125-1314.jpg


While I was there I kinda remembered that I had a credit card in my wallet...


So....


I got me one a these.

IMG00235-20110127-1141.jpg


And one a these.

TPPROJACK-3500-2T.jpg


Now I need to start work on one a these.

IMG00042-20100902-1924.jpg


To the Garage Journal and to all of those who contribute here, I asked many questions and learned a lot, and I thank you all!

Alex
 
To avoid these ads, REGISTER NOW!

wtfovr

Well-known member
Joined
May 30, 2009
Messages
145
Can I hate you at the same time I love the new garage and the lift and the car and the everything else in the pics?

I have a 26'x37' that I would love to punch out another 15' but my wife is no where on board with that idea.

The flooring came out great.
 

robs400

Well-known member
Joined
Aug 19, 2010
Messages
116
Location
Central MA.
That floor came out GREAT!!. Would you mind shooting me a PM on how much of an adder it was for the color, or was it just the $100 wash fee and thats it? If you had any info on the staining I'd be interested in hearing what you found out on that as well. I have an existing slab thats why I'm asking...however I have a slab in part of my house that I will hopefully be getting poured this year that the premix would look great on
 
OP
F

Fastback

Well-known member
Joined
Oct 5, 2010
Messages
518
Location
Indy
That floor came out GREAT!!. Would you mind shooting me a PM on how much of an adder it was for the color, or was it just the $100 wash fee and thats it? If you had any info on the staining I'd be interested in hearing what you found out on that as well. I have an existing slab thats why I'm asking...however I have a slab in part of my house that I will hopefully be getting poured this year that the premix would look great on

I looked up my receipt,14 cubic yards itself, (not counting winter mix fees and Saturday charges) in red was about $130 per cubic yard. I used 6 bag 6000PSI.

Find an experienced installer that has done this kind of work, he will know how long to power trowel it, the trick is to overheat it and add the black areas without pulling the cream off and showing rocks.

For staining advice just do a search on youtube, its silly how easy it can be. I dont know how durable it is so if you are using it in a garage environment I would consider a clear epoxy over the stained surface. If you chip it, the natural gray of the floor will stand out. On my other side I will be staining and using an Epoxy, that side will see more oil and metal shavings.


Thanks for the kind words guys. It really is something I have wanted for over a decade. Once I got my first garage done I had to move in right away, and I swore I would cover the walls with drywall one day, but once the walls were obstructed with tool boxes and everything else it became impossible, as did keeping it clean.
 

Cars&Classic

Well-known member
Joined
Apr 2, 2011
Messages
190
Location
Carmel, Indiana
Well, the other day I took a trip to both Gregg Smith Equipment and Complete Hydraulics. Indy is the home base for Gregg Smith, and I gotta say they had one hell of a display!

Here is a shot from the front door.
IMG00223-20110125-1314.jpg


While I was there I kinda remembered that I had a credit card in my wallet...


So....


I got me one a these.

IMG00235-20110127-1141.jpg


And one a these.

TPPROJACK-3500-2T.jpg


Now I need to start work on one a these.

IMG00042-20100902-1924.jpg


To the Garage Journal and to all of those who contribute here, I asked many questions and learned a lot, and I thank you all!

Alex

love the car and the garage Alex, I just finished a 67 getting ready to start a 66. How far away are you? I am at 161st and meridian
 

Attachments

  • Washington-20111220-00684.jpg
    Washington-20111220-00684.jpg
    142.9 KB · Views: 7
OP
F

Fastback

Well-known member
Joined
Oct 5, 2010
Messages
518
Location
Indy
love the car and the garage Alex, I just finished a 67 getting ready to start a 66. How far away are you? I am at 161st and meridian

Man, you are way up there! I'm down on the south side, greenwood way.

Love the 67, I had one in high school. I would love to have another but they have gotten out of hand price wise.
 
Last edited:

Cars&Classic

Well-known member
Joined
Apr 2, 2011
Messages
190
Location
Carmel, Indiana
we usually cruze down to greenwood every weekend to hang out at orileys or suds, 45min to orileys from here. we should meet up down there in the spring.
 
OP
F

Fastback

Well-known member
Joined
Oct 5, 2010
Messages
518
Location
Indy
we usually cruze down to greenwood every weekend to hang out at orileys or suds, 45min to orileys from here. we should meet up down there in the spring.

No doubt, although my car may not see the sun till July at the rate I am progressing.
 

fas10

New member
Joined
Jul 19, 2010
Messages
1
Location
Indiana
Nice add-on! Love the floor! Considering add-in color over an epoxy sealer myself. I was wondering what u used below the wire mesh (concrete?? ) & what you used to elevate the wire mesh? You mention "chairs" but never heard that term. The pics look like a rectangular tubing or something?

Thanks for shedding a little light on your install.
Again nice job!
Eric
 
OP
F

Fastback

Well-known member
Joined
Oct 5, 2010
Messages
518
Location
Indy
I just used a reflective insulation on top of compacted ""washout",that's the stuff they get when they clean out cement mixer trucks, fwiw it's usually free.

I used steel grid from the concrete supplier, it's sold in flat sheets and lays flat without curling up on the edges. You lay it out and wire or weld it together.

Then I tied the pex to the steel, obviously. The chairs are for menards, they are plastic disks that are designed to twist n lock onto the steel mesh. They elevate the steel so that it can do its job, but it also elevates the pex and that was my main goal.
 
To avoid these ads, REGISTER NOW!
Top Bottom