To avoid these ads, REGISTER NOW!

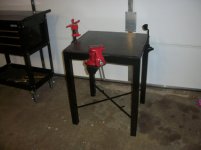
My 37 cents per pound welding table…

creativecars

Well-known member
Joined
Nov 15, 2010
Messages
4,300
Location
Indiana- where horse and buggies still roam
My 37 cents per pound welding table…
Here is the deal, I am very frugal, usually. :thumbup:
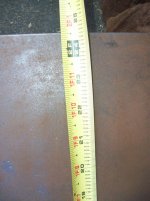
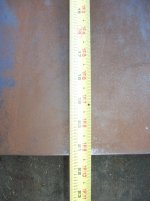
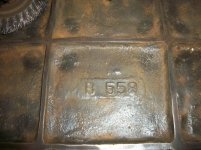
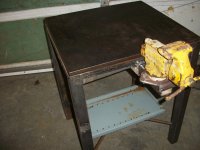
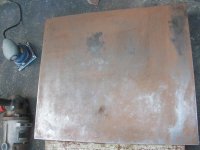
The Mission: I had been wanting/needing a welding/fab table and happen to be at C. Henry Steel where they allow you to wander around their secondary steel yard and pick out what you need. If the piece is too long they will cut it to length… for a fee. I happen to see this cast iron piece sitting in the corner and asked the guy about cast, yep… the same price. That got me excited. I’m not sure it should have gotten me excited, but it did.

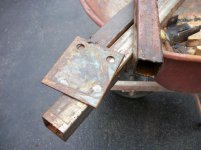
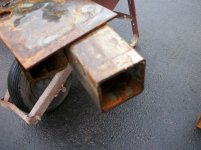
I then started planning this table out in my head, all to fit the iron piece I just found. I spotted some square tubing, angle iron and flat strap to go along with the cast piece. Turns out the top piece weighs 115 lbs. and the assembled table frame weighs 55lbs. That is without other additions. So my table is now up to 170 pounds X $.37 for a total of $62.90 plus tax. This does not include construction consumables of cutting disc, torch, welding rod, primer or paint, but you get the idea.

The actual construction took about two months as time permitted. It seems there are many other fires to put out and garage play time had to wait. Anyway, it gave me time to think and figure just what I wanted this table to be, and what the most efficient use of materials would be.

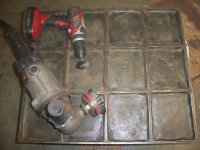
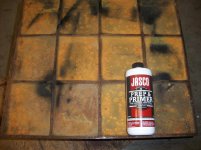
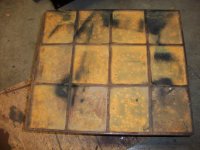
Pics: Getting things unloaded. I could not wait to see how it was going to clean up.
 

Attachments
  • 1140.jpg
    1140.jpg
    146 KB · Views: 202
  • 1142.jpg
    1142.jpg
    146.4 KB · Views: 168
  • 1143.jpg
    1143.jpg
    145.7 KB · Views: 152
  • 1144.jpg
    1144.jpg
    138.7 KB · Views: 160
  • 1145.jpg
    1145.jpg
    147.6 KB · Views: 171
Last edited:
To avoid these ads, REGISTER NOW!
OP
C

creativecars

Well-known member
Joined
Nov 15, 2010
Messages
4,300
Location
Indiana- where horse and buggies still roam
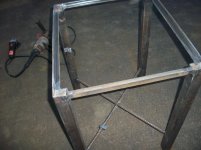
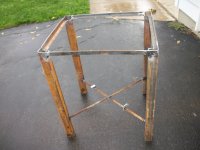
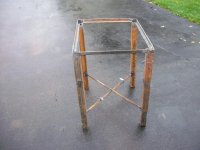
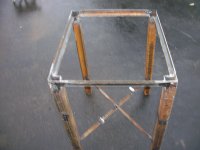
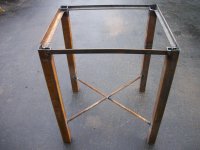
The base going together.
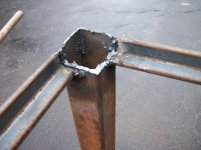
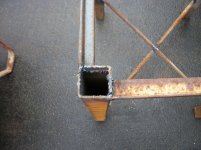
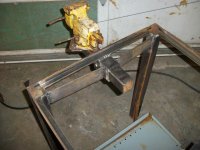
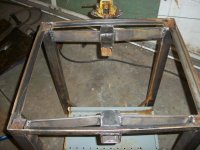
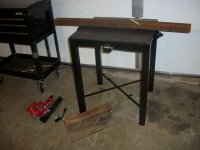
Welding the legs to the top frame. I used an X brace at the bottom for leg clearance or a foot rest.
Had to notch the square tube so the table would sit into the frame work.
 

Attachments

  • 1153.jpg
    1153.jpg
    145.1 KB · Views: 120
  • 1151.jpg
    1151.jpg
    142.4 KB · Views: 95
  • 1150.jpg
    1150.jpg
    147.3 KB · Views: 97
  • 1149.jpg
    1149.jpg
    144.4 KB · Views: 108
  • 1148.jpg
    1148.jpg
    146.7 KB · Views: 111
  • 1147.jpg
    1147.jpg
    136.8 KB · Views: 166
  • 1146.jpg
    1146.jpg
    141.1 KB · Views: 108
Last edited:
OP
C

creativecars

Well-known member
Joined
Nov 15, 2010
Messages
4,300
Location
Indiana- where horse and buggies still roam
Welding /Fab:
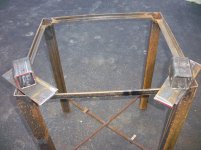
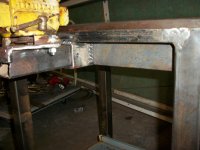
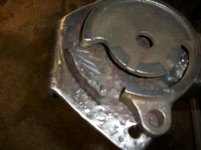
I started with the legs and since this was drop and secondary pieces I had to do some welding and splicing to get them all the same length. I decided to frame the table top with angle iron so it fits in tightly but is removable. I welded the legs to the top frame so I now had a standing table. I wanted to be able to mount a vise to this so 2” receivers were welded into each side and ¾” NPT tee’s were added to the other two sides for holders and clamping. I will use ¾ pony clamps when I need to squeeze down on something.

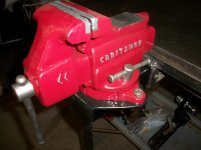
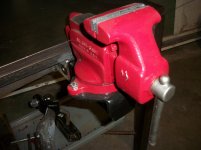
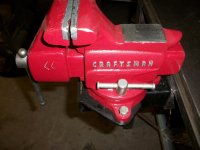
How to mount this ugly "free" vise and future accessories.
 

Attachments

  • 1162.jpg
    1162.jpg
    146.9 KB · Views: 105
  • 1163.jpg
    1163.jpg
    138.8 KB · Views: 101
  • 1168.jpg
    1168.jpg
    144 KB · Views: 128
  • 1169.jpg
    1169.jpg
    143.9 KB · Views: 110
OP
C

creativecars

Well-known member
Joined
Nov 15, 2010
Messages
4,300
Location
Indiana- where horse and buggies still roam
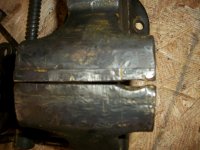
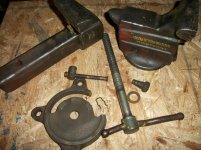
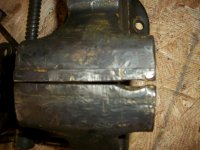
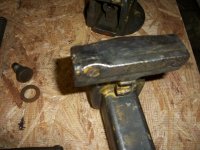
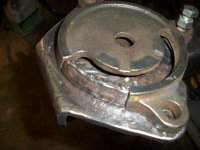
Time to make the top fit.. Easier said than done, as I said it weighs over 100 lbs. and there is not a great way to just slip it into place. Once it was a single unit, it was time to address the vise that was broken and had been neglected for a long time.
 

Attachments

  • 1174.jpg
    1174.jpg
    142.4 KB · Views: 99
  • 1173.jpg
    1173.jpg
    148.5 KB · Views: 98
  • 1172.jpg
    1172.jpg
    139.5 KB · Views: 105
  • 1171.jpg
    1171.jpg
    141.8 KB · Views: 106
  • 1170.jpg
    1170.jpg
    142.7 KB · Views: 127
OP
C

creativecars

Well-known member
Joined
Nov 15, 2010
Messages
4,300
Location
Indiana- where horse and buggies still roam
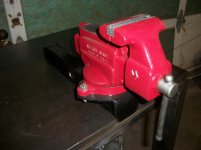
Addressing that vise! Broken and ugly, I decide to make a custom mount that would help the broken base work correctly and make the whole thing useable.
 

Attachments

  • 1182.jpg
    1182.jpg
    135.7 KB · Views: 85
  • 1181.jpg
    1181.jpg
    137.5 KB · Views: 90
  • 1180.jpg
    1180.jpg
    136.3 KB · Views: 78
  • 1178.jpg
    1178.jpg
    131.8 KB · Views: 69
  • 1176.jpg
    1176.jpg
    135.5 KB · Views: 70
  • 1174.jpg
    1174.jpg
    142.4 KB · Views: 75
OP
C

creativecars

Well-known member
Joined
Nov 15, 2010
Messages
4,300
Location
Indiana- where horse and buggies still roam
Painting:
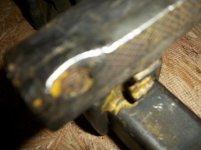
In preparation for paint I wire brushed everything I could get to. Then wiped it all down with thinner to remove grease/oil/dirt/dust. I always paint the back & bottom sides first so I started there with primer.
I chose Rustoleum Rusty Metal Primer this time for obvious rust reasons. I went ahead and bought a gallon as I knew I have several other projects waiting their turn and it is cheaper that way. When the whole table was primed I let it dry for several days, or until the rain let up as I wanted to spray it in the barn with the doors open.
For paint I used Rustoleum Black Professional reduced with Acetone and catalyzed with Nason acrylic enamel hardener. It dried very nicely overnight and will be much more durable than without hardener.

The piece of railroad iron will be a mini anvil when I can get to that.
 

Attachments

  • 1441.jpg
    1441.jpg
    139.8 KB · Views: 106
  • 1440.jpg
    1440.jpg
    142.8 KB · Views: 110
  • 1439.jpg
    1439.jpg
    139.7 KB · Views: 105
  • 1438.jpg
    1438.jpg
    140.4 KB · Views: 131
  • 1437.jpg
    1437.jpg
    138.7 KB · Views: 106
  • 1436.jpg
    1436.jpg
    140 KB · Views: 108
  • 1435.jpg
    1435.jpg
    146.2 KB · Views: 112
Last edited:
vintagespeed1956

Well-known member
Joined
Dec 24, 2014
Messages
221
Location
RanchoCucamonger, CA
dig it! i'd think about maybe some more beef for the receiver tube mounting, think leverage and how the force is moving through that support.

and thanks for the extra shot, those are one of my vices too. :D
 
OP
C

creativecars

Well-known member
Joined
Nov 15, 2010
Messages
4,300
Location
Indiana- where horse and buggies still roam
dig it! i'd think about maybe some more beef for the receiver tube mounting, think leverage and how the force is moving through that support.

and thanks for the extra shot, those are one of my vices too. :D

I did end up putting a piece of channel iron between the two receivers, but it was after the pic was taken. Its stout. The pretty vise is not as pretty now... I built it to work on... and I do.
 

bulletpruf

Well-known member
Joined
Nov 28, 2013
Messages
11,087
Location
San Antonio
Nicely done, and I'm not just saying that because of the cleavage shot (although I appreciated that one, too).

Scott
 
To avoid these ads, REGISTER NOW!

nine4gmc

Well-known member
Joined
Mar 24, 2012
Messages
14,357
Location
Dallas
Nice rack...er, I mean table and vises! Love the pipe tee idea, I will be incorporating that as well.
 

Gixxer-Ryder

New member
Joined
Jul 30, 2013
Messages
2
Location
Northeast Indiana
If your shopping at C Henry Steel you must be from my part of the country. I have been there several times. I use to be able to get all the steel I needed for small projects from my employer (SDI/OmniSource) But the rules have changed due to people abusing the system. Nice welding table. Gives me good ideas for my future table
 

drivesitfar

Well-known member
Joined
Oct 23, 2013
Messages
36,037
Location
Pacific Northwest
CC: nice table. It looks like an old surface plate. I was thinking of making a table out of an old walker turner table saw that has some issues.
Does the broken swivel base work now and any more pics of that vise?
 
OP
C

creativecars

Well-known member
Joined
Nov 15, 2010
Messages
4,300
Location
Indiana- where horse and buggies still roam
CC: nice table. It looks like an old surface plate. I was thinking of making a table out of an old walker turner table saw that has some issues.

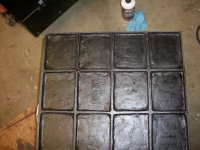
Does the broken swivel base work now and any more pics of that vise?

Yes, the swivel still works and it will unbolt, but the fix stays with the mount. Seemed to be the best way to make it better without welding into the cast.

A few more pics.
Good luck on your future table. :thumbup:
 

Attachments

  • 1164.jpg
    1164.jpg
    144 KB · Views: 28
  • 1165.jpg
    1165.jpg
    143.2 KB · Views: 28
  • 1166.jpg
    1166.jpg
    139.2 KB · Views: 30
  • 1179.jpg
    1179.jpg
    145 KB · Views: 28
  • 1184.jpg
    1184.jpg
    144.6 KB · Views: 26

drivesitfar

Well-known member
Joined
Oct 23, 2013
Messages
36,037
Location
Pacific Northwest
CC: thanks for the well wishes and first i need to save up funds to buy a nice welder. just an FYI that Craftsman vise fix you did was awesome, but that is a fairly common vise so you might find a good swivel on a broken one to replace yours down the road.

great find on the table and your son will learn as you keep showing and teaching him. My boys actually come up to me know that they are almost 40 and still thank me for some of the information i told or showed them that i didn't think they were listening to or liked.

cheers
 
OP
C

creativecars

Well-known member
Joined
Nov 15, 2010
Messages
4,300
Location
Indiana- where horse and buggies still roam
CC: thanks for the well wishes and first i need to save up funds to buy a nice welder. just an FYI that Craftsman vise fix you did was awesome, but that is a fairly common vise so you might find a good swivel on a broken one to replace yours down the road.

great find on the table and your son will learn as you keep showing and teaching him. My boys actually come up to me know that they are almost 40 and still thank me for some of the information i told or showed them that i didn't think they were listening to or liked.

cheers

The small vise works well enough for what it is. I'm looking out for something larger, have seen a few but nothing that has been a good deal yet. I have thought a post leg vise would be kind of cool and I could adapt it to the table like the little one. Will just wait until a deal shows up.

My older kids are now realizing how much they learned as their friends come to them for help.
 

fatboy99

Well-known member
Joined
Apr 23, 2009
Messages
908
Location
Indiana
Make sure you check any tubing you buy there to make sure the seam's are fully welded he get's a lot of reject steel from mills. I don't go there anymore I got tired of the employees attitudes ! If you need metal cut to size ad not all rusted up try Metal Supermarket.
 
OP
C

creativecars

Well-known member
Joined
Nov 15, 2010
Messages
4,300
Location
Indiana- where horse and buggies still roam
Make sure you check any tubing you buy there to make sure the seam's are fully welded he get's a lot of reject steel from mills. I don't go there anymore I got tired of the employees attitudes ! If you need metal cut to size ad not all rusted up try Metal Supermarket.

Yes, some of the seams needed work, but for the price I could not beat it.
I can only get there on Saturday mornings, the yard people seem ok, sometime even eyein' you like a used car salesman. Some just want Sat morning to be over.
The office people are very nice and usually score free donuts and coffee.

I usually just get pieces big enough to do the job, then finish cutting myself. Where is Metal Supermarket??
 
To avoid these ads, REGISTER NOW!
Top Bottom